This is the story of Cuddle and Kind…and Hudson the Polar Bear. Recently, while searching endlessly online for black and white “babystuff”- toys, clothing, decorations for the woodland nursery- this image kept popping up of these irresistibly adorable hand-crafted toys.

Something about their sweetness caught my eye, so I clicked on the link and discovered this cuddly world of wonder…with a twist. These beautifully hand-knit dolls were created for one reason…to eradicate childhood hunger around the world.

The dolls are lovingly hand crafted in Peru by local artisans-and the effects of the sales of these adorable dolls are far reaching.
 The mission?

For every doll sold, ten meals are provided for children around the world who would otherwise go hungry. Where do those meals go, you ask??
 Such an amazing goal!
 After browsing through page after page of cuddly cuteness, I chose this particular doll-Hudson the Polar Bear-because he is black and white (naturally) and has a woodland feel to him. And he is super cute and super soft. Check out the fineness of the stitching!
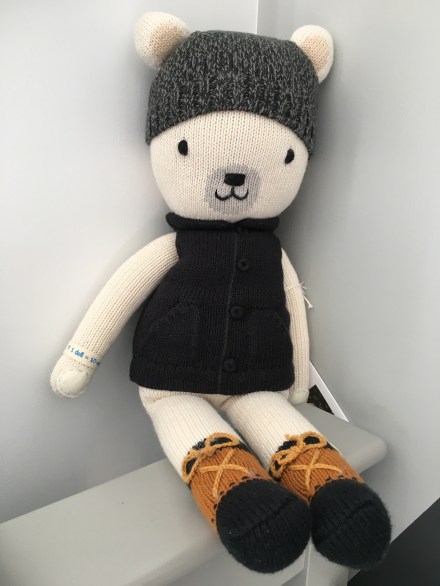 So Hudson the Polar Bear is now resting comfortably in his new home-perched on the crib in the Black & White Woodland Nursery. And he’s happy knowing that he is spreading the word, and the kindness, of the folks at Cuddle and Kind. Who, at this writing, have provided over 10 MILLION meals for hungry children.
 To honor that remarkable achievement, the family of Cuddle and Kind is having a contest…enter for a chance to win an elephant or two! This is a win-win…you win a pair of elephants, more hungry children are fed. The message of kindness is spread.
 Along with Hudson the Polar Bear doll, I purchased a whimsical print that pairs beautifully with the theme of the baby nursery…and also provides an additional 5 meals to the Cuddle and Kind mission! Simple and sweet…You Can Move Mountains…for our new little bear.

Whom, by the way, has finally entered the world! Our new infant grandson is quite camera-shy so I’m not posting any pics of him. But I will tell you that his name is Torin (which translates to chief in Gaelic…the perfect name for a child who will be moving mountains someday.) So, if you head over to Cuddle and Kind …to browse or hopefully purchase one of these amazing dolls…be sure to tell them that Torin sent you! Have a kind and cuddly day, everyone.
xoxo Susan


 were the perfect “woodsy” theme frame- and a perfect graphic backdrop when re-painted black.
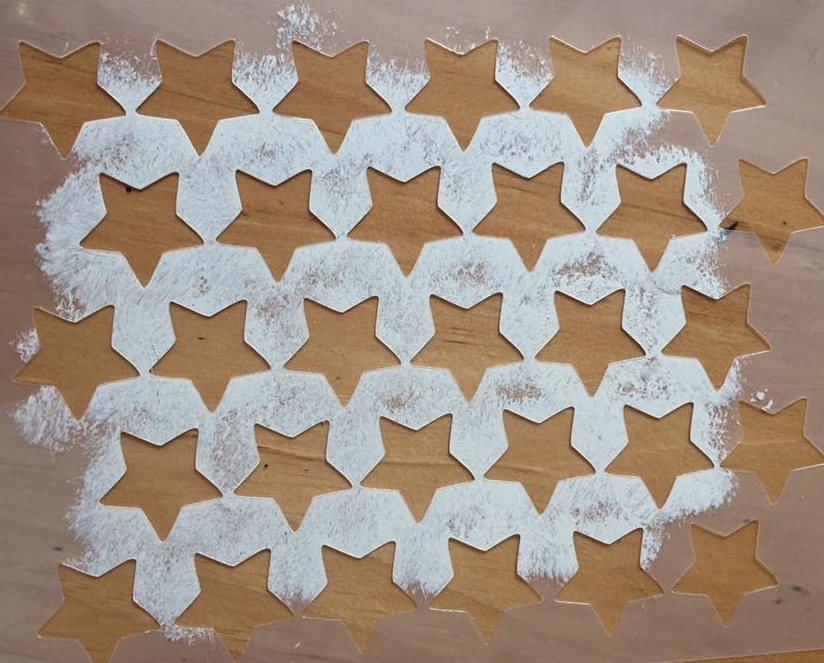
 For the average DIY-er it is incredibly versatile-cutting anything from paper to poster board to vinyl-even thin layers of wood! whatever your imagination can dream up, it can cut. In this case, I used a white glossy vinyl, cutting each design to fit the wood slices, then transferring them to the wood. Look how intricate these cuts are-that would have taken me hours by hand! (No, actually, I never would have attempted this by hand…) The wood piece for the bear was an odd shape and didn’t seem complete until we had added an extra star from the moon and the stars decals (on hand from the wall mural).
 Once completed, I sealed them all with a satin poly coating.

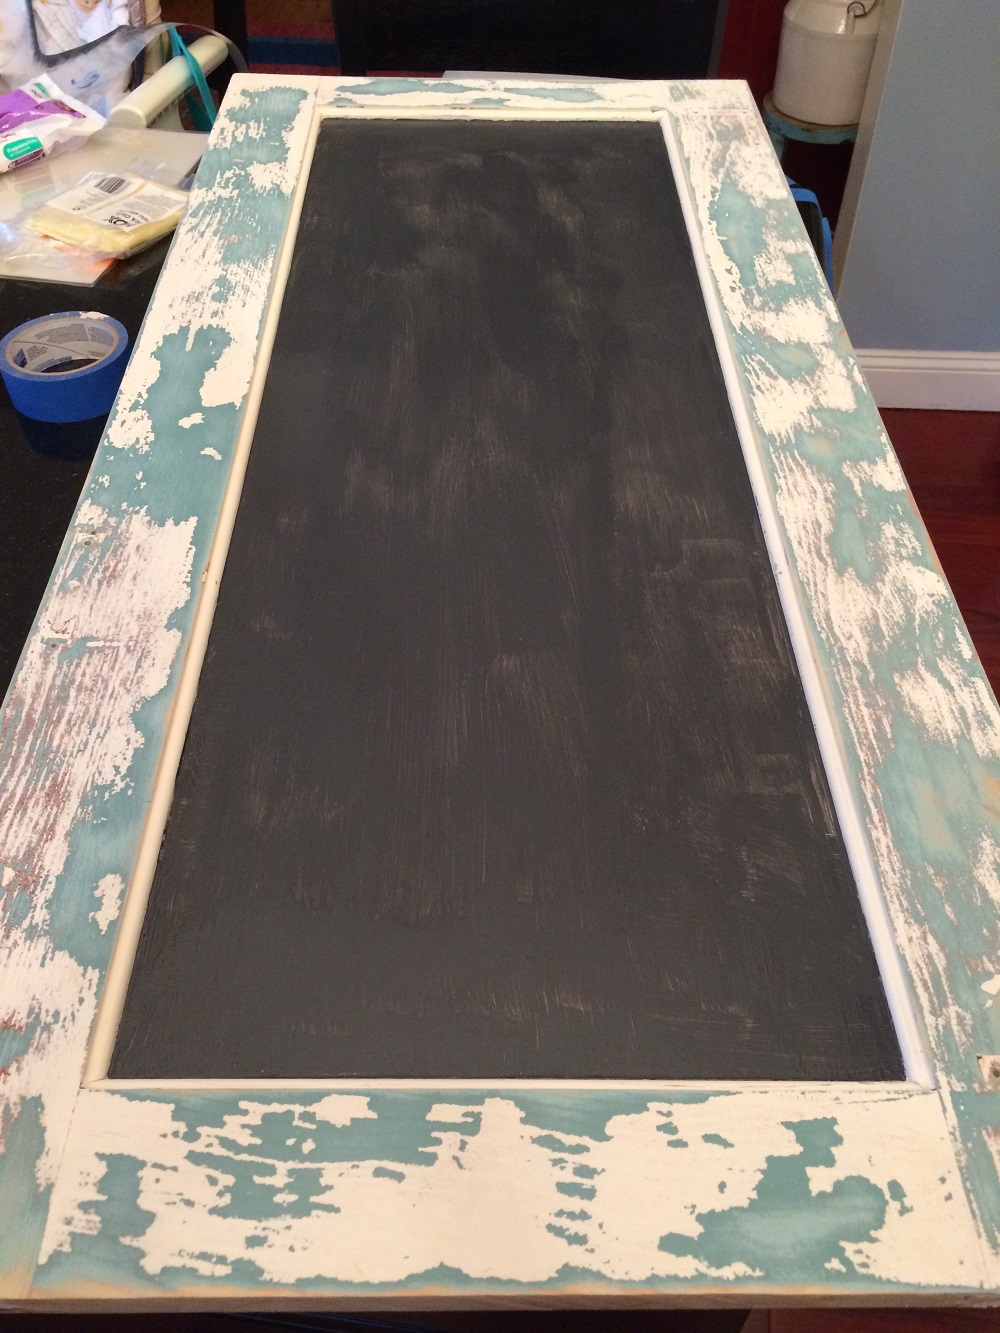
 When you’re searching for a simple technique that creates a worn, chippy finish on a piece of wood or furniture! Recently, Coach presented me with a reclaimed primitive pine bench that he thought would “look great with a whale on it!” It had most definitely seen better days…the top was scratched and gouged and the finish was non-existent, but it was solid and had no musty odors, which is always a plus. (Sorry, I hadn’t planned on writing about this project until I tried the brilliant block painting trial, so no before pics) Wanting to hurry along the transformation process, he sanded it down for me and painted the base black. Typically, his next line will be “OK, I’ll paint a whale on it”…which he knows will then trigger my response “Don’t touch it, I’ll do it.” OK, so I stained, then painted the bench, first with blue, then white chalk paint, then sanded it for a distressed look.
 Usually, when I do that, the top coat will sand down and expose the under color- but this time it didn’t work very well and the bench was primarily white and black. So, I thought, hmmm, what can I use to create the multi-layer effect I want…wait for it…a block of wood?! Recently, I had been binge-watching old episodes of
  I was grabbing a block of wood and dipping it into paint and scraping it across the bench and voila! Chippy, distressed look in about 5 minutes time! (OK, well that noise is pretty annoying and grating, but the results are worth it, I promise!) The reason this technique works so well is that, unlike a paint brush, which smooths paint into the contours and ridges, the wood block scrapes over those and only leaves paint on the textured areas.
 Now its time for the whale : ) Stay tuned… Susan
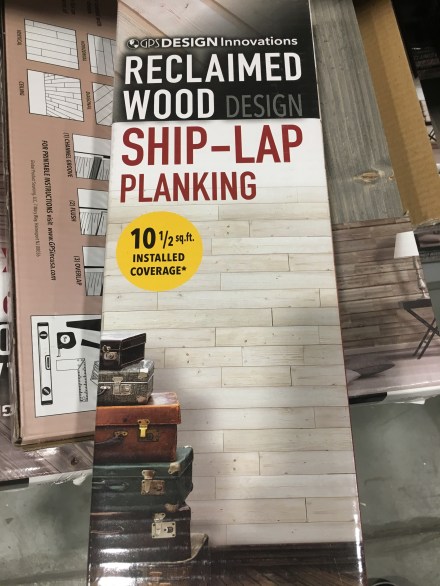
 This is important! Visually, shiplap is long lengths of boards attached to the wall in a straight row. Leveling as you go will ensure a clean, unwavy (is that a word??) sight line.
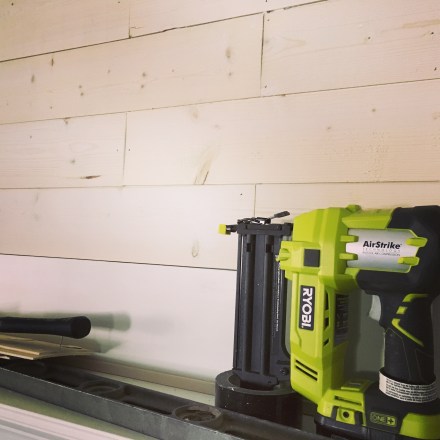 (I would not have attempted to do this installation without one.)
 I used
  This particular brand of shiplap had an assortment of lengths in each box, so it was important for me to decided which pieces would go in which order for each row. I was working around a fireplace and ceiling and baseboard moldings, so I had to figure those into the equation. It would have been so much easier if I was working on a simple blank wall, but that wasn’t the case. I taped these on to the wall to visualize how it was going to work before I started the actual nailing and gluing.
 you push it into an area and it forms into the shape that you need to cut around.
  Otherwise you’ll need some paper and tape to create a pattern to cut around.
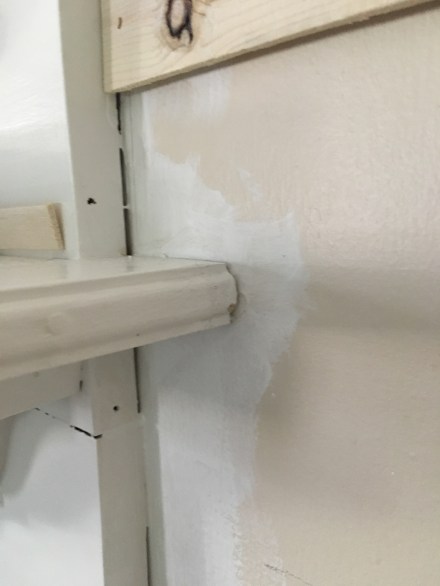
 It just doesn’t end up well. Fortunately for me, this particular brand is pretty rustic, so a few cracks and holes blends in quite well!
 It made it so much more tedious than if I had just kept using the larger pieces instead of trying to save them…for what, I have no idea….but I’ll figure something out.
 For now, I am leaving it as is and enjoying the fruits of my labor.
 Each time I returned to the store to purchase more, it had to be seasoned in the house for 36 hours before I could install it. Which meant more messy days in our family room.
 As an aside, I have a much deeper appreciation and newfound admiration for carpenters and contractors-actually, anyone who labors for a living-especially older folks, like me. The work is fulfilling, but it is not easy-the difference is, I did this for fun, they do it for a living. So my work here is done…for now…and I am shiplapped out… until my next project comes along. Have a terrific Thursday, everyone! And if you decide you need some shiplap in your life, I know the name of a great contractor I can share with you…and its not me : ) xoxo Susan
 which was around the corner from where we sat. Chatting about our new space and how best to stock and decorate it, I had a moment of…I’m not sure of the word…wonderment perhaps? Thinking about all that had transpired in the past year that brought us to this place in this moment left me a bit overwhelmed. A year ago at this time, our new Maine cottage plan was slowly coming to fruition but still a dream away. At that time, we had no thoughts of setting up shop in Maine…after all, Coach had the Arundel Flea Market that he frequents quite often. Its a great outdoor flea market right near our cottage, BUT, its not so great when there’s a foot of snow and its 20 degrees outside! We had visited
  then to The Barn at Todd Farm in Rowley (remember that giant rusty bedspring marquee sign? I miss that thing!)
 and then on to the Mills at Pulaski Street in Peabody.
 Each venue has had its own unique charm, and along the way, Coach and I have realized how much we enjoy doing what we do…reuse, restore, refurbish and sell…and we just weren’t ready to throw in the vintage towel quite yet!
 Anything we could stuff into our two SUVs-items that I had been working on for the past month-now fill the sunlight-splashed space.
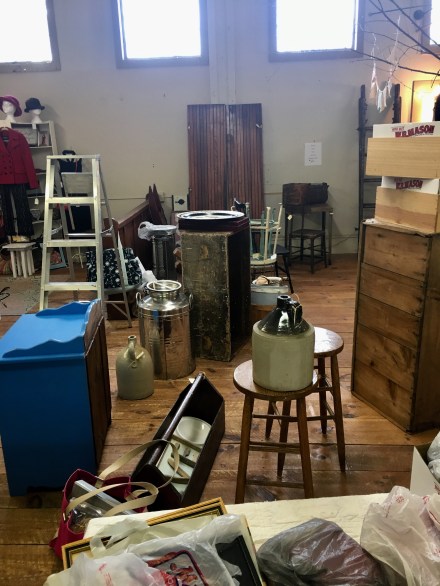 This weekend we’ll be adding some finishing touches…painted furniture and vintage accessories and lights for the tree…did I mention we have a tree in our space!?!
 I’ll be adding more pics as we keep adding to and editing our shop-presently its decorated for the LOVE holiday that is fast approaching.
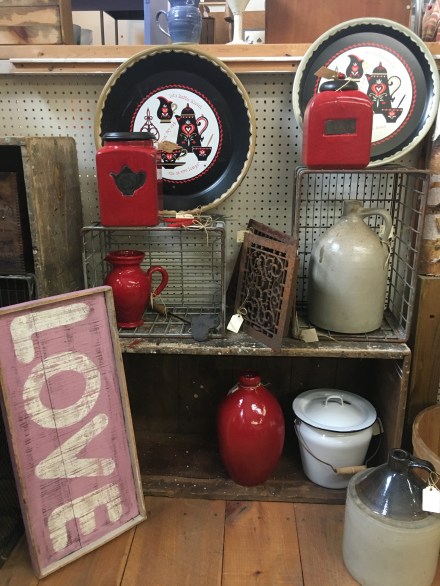 If you have a chance to visit- they’re open every day except Wednesdays during the winter (and they’re having a huge store-wide sale!) we’re in the shop on the right in the second room-just look for the sparkling tree : ) For now, it will be enough to say that I am so grateful for everything that has transpired over the past year to bring us home to Maine. Have a Maine-ly wonderful weekend, everyone! xoxo Susan
 and began implementing a design plan that I had been “Pinning” for months on end. The cottage was a blank slate, painted throughout in a pale gray color called “Reflection”…soft and serene and inspired by the colors of the natural beauty that surrounds us in Maine.
 Over the past 6 months, I have done my best to transform that blank slate into a warm and welcoming landing spot for family and friends, using the stunning coastline as my color inspiration.
 I recall that when we were in our initial discussions about how to decorate, Coach lamented that we would have to spend $50K to furnish a three bedroom home. But, I am here to tell you that it is simply not the case! Yes, we have purchased a few brand new things, ie: a super comfy sofa…
 privacy window blinds, the mattresses and all of the bedding (because, yuck : ) and a couple of accent pieces. But the majority of the decorating has been accomplished using cast-offs, inherited treasures…and LOTS of flea market finds that I have reused, repaired and refurbished…for thousands less than if we had gone to a furniture store and purchased everything off of a show room floor! Although it is still a work in progress, we are closed up for the winter now…so its time to reflect back and see what has been accomplished and what is left to be done. I don’t really have a lot of dramatic “before” pics, although this was the living/dining/kitchen area during construction…not much to see here, folks!
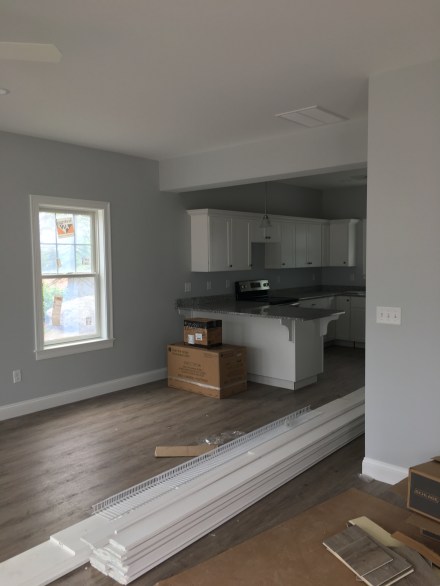 So I will just show you a few of my favorite “afters”. This vintage cupboard was recently transported north, tethered and roped onto the roof of our SUV…it has been in our dining room at home for many years, rather hidden in the corner. Now it is taking center stage…and decorated for the seasons! The blue buffalo check wool blanket is from
  The fireplace wall faces the front door, and welcomes our guests into our home. The electric fireplace, purchased almost a decade ago at the
 The LOG CABIN room. Well, what can I say? When Coach and I first started the process of finding our vacation home, my dream was to discover a pretty little log cabin tucked remotely away in the woods on a lake or stream. After looking at said houses, we realized that 1. We really didn’t want to live isolated in the woods 2. We are not lake or stream people, but are drawn to the sounds and sights of waves crashing on the shore.
 Which brings me to the LOG ROOM- I figured if I couldn’t have an entire log cabin…at least I could create the feel in one room! The log bed was a CL find, the side tables and log bench were flea market and thrift shop finds, as was the art work and accessories. The buffalo check (hmmm, there is a common thread here) drapery panels were markdowns from the

 Once you decide on your larger furniture pieces, start adding the accents, then dress it up as you go with accessories and artwork. For me, this is a fluid process…nothing stays in one place for too long…that little whale pillow has migrated from couch to chair to bench and back : ) and the fireplace has already graced two different spaces. I imagine I inherited that trait from my mom…coming home from school I would often find her re-painting a wall or a bookcase or single-handedly pushing a baby grand piano across the living room. What I have discovered on this journey is that no matter how you decorate your space, as long as it brings you…
 then you are on the right track. Have a great Sunday everyone, and GO PATS! xoxo Susan