Seasonal Scenes from the Market

This weekend marks the November edition of the Vintage Thymes Monthly Market, Farmhouse Holiday.

Stockings Were Hung

It seems like we just wrapped the October show with pumpkins and Halloween, and here we are barreling into the holiday season!

VTM November

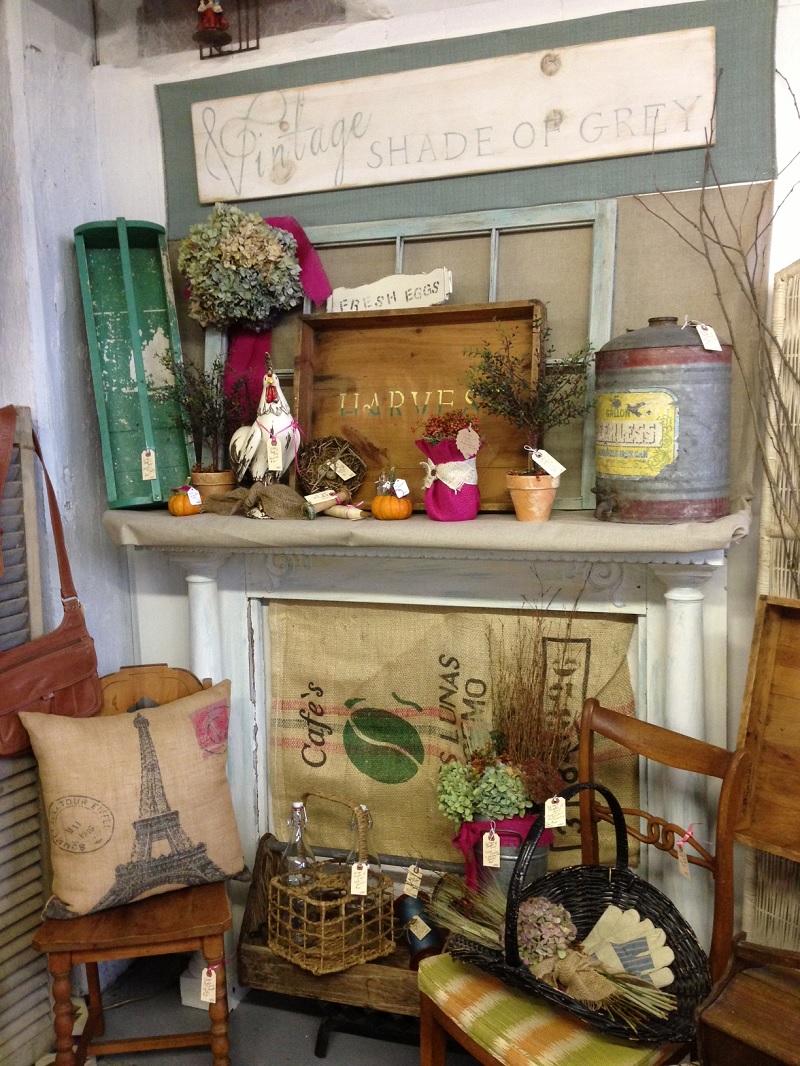
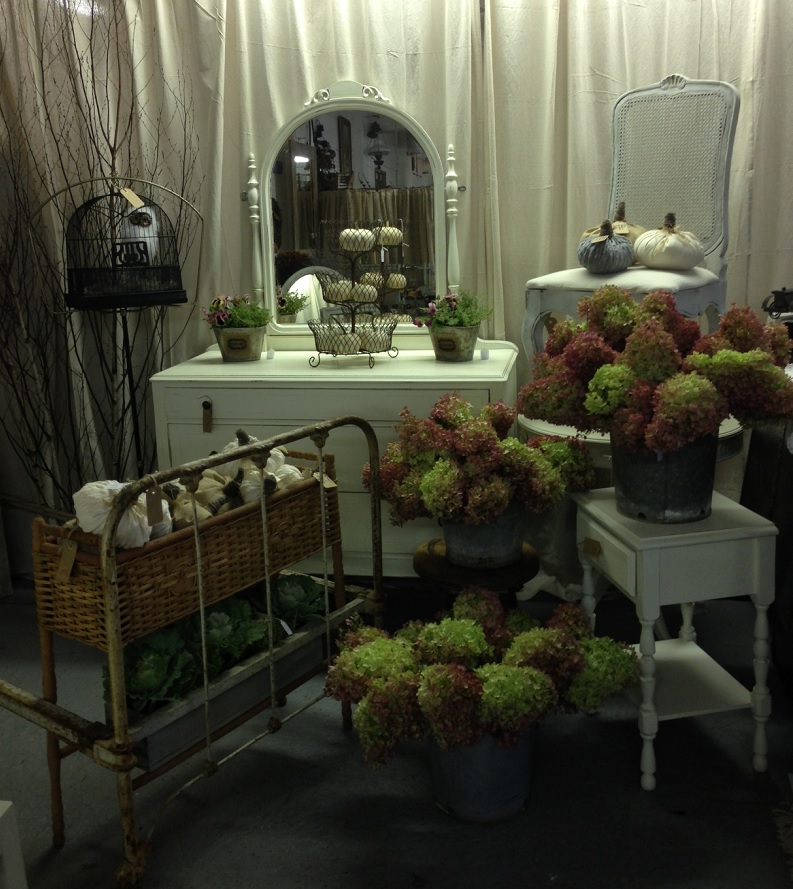
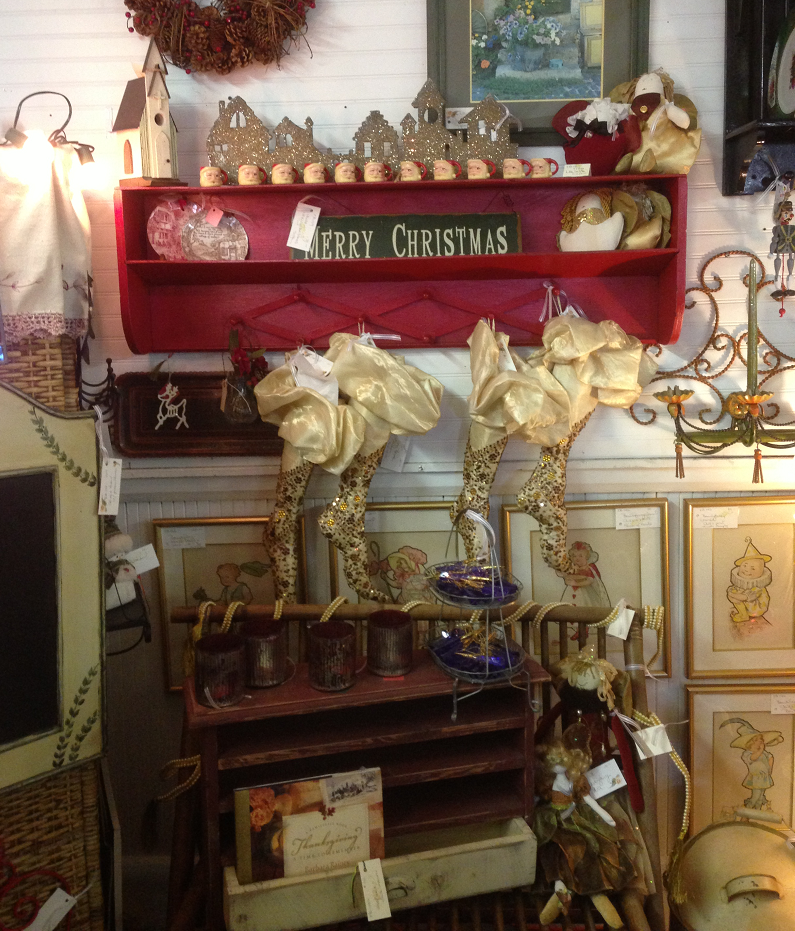
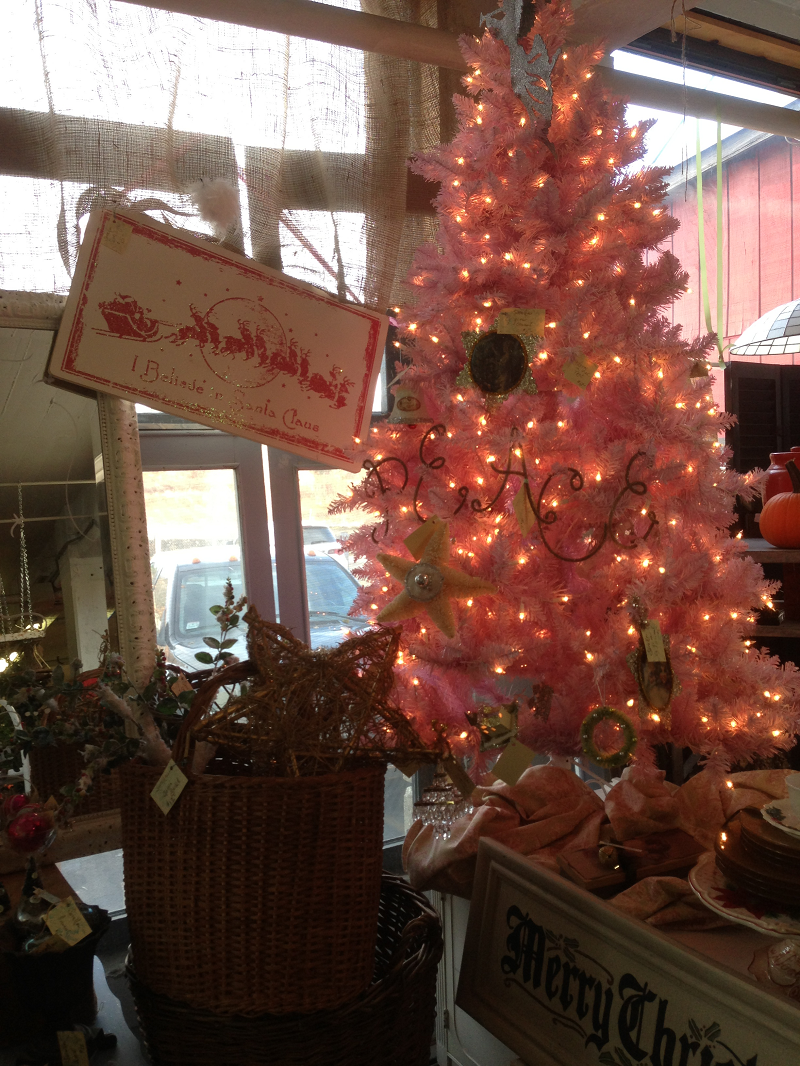
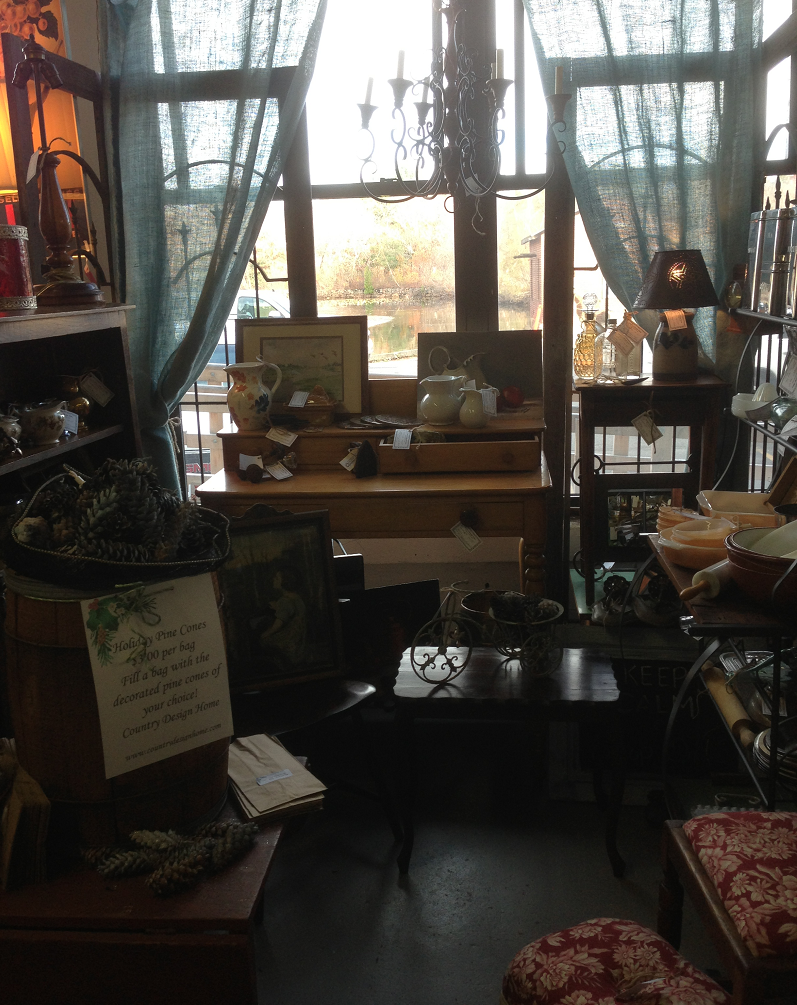
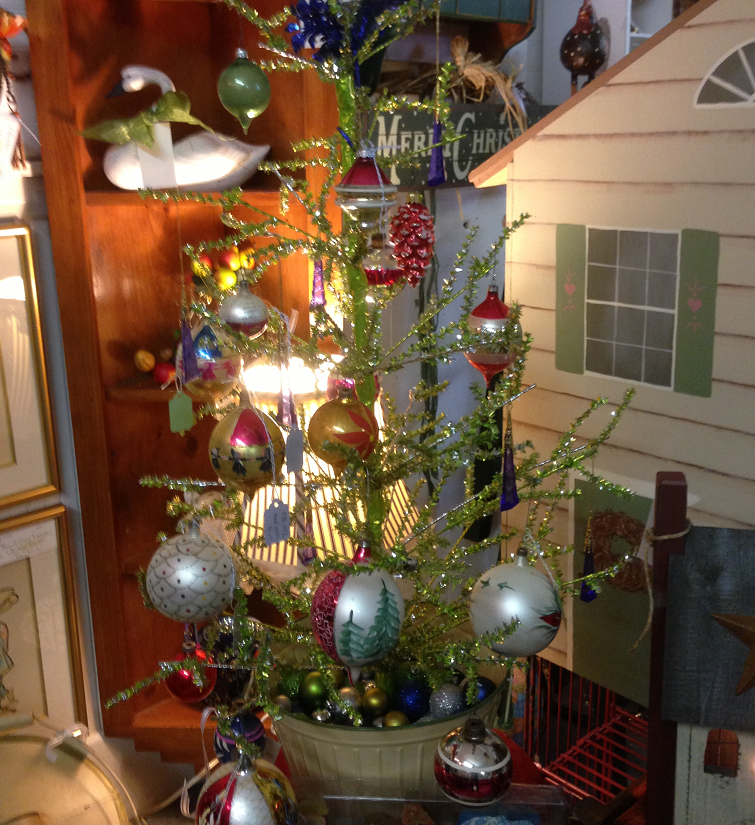
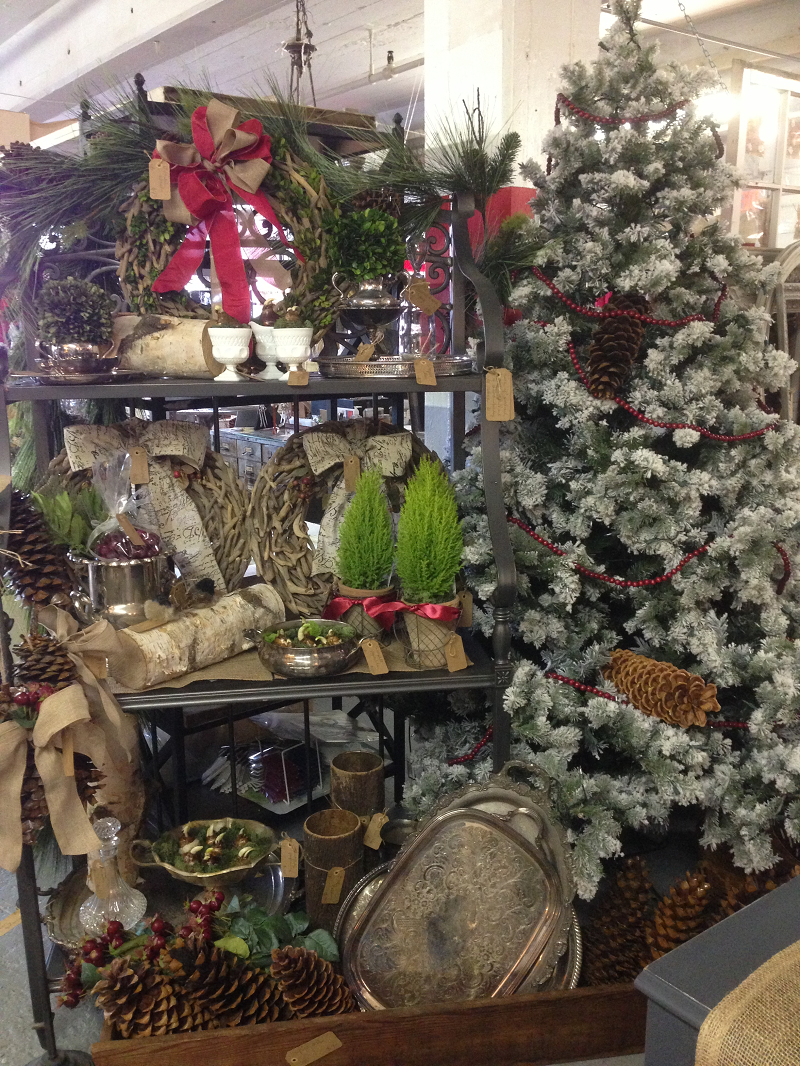
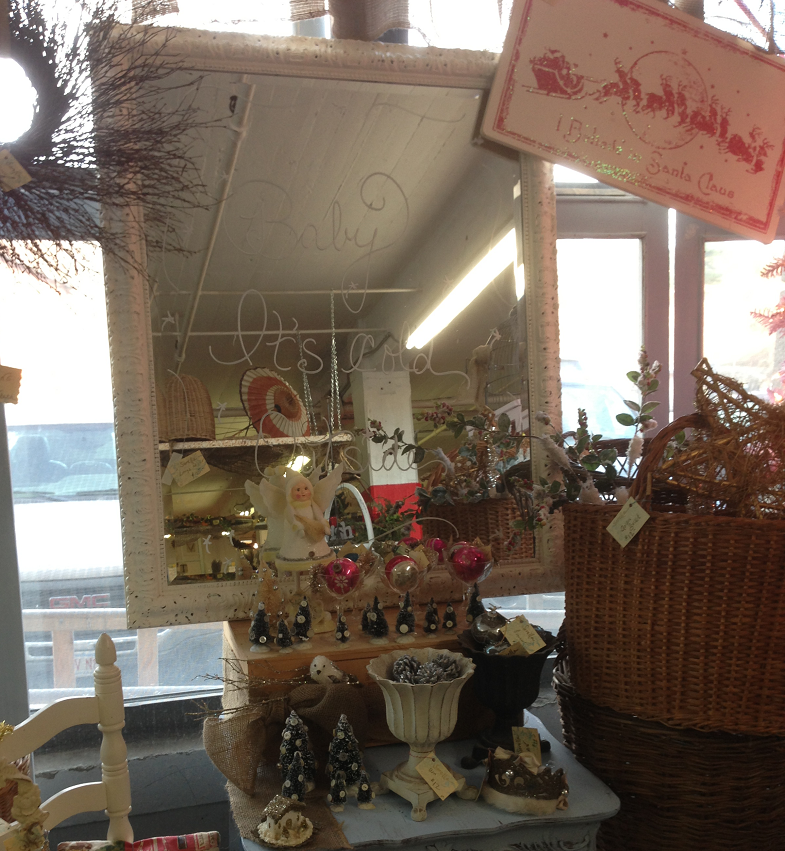
I was blown away when I walked through the double red doors

Joy

on Friday morning. So much sparkle and Christmas cheer!

Pink Tree and Santa

(Of course, I was thinking Thanksgiving, not Christmas, because I am most definitely a one-holiday-at-a-time kind of gal.

Country Design Home

So when I conceptualized my booth, I was planning Thanksgiving dinner and making pies! So my space is a little less sparkly

Green Tree Sparkle

and Santa-inspired than many others…

Santas Clogs

but I am pulling out my cans of sparkly snow and adding some bling for the December market!)

Get Your Holiday On

If you haven’t made it to the Vintage Thymes Market yet

Berries in Barrel

and I can’t imagine why not!?!

Skates and Skis

This month’s market is a great introduction

Christmas Country

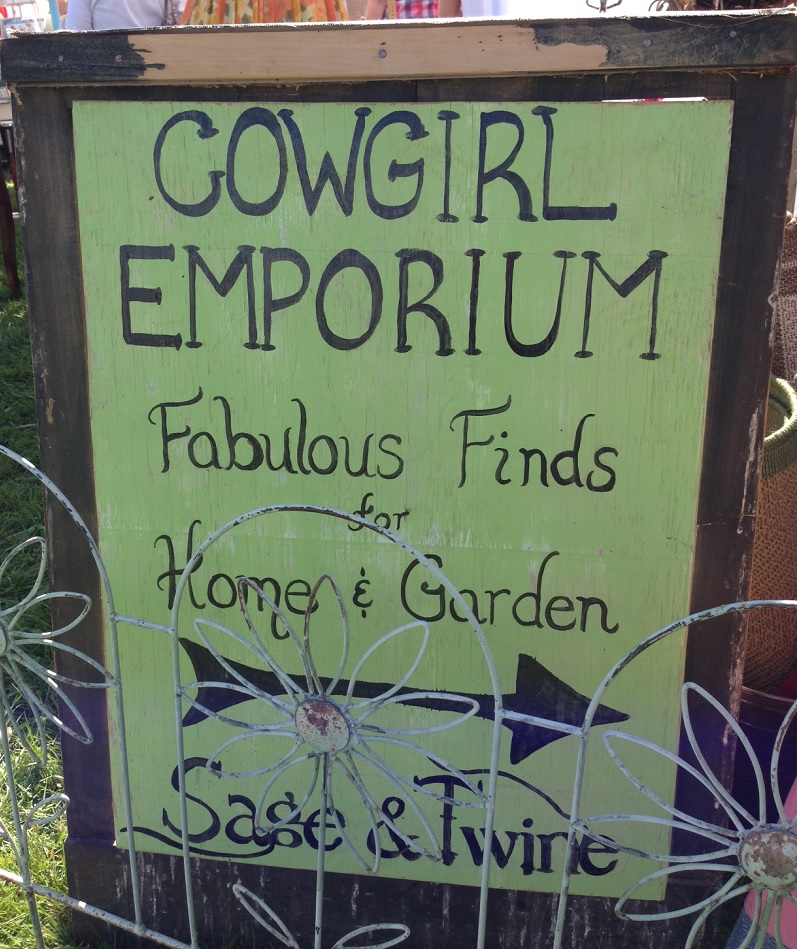
to view all of the extremely talented artists,

Simplify

craftsmen

Fleurish Home and Garden

and designers

Screen Door Vignette

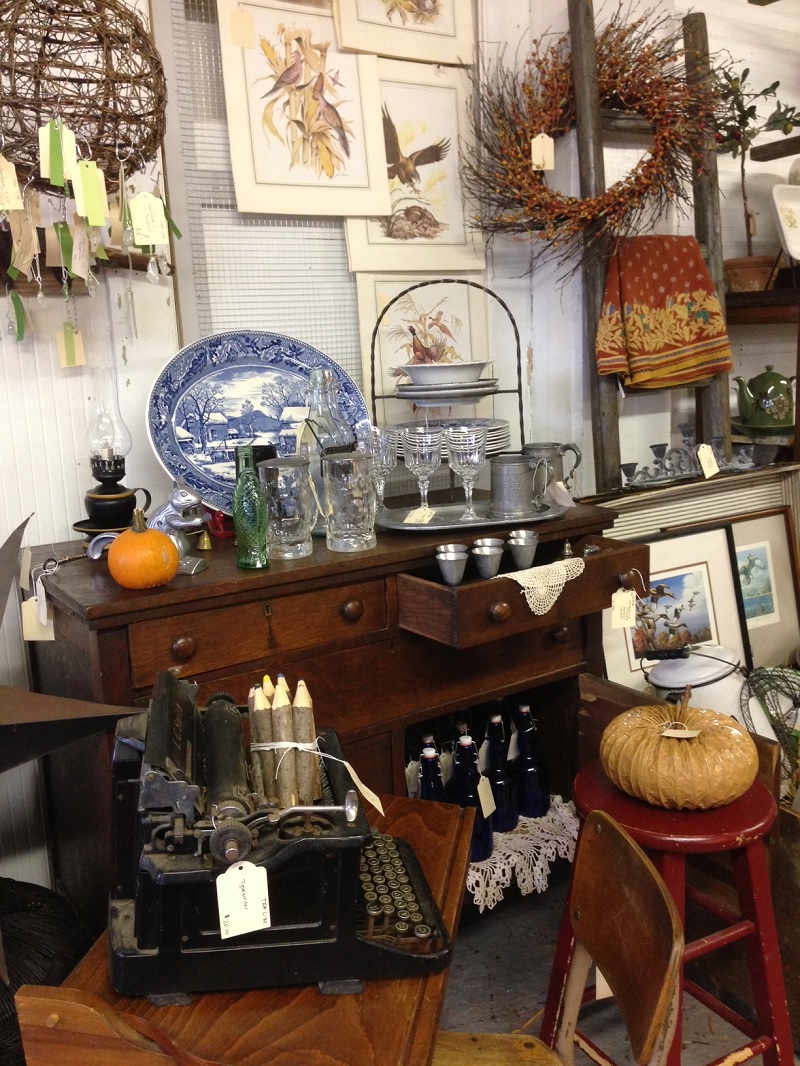
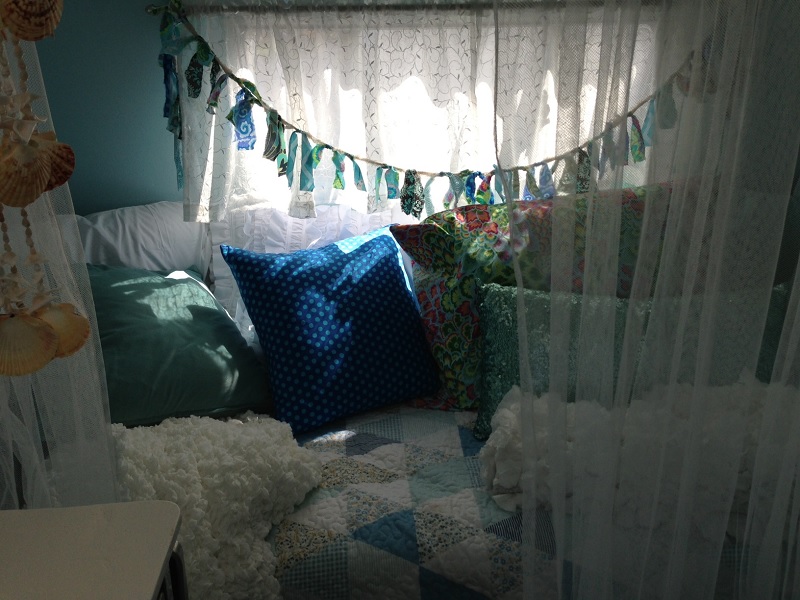
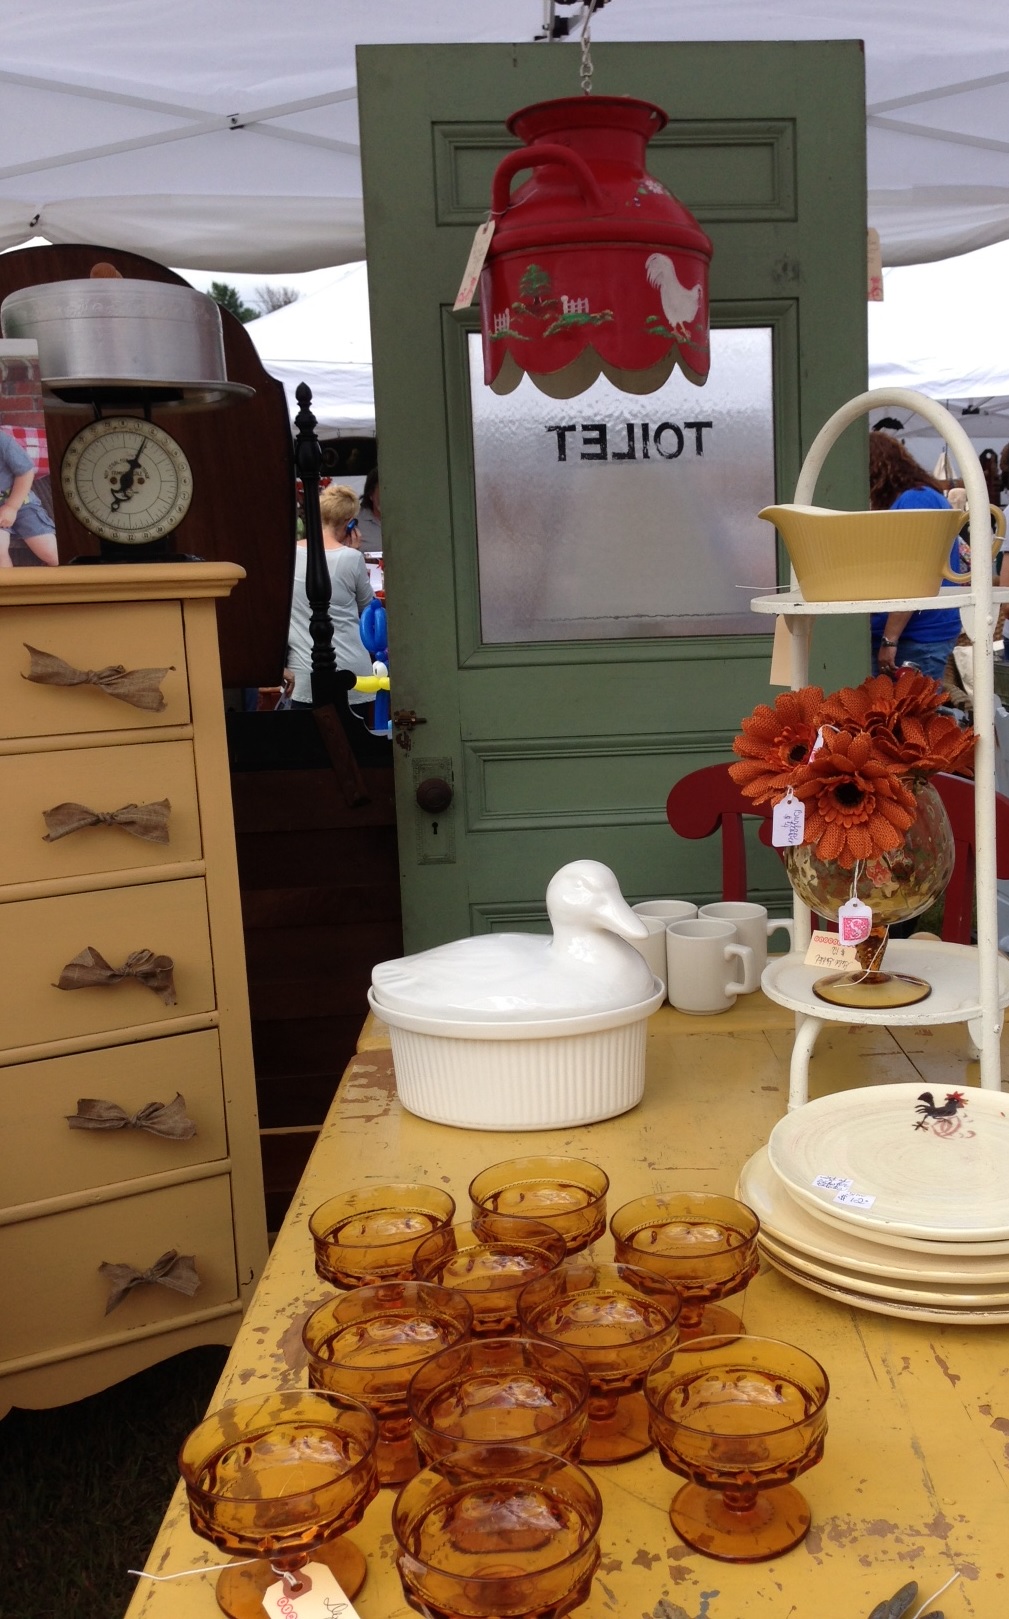
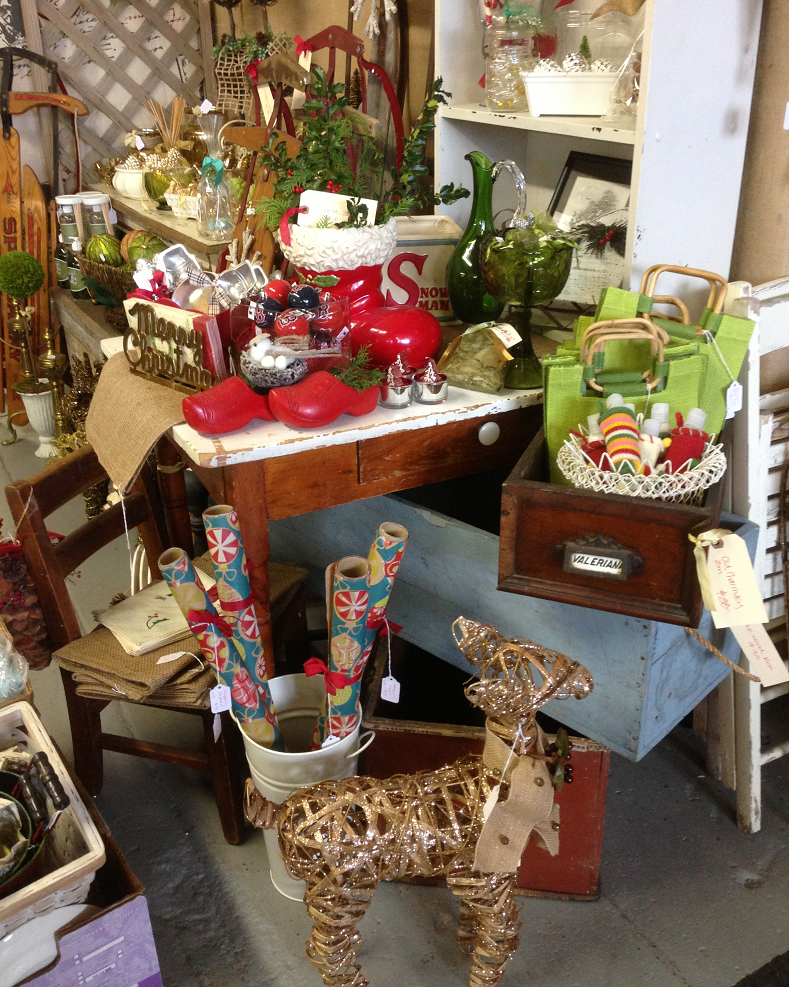
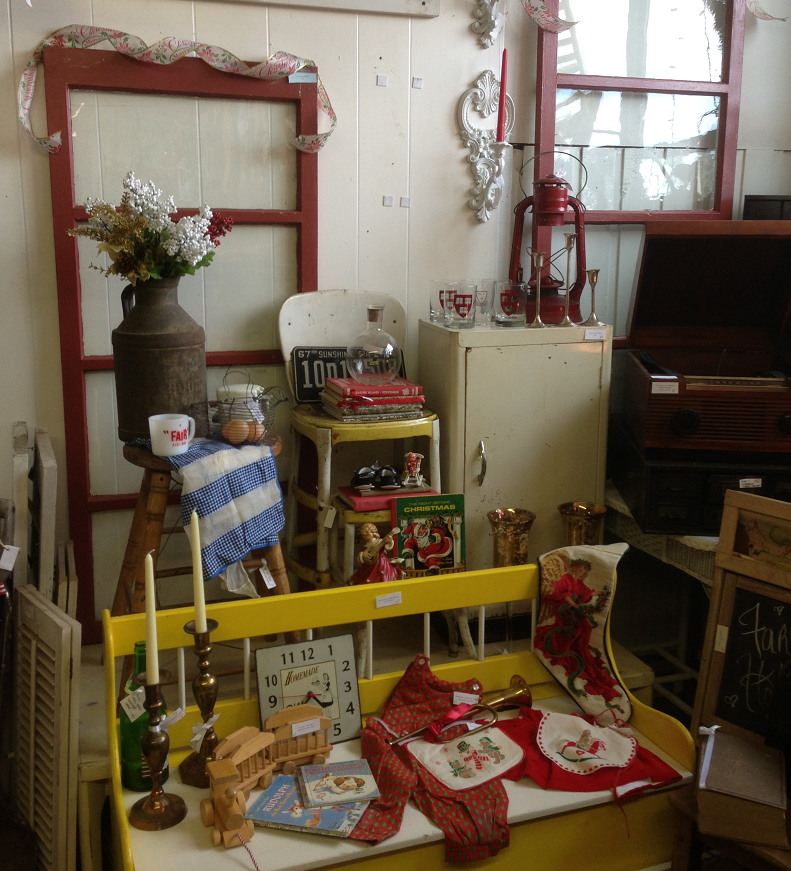
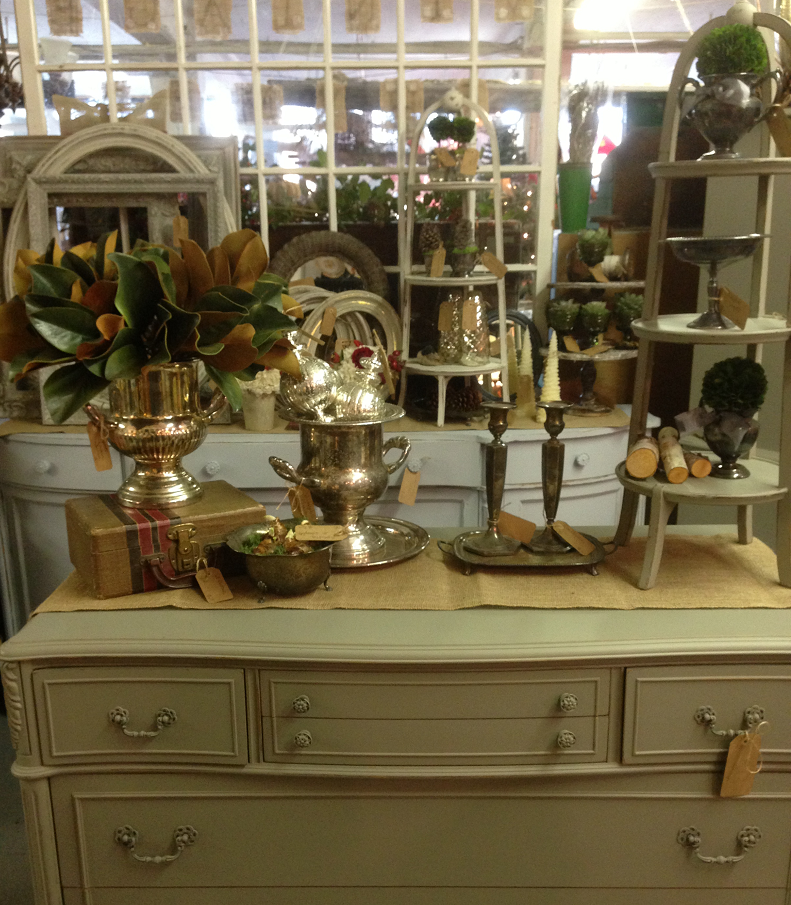
who create amazing pieces for their magazine-worthy vignettes,

Peace on Earth

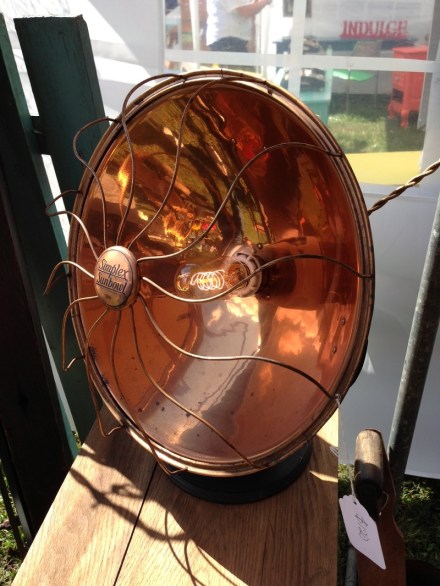
using simply vintage everyday items that they’ve dolled up and made beautiful,

Baby It's Cold Outside

and it’s all for sale : ) Something for everyone on your shopping list!

Fleurish Home SIlver

The Vintage Thymes Market is open today, Saturday from 9-6 and tomorrow, Sunday from 12-5.

Owl in Snow

And owl be seeing  you in December! Susan

Mixing Milk Paint Misstep

This past week I have been working on quite a few pieces for the upcoming Vintage Thymes Market in November. It’s fun, other than the fact that my house looks like a bomb hit it-I have bits and pieces of projects going on everywhere!

Family Room WorkshopThe smaller pieces I can do in my basement workshop, but the big pieces stay upstairs. Man, I really, really, really do need a studio! For my current project, I decided to use my Miss Mustard Seed’s “Eulalie’s Sky” Milk Paint for the back of a beautiful step-back cupboard I am working on.

Cupboard Back BeforeI read the instructions and set out my necessary tools: air-tight container, measuring cup, warm water, bag of milk paint, mixer-what?!?

Milk Paint Mixing ToolsYup, a mixer. You see, milk paint comes in powdered form, in much the same consistency as powdered milk we used to use as kids when we ran out of regular milk. (I can’t help but notice that in this advertisement, they are using a cocktail stirrer to mix the milk. Those were some crazy times…)

Non Fat Dry MilkInterestingly, when I first opened the package, it appeared to be white.

Mustard Seed Paint PowderUh, oh, I thought, they put the wrong color in here! But once I added the water, the magic began. Now, according to the instructions I had read, this paint needs to be blended for 3-5 minutes, which makes sense, to break up all the powder bits and get them blended smoothly.

Mixing Paint with MixerAnd it says you could use a blended or a stirrer stick. Well, my blended is reserved solely for frozen margaritas, so not using that! And, standing there for 5 minutes stirring paint didn’t seem like all that much fun, so I decided to use a single whisk on my mixer. FAIL. BIG FAIL. I should have stopped once I noticed that my paint was looking more like a blue vanilla frappe than a bucket of paint, but I didn’t. So once the 5 minutes were up, I had this:

Blue Frappe

A big container of frothy blue milk. You cannot paint with blue bubbles. I repeat, you cannot paint with blue bubbles. So, I put it in the fridge for awhile to allow it to settle-it is milk paint, after all! Once I removed it, it looked a lot less frothy, so I attempted to paint the cupboard. While it was actually useable, the color was very sheer, obviously from the aeration still present.

First Coat SheerIf I had wanted it to have a stained appearance, it would have been perfect. So I waited awhile, stirred up the paint again with a stick to smooth, then added a second coat.

Breaking Down the FoamBetter, but still kind of streaky and with a lot of color variation.

Second Coat Milk Paint

So, then I went online and watched all of the Miss Mustard Seed Tutorials to make sure I was doing this correctly.

Miss Mustard Seed Video

(You would have thought it would’ve been a no-brainer to do that first, right?) And I was doing it right, with that one fatal flaw-frothing the paint first. That was most definitely NOT in the tutorial. Oh, well, another DIY lesson learned. One more coat, and now the color is deep and true on the inside of the cupboard.

Final Coat Eulalie's Sky

And, although there are variations and some streaks, it gives the piece some striations and depth of color-much like the sky itself. (I took this from my car yesterday-so beautiful!)

Rainbow Sky PM

Now I just have to finish the rest of it! And I will, while watching the Red Sox Duck Boat Parade from the comfort of our family room  paint workshop. In the meantime, anyone got a studio for rent? Happy weekend, everyone! Susan

Paint A La Cart

Coach and I did a LOT of picking this weekend and scored many great items for some upcoming markets. Mirrors, and oak bookcases, furniture, rugs, and more mirrors-all amazing!

Rug and MirrorSaturday morning, I was busy doing house sort of stuff, so Coach went off himself, only to call me within a few minutes to tell me that someone was selling cases of paint for $1 per can! So he grabbed the first boxful of colors he thought I might use.

General Finishes Case of Paint

I went back with him later and struck up a convo with the homeowner. Turns out he had owned an unfinished furniture store for years, and had recently closed it down. These were the leftover paints, stains and finishes.

General Finishes Paint Supply

So I grabbed some stains (now, I know Hunter Green is not in style right now, but you never know when it might return to its former backwoods glory)

General Finishes Green Stain

some Milk Paints-can’t wait to try these

General Finishes Milk Paint

and Glazes- so many colors to choose from.

General Finishes Black Glaze

This ought to be fun! But my best yard sale buy of the weekend? This awesome heavy-duty stainless steel rolling kitchen cart!

Paint Cart Cleaned

The guy was asking $10 and Coach asked if he would take $5. He said “sure, quick, just take it before my wife comes back outside-she has an emotional attachment to everything!” LOL!! We all know how that goes! So, I brought it home with the intent of finally organizing all of my paints, stains and finishes into one spot instead of scattered all over my work shop.

Workbench Paints

Before I could use it, though, I spent about 2 hours with many household products including Awesome Orange cleaner, vinegar, baking soda, bleach spray, scrubbing brushes and many kettles of boiling water to clean off layer upon layer of grease-yuck! I am not sure where this thing had been, but I sure as heck didn’t want it in my basement attracting critters! Finally, the finished cart was sparkly and ready to go. I made quick work of filling it with so many cans and bottles and pots of paints and finishes.

Finish Cans

So now its filled with my newest additions

Filled Paint Cart

to go along with my ever-growing collection of Behr paint sample pots I get at Home Depot,

Behr Sample Pots From Home Depot

plus a new paint with some amazing colors

Paint Couture Color Samples

from a company called Paint Couture

Belize Blue Paint Couture

and my first ever Miss Mustard Seed Milk Paint (in a very special color, more on that later..).

/Miss Mustard Seed Milk Paint

Boy, do I have a lot of work to do in the next couple of weeks! As I try each new product, I will give my unbiased opinion on the overall painting experience. But tonight is game one of the World Series, so paintbrushes away! And Go SOX! Susan

Fancy Fringed Footstool

This past weekend was a whirlwind of events including a surprise birthday fiesta for our beautiful daughter,

Fiesta!

followed the next day by a “leftover” enchilada party featuring our favorite legendary local sports heroes,

Illustration by  Larry Johnson

Illustration by
Larry Johnson

followed by yet another birthday party (we do have a lot of family birthdays in October!) PLUS the 4 day  Vintage Thymes Monthly Market-whew! Didn’t leave any time for DIY’ing or blogging, but I am slowly cleaning up the final messes and getting back on the blogging bus. Sort of. This was the actual party bus we hired to move the party to Boston- fun!

Bus Ride to Boston

Today I am featuring this little project, a before and after of a footstool that I picked up in a thrift shop for a couple of bucks. It was very outdated but pretty sturdy, even though the middle was sort of sunken in.

Original Footstool

Here’s the how-I-did-it:  Pulled off the old, tattered dirty fringe, but left the rest intact, since I was just going to cover it anyway. Piled some batting on top of the sunken middle, as I wanted it to have more of a “poof” appearance than a flat top.

Adding Batting to top

I recently heard the name “gout stool” for the first time, which was apparently a term used in the Victorian era regarding footstools for people to rest their feet on while suffering from gout. So I thought that a poufier cushion might be a bit more comfy for any sore feet-this poor guy has two!

Gout Illustration

Cut the top fabric to fit over the new poufy top.

Cutting Top Fabric to Fit

Stapled it all the way around,

Stapling Top Fabric in Place

folding the corners down, but leaving the rest kind of casually creased.

Stapling Top Fabric 1

Measured the height of the bottom fabric- there was already a dividing line in the stool where the seam was, so I just used that. I had already finished off the top edge with a buttonhole stitch on my sewing machine, but  you can just fold it over and press if you don’t have a machine. Measuring Base Height

I glued it around the edges overlapping the floral fabric, then flipped it over and stapled it to the bottom.

Stapling Fabric to Base

Since it just looked like a big lumpy pouf, I decided to add the covered button, with one large stitch that pulled through all the foam and batting into the bottom, which tucked the middle down to create a tufting effect.

Center Covered Button

The feet were just simple cylinders, but they had the nice metal sliders on the bottoms, so I simply painted them.

Feet

The easiest way to paint anything mounted on a screw is to stand it up, so I put them into place in their existing corner brackets,  but screwed them in just enough to hold them upright, then added some wax paper to mask the fabric.

Masking with Wax Paper

Painted two coats of Behr Stealth Gray,

Painting Footstool Feet

allowed to dry and then pulled away the wax paper. Before I securely tightened the feet, I glued down a piece of burlap I had handy just to finish the base.

Burlap Base Cover

Added the fringe with a hot glue gun.

New Fringe

This is the finished “gout stool” that co-ordinates with an antique oak chair that I had already recovered with the matching Waverly Fabric. Which creates a lovely fireside vignette.

Footstool and Chair Completed

Both will be available at next month’s Vintage Thymes Market. In the meantime, I think I might use that stool to rest my weary feet while I watch the game today. Go Sox! Susan

Party Time at Vintage Thymes

Last night I participated in the one-year anniversary celebration at the Vintage Thymes Monthly Market -what a blast from the past!

History PlanterThere was delicious food and drink, great live music and sooo many shoppers (the line to get in started forming at 4:30!) I have been involved in this vintage market for a few months now, and have been continuously impressed by the owners, Robin and Nancy,

Vintage Thymes Founders Robin & Nancyas well as the many talented vendors,

Vintage Shades of Grey Mantel

who pull out all the stops to create breath-taking vignettes within the confines of their booth spaces. (this is my space : )

Country Design Home

This month, in particular, was more fabulous than ever, IMHO!

Vintage Bike VignetteThe range of vintage items available, from rustic tin pigs

Big Tin Pigto gorgeous florals

Vintage Shades Floralto ingeniously funky remade home wares-whoooo would think that two old saws could be so adorable?!

Saw Owlswas overwhelming, and I noticed that many shoppers stayed for hours trying to take it all in and find some perfect pieces for their homes and shops.

Harvest ThymeI had a chance to take a few pics before the mayhem began

Autumn Waresto give you an idea of the breadth of talent that is showcased in this monthly event.

Vintage Thymes Trunk(Disclaimer: some of the items in these pics were sold last night, but I assure you there is so much more to see and purchase over this long weekend!)

Vintage Cream and HydrangeasSo, if you have a chance to get down (or up) to the south shore this weekend, make sure you head on over to the WinSmith Mill Market to take it all in.

Starfish Tablescape

And, on Sunday, a special treat-there will be an outdoor anniversary fair as well, with music and food trucks and more vintage goodies with over 30 dealers! Have a happy harvest weekend, everyone! Susan

Cabbage Roses to Country Charm

The 80’s called and they wanted their dusty rose cabbage roses back. So I obliged. And our downstairs 1/2 bath, that used to look like this

Before Mirror
now looks like this! (I need to apologize for the not-so-great-pics. Do you know how difficult it was to squeeze into a 5 x 8 bathroom to take these?!)

Bathroom Completed 2

Many of the DIY projects in this tiny bath have been featured on my blog, including the vanity transformation, from boring beige

Vanity Before White Coffee

to rustic navy

After Tile and Vanity

the American flag art piece

Map and Sign on Wall Signed

and of course, my Oh Deer Buck Towel Rack.

Oh Deer Towel Rack
So what was once pink and beige with roses and LLadro dolls and shiny brass fixtures

Before Dolls and Statues

is now all dolled up with the new color palette of navy and green and polished nickel fixtures. The inspiration came from the fabulous wallpaper.

Bathroom Color Palette

This paper, that I scooped out of a clearance bin over a year ago for $10, has the appearance of old barn walls with textured crackled vertical striping. The woodwork, once Benjamin Moore Swiss Coffee, is now Benjamin Moore Snowfall White.

After Toilet Side Vintage Vignette
The floor, previously smoky pale blue tiles (many of which were broken or cracked)

Old Bathroom Tile Removal

is now a stunning slate subway tile I picked up in a clearance bin at Lowes for $1.12 per s/f!

Slate Subway Tiles

Love our new faucet from Home Depot, which resembles an old well pump.

Faucet

The sconces used to be shiny brass and hung next to an ornate, floral gold mirror.

Before Cabbage Roses and Brass Sconces

but when I (my daughter found these, actually, but as soon as I saw them I had to have them! She and I installed them together, so thanks Kate!)

Sconce Closeup

found these at Home Depot I knew they would be the perfect complement to the rustic old mirror Coach had picked up at a yard sale. I just cleaned it and added some Annie Sloan Soft Wax for a glowing finish.

Mirror Wall Complete

This cute little tin shelf came from a downtown shop, and its the perfect size for holding tissues, soaps and some reading material.

Tin Shelf Complete

Love this feature wall. Well, this was the feature wall until I was blow-drying my hair the other morning and the needlepoint picture ($1 at a flea market, oak frame from AC Moore with a coupon) that was resting on the shelf got blown off the shelf, taking the brown wood vase with it, smashing them onto the new slate floor. Luckily, the floor was spared any damage.

After Toilet Side Vintage Vignette

So now this is the feature wall.

Toilet Wall After 2

This was a budget makeover, with the only major changes being a new toilet, new faucet and the sconces, all from Home Depot. The towels, candle holders, soap dispenser, toilet paper holder and scatter rug were from Home Goods, of course. Everything else is reclaimed, refashioned and repurposed, like these beautiful Mason Jars, once filled with preserves, now preserving the past while serving as functional containers.

Mason Jars Edited

The only thing I am still on the fence about is the sink. It is old, and has lost most of its shine, but it is granite. And blue.

Sink Wall Edited

My original intent was to paint it white using epoxy paint. But, after reading the scary warning label (my nervous system has taken enough hits lately…)

Warning Label

and knowing that there is virtually no ventilation in the tiny space, I decided to pass for now. So blue it stays, but it does look like a sink you might find in an old farm bathroom, so I’m OK with it. This, by far, has been one of my all-time favorite transformation projects in our home. It captures the essence and stays true to our country design home style, don’t you think? Stay true to your Tuesday style! Susan

Rustic Rolling Bar Cart

DIY Tutorial- Rescuing and Restoring and Reloving an old cabinet into a Rustic Rolling Bar Cart.

Country Design Home Bar CartThis antique, beat up yellow cupboard has been sitting patiently in the barn since the spring, when I scored it on my way out of Todd Farm on a sunny Sunday.

Cupboard Todd FarmThe vendor let it go for cheap because he didn’t want to load it back into his car. It was next up on my DIM(Do It Myself) list this past weekend, so I finally had to decide out what to do with it. The inside writing indicates that it was removed from an old hardware store in Haverhill,

Bar Cart Hardware Coso my first instinct was to return it to its former nuts and bolts glory. But it really is too awesome to be hidden away in a workshop or storeroom, so now it’s a rolling bar cart! Better to be holding Jack Daniels than jackhammers, am I right?

Bar Cart Finished Kitchen SignedHere is the How-I-Did-It:
1. Washed the whole thing down-inside and out-with disinfectant cleaner-who knows where this thing was before I acquired it?!

Bar Cart Topless2. It was a bit wobbly and was missing the top, so I cut up some old pieces of scrap and glued and nailed it all back together so it’s nice and solid.

Bar Cart Top Braces3. No painting necessary, pretty awesome the way it is with all of the old chipped and splattered paint. But I did matte poly the inside to seal up any odors or dust.

Bar Cart Urethane InteriorThis thing is very old and rustic, so I wanted to make sure it stayed clean inside for storage purposes.
4. Added wheels to the bottom, so it can be easily moved-have bar, will party!

Bar Cart Wheels5. The new top was salvaged from an aged piece of wood-a yard sale find.

Bar Cart Top Old Table TopWashed it, sanded it, stained it and then waxed it to keep the old weathered appearance.
6. Attached the top to the base with some “L” brackets.

Bar Cart Attaching Top with L BracketsYou simply flip the top over, attach one half of the L to that, then place it onto the cupboard and screw it into place, for a nice secure surface.
7. The hardware we had in some bins in the barn. Who knows where this stuff comes from?! But whenever I seem to be looking for something specific, it magically appears. In this case, a towel hook for one side…

Old Hookand a bottle opener holder for the other.

Bar Cart Bottle Opener8. The front panel needed some sort of embellishment, and I found this old rusted window lock. Perfect!

Bar Cart Front Adornment9. Here is the finished cupboard filled with bar stuff. Pretty cool, huh?

Bar Cart OpenedI’m really happy with the final results. Looks great in my country styled kitchen!  Stayed tuned for more exciting junque transformations. In the meantime, its Monday, so make it a marvelous, magnificent, magical one. Susan

Grand (Af)Fair at the Farm

Pettengill Greenhouse Display AutumnDespite the dire forecasts, this past weekend’s weather turned out to be gloriously sunny, with a hint of fall air-perfect for the vendors and guests of the Vintage Bazaar at Pettengill Farm!

Pettengill Farm Pumpkin VignetteThis fair appeared to be bigger (judging from the amount of traffic streaming into the parking lot-we ended up in hog heaven)

Hog Wild at the Vintage Bazaarand better than ever. Each time I have ventured up to the fair I have been absolutely overwhelmed by the creativity and artistry of the vendors who are there to showcase their wares. This fall’s talented group was no exception. Since I cannot possibly showcase them all in this blog, you can go to MyBazaarLife and check out the full listing. But here are a few of my personal favs…
This is the interior sleeping area of the adorable vintage trailer from Good JuJu. Oh, my…

Vintage Trailer Interior JuJuSo perfectly pretty in cool aqua blues. Can you imagine catching some (much-needed)  R&R in this little haven? Well, someone did, because it was SOLD!Cowgirl Emporium teamed up with Sage & Twine to create a rustic, colorful spot filled with cowgirl find and accessories.

Cowgirl Emporium w Sage and Twine

  I did have a pair of cowboy boots once. Spent a fortune for them in Wyoming. Wore them once. Sold them on Ebay. Could have done this…

Cowgirl Boot Rack

Great way for a cowgirl to store her vintage jewelry. Once again, The Greeley Girls were offering their gorgeous line of vintage clothing, jewelry & accessories.

Vintage Hats and Scarves the Greeley GirlsThis vintage necklace pretty much sums up my day as I am strolling through the fields, enjoying the blue grass music and taking in all of the sights and sounds of a country fair.

Happy by The Greeley Girls 2

Pretty little succulent plants in vintage containers from Fleurish Home and Garden. I don’t have a green thumb, but I am fairly certain I could keep these alive, at least for awhile…

Succulents by Fleurish Home and Garden

Petite Michelle Louise & Evelyn And Rose had combined to bring this lovely neutral French Flea Market palette to the fair.

Evelyn Rose & Petite Michelle Louise Vignette

Inspired French, romantic, homemade decor. I adored this vintage suitcase filled with Parisian goodies, both old and new. C’est Magnifique!

Evelyn & Rose Suitcase

The Linens Lady’s tent was sooo bright and cheerful, filled with aprons and quilts and colorful tableware. Imagine wearing one of these beauties while prepping your Thanksgiving dinner!

Vintage Aprons Linen Lady

Soap confections by French Country Chick Soaps that looked yummy enough to eat.

French Country Chick Soaps

Red Tractor Vintage was featuring awesome light fixtures made from re-purposed, recycled anything. Loved this copper sunbowl.

Copper Sunbowl by Red Tractor Vintage

Someday I am going to get me one of these. Meet Ruby the gorgeous vintage truck at Barnstormers.

Ruby by Barnstormers

At last year’s fair I featured a pic of a large planter filled with glass flowers by Creative Glass Works Boston. It became one of my most re-pinned pics on Pinterest. Apparently glass flower gardens are a thing. A very popular thing. And rightly so. Can you imagine this one perfect flower-no watering needed?

One Perfect Bloom from Glass Art

Piano Keys as art.

Piano Keys Art by Naturally Unique

When I happened upon this work by Naturally Unique, I was so impressed with the creativity and ingenuity using my three “r”s principle-recycle, refurbish, relove-music to my ears! These piano keys, which could have ended up in a dump are now restyled into works of art.

Simplicity Bike

Simplicity, new to the Vintage Bazaar, where I discovered this so very cute hanging light fixture made from an old tin milk can. Linda has a shop-in-a-shop at Flukes and Finds in Newburyport. I may just have to go there to rescue this light, if it wasn’t sold at the fair…

Simplicity Shop

And then, for me the show-shopper by The Yellow Zebra. This baby grand piano restyled into a spectacular rolling bookcase. The background was pasted with old sheet music and the piano was painted black. Amazing. Did I say that loudly enough? AMAZING.

 Piano by The Yellow Zebra

And, continuing to restore and reuse, they transformed the piano top into this sign. Words cannot accurately depict the coolness factor here.

Grand Piano Top Sign The Yellow Zebra

If you missed the fair this time around, you’ll be excited to know that The Vintage Bazaar is hitting the road and taking its show to the next level! You will have a chance to see some of the vendors at the upcoming Boston Antiques & Design Show and Sale in Wilmington, Ma this October. More info to follow. In the meantime, have a terrific Thursday everyone! Susan

Drawer Pull Puppets

Did you ever decide that you wanted to paint some drawer pulls, but the pulling part that is hinged to the face plate keeps swinging back and forth while you are trying to hold it still to apply the paint? So frustrating! Simple solution: drawer pull puppets!

Pull Puppets

All you need is a place to hang the pulls while you paint, some thread, (you can use string, but the thinner the better so you don’t see the lines),

Thread and Scissorsscissors, painters tape and some newspaper, and of course, the paint. In this case I used Rustoleum Hammered Silver paint purchased at The Home Depot.

Hammered Rustoleumto give the old pitted brass a new old distressed look. Cut the thread and loop it over the wire. I used our cable wires in the basement that are attached to the beams in the ceiling over my work space.

Thread and wire

Now, obviously, if you have a nice, decorated basement, you would not be spray-painting in there anyway. I, on the other hand, have become a basement dweller surrounded by old pipes and cobwebs, concrete floors, hanging exposed wires and gray stone walls. No worries about ruining anything. So, I hung the hinges to just above the work table top, then taped them underneath to the table to stop them from swinging-uggh!

Pitted Brass Pulls

(if I ever tell you I want to add a puppeteer to my bucket list, remind me of this post, please).

Puppets in Window

Spray painted them, one coat needed. This paint adds a cool textured finish to the metal.

Hammered Silver Paint

Now, I wanted to add a little more interest to them, so I dry-brushed some of the Behr Stealth Jet Gray on top, the same color as the desk I had painted.

Antiquing pulls

Then I wiped most of it away, leaving just a hint of the darker gray to match the desk. Allowed to dry, then cut them down.

Hanging Pulls

This is the point where I typically show you the finished piece. Sadly, I forgot to take that pic! (sigh, I really need a camera crew to follow me around to take pics. Too many things to remember!!) Happily, I sold the desk at the Vintage Thymes Market this past weekend : ) But it did look pretty awesome, and that’s my unbiased opinion.

Desk Drawer Pulls

Have a non-distressing Tuesday everyone- stop hanging around and go do something today!! Susan

A Global Intervention

It’s Wanderlust Wednesday, and as much as I would like to be jetting to some fab location on the globe, this week I have to settle for repurposing a couple of globes instead. My shop in this weekend’s Vintage Thymes Market is all about back to school, and I have so many maps and globes, it’s a bit ridiculous. So a couple of them got a little makeover. A plain Jane, run-of-the-mill globe is now a chalkboard- thanks to some Benjamin Moore Chalkboard paint.Unpainted Globe

Super easy to do: literally take a globe (we found all of ours at yard and estate sales for just a couple of bucks), paint on a coat of chalkboard paint to cover. Wait a day. Add a second coat.

Globe Chalkboard Painted 2 coats

Wait a couple of days. Now you want to “size” the surface so when you write on it, you can change it easily by wiping with a damp cloth.

Chalking the Globe

You literally take the side of the chalk and paint the entire surface until it looks like an inverted snow globe…then wipe it with a damp rag.

Chalked Globe

The finished globe-guess this is what earth looks like at night when viewed from Mars. Kinda cool, right?

Chalk Globe Completed

The other great find was a standing, light-up globe-awesome! The base was an old, scratched and scraped cherry wood.

Stand Globe in Car

So I hit it will some steel wool and Liquid Sander. A little goes a long way. I think I’ve had this can since 1999!

Klean Strip Liquid Sander It cleans and preps the surface and creates a solid bond for the paint to adhere. I use this when I don’t want to use a white primer or chalk paint. The paint is Behr’s Enduring. I used two coats and then, to finish, I mixed some Annie Sloan Soft Wax with a bit of Behr Stealth Jet (my newest color obsession-it’s dark charcoal with a hint of chocolate)

Soft Wax and Paint Mix

and painted that into the crevices and molding edges to highlight the details.

Brushing On Wax

Wiped most of it away,

Rubbing Off Wax

allowed to dry, then finished the whole thing with a light coat of wax.

Stand Globe Painted

The results are out of this world!

Stand Globe Lit

Both will be available this weekend at the market, so if you happen to be wandering about on the south shore, stop by and say hello! I will be there on Friday, and would love to meet you all! Happy wandering…Susan