Anchors Away Vintage Cabinet

summer porch nautical theme
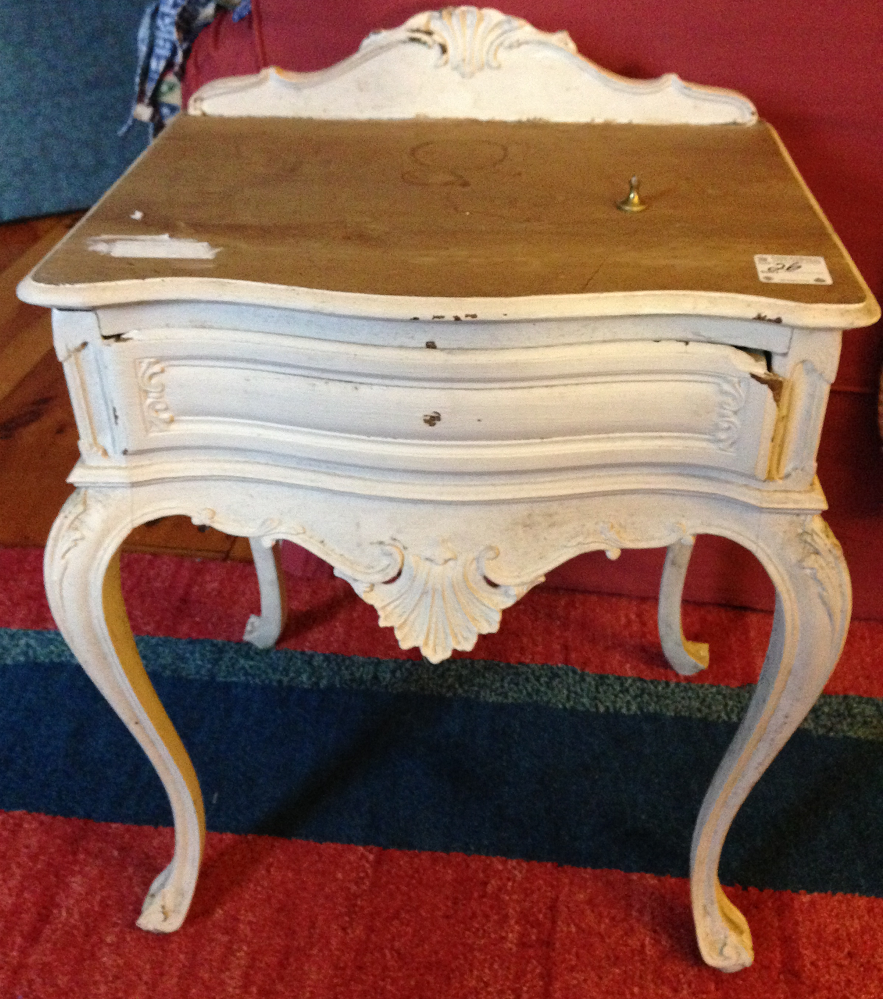
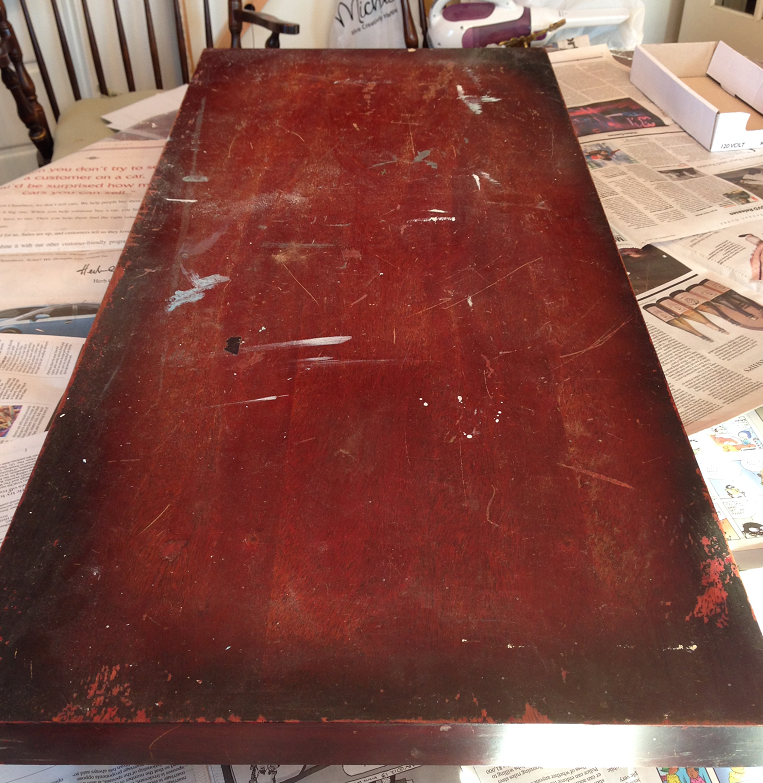
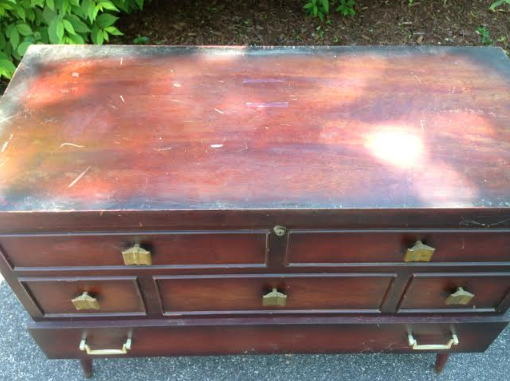
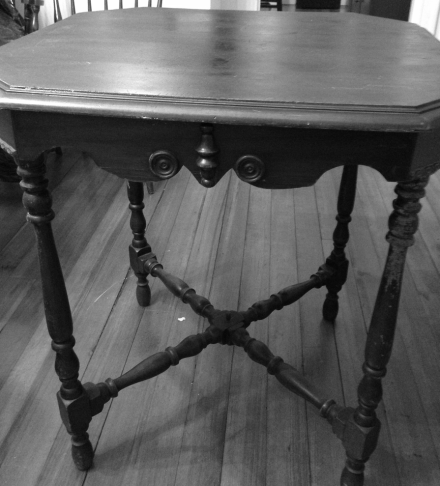
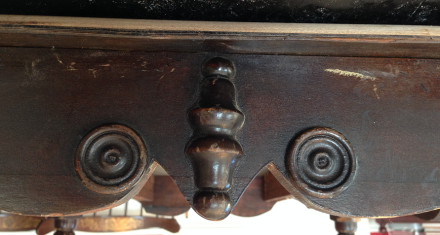
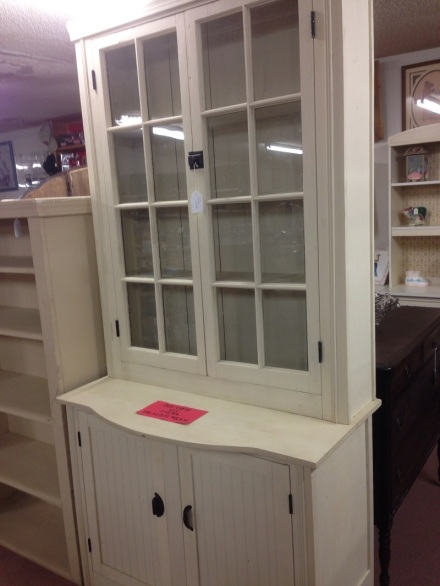
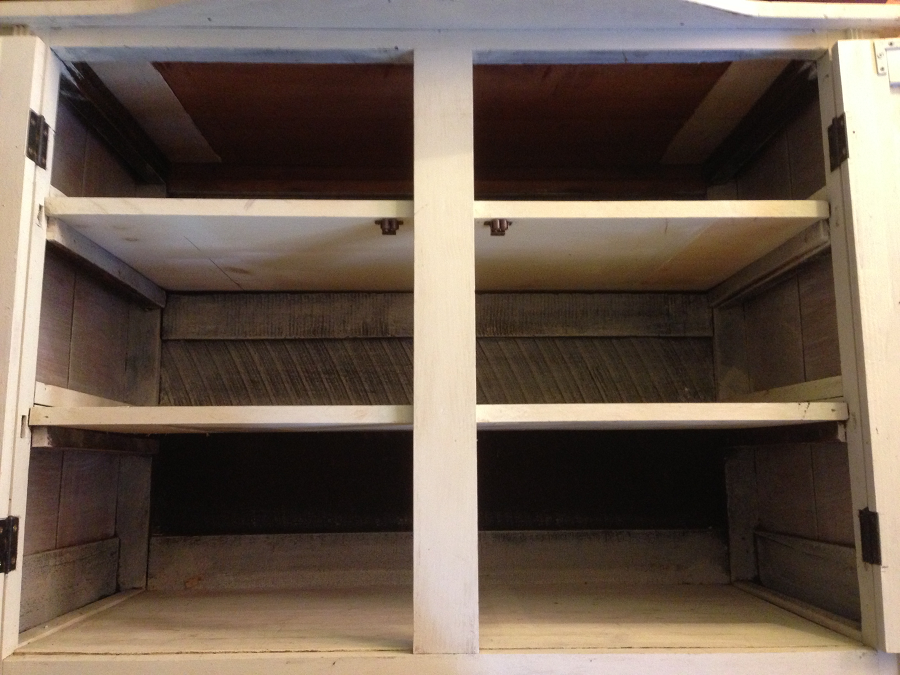
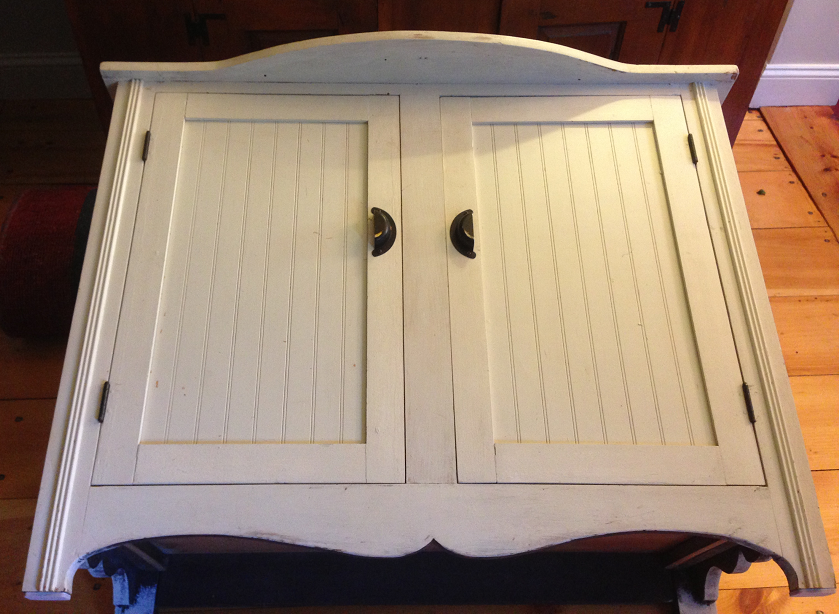
Another DIY project for the summer porch (if it ever gets above freezing around here so we can actually use the porch). This is the before, one of those old tin wall cabinets that someone had painted an awful shade of mustard neon yellow.

Nautical Cabinet Mustard Yellow Before

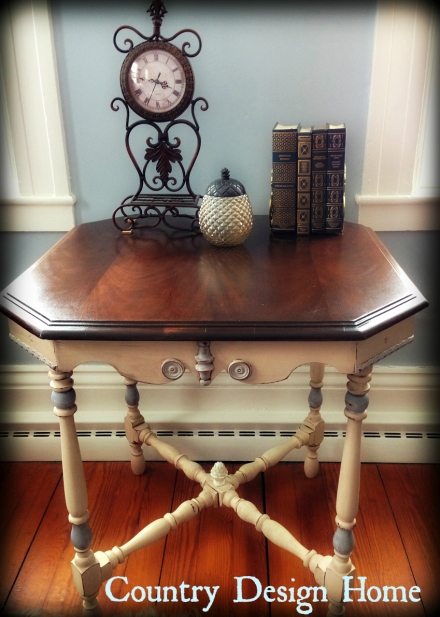
And this is the now: an Anchors Away Rolling Cabinet!

Nautical Cabinet Side view Stripes

A pretty dramatic transformation, yes? Here is the how-I-did-it:

1. Attached wheels to the base of the cabinet so it can roll easily

Nautical Cabinet Wheels

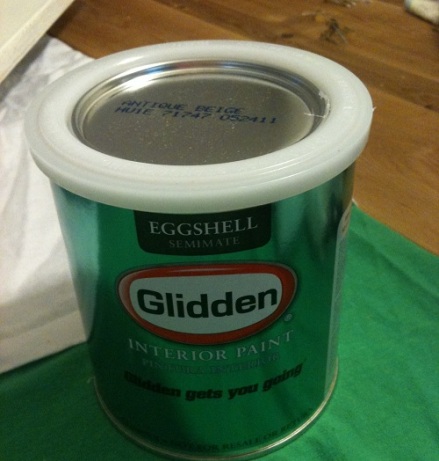
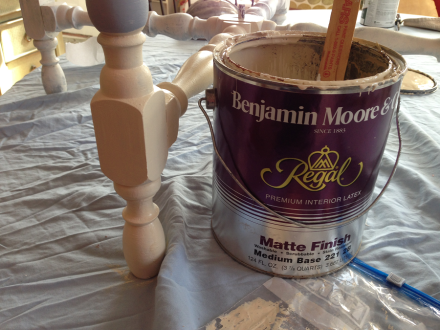
2. Painted with Glidden Gripper primer. This stuff works on wood or metal. Painted a coat of Benjamin Moore Snowfall white over the primer.

Antique Table Gripper Primer

3. For the sides, I decided to add a nautical stripe effect, so I taped the 2″ stripes over the white and painted with a custom (by me!) deep blue.

Nautical Cabinet Taping Stripes

Nautical Cabinet Blue Striping on Sides

4. For the front doors, I painted two layers of blue paint, a solid base and then a dry-brushed topcoat to create more depth of color.

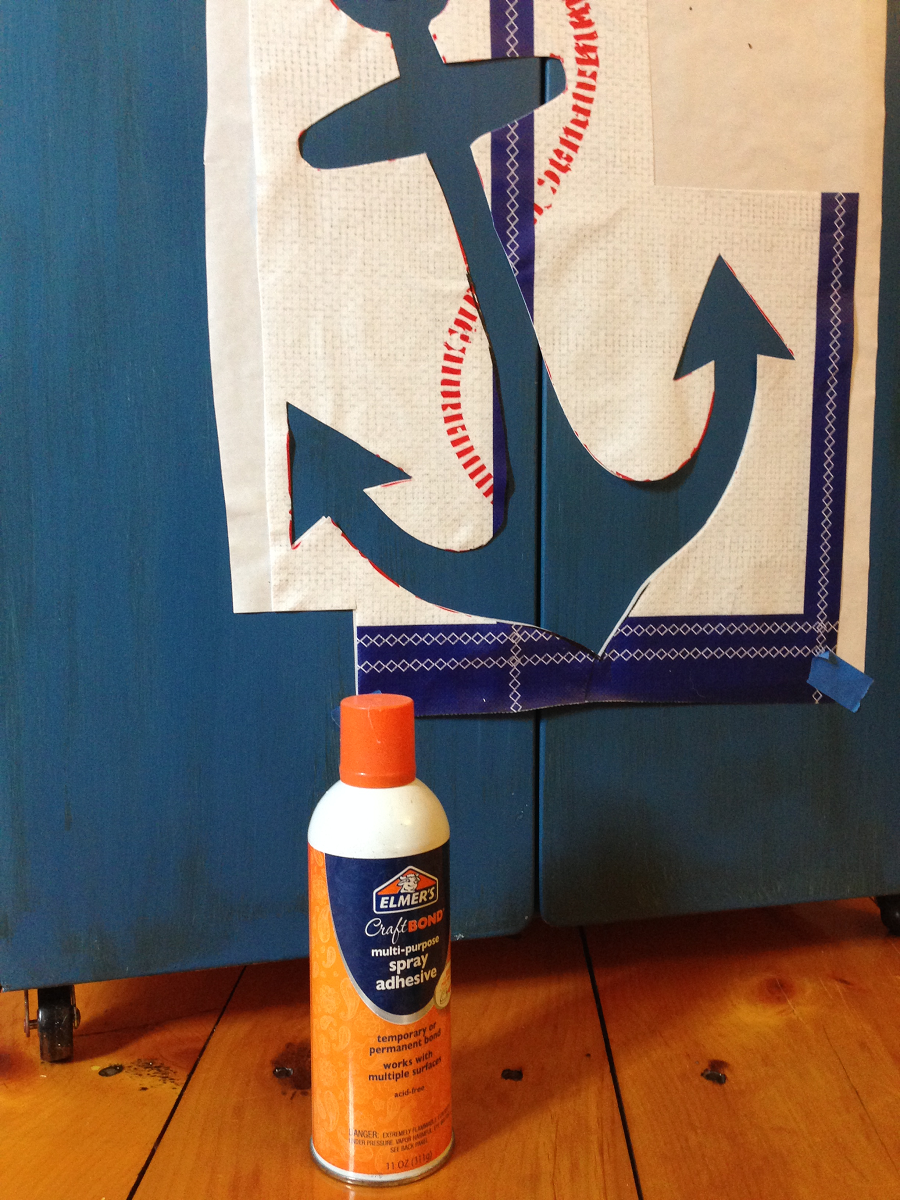
5. For the anchor stencil. I needed to look no further than my HomeGoods shopping bag!

Nautical Cabinet Anchor Stencil Home Goods Bag

I buy these all the time, and for 99 cents they can’t be beat. I usually use them for toting stuff around, but since the anchor was the perfect size, I figured why not? I’ve got plenty more where those came from! So I used the cut-out anchor for the stencil, affixing it to the cabinet with some temporary craft adhesive,

Nautical Cabinet Spray Adhesive for Stencilthen sponging paint on with a regular sponge.

Nautical Cabinet Stencil Removed

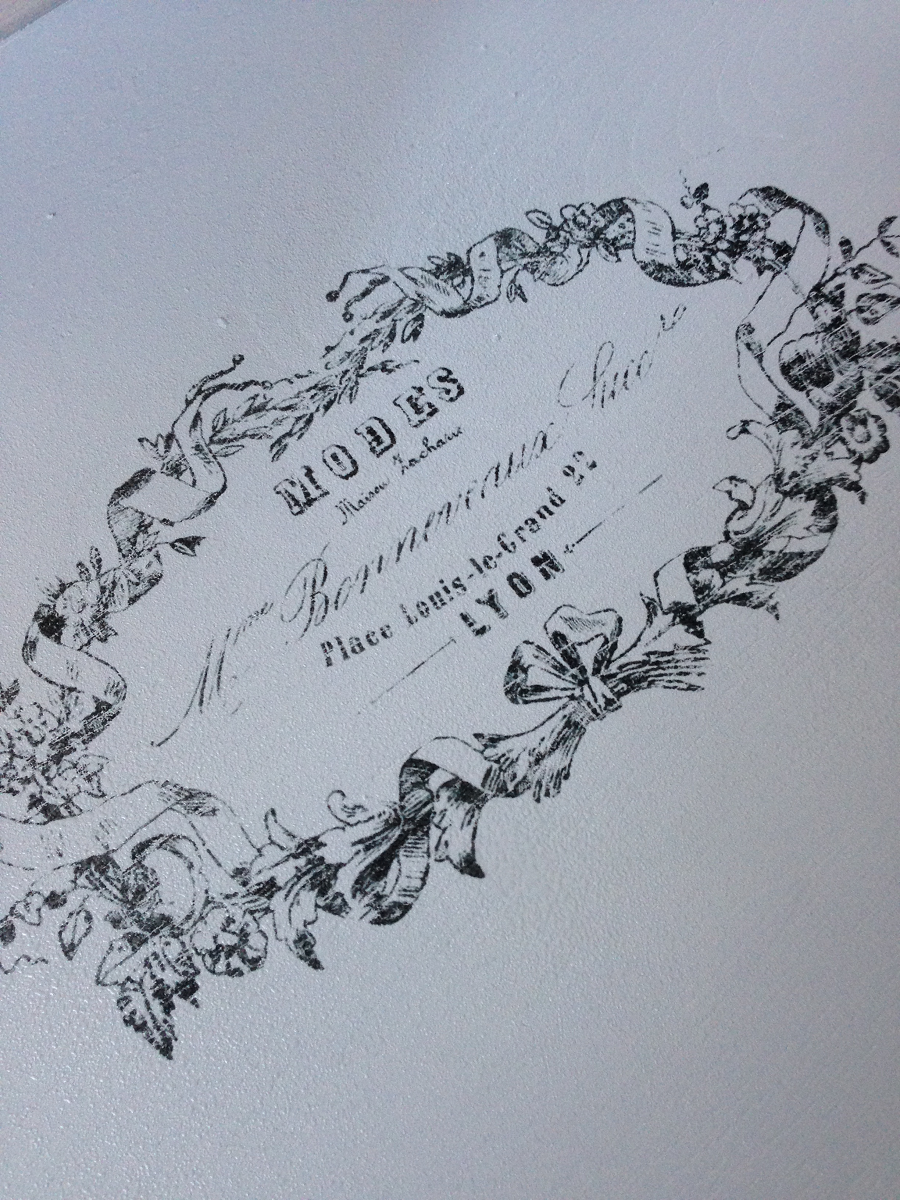
The roping I created from my PicMonkey Photo Editor. This anchor design is very similar to the one I used, so I’m sharing that in case you would like to create one of these too!

Nautical Anchor and Roping Design
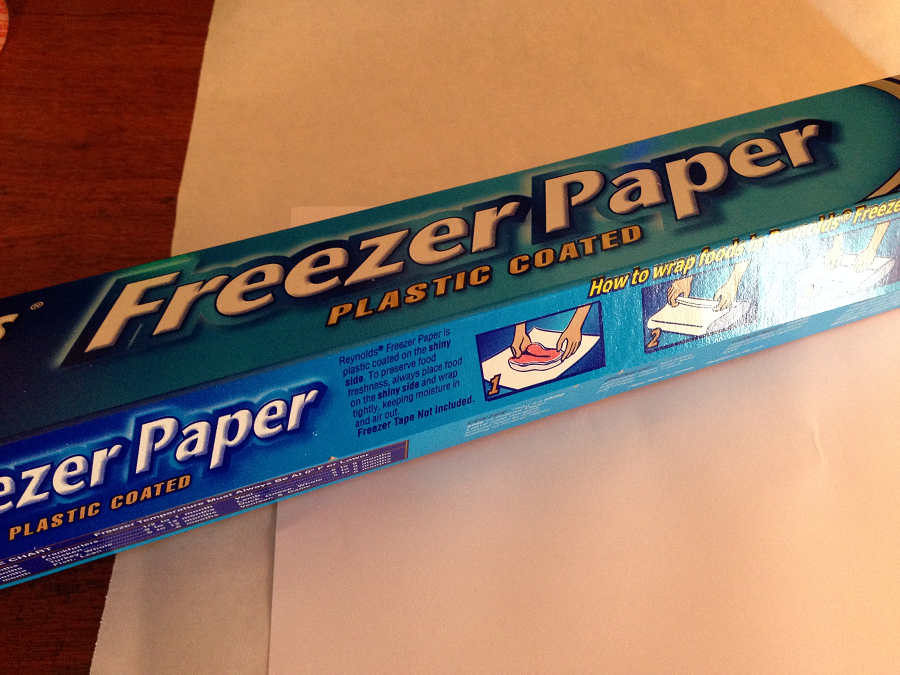
6. I printed the design on regular printer paper, then affixed a sheet of freezer paper to it with some spray adhesive, just to give it more strength. Cut out the stencil with an exacto knife.

Nautical Cabinet Cutting Stencil

7. Affixed the stencil to the cabinet with painter’s tape, dabbed the white with a piece of sponge until the white was deep against the dark blue.

Nautical Cabinet Completed Anchor and Rope Stencil

For the twisted rope, I cut the pattern from the HomeGoods bag (it has two sides : )

Nautical Cabinet Cutting Rope Pattern

and taped that to the cabinet.

Nautical Cabinet Taping Rope Pattern

Nautical Cabinet Chalk Outline Roping

Outlined with chalk, then took a small, tapered sponge piece

Nautical Cabinet Trimmed Sponge

and followed along the lines, dabbing with the white paint to create the rope effect.

Nautical Cabinet Sponging between lines

The great part about using chalk is that once the paint is dried, the chalk just wipes away with a damp sponge.

Nautical Cabinet Rope Completed

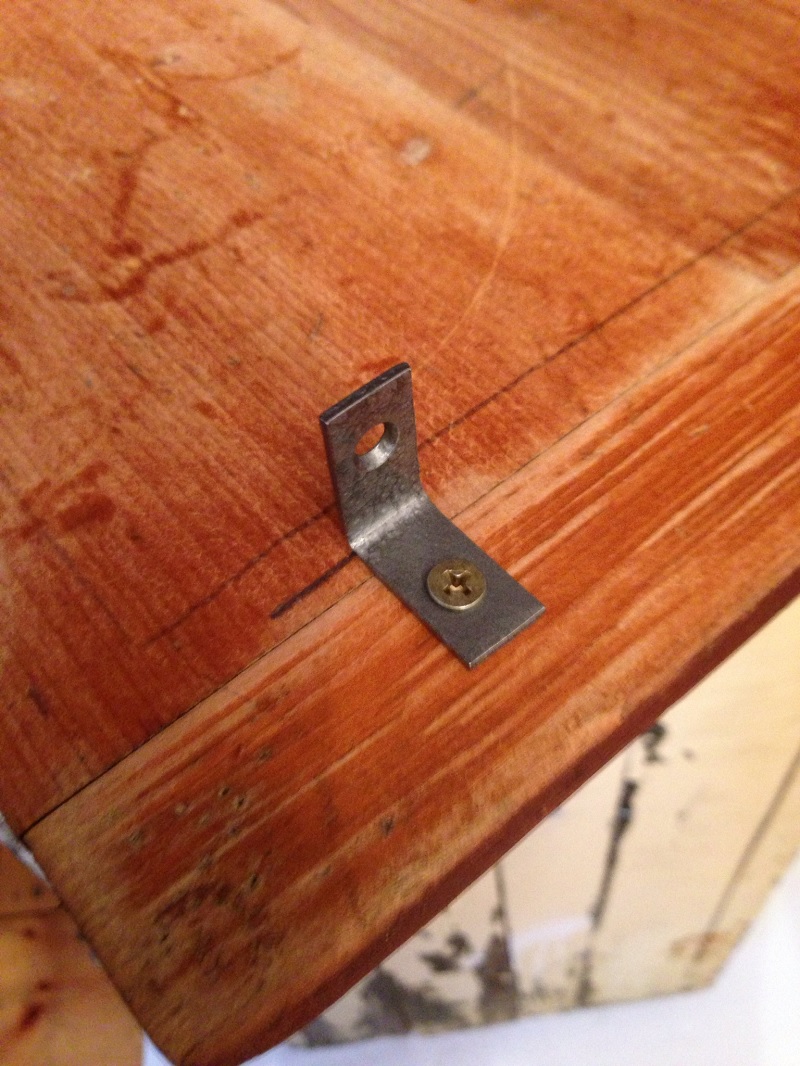
For the top, I used some light balsa wood pieces that I affixed with glue.

Nautical Cabinet Balsa for top

I wanted that beachy, weathered appearance, so I added some blues mixed with water just to give it an aged effect.

Nautical Cabinet Swirled Paint and Water

Nautical Cabinet Glazing Supplies for Top

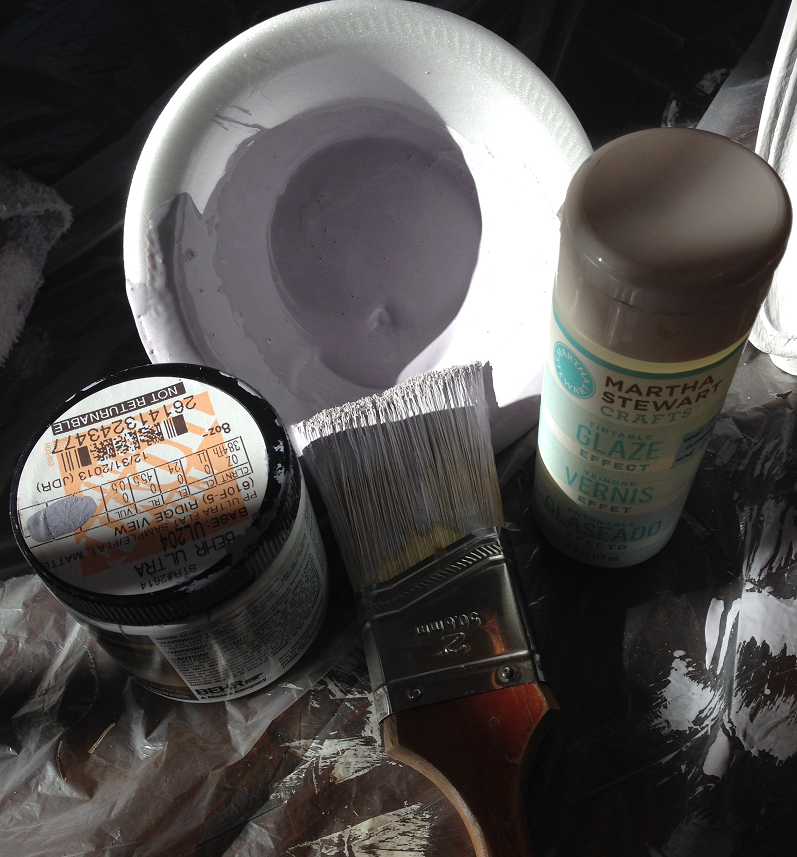
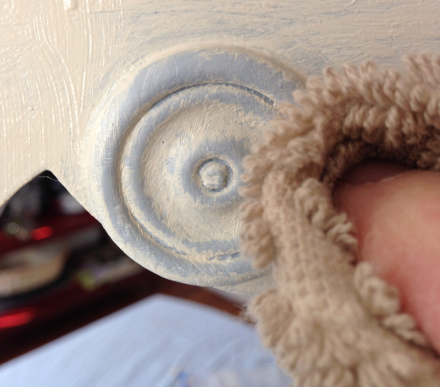
Then I glazed the top with a mixture of Martha Stewart Glaze and 2 paints, one white, one metallic silver to create that aged, driftwoody look I was going for.

Nautical Cabinet Weathered Top

With the glaze, you just paint it on, then wipe off what you don’t want

Nautical Cabinet Wiping Glaze off Top

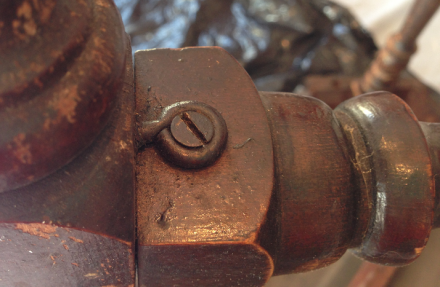
The original handles were 1950’s chrome, which would have been perfectly fine.

Nautical Cabinet Chrome Handles

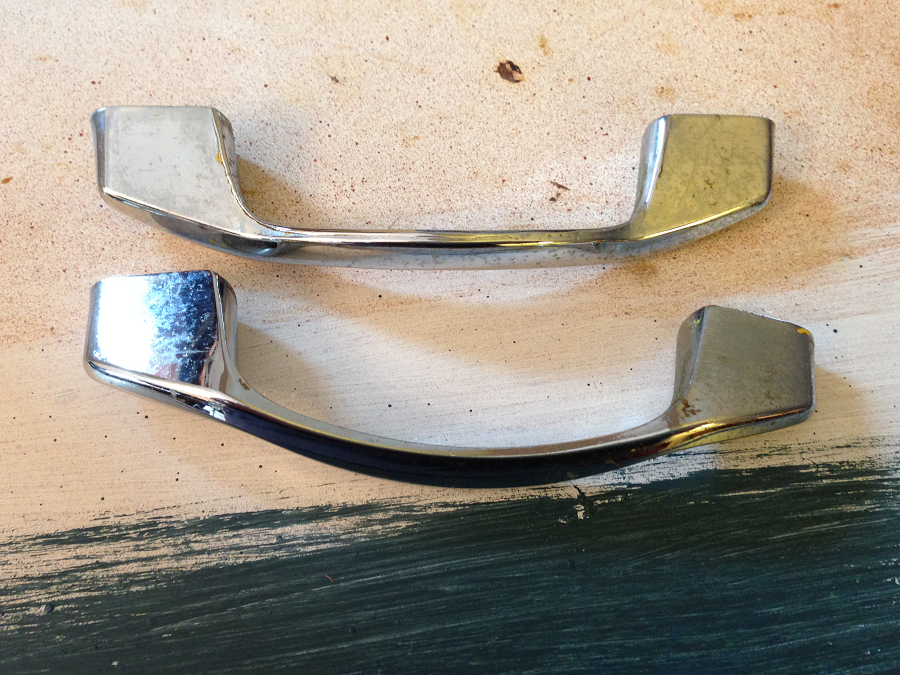
Instead, I used some brass grommets, one in each hole. I had do do a bit of drilling to make the holes larger, and then glued them into place.

Nautical Cabinet Grommets in Place 
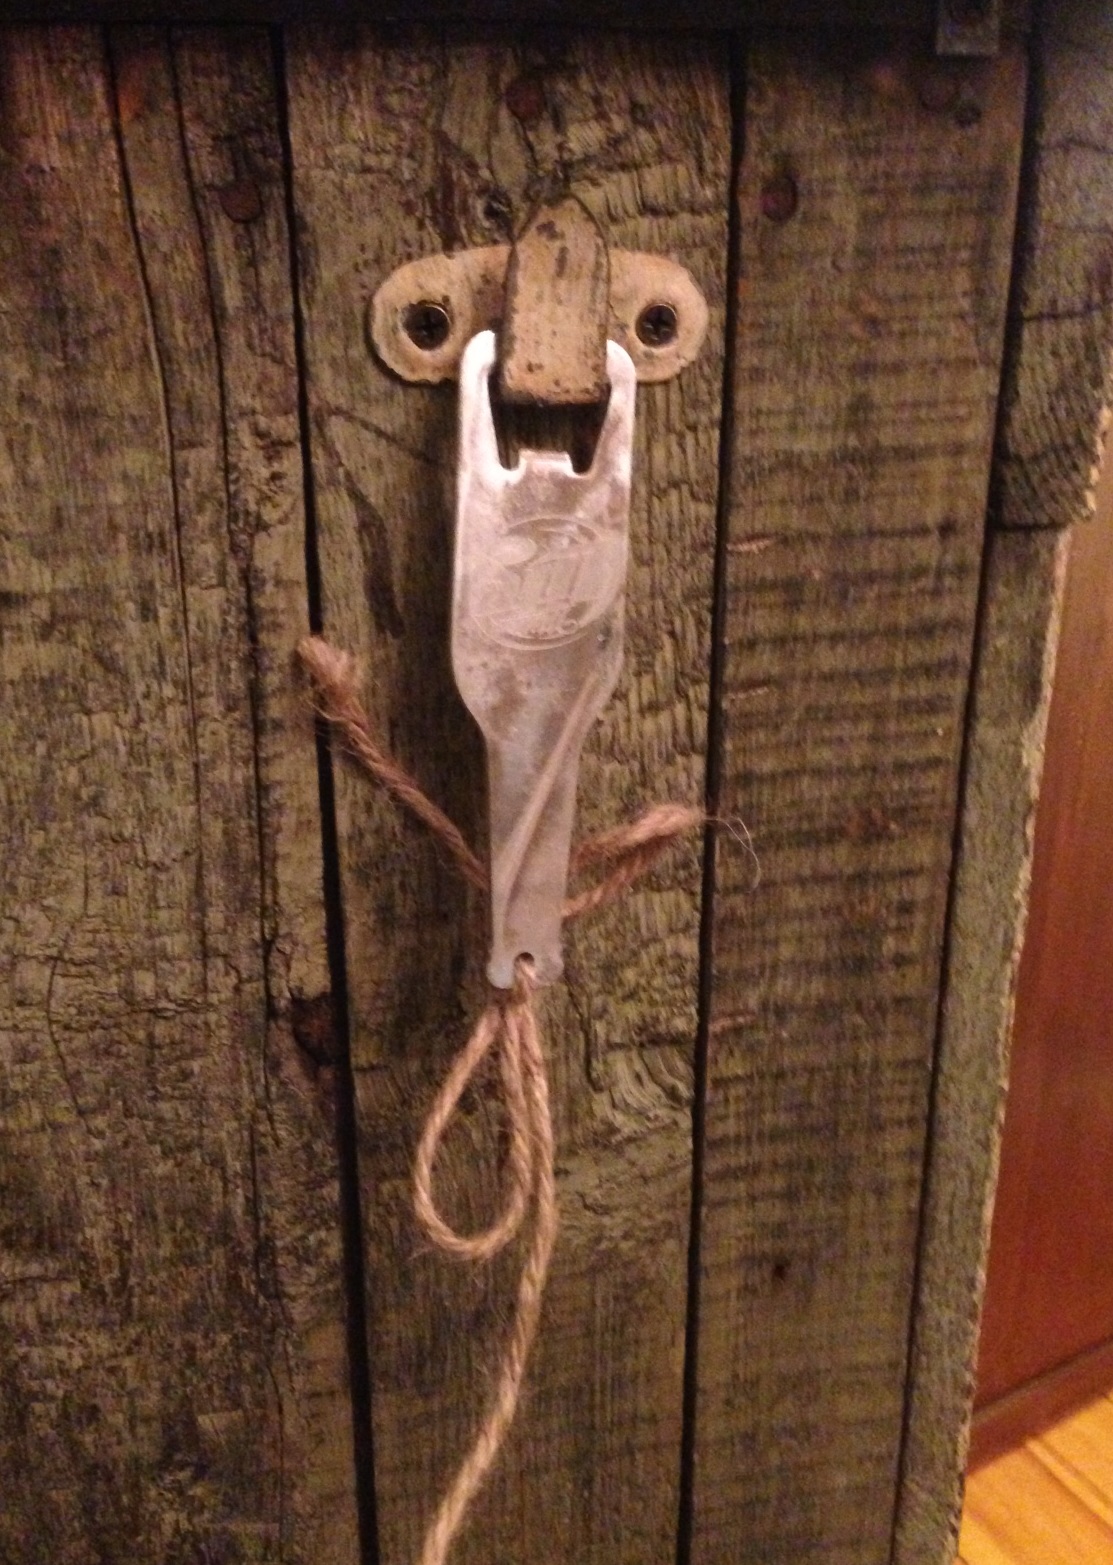
Added some nautical roping to create the handles. Plus, it mimics the roping in the stenciled design. Perfect!

Nautical Cabinet Rope Handles in place

A bit of DIY FYI: when you are cutting twisted rope, tape the end before you cut, otherwise it will untwist!

Nautical Cabinet Cutting Rope Taped Ends

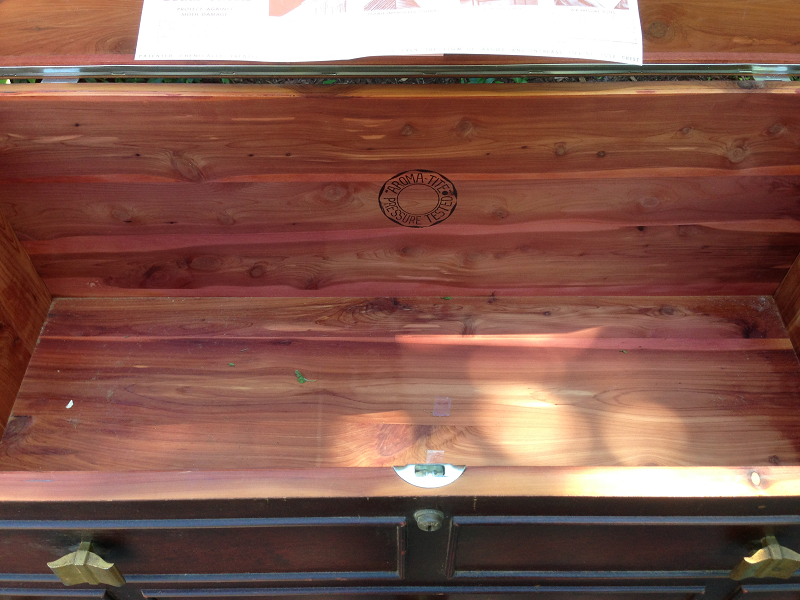
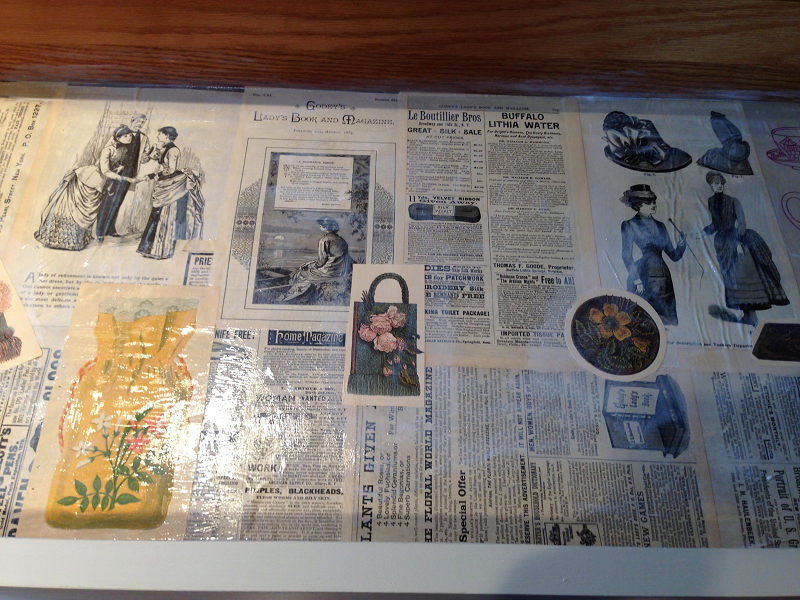
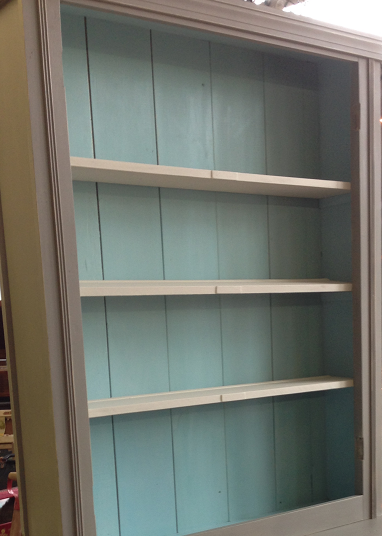
For the inside, I just painted it to match, then decopaged the shelves with some pretty blue tile paper I picked up at Michaels-4 for $1!

Nautical Cabinet DecPage and paper

Then I added a Martha Stewart Gloss finish just to waterproof the paper.

Nautical Cabinet Martha Stewart Gloss Finish

This cabinet is plenty big enough to hold cups, plates and glasses and an ice bucket for the porch.

Nautical Cabinet Interior Storage

The finished cabinet is perfect on our Nautical Summer porch, right at home with our white wicker seating and the Whale Coffee Table!

summer porch nautical theme

And. perhaps someday soon, we will be able to sit out on the porch and enjoy some much-anticipated warm weather! But for now, I hope you enjoyed my DIY Anchors Away Cabinet Project! Have a warm Wednesday, everyone! I know I will because I am headed to sunny California!!!  Susan


The Antique Table Throwback

It’s #Throwback Thursday, everyone! What better way to celebrate than to show off my latest DIY project? This week it’s a turn-of-the-century table Coach had stashed in the barn. Pretty beat up, lacking polish and pizazz and missing the little finial in the base.

Antique Table Before Restoration B&WThis is the before when it was manufactured by the Denhard Furniture Company of Louisville, Kentucky, sometime between 1855 and 1905. This is the after.

Antique Table Clock and Books Staged PMHere is the how-I-did-it:

1. My first step is always to clean the piece to make sure there isn’t any dust or dirt or mold or mildew-after all, who knows where its traveled in these last 100 years? I wanted to preserve the top to stain, so I flipped it upside down and went to work.

Antique Table Primer Upside Down

2. I painted the base it with my favorite primer: Gripper by Glidden. Awesome stuff. Covers everything in one coat.

Antique Table Gripper Primer

3. Once that dried, I painted the body with a coat of Benjamin Moore matte finish paint in a custom color. And by that I mean that I mixed a couple of different cans of paint I had on hand to create this creamy white color. I will name it Buttercream Frosting. Because I love Buttercream Frosting. And it is a buttery cream color. Hence, the name.

Antique Table Benjamin Moore Custom Color4. I painted all of the raised detail blue-this is why I LOVE redoing old furniture. You don’t find this kind of carved detail at big box stores!

Antique Table Old Finish Detail

And this locking mechanism for the legs is brilliant! A screw-eye is attached to the leg, which then in turn is attached to the brace with the screw. So sturdy.

Antique Table Screw and Hook
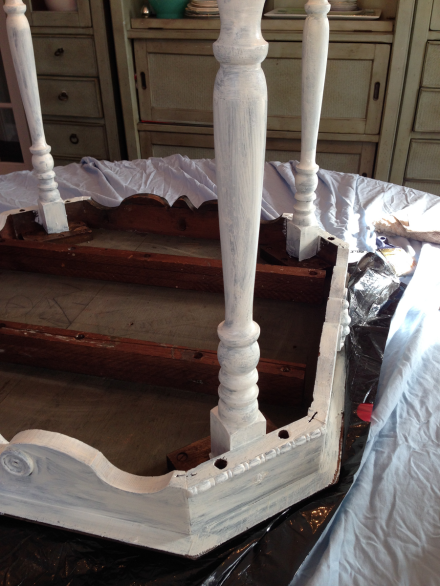
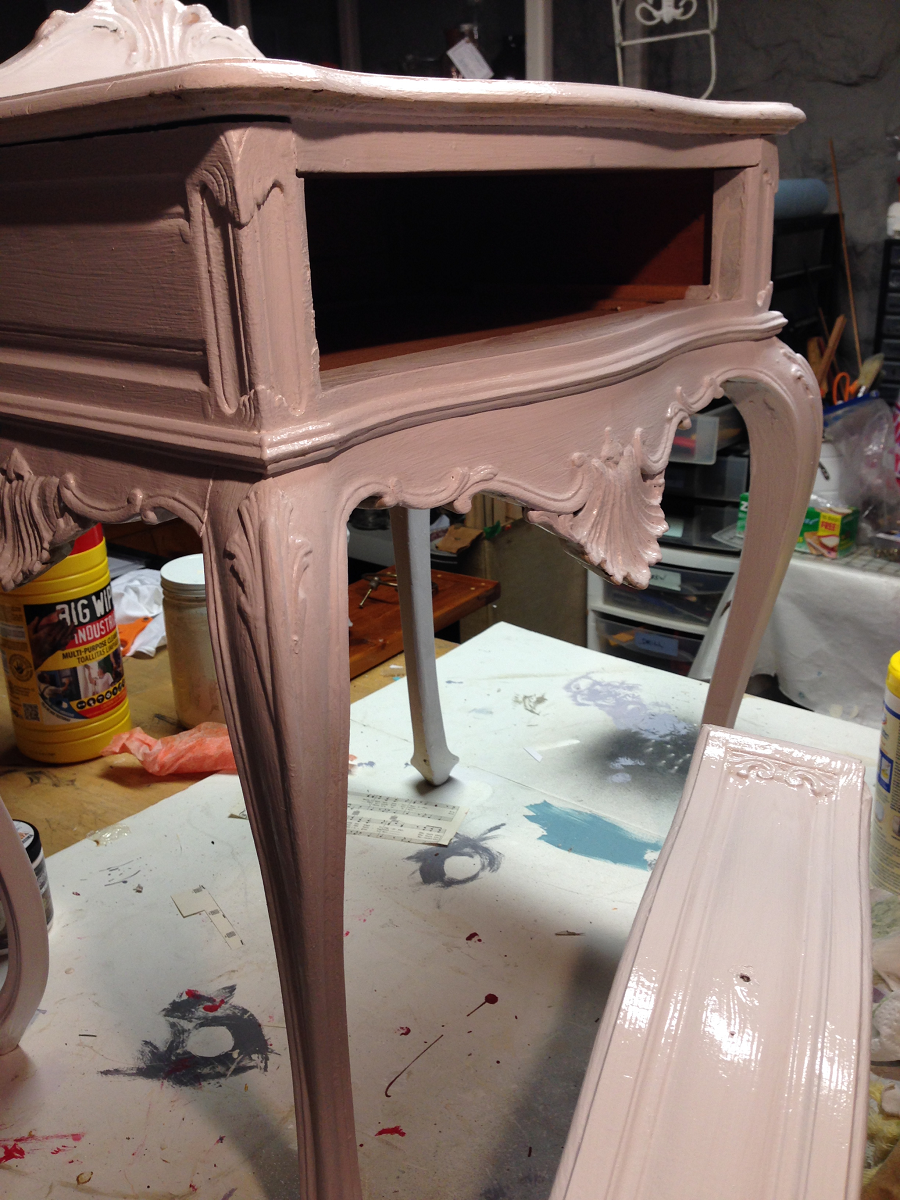
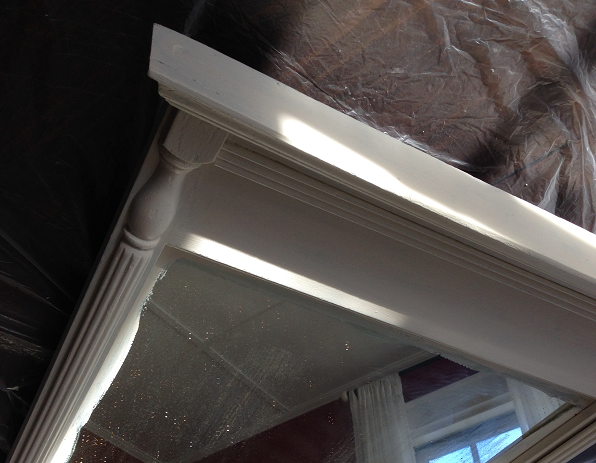
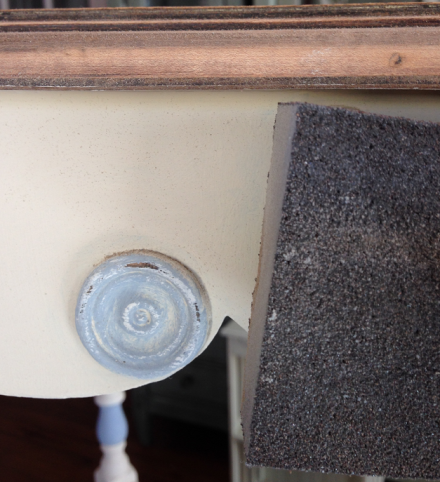
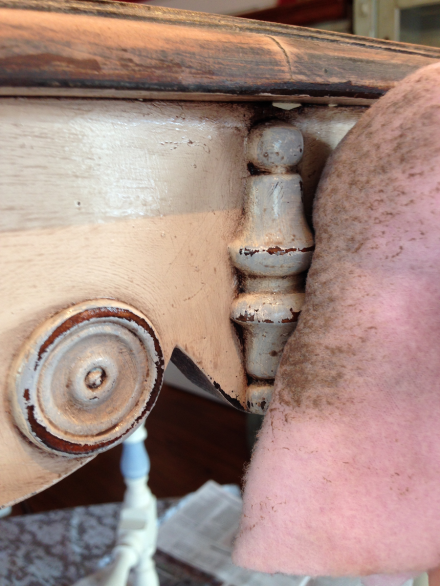
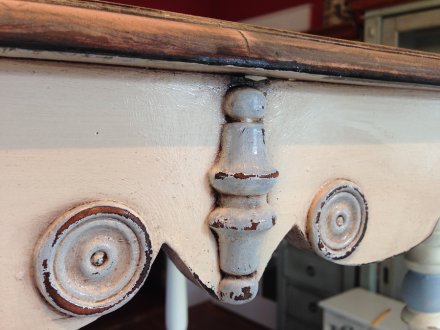
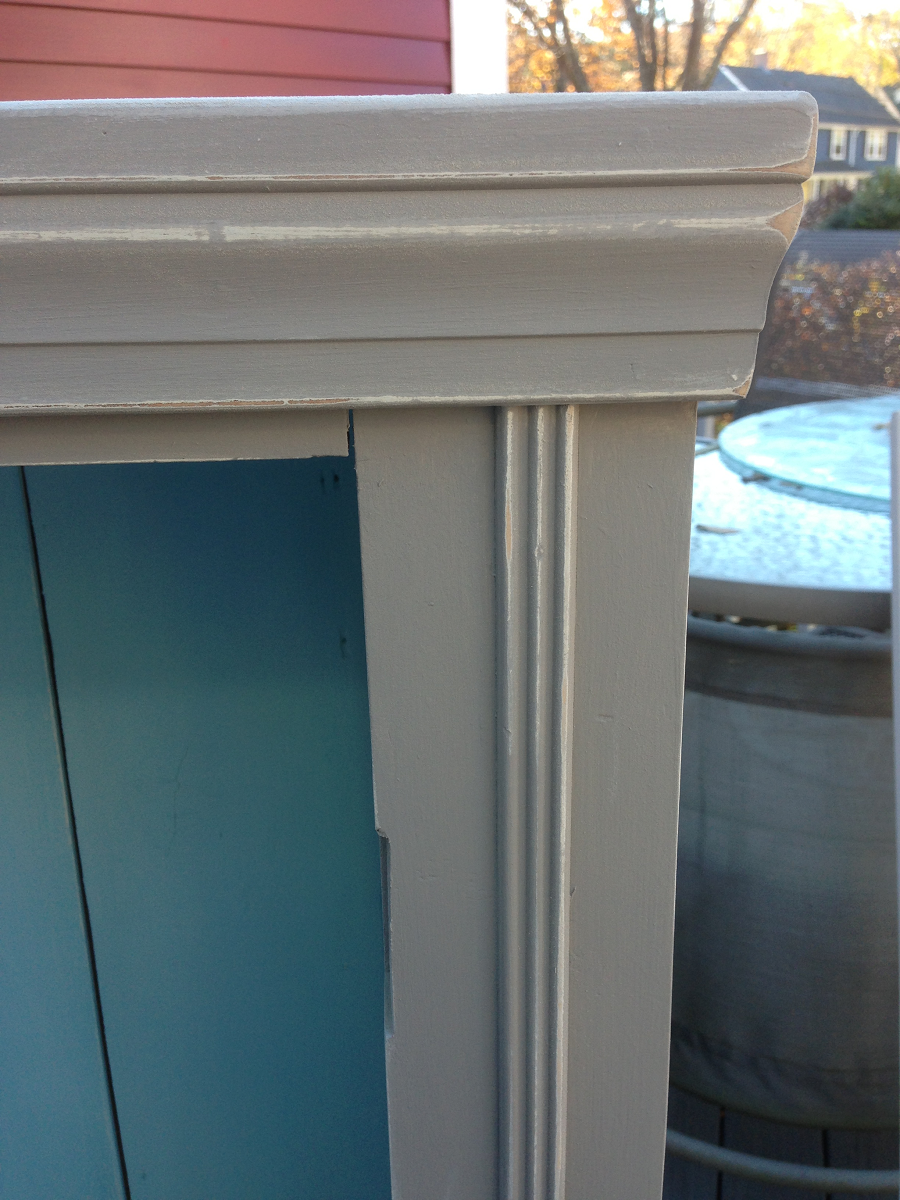
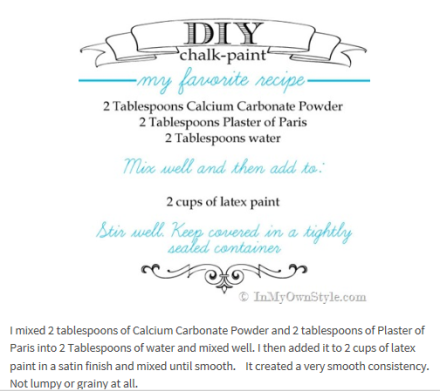
OK, so I painted all of the raised detail with the same home-made blue paint concoction that I used in the Colonial Country Cupboard I recently completed. Love it, want to use it over and over again. But I am almost out, so I’m going to have to find a way to replicate it! OK, so now the detail was blue.

Antique Table Painting DetailThen I repainted the entire piece again with the Buttercream Frosting and wipe away the excess off the blue details.

Antique Table Wiping Off Paint from Detail5. I sanded everything down to give it that rustic, aged look that we like.

Antique Table Sanding DetailAnd by we, I mean myself and Coach. I know a lot of people are not fans of the painted, sanded, stained look, but that’s cool. One man’s trash is another family’s re-loved vintage table : )

5. I glazed the entire piece with General Finishes Brown Mahogany

Antique Table General Finishes Brown Mahogany Glaze

(I was planning on using this for the top, anyway, so this way it matched color tones. I’m kinda smart like that.) Simple process. Paint the stuff on.

Antique Table General Finishes Brown Mahogany Glaze Applied Try not to spill it. But if you do, use plastic drop cloths so it’s easier to scoop the stuff up and put it back in the can.

Antique Table Spilled GlazeI’m using plastic lace table cloths from the dollar store. I know, right? Cheap, pretty and practical (insert joke here). Used a damp rag to keep it workable while I wiped it off until I was satisfied with the results.

Antique Table Wiping off Glaze

Look how the detail pops now!

Antique Table Glaze completed

Antique Table Side Detail Finished6. The base has two cross pieces that meet in the middle. At one time there was most definitely a decorative finial, but that was  missing. I was searching for something suitable when I spotted these curtain rods at the Christmas Tree Shop. (If you don’t have one near you, and don’t know what this store is, let me assure you it does not merely sell Christmas Trees!) These were a glazed, antiqued metal and cost $5.99!

Antique Table Pineapple Rods Christmas Tree ShopSo I removed the finial from the rod,

Antique Table Removing Finial From Polethen filled the finial with glue

Antique Table Finial with glue filler

and also coated the spindle with glue so it would be very secure.

Antique Table Coating Post with Glue7. So now the new pineapple finial is a welcoming addition to the antique table. Is it the original? No. But I would never have been able to find that. This seemed like a sweet solution.

Antique Table fixating pineapple finial to post8. For the top, I used the aforementioned Brown Mahogany Stain to replicate the rich brown of the original color and finish. That was after Coach sanded it down, but I didn’t catch him in the act, so I don’t have a shot of that. But I do have a pic of him cleaning an old cupboard using my kitchen gloves. He worked for a few minutes and then said, and I quote: “This DIY stuff is hard work. I’ll finish it later.) And he removed the pink gloves and left! So I remind him of that whenever he drags home yet another piece of furniture and says “work your magic with this”. Ha.

Coach cleaning the cupboard7. I applied a couple of coats of Fidde’s Supreme Wax

Hope Chest Fiddes & Son Waxto give the top that glowing finish.

Antique Table Top Fiddes Wax Finish

8. Here is the final closeup reveal of the accented details and beautiful wood top!

Antique Table Top Dressed

I think Mr. Denhard would be very pleased with how I have lovingly restored his table. What do you think? Could you love a table like this in your home?! Do you have an old piece of furniture kicking around? If you do, then it’s your turn to add it to the #Throwback Thursday Collection! Susan 

Dangers of DIY-Hardware Replacement

I recently wrote a post entitled the Dangers of DIY

Dangers of DIY

where I discussed the many chemicals and compounds that are in all of the seemingly harmless paints and finishes that DIY’ers use on a daily basis. If you didn’t see it, please click here and read it. It’s very important that you are aware of the pollutants and potentially hazardous materials that you are breathing in while working on your favorite old piece of furniture or wood trim in your homes!

However, there is another, less apparent danger that is also so important to know about and correct for your family’s safety. In another recent post, I showed off a gorgeous 1950’s Lane hope chest that I had completely restored.

Refinished Lane Mid Century Modern Hope ChestI am really proud of that piece, but what was I not aware of that needed changing? The locking mechanism of the chest was similar to the one that was in the news recently, when two small children climbed into it and tragically suffocated. How could that happen?! The old locks, in the chests built before 1987, had a push-button that was easily engaged so that the top could open up, and then instantly click into place and lock down once the top was lowered. There was no way to unlock it from the inside, and since it is a cedar-lined chest, it was built with a tight seal to keep out the moths and protect your clothing. Clearly, this needed to be changed.

The new locking mechanism was provided by the manufacturer, the Lane Company, free of charge.

Lane LogoThey have had several recalls in the past, most recently in 2014 due to this recent tragic incident. All we had to provide was the latch style and serial number (here is the online link to use)

Lane Furniture Latch Replacement Illustration

and we received the new lock in the mail in less than a week. The simple replacement process took just a few minutes, and you can see a video here by The Furniture Refinishing Studio on the exact procedure. Lane Hope Chest Lock Replacement VideoThe lock is not that difficult to open (and it does come with a key if you really want to keep it shut tight) but once it is opened, there is no way to lock it down from the inside. The mechanism remains disengaged and the top remains open about 1/2 inch until you re-engage it, which can only be done from the outside of the chest.

Lane Latch Operation Video

So now, there is no way that this tragedy can be repeated. If you have an old hope chest or any other old piece of furniture that you are DIY’ing, check the hardware! Old cupboards and cabinets and cribs and dressers were not built with the same safety procedures we have in place today. It is our responsibility, as we are refurbishing these pieces to use or sell to make sure that we change locks and alter pieces to ensure the safety of our children and pets, too! So, as you are working on your next DIY project, take a step back and make sure that what you are producing is not only beautiful but safe and secure for all to enjoy. Have a terrific Tuesday, everyone! Susan

Colonial Country Cupboard

Last summer, Coach and I took a long weekend trip to Bethel, Maine for a bit of golf and R & R.

Two Beers Please Bethel Maine PMWell, I should say R & S (Rest and Shopping) as we did quite a bit of antique shopping up and down the Maine coast. My heart skipped a beat when we turned a corner while wandering through the many aisles of Pa’s Tradin’ Post in Oxford, Maine.

Pa's Tradin Company Signand discovered this gorgeous old country cupboard!

Pa's Tradin Company MaineAnd, I was even more excited that it actually fit in our CRV, even with all the luggage, coolers and golf clubs! (Truth be told, I would have tossed those clubs to get this piece in my car…)

Country Cupboard in CRVIt was newer, but completely hand-crafted using old lumber and pieces from antique windows and dressers. It needed quite a bit of work, so I took my time refurbishing it, in between quicker, easier projects. Well, I am happy to say that it is finally finished, and styled, and sitting proudly next to the fireplace in my family room. So, what once looked like that, now looks like this!

Painted Country CupboardThe exterior body was painted with Annie Sloan French Linen Chalk Paint. I then sanded the edges and raised detail to give it the distressed look we like.

Country Cupboard Sanded Corner DetailThe shelves and doors I painted (after replacing and re-glazing many of the old panes-these were actually old windows that were repurposed-I LOVE that!)

Reglazing and painting window panesin Glidden Antique Beige “chalk-like” paint that I mixed myself. Here’s the recipe from “In My Own Style”

In My Own Style Chalk Paint RecipeThe back planked wall of the cupboard was painted with a custom color that I created-kind of a soft, denim blue.

Country Cupboard Custom PaintI had originally painted it with Miss Mustard Seed Eulalie’s Sky Milk Paint (you can read about that fiasco here),

Miss Mustard Seed Milk Paint Eulalie's Skybut once I decided where it was going to be in our home, that needed changing. Oftentimes, I paint a piece with the colors I would like, only to realize that it just doesn’t work in the intended space. That’s the beauty of paint-one quick coat and you have a whole new look! I wanted it to be a close match, but a lighter blue tone to the drapes in the room, since it would be in proximity to the window where they hang. Finally, I waxed the entire piece with Fidde’s Supreme Wax to give it a nice, warm, glowing finish. The hardware remained the same. Chipped, rusted black? Perfect!

Fiddes and Son Supreme WaxThis is the before, dingy white, cracked windows, unpainted interior.

Country Cupboard Base Interior

Country Cupboard Base BeforeThis is now. A pretty painted piece that shows off many of the pieces that Coach and I have collected over the years.

Country Cupboard Design HomeThe showcased pieces are primarily from Colonial Williamsburg in Virginia, The custom color blue I chose for the background enhances the blues in the pottery and plates and brightens the brass trivets and pieces.

Country Cupboard Styled
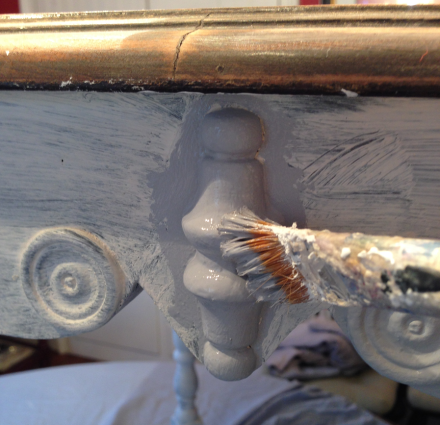
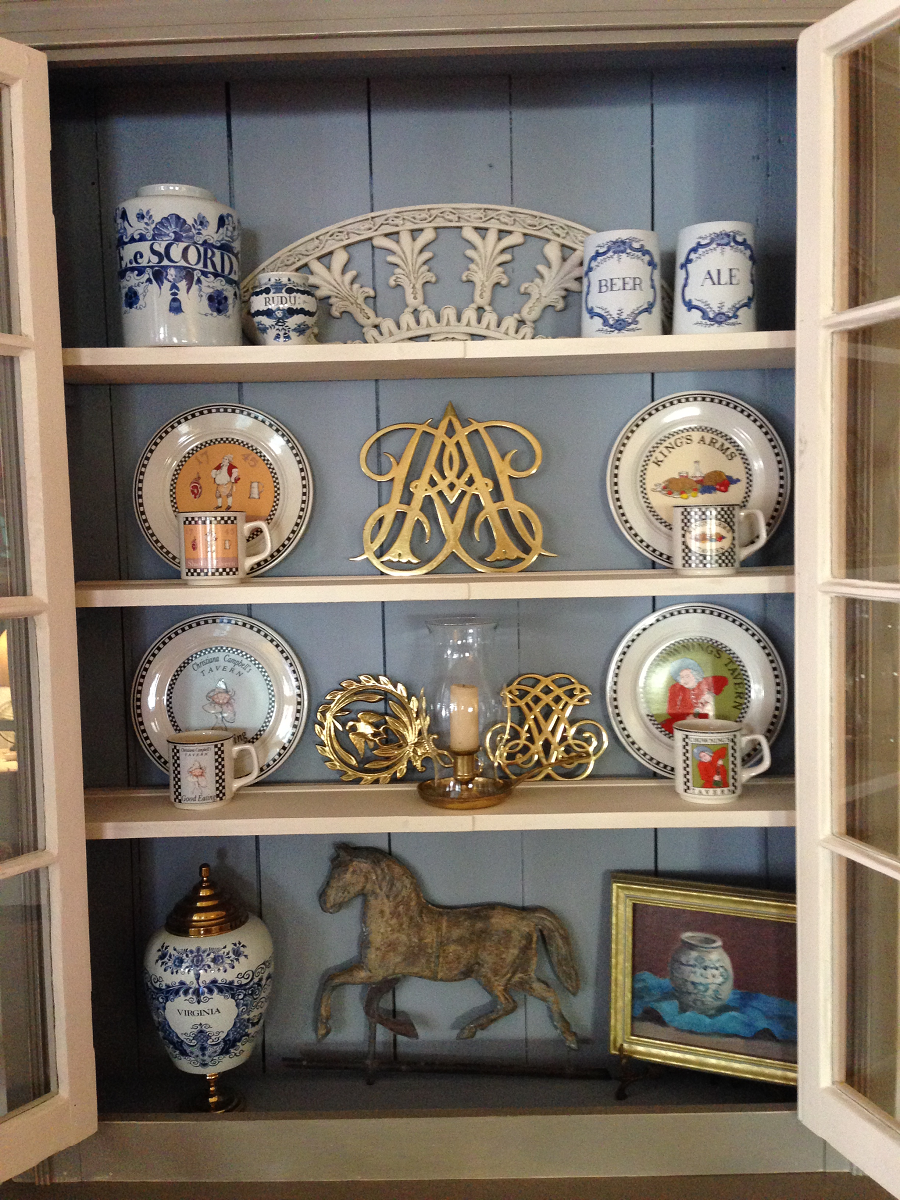
Colonial Williamsburg is an historic site that Coach and I love and have visited many, many times. This is the William and Mary crest trivet-one of our very first mementos we purchased over thirty years ago.

William and Mary TrivetThe re-painted and re-loved cupboard now reminds me of the shop front windows and taverns on the Duke of Gloucester Street, filled with old glass and pottery pieces, brass trivets, plates and mugs.

Williamsburg Virgina JugNow, when I step back to admire my transformed country cupboard,

Country Cupboard Doors Opened Styled

I am transported back in time to our many wonderful trips to Williamsburg. And isn’t that why we save our souvenirs and mementos-to remind us of happy times and fun trips? I hope you all have mementos you keep to tell your story, and a beautiful cupboard in which to display them. Have a “think spring” Tuesday, everyone! Susan 

French Lavender Side Table-Ooh-la-la!!

Writer’s Note: I am excited to share that my little French Lavender Table Transformation was featured as an Editor’s Pick on BlogHer!! To view that post, click here:

As featured on BlogHer

As featured on BlogHer

Now, onto the transformation! With some pieces of old furniture, I choose the style and color of the makeover according to my needs. Some pieces tell me what they need to be. This little table needed to be the center of attention in a lovely lavender French boudoir.

French Lavender Side Table Completed PMWe purchased it at auction and I could have chosen to paint it red or black or green, but Behr Lavender Lily seemed to be just the perfect, soft color for this delicate little beauty. Here is the how-I-did-it:

1. Cleaned and lightly sanded the entire piece. It was pretty dusty and dirty and topless-must have been a long, crazy trip from Paris!

French Lavender Side Table Before2. The base coat of paint was quite adhered and sturdy other than a few chipped edges, so I just sanded them, added a primer for the top and simply painted over it. Look at the sculpted details here!

French Lavender Table Before

French Lavender Table Behr Lily Lavender First CoatFirst 2 coats, Behr Lily Lavender.

French Lavender Table Behr Lily LavenderSo soft and pretty!

French Lavender Side Table Behr Lily Lavender Sample Pot3. Added a glaze of Behr Ridge View paint mixed with Martha Stewart Glaze Effects to highlight all of the exquisite detail on the legs, drawer and back.

French Lavender Table Martha Stewart Glaze EffectsI mixed it together in a 4 to1 ratio (glaze to paint) then painted it on (working in small sections because it dries pretty quickly),

French Lavender Side Table Paint on Glazethen wiped it off, leaving the glaze where I wanted it to remain as a highlight.

French Lavender Side Table Drawer Detail GlazedAllowed the piece to dry.

French Lavender Table Detail Glazed4. In the past, I have used waxed paper for my transfers, but this time I tried freezer paper instead.

French Lavender Table Freezer Paper for Graphics TransferThe freezer paper is a little heavier and easier to work with than the waxed paper. There are two sides, a matte side and a shiny “plastic-coated” side.

French Lavender Side Table Transfer Reverse PrintedYou want to print the graphic (thanks, Graphics Fairy : ) on the shiny side, in reverse! In this case, I wanted to use a small graphic to decorate the center of the table top, so I would be able to place things on it without completely hiding the picture.

French Lavender Table Printing with Freezer Paper5. Once printed, allowed to dry for a short time. DO NOT TOUCH IT or it will smear. Lightly dampened the painted surface.

French Lavender Side Table Dampening with SpongeDO NOT OVER-DAMPEN

French Lavender Side Table Too Wetor the graphic will come out all smeary and then you have to wipe it off and repaint it and start over again. Ok, well, that happened to me. More than once. So DON’T DO THAT.

6. Gently and carefully placed the graphic straight down onto the surface, then affixed with painter’s tape to create a “hinge” at the top.

French Lavender Side Table Taping Design for TransferThis allows you to check your progress without moving the graphic around and messing up the picture. WARNING: you only get one shot at this. If you attempt to moved the transfer around once it has touched the painted surface, you will need to start over. Ok, well that happened to me too. More than once. So DON’T DO THAT.

7. Once the transfer had successfully landed on my piece, I used a blunt object to rub the surface using firm pressure. I used the back of a spoon but I have seen others using credit cards (I prefer to use those at HomeGoods).

French Lavender Table Transferring with Spoon RubThis takes a minute or so to complete the transfer. Just keep rubbing all over, and check periodically by lifting the corner and then placing back down in the exact same spot. Hence, the tape hinges. Removed the paper from the design once I was happy with the transfer. Allowed to dry.

French Lavender Side Table Transfer Completed8. Once the piece had dried, I applied a coat of Fidde’s Supreme Wax

French Lavender Side Table Top Waxto protect the entire piece and provide a nice, glowing finish. Wiped it on, buffed it off with a soft cloth.

French Lavender Side Table Buffing Wax9. Drilled the hole for the antique brass pull

French Lavender Side Table Drilling Knob Holeand Ooh-la-la!

French Lavender Side Table Completed PMMy new precious French Provincial side table is magnifique!? Oui? This technique is pretty fool-proof as long as you allow time to dry between steps and follow the transfer instructions. But, before you transform a piece, make sure you really look at it to decide what it needs to be. Have a Bon Mardi, everyone! Susan


LOVE-ingly Restored Hope Chest

      Back when I was a little girl, hope chests were a thing.

Hope Chest Completed Logo

The only company I was aware of that built them was Lane-they made cedar hope chests in different furniture styles as the trends changed, but the interiors remained the same. They were deep, cedar-lined chests where a girl could store her “betrothed” collection.

Hope Chest Cedar Interior

After all, hope chests were used to gather and store a young woman’s wedding dowry- you know, that whole love and marriage thing. The definition of a hope chest, according to Wikipedia: A hope chest, dowry chest, cedar chest, or glory box is a chest used to collect items such as clothing and household linen, by unmarried young women in anticipation of married life” As a high school graduation gift, each girl in my school received a miniature hope chest-apparently our goal was to find a prince charming and get married.

Photo Courtesy of  Allee Willis Museum Of Kitsch

Photo Courtesy of Allee Willis Museum Of Kitsch

The heck with that college stuff! How times have changed, fortunately. Fast forward a few decades, when I discovered this now un-used and un-loved, divorced-from-its-owner, Lane Mid-Century-Modern Style Hope Chest at our local Salvation Army.

Hope Chest Full BeforeIt had definitely seen better days, and reeked of stale cigarette smoke. Back in the 50’s and 60’s, everyone smoked, so pretty much any vintage pieces from that time period will likely have that lovely Eau Du Lucky Strike Scent. “It’s Toasted” is an understatement…

Lucky Strike Poster via JVoyage Etsy

Lucky Strike Poster via JVoyage Etsy

This piece took quite awhile to transform, as I pretty much had to prep every surface, both inside and out. Here is the how-I-did-it:

1.Removed top from base. The top was in the worst shape and needed a complete stripping and refinishing job.

Hope Chest Top BeforeThe plan was to paint and glaze the base, but to refurbish the top back to its original glowing cherry finish. I used this Motsenbocker’s Gel Stripper (yet another water-based, green product for us DIY’ers : )Water Based Hope Chest Paint Stripper GelAccording to the directions, you paint it on, wait 5-10 minutes then scrape off the old paint or varnish. Repeat if necessary.

Hope Chest Stripper ScraperIt took three coats of this, then a damp sponging before it was completely cleaned and prepped for a new finish. But it was well worth the wait. The wood was absolutely stunning!

Hope Chest Top Stripped Wood

For the finish, I used General Finishes Water-Based Brown Mahogany Wood Stain

General Finishes Water Based StainPainted it on with a sponge brush, wiped it off with a rag.

Hope Chest Staining Top

Two coats for the proper depth of color. Look at the richness of the color!

General Finishes Mahogany Brown StainFor the top coat, I used General Finishes Satin Poly-Acrylic Blend.. Three coats, with a light sanding with steel wool in between. The more I use them, the more I love these General Finishes Water-Based products. Easy application, much less odor, gorgeous durable finishes, dries fast, super easy to clean up and safer for the environment. Win,win!  I also used this to paint any unsealed exterior wood to make sure the stale smoke scent was gone.

Hope Chest General Finishes Poly-Acrylic TopCoat2. The base required a good cleaning and light sanding just to remove any loose particles and dust. I painted it with two coats of paint: Behr Ashwood

Behr AshwoodThis is a very pale greenish taupe color, in keeping with the 50’s when avocado green was all the rage. I then added second, lighter coat of the Ashwood mixed with some Glidden Antique Beige. This is another “go-to” neutral I keep on hand to use as a base color or to mix with other colors. It is a soft, creamy beige with a hint of pink. Pretty.

Hope Chest Painted Behr AshwoodTo define the insides of the trim squares, I added a glaze of the slightly darker Behr Ashwood mixed with Martha Stewart Glaze Effect. You mix them together in a bowl, using a 5 to 1 ratio of glaze to paint. The more paint, the darker the glaze, so you can adjust it according to your needs.

Hope Chest Martha Stewart Tintable GlazePainted it just inside the squares

Hope Chest Brushing on Glazingthen wiped it off to the edges to just leave a hint of color behind to enhance the trim.

Hope Chest Wiping Off GlazeThen the entire base was finished with Fiddes & Son Superior Wax.

Hope Chest Fiddes & Son Superior WaxI find the simplest way to use this product is to brush or wipe it on, allow to dry for a few minutes. Then I take my little Black and Decker Mouse Sander (without the sand-paper!) and then buff it using a pad of folded soft fabric.

Mouse Sander Buffer

Quick and easy on the elbows and leaves a perfectly smooth finish.

3. The lining inside the drawer was some old rotted, smelly green felt. I just wet it down, then scraped it out.

Hope Chest Removing Drawer LiningIn its place went some vintage ads and news articles

Hope Chest Americana Deco-Page for Drawer InteriorI affixed with Americana Deco-Page Matte Finish Gel.

Hope Chest Drawer Interior Vintage Newspaper Clips

4. The drawer pulls were dark and tarnished, but they were solid brass. I just didn’t have the heart to paint them, as I had originally intended! So I soaked them in acetone (that’s nail polish remover, folks)

Hope Chest LOVE Removing Tarnish from Hardware

to remove the lacquer coating, scrubbed with some steel wool and then cleaned them with Brasso polish. Gorgeous and shiny again, they are shaped like little bows and now pop against the Ashwood paint.

Hope Chest LOVE Handle Polished

5. The little brass feet on the bottom of the legs were also quite tarnished. For this I dipped the steel wool in some acetone and wiped until they were clean, then polished them as well.

Hope Chest Polishing Brass Feet with Brasso

(Note the heavy rubber gloves. Also note that I am not working in the basement, but in a well-ventilated dining room with the window open and the fan blowing. Which is better for my health, but let’s just say that my dining room is no longer suitable for dinner guests-takeout, anyone?)

Hope Chest Dining Room Workshop6. Amazingly, the interior of the hope chest was in perfect condition, even down to the little key. You can see by the sign that this one was built in 1957, true Mid Century Modern style, and comes with a $500 moth damage guarantee! I wonder if that is still in play…

Lane Hope Chest Mid Century ModernSo now, the little Mid-Century Hope Chest that looked like this

Cedar Hope Chest Top View

looks like this-not bad for 50 years old!

Hope Chest Completed LogoIf you are interested, you will find it at the Vintage Thymes Monthly Market today,

Mid Century Modern Hope Chestawaiting some love-struck young bride-to-be to fall in love with it and bring it home to start her dowry-which nowadays is more likely to include an MBA and a 401K than a linen tablecloth and lingerie.  But it would make a great storage chest or console table as well! Since this is LOVE post #7, and it is actually day 8, I will be sharing another project later on today. In the meantime, have a hopefully fun-filled weekend, everyone! Susan

Vintage LOVE Sign

In this month of openly-proclaimed all things LOVE, I am celebrating by posting a new LOVE sign or picture each day until February 14th, Valentine’s Day. Some will be images and ideas I have found on the web that I would love to share, some are my own creations, like this reclaimed wood plank with LOVE letters spelled out in shutter slats and the “O” from an old mason jar top. Hope you love it!

Country Design Home Vintage Love Sign

I created this using a reclaimed wooden plank, some paint, glue, reclaimed vintage shutter slats and an old mason jar lid. Here is the “how-I-did-it”:Painted two coats of Annie Sloan French Linen chalk paint. This is my go-to neutral that I use for so many projects!

Annie Sloan French Linen Base CoatStenciled the background with Behr Gulf Winds

Behr Gulf Winds Paintin an all-over stencil pattern to give the piece a “wallpaper” effect.

LOVE sign stenciled backgroundThe blue I chose matched closely to the hue of the mason jar top. Isn’t it just the soothingest color?

LOVE sign Stencil Color Gulf WindOnce the paint was dry, I sanded everything to distress the top and edges

Vintage LOVE sign distressed edges

and then added a coat of Fidde’s Paste Wax to give the board a glowing effect.

 Fiddes and Son Supreme Wax

Cut the shutter slats into the letters necessary to spell out LOVE-without the “o”.

Antique Shutter Slats for LOVE signCoach initially cut them with the chop saw, but I discovered that these are easily cut with just a razor box cutter. They are pretty old and brittle, so it didn’t take much effort at all.

Vintage LOVE sign cut letters

I glued the letters to the board with Gorilla Glue. Just as an FYI, their label was one of the few I looked at during my freak-out session while writing “The Dangers of DIY” that says their product is non-toxic and has no harmful chemicals or odors.

Gorilla Glue LabelHigh five, Gorilla Glue!

Vintage LOVE sign Gorilla GlueJust painted the glue on the back of each piece, placed them into position and then weighted them down with some books and cans of paint and left overnight to ensure the proper bonding.

Add the “O”. Hot glue worked well for this.

Mason Jar Top O for Love SignJust glued all around the edges, pressed it down onto the board to complete the sign.

Mason Jar O for Love Sign

To hang it, I used a couple of tiny rings and some wire. The board was quite thin, so most of the screws and nail hangers I had were too long.

Screw Hook and wire for LOVE signThis worked great because the sign is very light and won’t stretch out the wire. So this is the before:

Wood plank for LOVE sign

And this is now: Do you LOVE it?!?

Vintage LOVE Sign TM

If you have a LOVELY craft, idea or recipe to share, please send it to me @ countrydesignhome@gmail.com and I will add you to my LOVE collection. Hope you have a lovely Saturday! Susan

Antiqued Mirror on the Wall

Antiqued Mirror Completed PM

Who’s the fairest (and most rustic, vintage and gorgeous!) of them all? This mirror was another “throw-away” Coach found “somewhere”. I don’t ask anymore. It’s like a magic cupboard-I need something, I open up the barn door and voila! Instant DIY subject! Today’s project was this old, dirty, chipping and peeling dark brown mahogany mirror. Despite it’s sorry, drab exterior in dire need of some TLC, the actual structure itself was totally solid and quite heavy, I might add. I transformed it from this in a few simple, easy steps.

Antiqued Mirror BeforeHere is the How-I-Did-It: 1. Cleaned the mirror and frame thoroughly with heavy duty cleanser. The mirror is not in perfect condition, but that’s fine by me. Adds to the charm, and it stills reflects the light, which is most important. Lightly sanded the frame just to remove any loose particles of old varnish.

2. Primed with Gripper by Glidden. LOVE this stuff. Seals in stains, odors, evens the color and preps the wood to accept the topcoat.

Glidden Gripper Primer3. Painted with one coat of Glidden Antique Beige

Glidden Antique Beige Can

that I added my “chalk-like-paint” mixture to. It is a nice, soft, matte finish that accepts glazes and waxes very well. That recipe here:

Antiqued Mirror Painted

4. Added the unfinished medallion to the top for detail.

Antique Mirror Unfinished MedallionI purchased this one at Michaels for a couple of bucks. Just glued it on with Gorilla Glue . You have to brush it on, then weight it down

Antiqued Mirror Glueing Downand wait until it’s dry to ensure a good solid bond. Then I painted it with the same Glidden top coat and allowed to dry.

Antiqued Mirror Medallion Primed5. Lightly sanded the whole mirror frame and detail to expose some of the dark wood beneath.

Antiqued Mirror Detail Sanded 26. Painted on this Antique Wax in Scrub Pine from General Finishes. I like this one because you don’t have to work it in with a rag. You literally paint it on!

Antiqued Mirror Scrub Pine Antique WaxBrushed it on with a foam brush, then wiped off with a rag, leaving the dark wax in places to enhance all of the crevices and lines and detail.

Antiqued Mirror Glazed and Sanded

It leaves some color, but it also adds a nice matte finish to the entire piece. Allowed to dry.

7. Scraped off the excess paint and stain insdie the frame of the mirror. Cleaned the mirror.

Antiqued Mirror Scraping Glass8. Here is the finished closeup of my antiqued mirror. I love it, but what do you think? Should I have left it alone or did I give this piece some love? (BTW, if anyone knows the trick to photographing mirrors without me being in the shot, I would love to hear it!!!)

Antiqued Mirror Top Details

This is a very simple DIY project, it just takes some time and a little patience to allow each layer to dry before adding the next. If you are thinking of trying this process, test it out on a sample piece of wood before taking on a big, detailed mirror or frame. But remember, it’s supposed to look old and messy, so perfection is not an option! Sometimes a little messy is a good thing… Hope you have a reflective Thursday, everyone! Susan

Rustic Rolling Bar Cart

DIY Tutorial- Rescuing and Restoring and Reloving an old cabinet into a Rustic Rolling Bar Cart.

Country Design Home Bar CartThis antique, beat up yellow cupboard has been sitting patiently in the barn since the spring, when I scored it on my way out of Todd Farm on a sunny Sunday.

Cupboard Todd FarmThe vendor let it go for cheap because he didn’t want to load it back into his car. It was next up on my DIM(Do It Myself) list this past weekend, so I finally had to decide out what to do with it. The inside writing indicates that it was removed from an old hardware store in Haverhill,

Bar Cart Hardware Coso my first instinct was to return it to its former nuts and bolts glory. But it really is too awesome to be hidden away in a workshop or storeroom, so now it’s a rolling bar cart! Better to be holding Jack Daniels than jackhammers, am I right?

Bar Cart Finished Kitchen SignedHere is the How-I-Did-It:
1. Washed the whole thing down-inside and out-with disinfectant cleaner-who knows where this thing was before I acquired it?!

Bar Cart Topless2. It was a bit wobbly and was missing the top, so I cut up some old pieces of scrap and glued and nailed it all back together so it’s nice and solid.

Bar Cart Top Braces3. No painting necessary, pretty awesome the way it is with all of the old chipped and splattered paint. But I did matte poly the inside to seal up any odors or dust.

Bar Cart Urethane InteriorThis thing is very old and rustic, so I wanted to make sure it stayed clean inside for storage purposes.
4. Added wheels to the bottom, so it can be easily moved-have bar, will party!

Bar Cart Wheels5. The new top was salvaged from an aged piece of wood-a yard sale find.

Bar Cart Top Old Table TopWashed it, sanded it, stained it and then waxed it to keep the old weathered appearance.
6. Attached the top to the base with some “L” brackets.

Bar Cart Attaching Top with L BracketsYou simply flip the top over, attach one half of the L to that, then place it onto the cupboard and screw it into place, for a nice secure surface.
7. The hardware we had in some bins in the barn. Who knows where this stuff comes from?! But whenever I seem to be looking for something specific, it magically appears. In this case, a towel hook for one side…

Old Hookand a bottle opener holder for the other.

Bar Cart Bottle Opener8. The front panel needed some sort of embellishment, and I found this old rusted window lock. Perfect!

Bar Cart Front Adornment9. Here is the finished cupboard filled with bar stuff. Pretty cool, huh?

Bar Cart OpenedI’m really happy with the final results. Looks great in my country styled kitchen!  Stayed tuned for more exciting junque transformations. In the meantime, its Monday, so make it a marvelous, magnificent, magical one. Susan

%d bloggers like this: