Welcome Home Drop Zone

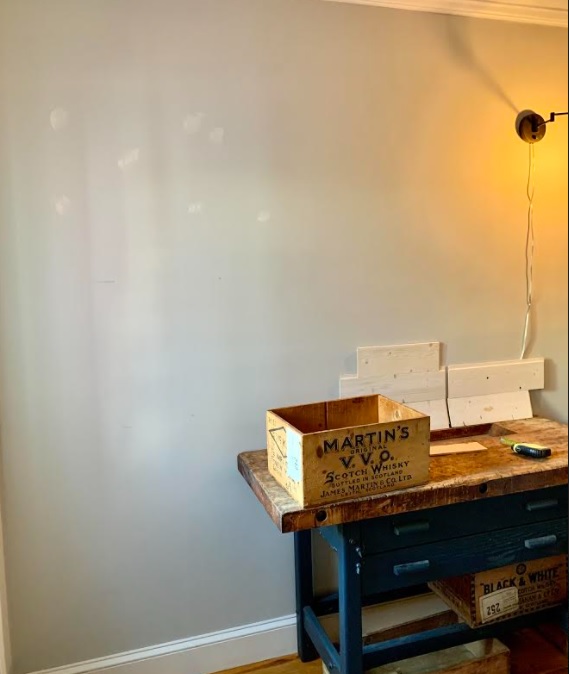
During this stay-at-home-forever-year-that-never-ends-when-will-this-be-over, I’ve been working on lots of DIY projects that have been on my to-do list. Our family TV room is situated in the back of the house, with an entrance that opens directly into the room. Since this is the door that our friends and family use when they visit (remember when people used to come over to your house and hang out?), I try to keep it tidy and neat. So many times, I have wished for a mud room to be able to remove snowy or muddy boots & shoes, coats, scarves and of course, masks. Over the years, I’ve tried baskets and shelves and benches, but somehow it always looked messy. So, adding an antique workbench to the entry was the perfect solution!

It offers lots of storage and looks great, but when I moved it into place initially, I thought it just looked rather small and plain against the painted wall.

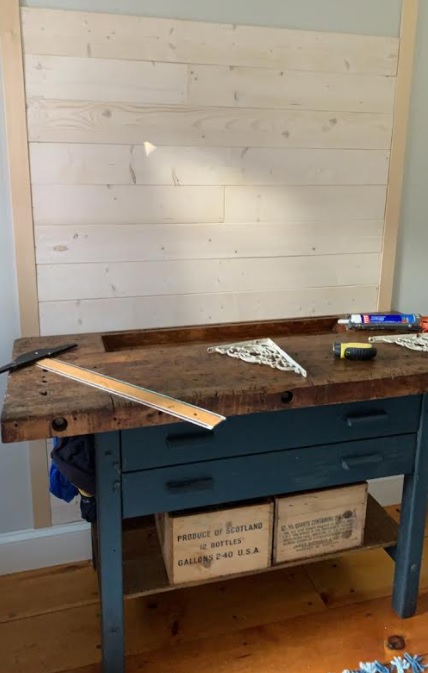
So, since this is the room where I had previously installed the ship-lap wall surrounding the fireplace, I figured, why not? You can never have too much shiplap, amiright? The install was pretty simple, starting with measuring the width of the workbench, ensuring to leave enough clearance for the back door to fully open into the room. Nothing worse than trying to open a door, only to find it blocked half-way!

The shiplap I chose for both projects was from Lowes.

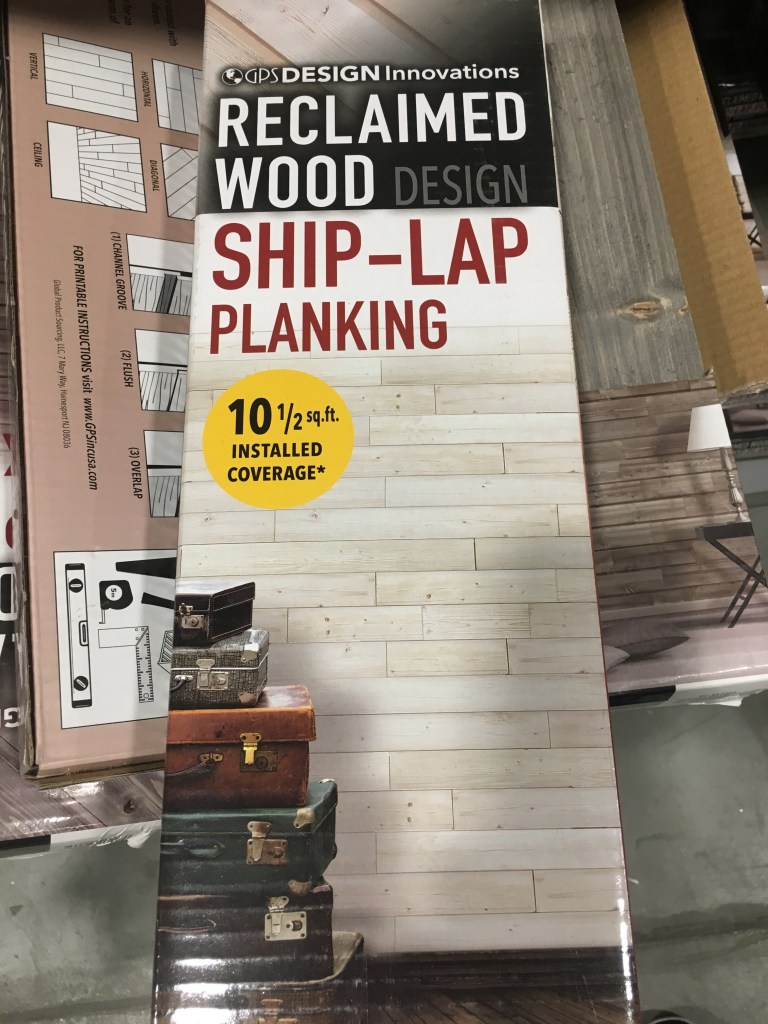
You can read the full DIY instructions in my previous post here. It is light weight and super easy to cut and install. That fireplace project took me many weeks, but this project took about 2 days to cut, install and add the hardware.

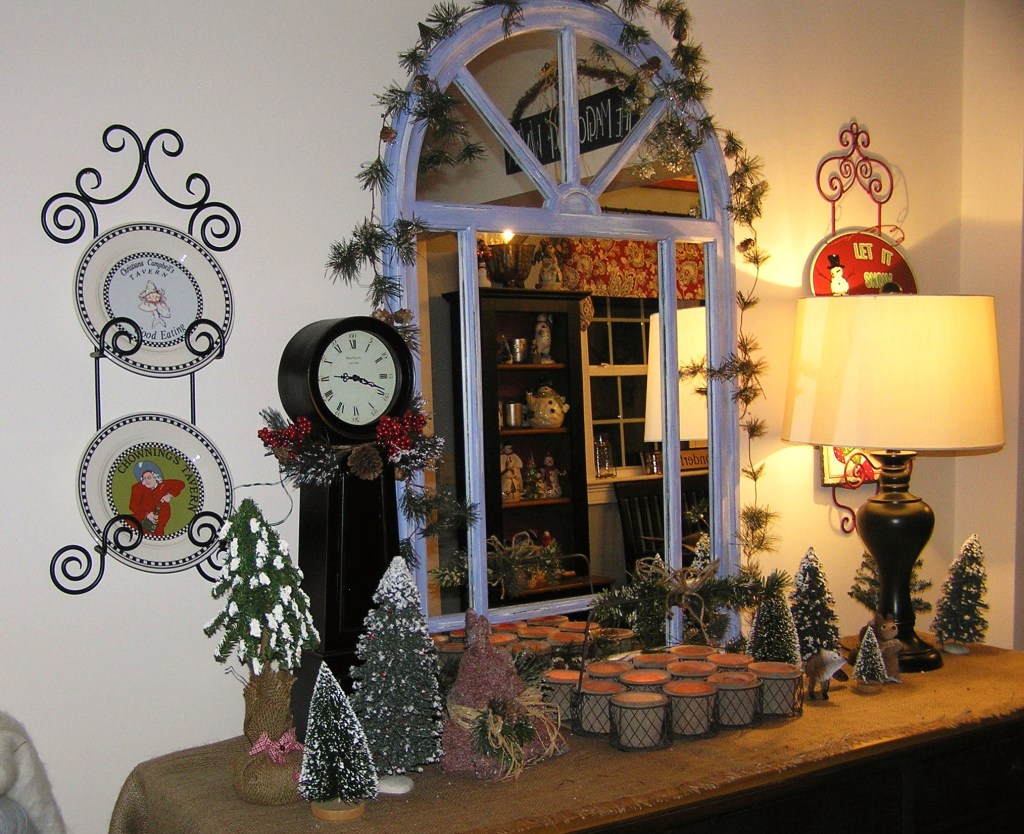
Once installed, I added an antique plank shelf on top-solely for decorative purposes-that I can change and arrange for the seasons. Love those antique white brackets!

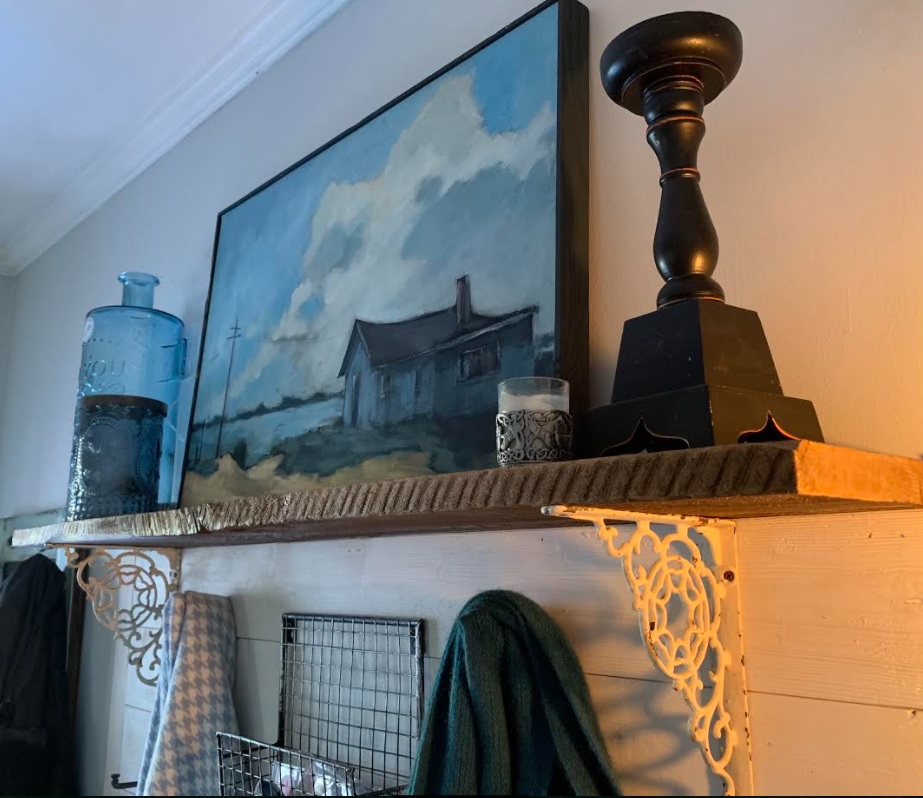
Then I added vintage hooks to hold tote bags and scarves, gloves and anything else that would need to be hung to dry, plus a his & hers mask basket

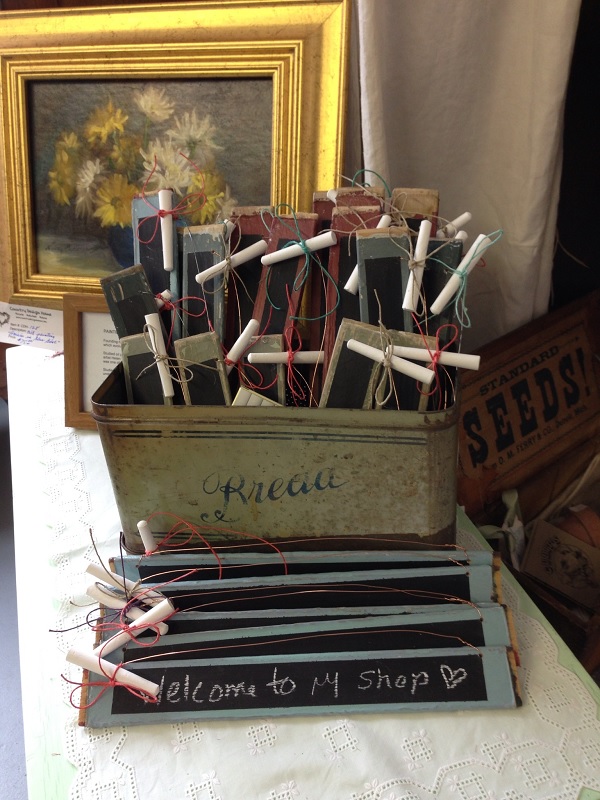
and this cute little sign-a gift from my sister, because I was complaining that I kept forgetting them on my way out the door- no more! And once the mask-wearing finally comes to an end, and we certainly look forward to that day…we’ll just use it for other junk!

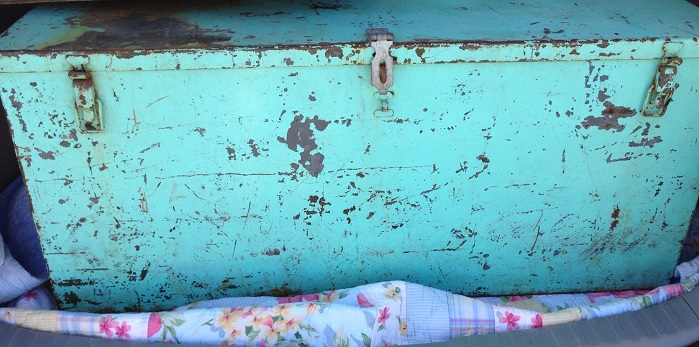
The workbench base was already the perfect shade of blue, so that remained untouched. The old worn top required a bit of TLC, so I used General Finishes Antique Wax in a medium brown shade called Scrub Pine. That same wax was used for the top and bottom shelves as well, to create a uniform look.

Paint on, wipe off, add a couple more coats and buff ’til it glows. We look at that antique plank of wood, and marvel at the scars from years of use in a basement workshop where we first discovered it.

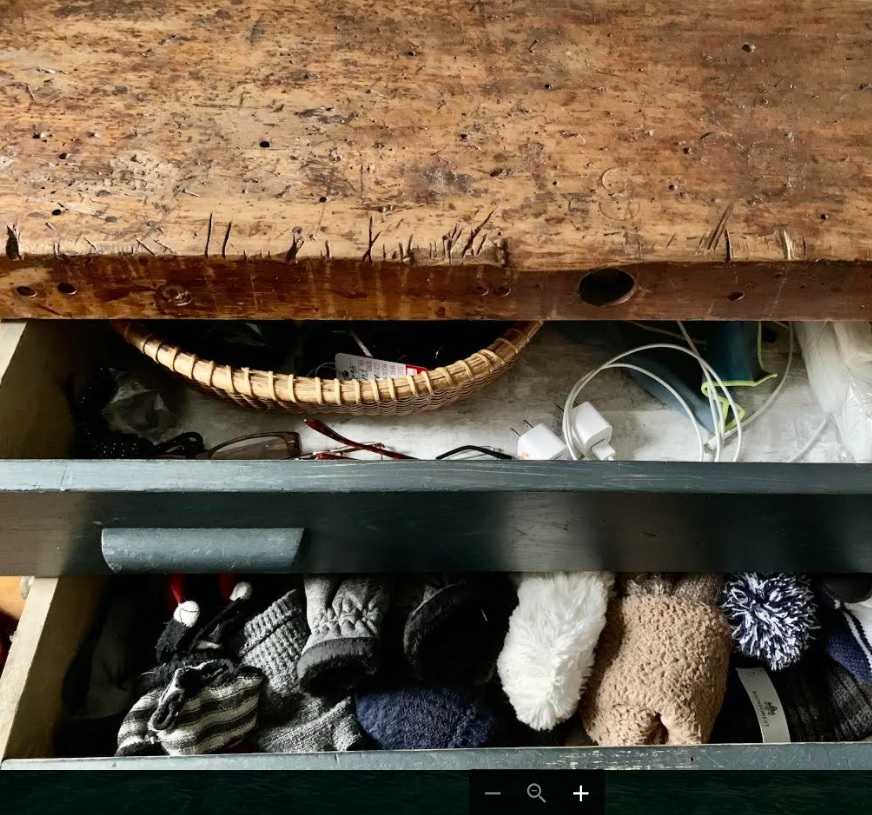
Some people might look at it and think “what a mess”- we look at it and think “gorgeous”- happily saving a piece of history for another generation. It features a hand-hewn built-in trough, previously used to hold wood shavings and hardware, now useful for keys and glasses. There are hooks on the sides underneath…

previously used for tools, but now they’re for hanging umbrellas and purses. These drawers hold gloves and glasses, phone chargers and even a tape measure. Because, you know…”where’s the tape measure-we have like a dozen of them-where did they go?!”

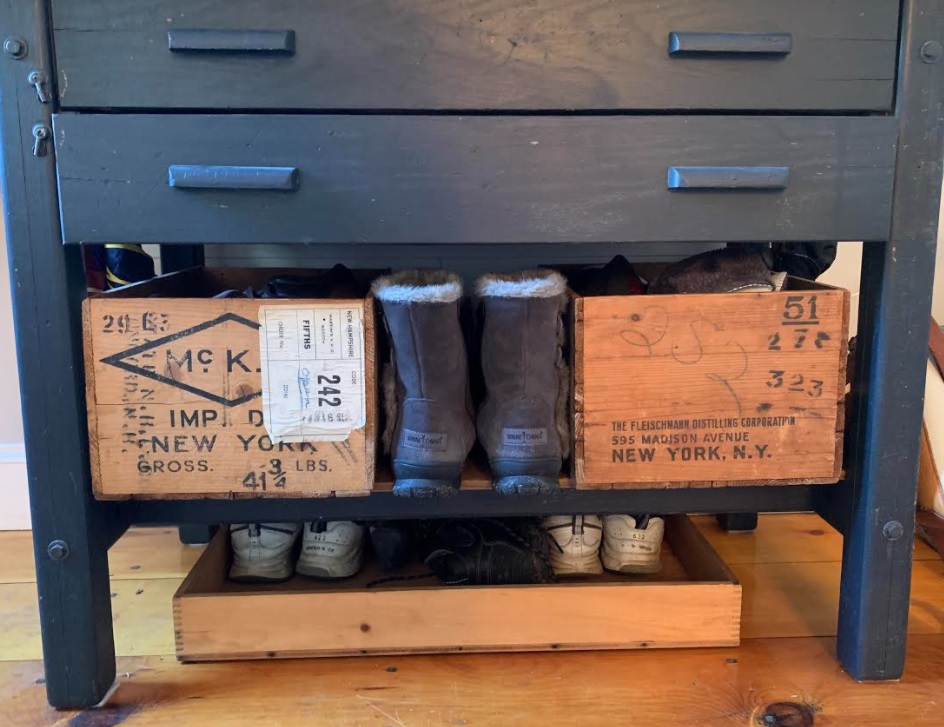
Finally, there’s a shelf on the bottom where we store our shoes and boots in vintage crates.

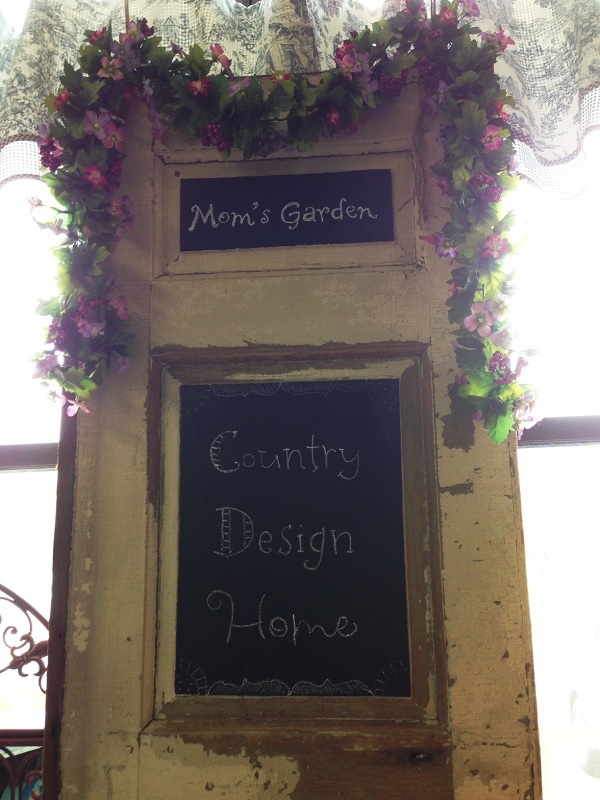
Next to the workbench I added an old cabinet door chalkboard with lots of hooks for coats and sweatshirts to hang.

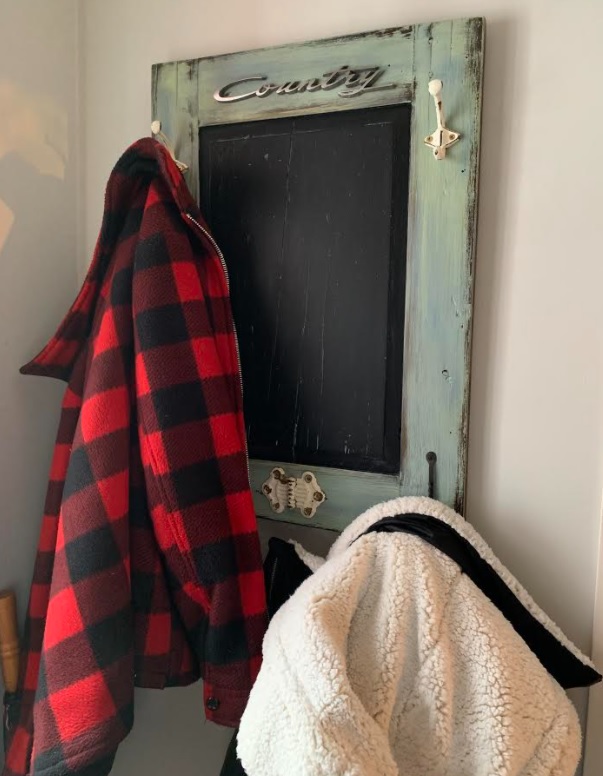
Obviously, I can’t write on it in chalk, because our coats would be a mess! But I could do a painted sign there. What should it say? Hang your coat seems rather obvious-any other clever ideas? So that’s it. One more project completed. It looks great and keeps everything neat and tidy by our back door. On to my next project…and praying for this pandemic to be over and masks to be a thing of the past.

Have a safe, Super (snowy) Sunday everyone! xoxoxo Sue

We’ve Moved! (but not far…)

This past couple of months, Coach and I have been working really hard to create a new fresh look for our space in the Barn at Todd Farm. Well, actually, its my new space…but I didn’t move far- just across the aisle! Our friends and barn co-inhabitants from The Laughing Cottage moved down to the front entrance of the barn, leaving their space available. So, Coach and I decided that because of its size and orientation (it is wide rather than deep) it made sense for me to make the move to give us a lot more wall space to hang our artwork and decorative stuff. We moved into a blank slate, basically plywood walls and floors, and set out to create a warm and welcoming space with a slightly nautical theme. We painted the back chipwood wall, first with an undercoat of white,

Barn Booth painted wall

and then I dry-brushed over it in shades of grays and blues. (woops, I forgot to take the after picture, but if you look real close behind the whales, you can see the finished wall).

Barn Booth Back Wall Styled

The bookcase wall, which had been covered with rustic shutters, took on a mid-century modern look once I painted random squares with pops of color and stained the rest.

Barn Booth Painted Shelving

Then, we filled it with all sorts of curated items, hung a ladder and some fish net and patio lights for ambiance. So cute!

Barn Booth Bookcase Wall Lights

Then, the floor! Well, what was once a dusty, plain brown plywood

Barn Booth Plywood Plank Flooring

is now a striped and stenciled masterpiece that continually draws customers’ attention and comments-who just love it!

Barn Booth Old Trunk

The painted floor stripes were simple to do-measured, then taped off, followed by painting alternating stripes of General Finishes Milk Paint in Coastal and Federal Blue. You can see in the photo below that I did create more of a paint-washed look rather than a solid color. I wanted it to look old and worn, not shiny and new, so I used a brush rather than a roller- an arduous task, but worthwhile in the end.

Barn Booth Painted Stripe Flooring

By the time I was finished with the stripes, they were already dry and ready for the stencils! I created a large pattern on my handy-dandy Cricut machine and cut it-so large, that I had to piece it together with tape!

Barn Booth Cut Stencil

Stenciling was done with a large sponge and some random acrylic paint I mixed together in a pale chartreuse.

Barn Booth Spacing Stencils

Spacing was a bit tricky- I started in the middle in front of the beam (which I thought was centered, but not quite) and worked to the left and right. Along the way, I gave up the measuring tape and just eyeballed it to make sure I could fit it all in. As is sometimes the case (but not always), the stenciled design fit perfectly! So now my space is filled with pieces that I have refurbished and lots of cool junk that Coach has picked along the way. Actually, quite a few of these pieces sold on our flea market opening day this past Sunday- but there are plenty more where those came from!

Barn Booth Styled

If you haven’t been up in awhile, or have never been to The Barn at Todd Farm, come on up and visit us in our sweet new space.

Barn Booth Bookcase Wall

(and Coach is now in my old space with the rusty bedspring light)- with a new name- American Vintage GoodsRusty Bedspring Marquee Light In Shop PM

So stop on by and say Hi!! And have a wonderful (albeit WET) Wednesday! Susan xoxo

The Barn at Todd Farm

Greetings!! Back from my blogging break and ready to start sharing some very exciting news! Beginning Sunday, August 3, Coach and I, along with Lisa from RitaJosVintage will be setting up shop in the Barn at Todd Farm!! Woo Hoo!

Barn Postcard no emailsMany of you already know about the historic Todd Farm in Rowley, Mass-the amazing Sunday flea markets with hundreds of vendors selling everything under the sun-and even a kitchen sink or two. (to read about our outdoor selling experience, click here)

Todd Farm SignBut what many of you may not know is that the beautiful huge yellow barn

Barn View Closeupin the center of the property has undergone a restoration and has been transformed from an antique functioning dairy barn

Todd Farm Dairy Cows Phototo an antiques co-operative. Inside the barn there are many vendors (with more to come) that have filled each of the old cow stalls with antiques, collectibles, junque and recycled, refurbished and reloved furniture and accessories. So, what will we be selling?? Some of the items you have seen me transform on the blog will be there,

Vintage Painted Cabinet PMalong with an ever-changing stock of old and really old and newly old stuff from our barn (and porch, and yard, and deck, and dining room and living room…) along with Lisa’s vintage kitsch collections. I will be posting pics of new items and stock each week on this blog, but also on my Facebook pages, as well as Craigslist (look under north shore garage and yard sales and just search Todd Farm). For now, we will be open at the crack of dawn on Sundays…or by chance…or by appointment. But, for now I have to sign off-the truck is arriving shortly and the packing and moving begins now! See you at the Farm

Rusty Bed Spring Arrow Marqueejust look for the stall with the rusty bedspring arrow marquee : ) xoxox Susan


Seasonal Scenes from the Market

This weekend marks the November edition of the Vintage Thymes Monthly Market, Farmhouse Holiday.

Stockings Were Hung

It seems like we just wrapped the October show with pumpkins and Halloween, and here we are barreling into the holiday season!

VTM November

I was blown away when I walked through the double red doors

Joy

on Friday morning. So much sparkle and Christmas cheer!

Pink Tree and Santa

(Of course, I was thinking Thanksgiving, not Christmas, because I am most definitely a one-holiday-at-a-time kind of gal.

Country Design Home

So when I conceptualized my booth, I was planning Thanksgiving dinner and making pies! So my space is a little less sparkly

Green Tree Sparkle

and Santa-inspired than many others…

Santas Clogs

but I am pulling out my cans of sparkly snow and adding some bling for the December market!)

Get Your Holiday On

If you haven’t made it to the Vintage Thymes Market yet

Berries in Barrel

and I can’t imagine why not!?!

Skates and Skis

This month’s market is a great introduction

Christmas Country

to view all of the extremely talented artists,

Simplify

craftsmen

Fleurish Home and Garden

and designers

Screen Door Vignette

who create amazing pieces for their magazine-worthy vignettes,

Peace on Earth

using simply vintage everyday items that they’ve dolled up and made beautiful,

Baby It's Cold Outside

and it’s all for sale : ) Something for everyone on your shopping list!

Fleurish Home SIlver

The Vintage Thymes Market is open today, Saturday from 9-6 and tomorrow, Sunday from 12-5.

Owl in Snow

And owl be seeing  you in December! Susan

It’s High Time to Shop!

In an early High Five for Friday!, I wanted to give you a sneak peek at all things country being offered in my shop at the Vintage Thymes Monthly Market. After what seems like a year (actually its only been 6 weeks since I agreed to join the market- but boy my arms are tired!) of sanding, staining, waxing, painting, cleaning and hauling loads of great vintage stuff in my poor car-soooo many dings and bumps : ( CRV Hauling Stuff

 I am finally ready to debut my collection!

Country Design Home: A Carefully Curated Collection of  Simply Casual Country Style Furnishings & Accessories.

Market Sign

This was the before:

Market Space Before

And this was during (I really thought I was going to need a bigger booth!)

Market Pre-Staging

And this is now:

Country Design Home Shop

In my shop, you will find hand-crafted items, like these very cute shutter chalkboard signs,

Chalkboard Signs

refurbished beauties like this pink and gray Victorian commode that was featured in a previous blog post: Coming Unhinged

Market Pink Commode

and of course, my newly created wrought iron shutter top patio set! Shutter Patio Set If you get there early, you might find this amazing aqua blue vintage hinged and locking steel box Market Aqua Steel Box presumably from the back of my dream pickup truck

Vintage Pickup Truck

(but I have a feeling that one’s not going to be there long, judging from the oohs and ahs of anyone who saw it…), loads of creamy white stoneware and crocks, mason jars by the barrel, vintage tin milking pails, luscious yellow enamel bowls and these cute tin daisy canisters with cut glass knobs.  If you follow my blog, you know I am all about color. This month is pretty pastels, reflected in the paints and accessories I chose to highlight. I love muted grays and blues as much as the next girl, but for me, color brightens my world and makes me happy : ) market cupboard closeup The cupboard shown here was in my dining room for years. Moved around a bit, but finally landed back in the barn. What was once an old, tired dark brown stained wood was transformed with Annie Sloan French Linen Paint and Soft Wax Finish and Benjamin Moore Chalkboard Paint on the buffet top.  Or, if you have a hankering for some home-made ice cream, how about this vintage ice cream maker? market aqua ice cream maker If you are getting ready to plant, I suggest this 9 clay pot vintage iron rack. The pots are chalkboard painted, so you can erase my numbers and label them with the various plants and herbs you are nursing along.Clay Pot Planter I had a blast putting my shop together, with special thanks to Coach, who is my fabulous picker, Lisa Mokaba, my right hand girl and lover of all things vintage, Nancy Granese, who added her amazing artwork for my space and the fabulous ladies from Vintage Thymes Monthly Market-Robin and Nancy-who have helped me immeasurably with great staging and pricing advice : ) Vintage Thymes Market Shop The entire market is stacked to the rafters with great vintage finds, and ready for opening day-tomorrow!  So much to see, so much to buy! I hope you have a truck : ) The hours of operation are Friday, May 10 from 9-6, Saturday May 11 from 9-6 and Sunday May 12  from 12-5. The address: WinSmith Mill Market at the Norwood Commerce Center, 61 Endicott Street, Norwood, MA.  Google Map Here. Hope to see you all there! Now I’m going to take a breath and have a cup of coffee before I start getting ready for June. Happy Shopping, and a very Happy Mother’s Day everyone! Susan

“Rockin’ Around the Christmas Tree…”

“…at the Christmas Party Hop!”  (What exactly is a party hop, anyway??) Yesterday I decided to make a cake for a an amazing person whose birthday happens to fall three days before Christmas. I imagine that it’s not always fun having your birthday so close to the biggest holiday of the year- your special day may totally get forgotten in all the hustle and bustle of the season. So I pulled all these ingredients out, and turned this:

Cake Ingredients

Into this Winter Wonderland Cake:                Christmas Tree Cake

It is a pretty simple cake, although it looks like  you spent hours and hours creating it! Here’s how:

1. Bake a cake in a bundt pan. Cake Bundt Pan

Here is a great recipe for turning a box mix into a pound cake with the additions of butter, water and pudding mix!

Cake Mix Recipe

Cool the cake, and invert in onto your serving plate.

2. Frosting: you certainly can use the kind in the tubs, I did for this, but I added some more confectioner’s sugar, cream and vanilla to boost the flavor. Then I added the green food coloring, but I saved a little of the white for the top layer of drizzle. Fill a pastry bag with the colored frosting.

3. Make your trees from ice cream cones. Take a “star” tip in a pastry bag and fill it with whatever color frosting you want the trees to be- green is good, pink or purple is fine too! Holding the cones at the tip, and starting at the bottom, pipe rows of stars, pulling them out a little so they look shaggy.  Cake Frosting Trees

As you go along, every fourth or fifth row, turn the cone sideways and sprinkle with decorations-cute, huh?

Cake Trees

When you get just to the top, put the cone down on wax paper and then add the frosting tip of the tree.  Frost your forest, then allow to dry.

Cake Frosting Forest

4. Take whatever colored frosting you have remaining, and put it in a microwave-safe bowl and begin to melt it. I use the high setting and check it every 15 seconds until it is a runny consistency. Don’t burn it!!!!

Cake Drizzle

5. Now using a spoon or fork, drizzle the icing back and forth over the cake until it is covered. It sets quickly so you have to work fast. Then take the white icing and melt it the same way.  Doing one section at at time, drizzle the white icing onto the cake, sprinkle some coconut, place a tree into place and push gently to secure it. Repeat with remaining icing and trees until you have a wonderland!

6. Final step: take confectioner’s sugar and a little sifter and sprinkle all over the entire cake to give the illusion of snow fall…pretty!! Now serve it to the very special birthday girl : ) and sing a little “Happy Birthday Party Hop”     Cake Sprinkling Sugar   Hope you have a sugary sweet Sunday everyone!! Two days until Santa arrives!! Susan


The Glidden Project-Complete!

Soooo, how did I do?!? If you remember the before pics, dark and dreary, not much light, kind of drab. But now… bright and cheerful, lighter and fresher-just in time for the holidays!! A few things I did for this makeover:

1. Repainted all the walls, including the tired blue fireplace wall, which immediately brightened up the entire room.

Completed Room

2. Transformed the bookcases/media wall. Fresh paint on back wall, repainted all the shelving from dark, stained brown to creamy white. I also painted the niche with the Steel Blue for a focal point- where the hand-carved whale now sits. Backlighting it with some LED lights gives an aquarium-like transformation-kind of cool, right?

Glidden Bookcase Whale Wall

3. Edited the shelves by removing most of Coach’s old books and keeping the ones that have some meaning (or the colors looked pretty : )

Bookshelves Edited

4. Had this old chair and ottoman re-upholstered in a light blue linen with creamy white trim.

Family Room Chair Before

Here is the brighter, fresher, newly transformed chair and ottoman! I have a great company in Lynn, just in case anyone needs a remodel…

Glidden Chair Redo

4. We kept the rugs the same, but change out some lampshades, added some colorful throw pillows, some soft fluffy blankets for those chilly winter evenings and re-arranged the pictures and mirrors.  This is Daisy’s chair. She would be really upset if we got rid of her chair, even if she really isn’t able to get up there to curl into a ball : )

Daisy's Chair

Wall Completed with Sofa

5. I also used the Steel Blue to re-paint the arched mirror so it would stand out against the Antique Beige background.

Arched Mirror Steel Blue

And then I decorated for the holidays, of course!

Decorated Fireplace and Tree

Arched Mirror Steel Blue Decorated

I would like to again thank the folks at Glidden for their paint, and their patience in allowing me the time to make this happen and write about it in my own words. I hope this story inspires you to try something new, break away from the known and do a little experimenting of your own!  Susan

A Lousy Im”Press”ion

So, it appears as if you all received an email from Country Design Home yesterday that held no content, just a link to a post that was password protected. Apologies for that! Apparently, if you privately publish a post, Word Press (my blog hosting site) still sends out an email with the link to all of your followers, even if they cannot view it! I am not sure what the concept is there, but I will tell you that the blog post in question is now live, and I would love for you to read it- it is part 1 of 2 posts! Here is the link: https://countrydesignhome.com/2012/12/18/thegliddenproject/ This is a project I have been working hard on for the past couple of months, and would love any comments or feedback! Again, I apologize for the snafu…and I hope you enjoy the blog! Susan

That’s A Crock!

Once again, this weekend flew by, along with my best intentions to work on the Hall of Shame. I know, it’s getting to be old news by now. But it was just so darn hot, especially in the hall, where heat rises and turns the upstairs into an inferno. The alternative? Hit the road in the CRV with the AC and music cranked up, on yet another trash to treasures hunt. Had some major scores, including these pretty vintage fruit compotes ($1.00!), this amazing pressed glass punch bowl set ($5.00!) and

…my new favorite piece of porch furniture- meet Mr. Whale!!! I have been searching for quite some time for a whale coffee table to replace one that Coach and I had acquired for our first apartment- is it possible that was 30+ years ago!?! Not sure why we ever gave it away the first time, but I am so happy to give this little guy a new home. We had (shall I say it?) a whale wash today, and it will be sanded, primed and painted, hopefully in time to celebrate the 4th in patriotic fashion. After a few yard sales, we made the trip to Todd Farm in Rowley, still searching for a final piece for the porch- a couch. Although I think we have done a fine job of filling the porch with vintage wicker, Coach has complained loudly and often that he needs a couch for his afternoon siesta. After months of fruitlessly searching yard sales, antique shops and

craigslist, we came upon this vintage Benchcraft rattan sofa. Vintage is putting it nicely. It is smelly, dirty, has UGLY cushions and some unexpected guests-yuck! These creepy little things started crawling out of the sides when we were hiking it up on to the roof rack. Brought back memories of Rod Serling’s Night Gallery– remember the episode when the earwig laid eggs in the guy’s brain and they hatched?!?!?!? Not sure if I will ever be able to lay down on this couch, but the reno has begun in ernest. Washed, bleached, cushions tossed. Stay tuned for the final results.

Along with the couch, Coach picked up yet another crock for his growing collection, this one a George Washington Commemorative Crock! (Click the link if you would like one of your very own)

Him being a history teacher and all, anything presidential always peaks his interest. Me being married to a history teacher, I am all about learning important historical origins. So I wanted to find out where the phrase “that’s a crock of Sxxx!“came from. Let’s just say the Romans could have used a little indoor plumbing while waxing philosophical.

Walking along the dusty paths of Todd Farm, saw some really cute vintage yellow kitchenware I love it when the dealers actually bring some sense of order and style to their offerings like these stacks of vintage crates

Anyone got the time?

I am kicking myself for not buying this beautiful set of Virgina Glassware- Tangerine Tango!!

But I am not kicking myself for not buying this clock. Vintage and pretty, but not sure if it worked (if there is a worm stuck on the second hand, does that slow the time?) and just saw it listed on Ebay for $10 less than the dealer wanted. Phew!

So that’s a wrap (gotta find out where that saying came from). Time to start sanding Mr. Whale. For those of you who have the whole week of the 4th off, have a great vacation! For the rest of you, does anyone have a red,white and blue punch recipe? If you do, send it to me at countrydesignhome@gmail.com and I will post it! Susan

%d bloggers like this: