WoW! Wainscoting Wallpaper!

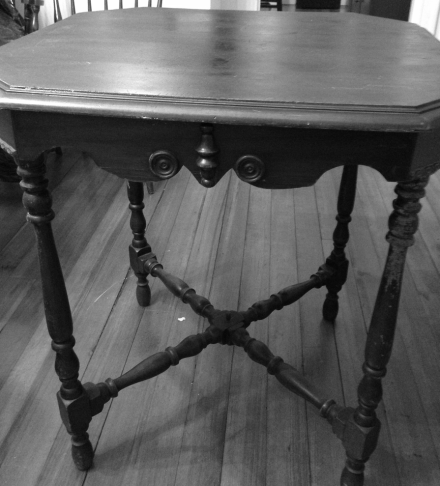
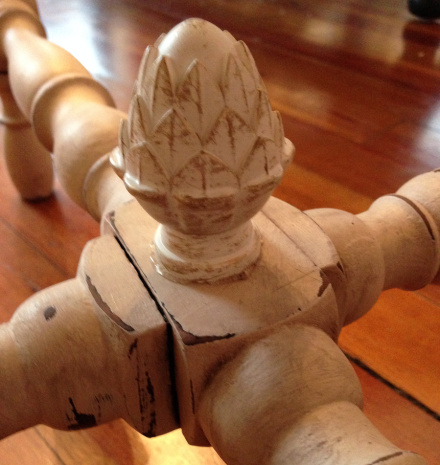
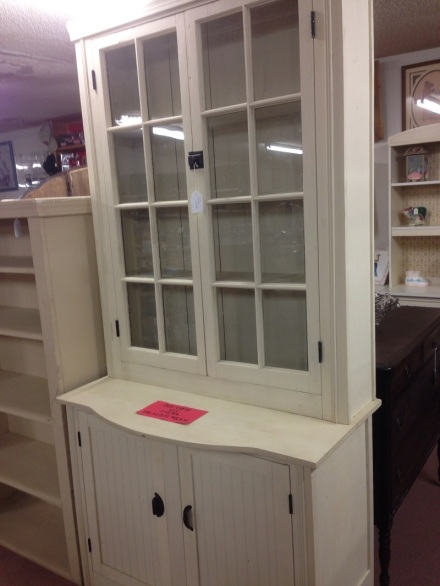
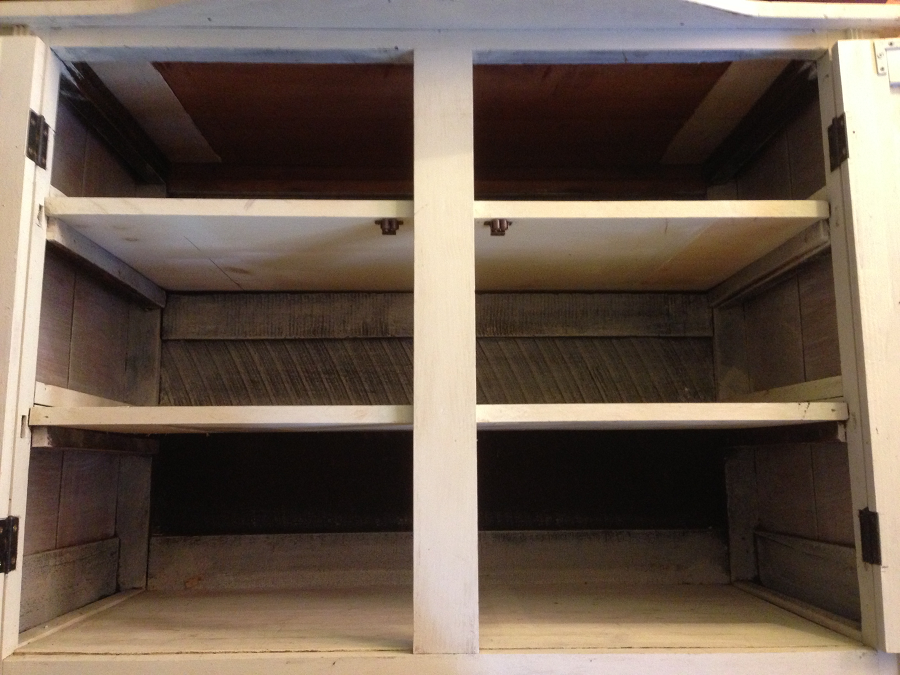
Coach and I recently purchased this country-style cupboard at auction for…wait for it…$10!!! It was pretty grimy and the front doors were missing, but I just fell in love with the detail in the top trim and base.

Country Cupboard Before Painting
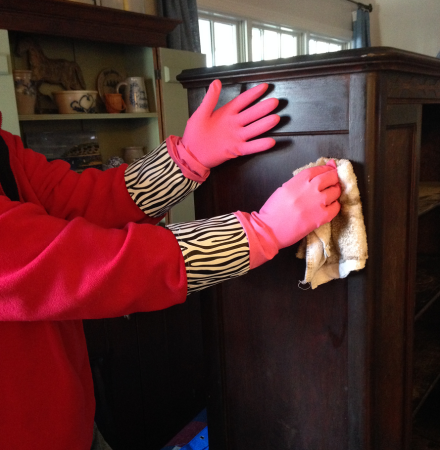
The color was a faded and chipped greenish-mustardy yellow with some sort of stenciling on it. So not country pretty, so time for a makeover. First step, clean it up! Second step, I had to remove the middle piece of wood where the now-MIA doors would have normally closed and latched. (If anyone knows what that piece is actually called, let me know : )

Country Cupboard Middle trim piece
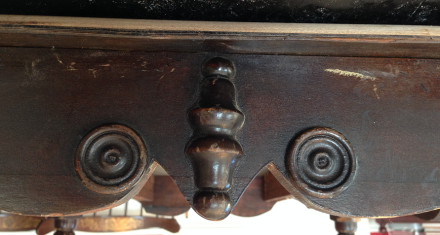
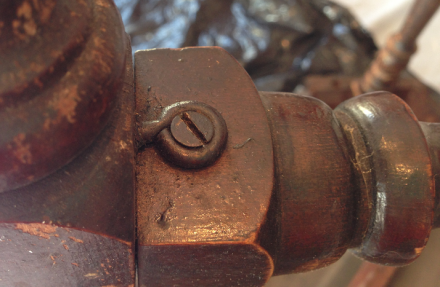
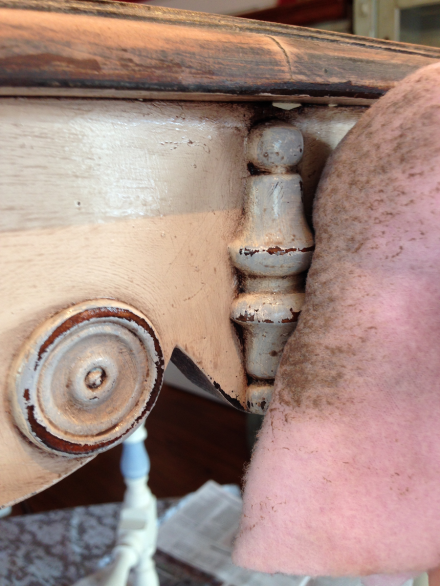
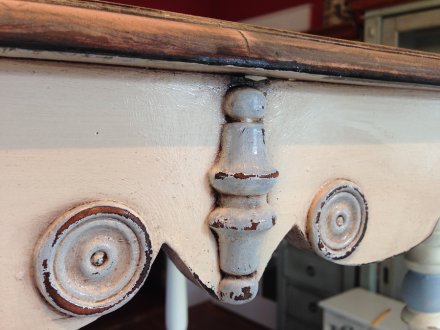
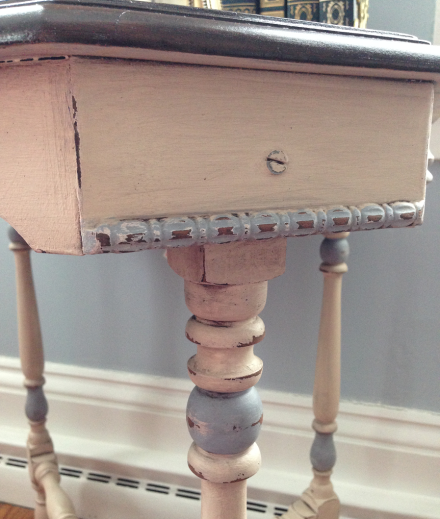
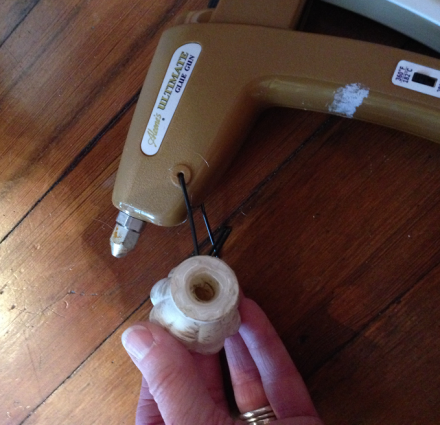
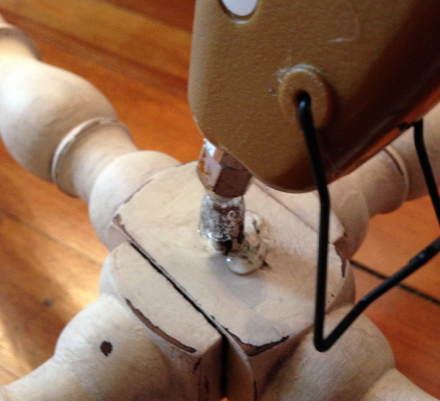
It was easy to pop out with a tap of a hammer, but there was a wood spindle at the base that needed removing, since I wasn’t planning on replacing the doors.

Removing Spindle from Door
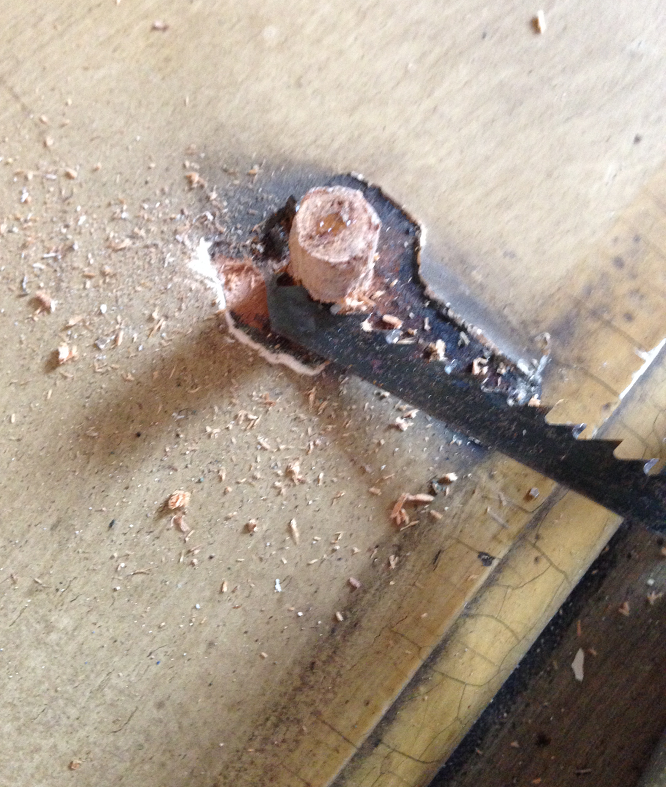
(This is the point when Bartlet the Frenchie was exiled into the hall closet, as he was none too pleased with the noise of the saw and kept trying to attack it!)

Bartlet the French Bulldog
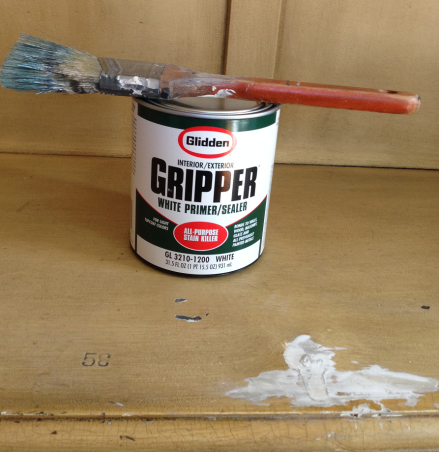
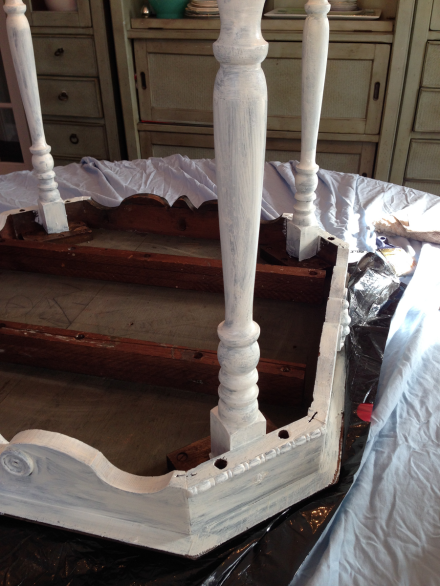
Easily done with a small saw, then I patched up the holes and was good to go. The first coat, my go-to primer, Glidden Gripper. It covers lots of sins : )

Glidden Gripper Primer
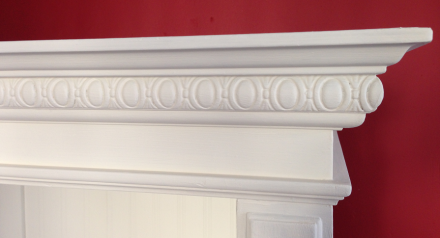
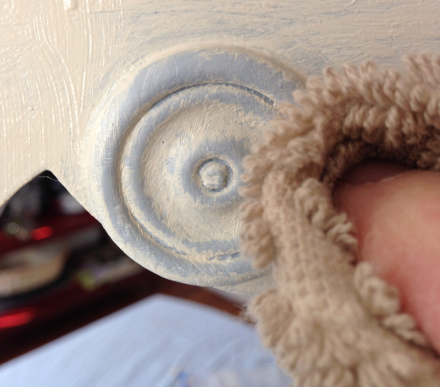
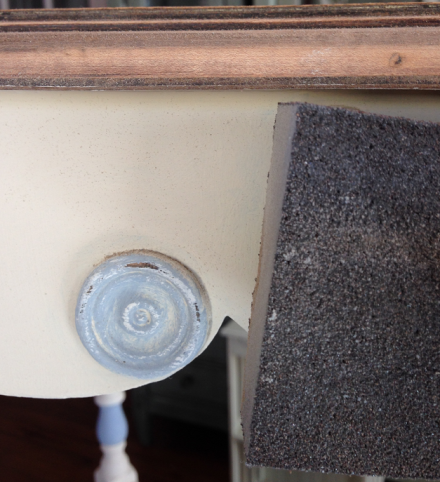
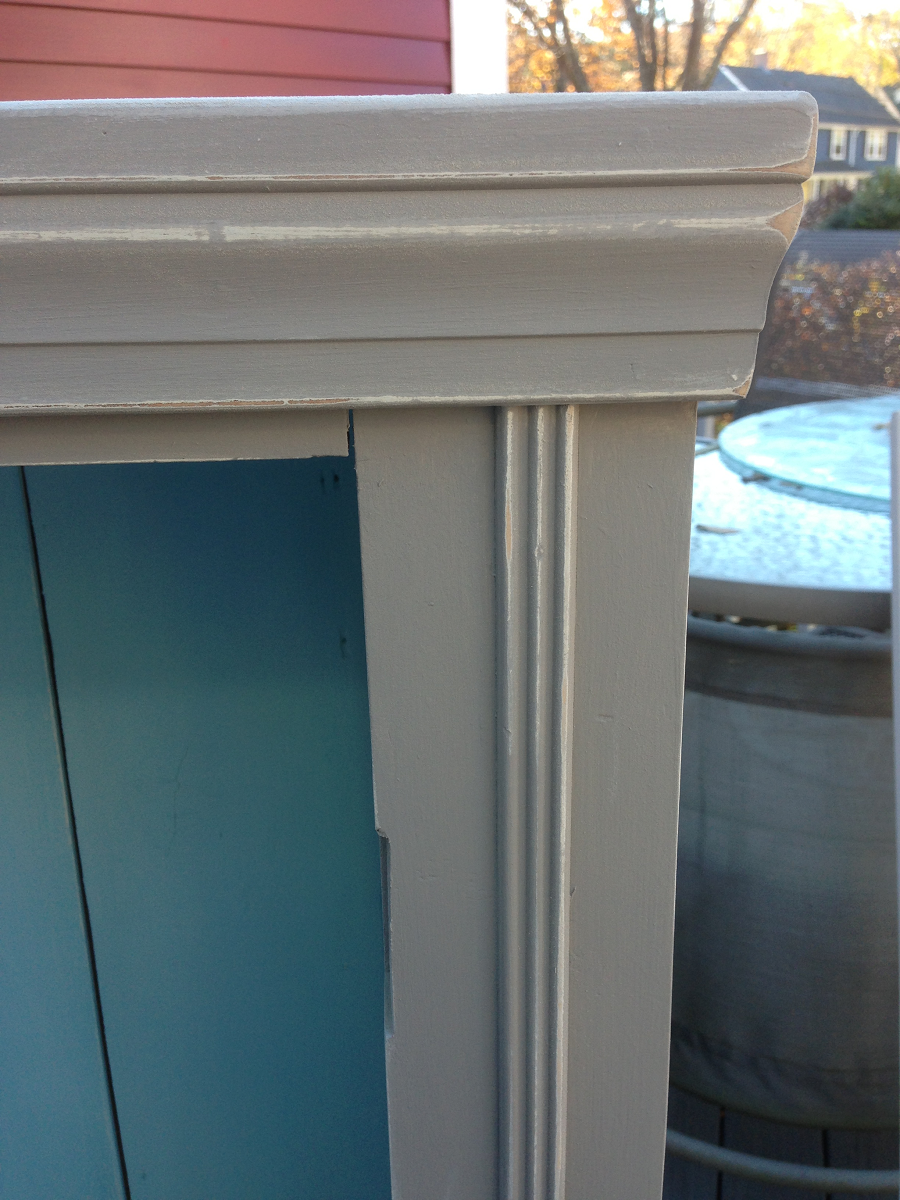
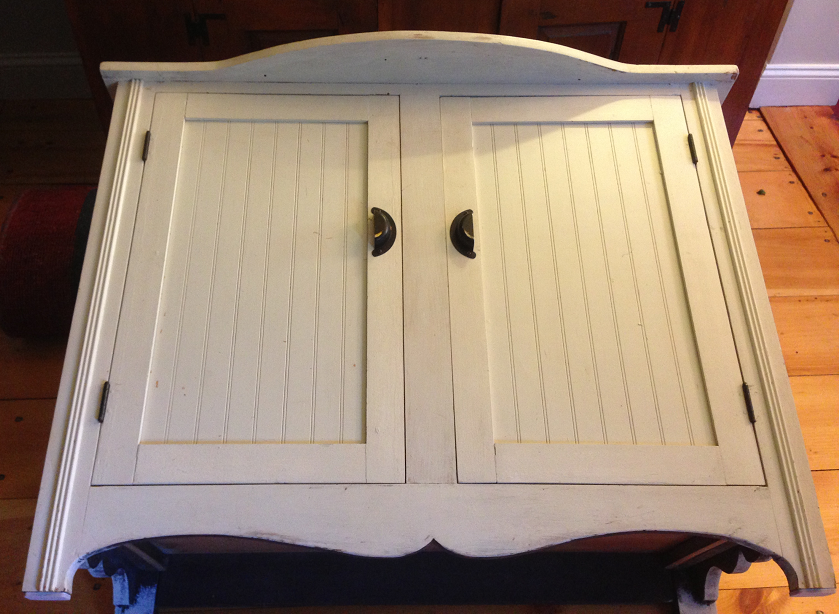
Amazing how one coat of primer can change the entire look of a piece! See how the detail pops with the clean, white paint!?

Country Cupboard Primed Detail
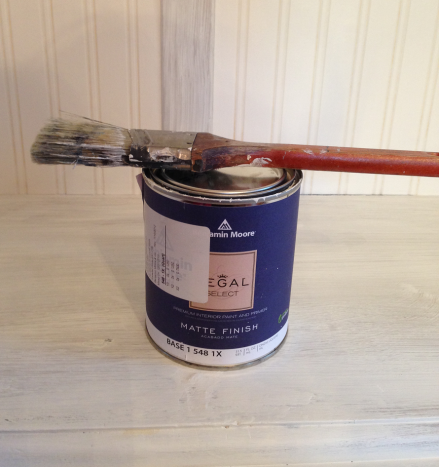
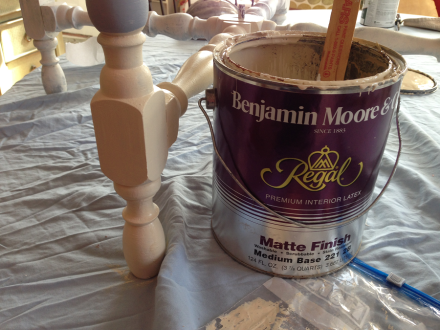
My finish paint choice? A lovely shade of creamy white called Snowfall White by Benjamin Moore in a matte finish.

Benjamin Moore Snowfall White

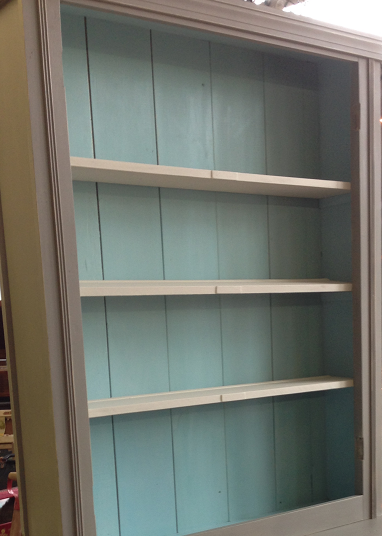
If Linen White and White Dove were married and had painty children, this is the color they would be. Before I applied the top coat, I decided I wanted to add some sort of trim or wainscoting to the back panels to give the cupboard a bit more interest. I went searching through Lowes (well, first I scoured the basement workshop and the barn but came up empty handed there), where I perused all sorts of wood, metal and vinyl options. I wanted something simple and lightweight to install that would give a nice finished look. At Lowes I discovered this roll of faux paintable, pre-pasted wallpaper wainscoting by Allen & Roth. Score!

Allen & Roth Paintable Wallpaper Wainscoting
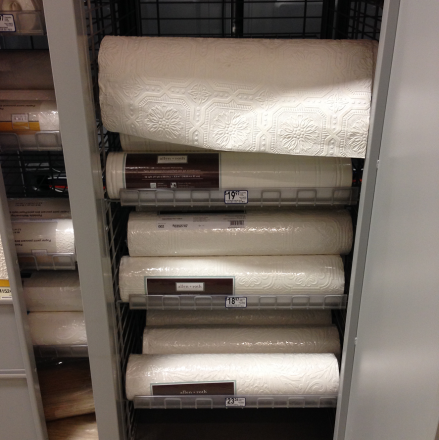
It looks like a regular roll of paper, but It had the feel of foam, so it is very lightweight and easy to cut with scissors. No dragging out my saw and sanding down edges, then gluing and nailing in place. Just measure, cut, dip and paste. Perfect.

Measuring Faux Wainscoting

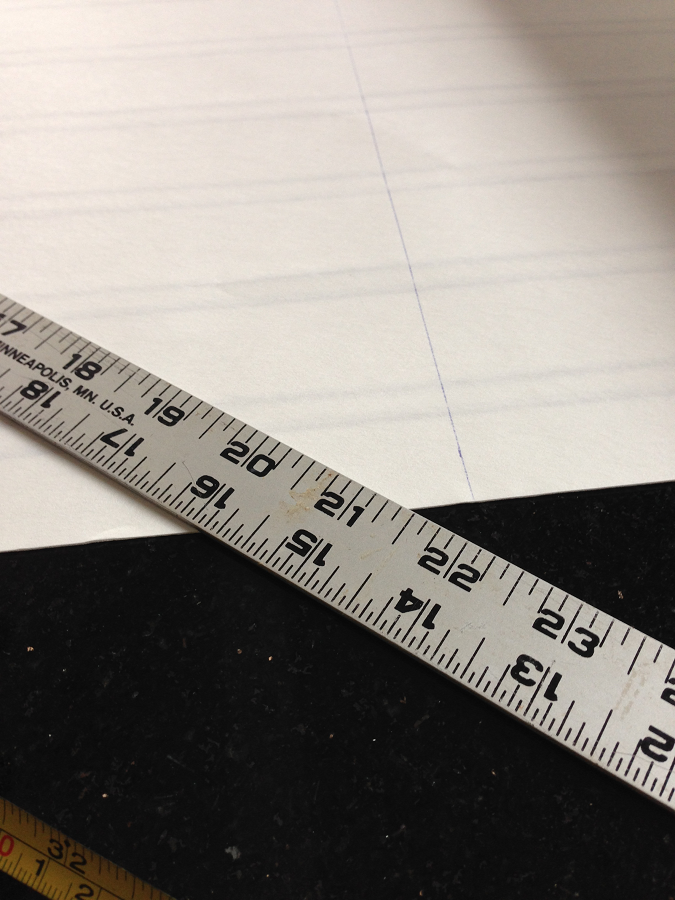
Simple to cut, just measured it out, marked with a pencil and used scissors.

Faux Wainscoting Measure and Cut
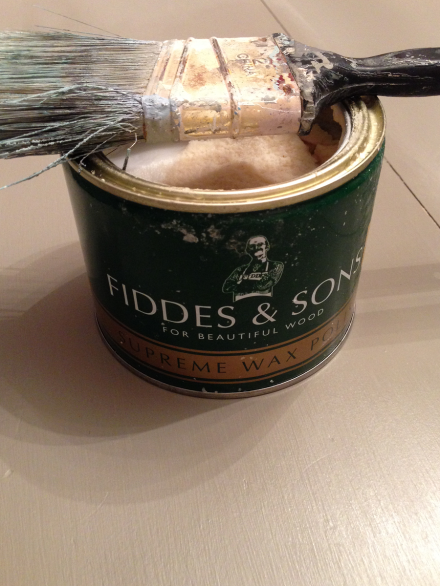
Dipped it in a warm bath in the sink for 30 seconds, then removed it and allowed it to sit for 3 minutes to allow the glue to really gel up.

Dipping Wallpaper in Warm BathThis is some seriously sticky and gluey glue! The panels went on so easily over the primed surface, and since I had already premeasured and cut, no additional trimming was necessary. I just placed the paper into position and used a damp sponge to wipe it down and remove any excess glue.

Wiping Faux Wainscoting with damp spongeAccording to the instructions, I waited 24 hours prior to painting, then I painted the entire piece with the Snowfall White.

Painting Faux WainscotingAnd folks, this really does look like raised wood wainscoting!

Faux Wainscoting PrimedThis painted piece is so much better, BUT, I am not finished.

Country Cupboard Painted

I need to decide on an accent glazing color, and I am open for suggestions. Red, lavender, gray, blue, brown, what color would you choose to enhance the beautiful trim and the wainscoting without changing the overall feel of the cupboard? I am loving the white, but it needs just a touch of something!

Country Cupboard Trim Detail

And this needs to be completed quickly, as Easter is fast approaching, so time is of the essence. Help! Susan

Coronado Captured in Color

This past weekend I spent a little R & R in California to recharge my blogging soul and warm my freezing bones. Mission accomplished. Sharing just a few sights and sounds of colorful Coronado, a resort city that sits across the bay from San Diego, connected by the spectacular San Diego/Coronado Bridge.

Coronado Bridge ViewView From The Bridge Color Capture

Colorful Coronado Bridge ViewWhenever I go walking to explore my surroundings, I always have my iPhone at the ready to take photos. And, with my Benjamin Moore Color Capture App, I can replicate those exact colors of nature in paint-to add a touch of sunny California to my home! Hmmm, I wonder if they have an EARTHQUAKE app?!?

San Diego Harbor-A View From Coronado

San Diego View From Coronado

San Diego Harbor Color Capture

Colorful Coronado San Diego Skyline

Coronado Brick Walkway

Brick Walkway Coronado

Brick Walkway Color Capture

Colorful Coronado Brick WalkwayPurple Flower Color Capture

Colorful Coronado Lavender Floral WalkwayGreen Grass and White Picket Fences

20140330_172102772_iOS

Green Grass Color Capture

Colorful Coronado Green Grass

Coronado Flower Gardens

Malibu Beach Photo

Lavender Daisies Color Capture

Colorful Coronado Daisies


Fresh From the Farm

Famer's Market Produce

Luscious Red Tomato Color Capture

Red Tomato Color Capture

Boney’s Bayside Farmer’s Market

Boneys Farmers Market

Fresh From the Farm Color Capture

Colorful Coronado Farmers MarketCoronado Bicycle Weathervane

Bicycle Windmill CoronadoWeathervane Color Capture

Weathervane Color Capture

If you haven’t downloaded the Color Capture App to your smartphone, do it now! You will be amazed at all of the colors available in each picture frame that you can’t see with the naked eye. Have a spring-in-your-step kind of Thursday, everyone!! Warmer temps will be here soon… maybe. Susan


Pretty Pasadena

Since the winter has been so reluctant to release its icy clutches in the Northeast, I figured a little R & R in sunshiny California might boost my spirits and get my creative juices flowing again! Luckily we have relatives living up and down the California coastline, so first stop, Pasadena!

Screenshot (16)

Not quite as warm as I had hoped, but by Boston standards, a relative heat wave!! Yesterday we took a drive down to Malibu to catch the Pacific Ocean-breathtaking…

Malibu Beach Pacific Ocean

Today, I took a walk around the neighborhood where we are staying in the historic Orange Heights District of Pasadena.

Screenshot (11)

Quaint little bungalows and cacti line the streets,

Pasadena Welcome Sign

and everywhere there are palm trees,

Screenshot (17)

bright green grass

Screenshot (15)

and beautiful flower gardens.

Screenshot (20)

Makes me long for springtime to finally arrive in Boston.

Screenshot (14)

This historic area has a Spanish influence that is reflected in the architecture, loving these steps and wrought iron gate.

Screenshot (18)

Nearing my walk’s end, I spotted this box, which I initially thought to be a bird house. Upon closer inspection, I realized it was a little neighborhood free lending library!

Screenshot (13)

This is the view from the front porch where we are staying. Palm trees and grapefruits

Grapefruit Trees

and white picket fences.

Pasadena Porch Yard

Sweet. Tomorrow its onto San Diego! And don’t worry, Coach is at home digging up new treasures for me to DIY once we get back home. Hope things are warming up on the east coast!! But for now, haste la vista, baby!! Susan

Anchors Away Vintage Cabinet

summer porch nautical themeAnother DIY project for the summer porch (if it ever gets above freezing around here so we can actually use the porch). This is the before, one of those old tin wall cabinets that someone had painted an awful shade of mustard neon yellow.

Nautical Cabinet Mustard Yellow Before

And this is the now: an Anchors Away Rolling Cabinet!

Nautical Cabinet Side view Stripes

A pretty dramatic transformation, yes? Here is the how-I-did-it:

1. Attached wheels to the base of the cabinet so it can roll easily

Nautical Cabinet Wheels

2. Painted with Glidden Gripper primer. This stuff works on wood or metal. Painted a coat of Benjamin Moore Snowfall white over the primer.

Antique Table Gripper Primer

3. For the sides, I decided to add a nautical stripe effect, so I taped the 2″ stripes over the white and painted with a custom (by me!) deep blue.

Nautical Cabinet Taping Stripes

Nautical Cabinet Blue Striping on Sides

4. For the front doors, I painted two layers of blue paint, a solid base and then a dry-brushed topcoat to create more depth of color.

5. For the anchor stencil. I needed to look no further than my HomeGoods shopping bag!

Nautical Cabinet Anchor Stencil Home Goods Bag

I buy these all the time, and for 99 cents they can’t be beat. I usually use them for toting stuff around, but since the anchor was the perfect size, I figured why not? I’ve got plenty more where those came from! So I used the cut-out anchor for the stencil, affixing it to the cabinet with some temporary craft adhesive,

Nautical Cabinet Spray Adhesive for Stencilthen sponging paint on with a regular sponge.

Nautical Cabinet Stencil Removed

The roping I created from my PicMonkey Photo Editor. This anchor design is very similar to the one I used, so I’m sharing that in case you would like to create one of these too!

Nautical Anchor and Roping Design6. I printed the design on regular printer paper, then affixed a sheet of freezer paper to it with some spray adhesive, just to give it more strength. Cut out the stencil with an exacto knife.

Nautical Cabinet Cutting Stencil

7. Affixed the stencil to the cabinet with painter’s tape, dabbed the white with a piece of sponge until the white was deep against the dark blue.

Nautical Cabinet Completed Anchor and Rope Stencil

For the twisted rope, I cut the pattern from the HomeGoods bag (it has two sides : )

Nautical Cabinet Cutting Rope Pattern

and taped that to the cabinet.

Nautical Cabinet Taping Rope Pattern

Nautical Cabinet Chalk Outline Roping

Outlined with chalk, then took a small, tapered sponge piece

Nautical Cabinet Trimmed Sponge

and followed along the lines, dabbing with the white paint to create the rope effect.

Nautical Cabinet Sponging between lines

The great part about using chalk is that once the paint is dried, the chalk just wipes away with a damp sponge.

Nautical Cabinet Rope Completed

For the top, I used some light balsa wood pieces that I affixed with glue.

Nautical Cabinet Balsa for top

I wanted that beachy, weathered appearance, so I added some blues mixed with water just to give it an aged effect.

Nautical Cabinet Swirled Paint and Water

Nautical Cabinet Glazing Supplies for Top

Then I glazed the top with a mixture of Martha Stewart Glaze and 2 paints, one white, one metallic silver to create that aged, driftwoody look I was going for.

Nautical Cabinet Weathered Top

With the glaze, you just paint it on, then wipe off what you don’t want

Nautical Cabinet Wiping Glaze off Top

The original handles were 1950’s chrome, which would have been perfectly fine.

Nautical Cabinet Chrome Handles

Instead, I used some brass grommets, one in each hole. I had do do a bit of drilling to make the holes larger, and then glued them into place.

Nautical Cabinet Grommets in Place 
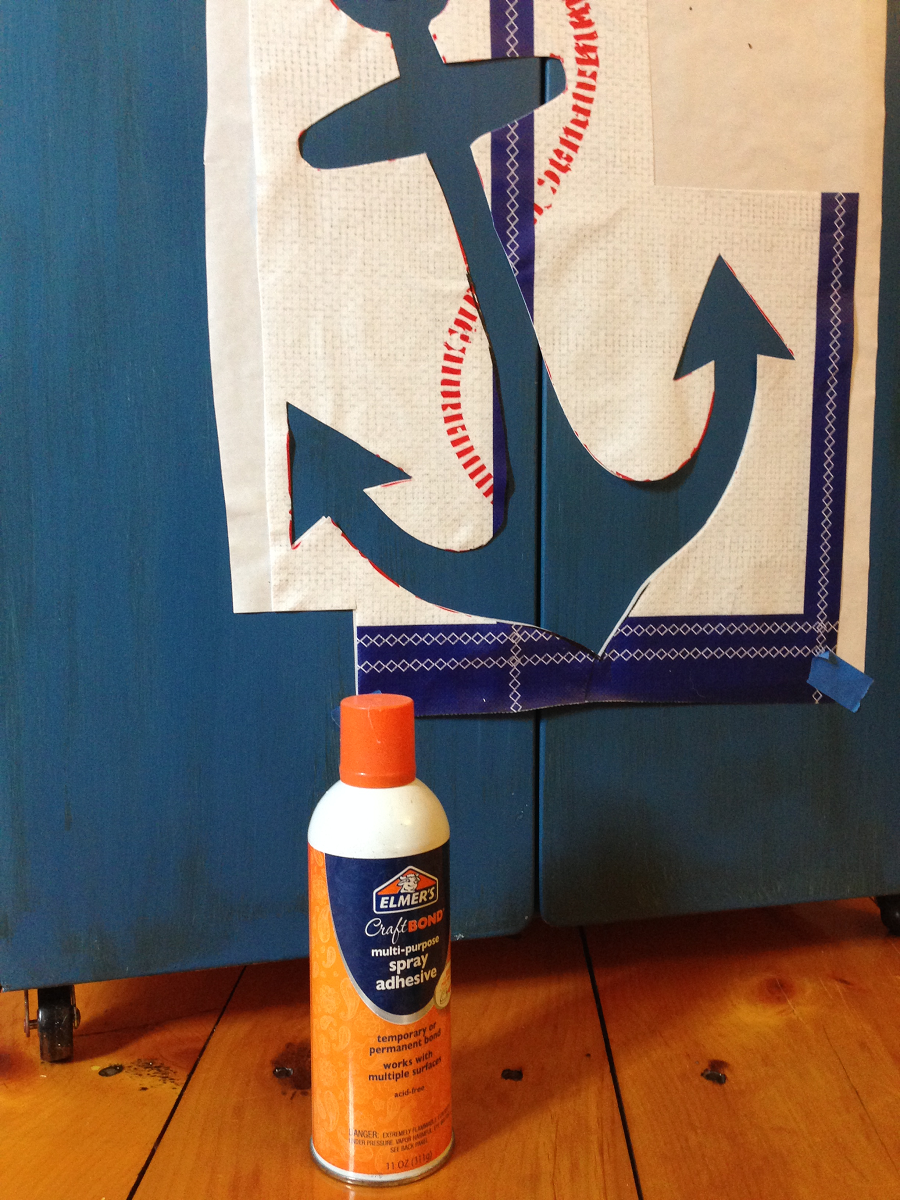
Added some nautical roping to create the handles. Plus, it mimics the roping in the stenciled design. Perfect!

Nautical Cabinet Rope Handles in place

A bit of DIY FYI: when you are cutting twisted rope, tape the end before you cut, otherwise it will untwist!

Nautical Cabinet Cutting Rope Taped Ends

For the inside, I just painted it to match, then decopaged the shelves with some pretty blue tile paper I picked up at Michaels-4 for $1!

Nautical Cabinet DecPage and paper

Then I added a Martha Stewart Gloss finish just to waterproof the paper.

Nautical Cabinet Martha Stewart Gloss Finish

This cabinet is plenty big enough to hold cups, plates and glasses and an ice bucket for the porch.

Nautical Cabinet Interior Storage

The finished cabinet is perfect on our Nautical Summer porch, right at home with our white wicker seating and the Whale Coffee Table!

summer porch nautical theme

And. perhaps someday soon, we will be able to sit out on the porch and enjoy some much-anticipated warm weather! But for now, I hope you enjoyed my DIY Anchors Away Cabinet Project! Have a warm Wednesday, everyone! I know I will because I am headed to sunny California!!!  Susan


#tbt Photo Memory Cake

It’s #throwback thursday! I’m not certain who came up with this idea, but it’s kinda fun to see so many friends and family posting old photos of loved ones on social media. This week’s throwback is actually a post I penned back in 2012, when I first started blogging (boy, that seems like a lifetime ago…) Back then, I had about 5 followers, maybe a half dozen “likes” on Facebook and I had no idea what Instagram even was! Since hardly anyone actually saw this post, I thought I would re-share it. Hopefully it inspires you to try one too!.

So, in the spirit of #tbt, here is the Memory Cake that I created for my sister’s (ahem, milestone) birthday, using old photographs that I printed on icing sheets. And, if you have a faded photograph of someone you hold near and dear, don’t forget to share it!!

“Faded photographs, covered now with lines and creases”. When it’s time to celebrate a special family occasion, such as a milestone birthday, people often create videos or scrapbooks using old photographs. This year, for my sister’s (I am not going to divulge the year she was born, but let’s just say Elvis was in the building) birthday celebration, I decided to add a sweet twist to an old idea. A photo cake!!  I have made hundreds of cakes over the years for birthdays, anniversaries, even weddings, but I have to say that this particular cake was really special, as it touched my heart, as well as my sister’s.  I am not going to give you a full tutorial on how to create a cake like this. It is not simple, and you do need a basic understanding of cake decorating and using fondant. However, I will provide you with what I think are the most important things a cake artist needs in his/her “tool box” in order to create a memorable photo cake.  Let’s start with the cake. You need a good solid cake that will hold up to the heavy fondant and piped icings. I normally make mine from scratch, but when I am pressed for time, I sometimes us a box cake mix, doctored up. This is a great basic

Once you have all your layers baked, cooled and chilled, it’s time to start decorating!!  I used to freak out when my cakes weren’t level, or pieces pulled off around the edges, but then I started watching Ace of Cakes. Duff Goldman describes cake decorating as using”‘smoke and mirrors” to get the desired results. He, by the way, has a line of awesome cake decorating stuff at Michael’s Crafts. A little extra glob of frosting here, a bit of fondant there can make what initially looks like a disaster into a beautiful edible work of art. This handy tool, a cake leveler (I know, it looks like a hacksaw, right!?) levels each layer so that they stack properly. When cakes bake, they rise and end up with a “dome” in the middle which needs to be planed down. This leveler makes a perfectly even cut, and you can use it to cut exact layers as well. I use a basic buttercream frosting recipe, especially if the cake will be covered in fondant, which is actually just sugar and water cooked until it becomes a pliable sweet dough. You can find fondant pre-made in your local arts and crafts store, but this recipe is super easy, a lot cheaper and the fondant actually tastes really delicious! Rolling out the fondant smoothly can be tricky- you have to keep covering your work surface with confectioner’s sugar to prevent sticking.  Once it is rolled out to your desired thickness (it should be 1/8-1/4 inch thick) and size, you simply roll it right right onto your rolling pin and then transfer it to the cake. It is important that the frosting “crumb” layer of the cake be smooth, as you will see every bump and lump through the fondant! Unfortunately, they don’t make “spanx” for cakes!!

Stacking the layers is the next step. Place each layer on it’s own base! Stick dowels or sticks into the layer below, cut exactly at the level of the fondant.  Without this step, your cake could end up unintentionally looking like the Leaning Tower of Pisa,

Family holding up leaning tower of Pisaas the weight of the higher layers will eventually sink into the one below.  Next up, adding the photos.

On this cake, the photographs were “pasted” on using a watered-down buttercream frosting. “Now where did she get those photographs, and are they edible?!?” you ask. The photos were printed on my Canon IP3600 photo printer, using special frosting paper from Icing Images (yes, its actually frosting on a plastic back that you put in your printer!) with special food coloring inks,

which make for edible decorations. (Disclaimer: on this cake, some of the photos became non-edible, as I ran out of food coloring ink at the last minute and had to switch to regular ink instead. Luckily I was there to cut the cake and remove the pics prior to serving : ).  The final touch: the ribbons. I was going for a “movie reel” look, but couldn’t find ribbon or tape anywhere.

So I fused these two ribbons together to make one long continuous piece to wrap around the cake and give it a vintage look. The topper was just a sparkly plastic Happy Birthday from the dollar store. And, again, I am not going to divulge the actual number of candles on the cake, but there was enough heat to start it on fire-lol!!! 

So there you have it. Photo cake deconstructed. Now,  I think there is some leftover pound cake that should go well with my morning coffee!! Have a sweet day everyone!

And a very special happy birthday to my big sister. XOXOXO Susan

One Ocean Arts Shop Showcase

OneOceanArts Logo Baby Seal If you follow my blog, then you know I love showcasing new businesses and shops that are unique and have something special to offer. So, today I am super excited to share the newest venture of my niece, Jamie, a fur seal trainer by trade,

Jamie Mathison OneOceanArtsa talented artist and now a budding entrepreneur from Gloucester, MA. (Where she actually lives in a lighthouse, folks!!) Inspired by her love of the ocean and its beautiful creatures, she is taking the plunge and has opened her Etsy shop called OneOceanArts.

OneOceanArts Etsy ShopNow offered are beautifully block-printed clothing and accessories, including t-shirts and tanks, tote bags and baby onesies

baby whale onesie on OneOceanArtswith the sweetest sea-inspired illustrations. How awesome is this little guy!?!?

Baby Seal Onesie One Ocean ArtsEven the happy shark is adorable!

Shark Onesie from One Ocean ArtsAll of her artwork is original,

Sea Turtle Onesie from One Ocean Artsand each order is customized and hand-block-printed on 100% cotton, organic and blended materials, using colorfast and long-lasting inks in bright, vivid hues of blacks, whites, pinks and aquas.

Fish School Toddler T on OneOceanArtsMore examples: A block-printed women’s hoodie offered in grey with your choice of block print color.

Anchor Hoodie on OneOceanArtsHere is the description: “This is a one of a kind hoodie hand printed just for you. There are a variety of prints, shirt colors and ink colors to chose from so you can make it your own!  Any print you see in our store can go on this shirt, so feel free to customize your item. You can also chose placement of the image. Do you want it on the back of the shirt instead? No problem! Make sure to let us know what image and ink color you would like when placing your order. Don’t see your size or favorite color? Message us and we’ll do our best to make it happen!” Loving the design on this men’s nautical compass T.

Compass T on OneOceanArtsSo you choose your clothing or accessory item, then you have the option to choose the block print, the placement and the colors. Brilliant!! Each item has a full description including sizes with full measurements and color choices. Loads of options, each one ocean-inspired and uniquely created for you. Along with children’s and adult clothing, OneOceanArts is also offering block-printed canvas tote bags

Canvas Fish Tote Bag from OneOceanArtsmade from recycled materials, block-printed in the design and colors of your choosing. Loving the old VW bus with the surfboards!

Block printed tote bag on OnceOceanArtsJamie is continually adding new items and designs to the shop, so check back often to see what’s new! If you are searching for the perfect gift inspired by the ocean, or just want to “sea” Jamie’s new shop, check out OneOceanArts (and tell her that Auntie Sue sent you). Have a (not-so-top ‘o the morning after St. Paddy’s Day) Tuesday, everyone! Susan

The Antique Table Throwback

It’s #Throwback Thursday, everyone! What better way to celebrate than to show off my latest DIY project? This week it’s a turn-of-the-century table Coach had stashed in the barn. Pretty beat up, lacking polish and pizazz and missing the little finial in the base.

Antique Table Before Restoration B&WThis is the before when it was manufactured by the Denhard Furniture Company of Louisville, Kentucky, sometime between 1855 and 1905. This is the after.

Antique Table Clock and Books Staged PMHere is the how-I-did-it:

1. My first step is always to clean the piece to make sure there isn’t any dust or dirt or mold or mildew-after all, who knows where its traveled in these last 100 years? I wanted to preserve the top to stain, so I flipped it upside down and went to work.

Antique Table Primer Upside Down

2. I painted the base it with my favorite primer: Gripper by Glidden. Awesome stuff. Covers everything in one coat.

Antique Table Gripper Primer

3. Once that dried, I painted the body with a coat of Benjamin Moore matte finish paint in a custom color. And by that I mean that I mixed a couple of different cans of paint I had on hand to create this creamy white color. I will name it Buttercream Frosting. Because I love Buttercream Frosting. And it is a buttery cream color. Hence, the name.

Antique Table Benjamin Moore Custom Color4. I painted all of the raised detail blue-this is why I LOVE redoing old furniture. You don’t find this kind of carved detail at big box stores!

Antique Table Old Finish Detail

And this locking mechanism for the legs is brilliant! A screw-eye is attached to the leg, which then in turn is attached to the brace with the screw. So sturdy.

Antique Table Screw and HookOK, so I painted all of the raised detail with the same home-made blue paint concoction that I used in the Colonial Country Cupboard I recently completed. Love it, want to use it over and over again. But I am almost out, so I’m going to have to find a way to replicate it! OK, so now the detail was blue.

Antique Table Painting DetailThen I repainted the entire piece again with the Buttercream Frosting and wipe away the excess off the blue details.

Antique Table Wiping Off Paint from Detail5. I sanded everything down to give it that rustic, aged look that we like.

Antique Table Sanding DetailAnd by we, I mean myself and Coach. I know a lot of people are not fans of the painted, sanded, stained look, but that’s cool. One man’s trash is another family’s re-loved vintage table : )

5. I glazed the entire piece with General Finishes Brown Mahogany

Antique Table General Finishes Brown Mahogany Glaze

(I was planning on using this for the top, anyway, so this way it matched color tones. I’m kinda smart like that.) Simple process. Paint the stuff on.

Antique Table General Finishes Brown Mahogany Glaze Applied Try not to spill it. But if you do, use plastic drop cloths so it’s easier to scoop the stuff up and put it back in the can.

Antique Table Spilled GlazeI’m using plastic lace table cloths from the dollar store. I know, right? Cheap, pretty and practical (insert joke here). Used a damp rag to keep it workable while I wiped it off until I was satisfied with the results.

Antique Table Wiping off Glaze

Look how the detail pops now!

Antique Table Glaze completed

Antique Table Side Detail Finished6. The base has two cross pieces that meet in the middle. At one time there was most definitely a decorative finial, but that was  missing. I was searching for something suitable when I spotted these curtain rods at the Christmas Tree Shop. (If you don’t have one near you, and don’t know what this store is, let me assure you it does not merely sell Christmas Trees!) These were a glazed, antiqued metal and cost $5.99!

Antique Table Pineapple Rods Christmas Tree ShopSo I removed the finial from the rod,

Antique Table Removing Finial From Polethen filled the finial with glue

Antique Table Finial with glue filler

and also coated the spindle with glue so it would be very secure.

Antique Table Coating Post with Glue7. So now the new pineapple finial is a welcoming addition to the antique table. Is it the original? No. But I would never have been able to find that. This seemed like a sweet solution.

Antique Table fixating pineapple finial to post8. For the top, I used the aforementioned Brown Mahogany Stain to replicate the rich brown of the original color and finish. That was after Coach sanded it down, but I didn’t catch him in the act, so I don’t have a shot of that. But I do have a pic of him cleaning an old cupboard using my kitchen gloves. He worked for a few minutes and then said, and I quote: “This DIY stuff is hard work. I’ll finish it later.) And he removed the pink gloves and left! So I remind him of that whenever he drags home yet another piece of furniture and says “work your magic with this”. Ha.

Coach cleaning the cupboard7. I applied a couple of coats of Fidde’s Supreme Wax

Hope Chest Fiddes & Son Waxto give the top that glowing finish.

Antique Table Top Fiddes Wax Finish

8. Here is the final closeup reveal of the accented details and beautiful wood top!

Antique Table Top Dressed

I think Mr. Denhard would be very pleased with how I have lovingly restored his table. What do you think? Could you love a table like this in your home?! Do you have an old piece of furniture kicking around? If you do, then it’s your turn to add it to the #Throwback Thursday Collection! Susan 

Dangers of DIY-Hardware Replacement

I recently wrote a post entitled the Dangers of DIY

Dangers of DIY

where I discussed the many chemicals and compounds that are in all of the seemingly harmless paints and finishes that DIY’ers use on a daily basis. If you didn’t see it, please click here and read it. It’s very important that you are aware of the pollutants and potentially hazardous materials that you are breathing in while working on your favorite old piece of furniture or wood trim in your homes!

However, there is another, less apparent danger that is also so important to know about and correct for your family’s safety. In another recent post, I showed off a gorgeous 1950’s Lane hope chest that I had completely restored.

Refinished Lane Mid Century Modern Hope ChestI am really proud of that piece, but what was I not aware of that needed changing? The locking mechanism of the chest was similar to the one that was in the news recently, when two small children climbed into it and tragically suffocated. How could that happen?! The old locks, in the chests built before 1987, had a push-button that was easily engaged so that the top could open up, and then instantly click into place and lock down once the top was lowered. There was no way to unlock it from the inside, and since it is a cedar-lined chest, it was built with a tight seal to keep out the moths and protect your clothing. Clearly, this needed to be changed.

The new locking mechanism was provided by the manufacturer, the Lane Company, free of charge.

Lane LogoThey have had several recalls in the past, most recently in 2014 due to this recent tragic incident. All we had to provide was the latch style and serial number (here is the online link to use)

Lane Furniture Latch Replacement Illustration

and we received the new lock in the mail in less than a week. The simple replacement process took just a few minutes, and you can see a video here by The Furniture Refinishing Studio on the exact procedure. Lane Hope Chest Lock Replacement VideoThe lock is not that difficult to open (and it does come with a key if you really want to keep it shut tight) but once it is opened, there is no way to lock it down from the inside. The mechanism remains disengaged and the top remains open about 1/2 inch until you re-engage it, which can only be done from the outside of the chest.

Lane Latch Operation Video

So now, there is no way that this tragedy can be repeated. If you have an old hope chest or any other old piece of furniture that you are DIY’ing, check the hardware! Old cupboards and cabinets and cribs and dressers were not built with the same safety procedures we have in place today. It is our responsibility, as we are refurbishing these pieces to use or sell to make sure that we change locks and alter pieces to ensure the safety of our children and pets, too! So, as you are working on your next DIY project, take a step back and make sure that what you are producing is not only beautiful but safe and secure for all to enjoy. Have a terrific Tuesday, everyone! Susan

Colonial Country Cupboard

Last summer, Coach and I took a long weekend trip to Bethel, Maine for a bit of golf and R & R.

Two Beers Please Bethel Maine PMWell, I should say R & S (Rest and Shopping) as we did quite a bit of antique shopping up and down the Maine coast. My heart skipped a beat when we turned a corner while wandering through the many aisles of Pa’s Tradin’ Post in Oxford, Maine.

Pa's Tradin Company Signand discovered this gorgeous old country cupboard!

Pa's Tradin Company MaineAnd, I was even more excited that it actually fit in our CRV, even with all the luggage, coolers and golf clubs! (Truth be told, I would have tossed those clubs to get this piece in my car…)

Country Cupboard in CRVIt was newer, but completely hand-crafted using old lumber and pieces from antique windows and dressers. It needed quite a bit of work, so I took my time refurbishing it, in between quicker, easier projects. Well, I am happy to say that it is finally finished, and styled, and sitting proudly next to the fireplace in my family room. So, what once looked like that, now looks like this!

Painted Country CupboardThe exterior body was painted with Annie Sloan French Linen Chalk Paint. I then sanded the edges and raised detail to give it the distressed look we like.

Country Cupboard Sanded Corner DetailThe shelves and doors I painted (after replacing and re-glazing many of the old panes-these were actually old windows that were repurposed-I LOVE that!)

Reglazing and painting window panesin Glidden Antique Beige “chalk-like” paint that I mixed myself. Here’s the recipe from “In My Own Style”

In My Own Style Chalk Paint RecipeThe back planked wall of the cupboard was painted with a custom color that I created-kind of a soft, denim blue.

Country Cupboard Custom PaintI had originally painted it with Miss Mustard Seed Eulalie’s Sky Milk Paint (you can read about that fiasco here),

Miss Mustard Seed Milk Paint Eulalie's Skybut once I decided where it was going to be in our home, that needed changing. Oftentimes, I paint a piece with the colors I would like, only to realize that it just doesn’t work in the intended space. That’s the beauty of paint-one quick coat and you have a whole new look! I wanted it to be a close match, but a lighter blue tone to the drapes in the room, since it would be in proximity to the window where they hang. Finally, I waxed the entire piece with Fidde’s Supreme Wax to give it a nice, warm, glowing finish. The hardware remained the same. Chipped, rusted black? Perfect!

Fiddes and Son Supreme WaxThis is the before, dingy white, cracked windows, unpainted interior.

Country Cupboard Base Interior

Country Cupboard Base BeforeThis is now. A pretty painted piece that shows off many of the pieces that Coach and I have collected over the years.

Country Cupboard Design HomeThe showcased pieces are primarily from Colonial Williamsburg in Virginia, The custom color blue I chose for the background enhances the blues in the pottery and plates and brightens the brass trivets and pieces.

Country Cupboard Styled
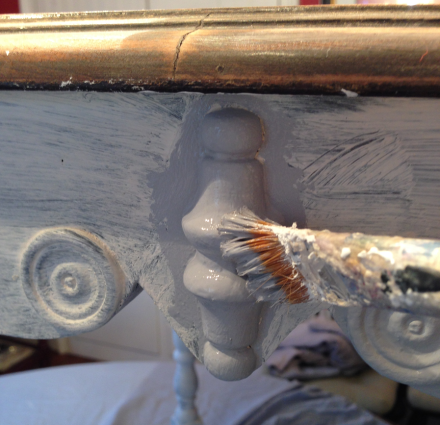
Colonial Williamsburg is an historic site that Coach and I love and have visited many, many times. This is the William and Mary crest trivet-one of our very first mementos we purchased over thirty years ago.

William and Mary TrivetThe re-painted and re-loved cupboard now reminds me of the shop front windows and taverns on the Duke of Gloucester Street, filled with old glass and pottery pieces, brass trivets, plates and mugs.

Williamsburg Virgina JugNow, when I step back to admire my transformed country cupboard,

Country Cupboard Doors Opened Styled

I am transported back in time to our many wonderful trips to Williamsburg. And isn’t that why we save our souvenirs and mementos-to remind us of happy times and fun trips? I hope you all have mementos you keep to tell your story, and a beautiful cupboard in which to display them. Have a “think spring” Tuesday, everyone! Susan 

Facebook Follies

Yesterday I posted this picture from KMPH FOX 26 on Facebook. It must have resonated with a few folks, because as of this morning, it already has over 23,000 Facebook views and shares! The reason it is so popular? People are frustrated with the way Facebook keeps changing their parameters of how we can post and view our own pages. My favorite is #6: “Let me see every post from pages I like. If they post too much, I’ll hide them myself.” Too often, I find myself searching through my friends’ profiles because Facebook has determined their posts are something I don’t want to see-but if I didn’t want to see them, I wouldn’t have them in my friends’ list, correct? WKMP Fox 26 A few days ago I was directed to a web video about Facebook by my son, who happens to work in marketing. His company had thought that the information in the video was important enough to share with his marketing team, and he deemed it important enough to share with me. We all know the frustrations of Facebook: they keep changing the game, especially for the small business owner who is just trying to gain exposure through social media. Previously, if I posted something on my Country Design Home timeline, it would be shared with my followers-all my followers. But then Facebook started selling “BOOST YOUR POST” advertising, where you could garner “likes” with a small investment ($5 and up), and they stopped sharing my posts for free. My paid posts would be shared with my friends, and their friends, and their friends-a pyramid scheme of sorts-the more you spent, the more exposure you received. My unpaid post would sit there and perhaps be shared with a mere fraction of my total followers, unless they shared it. So, I tried the Boost Your Post a couple of times at $5 each. The first time was fairly successful with a couple of hundred new “likes”, the second time I saw no appreciable difference in my likes. BUT, what I did notice was that the paid “likes” that I received through Facebook advertising were not from followers who liked country design, did not comment or engage in my page at all, and many had blank profile pages. This is a recent typical “new like”: Vu Tuan (the profile states this person is male)-is there any indication here that she/he would be the least bit interested in country design? I don’t know for sure because I cannot translate Vietnamese, but I am thinking not, since most of her/his likes are American TV shows and companies.

Facebook Vu Tuan

So, where on earth are these likes being generated from? Is Facebook committing advertising fraud or not? This is a You Tube video from Derek Muller of Veritasium, who normally writes about scientific research and phenomena, but he published this video about Facebook advertising fraud because he believed it is an important topic. And, with over 1.5 million views, I would guess that he is not alone. Veritasium Video Pic This video (along with several other sources I have read) explains that most of the paid “likes” are being generated from “click farms” in developing countries like India, Indonesia and Bangladesh. The circled bubbles in this graph are the “likes”  from developing countries from a paid Facebook advertising campaign he had created specifically to test his theory. Veristasium Facebook Engagement These workers are paid $1 per thousand clicks to essentially sit all day and click away at anything and everything, whether it is directly related to the paid Facebook ad page or not. In essence, they are not “liking” you or your page, they are merely clicking away to make a dollar. Now, according to Veritasium, it is against Facebook rules to purchase likes through web companies that provide clicks per dollars, and your account can be suspended for that. But, the video goes on to claim that despite that rule, Facebook itself engages click farms to sell their advertising packages. In another article on Search Engine Watch, Facebook Ad Fraud: How Can Advertisers Combat Paid Likes? the author, Jennifer Slegg goes on to explain some strategies and steps to take to avoid having your advertising dollars being wasted on spam Facebook accounts. And, on Wikimotive: Why The Facebook Fraud Video Is Not Completely Accurate, author Erin Ryan refutes some of Veritasium’s key points, while citing her own advertising clicks to dollars spent, which is, on average, much more successful than those from the video. She states: “I’m not stating that the results that Veritasium have calculated are false, but the results may have been skewed, as the video doesn’t fully explain the targeting process.” Which is really the key issue here. We are all attempting to engage followers who are interested in what we are doing, selling, saying or creating so we must TARGET that audience specifically. So, what’s a low-budget, low-follower Facebook user to do if you’re not interested or able to purchase their ad boosts? Well, you can abandon Facebook altogether, there are plenty of other social media vehicles that are useful for spreading your information. But, like it or not, Facebook is still a powerful social media tool, and many bloggers and websites use Facebook “like” numbers as a gauge of how popular you really are. (However, I am typically suspicious of Facebook profiles that have 100,000+ “likes” if their other social media does not support that inflated number.) So-a few options. You can grow your followers organically, meaning that you search out other pages similar to yours, like them, follow them, comment on their pages and hopefully gain a follower and a new Facebook friend. This takes time, patience and the ability to sift through hundreds of pages, but once you have established that base, then more of your posts will be seen by more people, and you will gain more followers who will then in turn, see more of your posts. Or, you can join one of the many, many contests and giveaways that circumvent the paid Facebook advertising altogether. BUT, you are still paying for advertising, only now its going to the originators of the contest-the “hosts”. You pay them, sometimes upwards of $50, for a chance to participate in a “click-fest” hosted through a third-party contest portal like Rafflecopter. In order to win the prize, readers must click and like the hosts’ Facebook, Twitter, Instagram, Pinterest, etc… pages. There can be as many as 40-50 clicks that are required in order to enter the contest, which can be tedious, but hey, its a chance to win some quick cash or gift cards! Over the holidays,I participated in a Facebook New Year’s Giveaway, where the first prize was $500. I paid my $40 to the hosts, and watched my “likes” grow by approximately 1500, which was great! Some dropped off and “unliked” me once the contest was over : ( but my new followers are primarily from the US, engaged in what I am posting and continue to follow my page on Facebook. But, in the end, I felt that I was merely buying “likes” to boost my Facebook numbers, and for me, that is not the answer to gaining true fans of my blog, which is what I am really trying to promote. So, for now, I am going to keep my advertising dollars and focus on my true purpose: blogging and DIY’ing-and hope that my readers will “like” me because (as Sally Fields once declared), you really “like” me!!! If you have any thoughts, ideas or suggestions on this interesting and timely topic, let me know! I would love to hear how all of you promote your blogs and gain followers. In the meantime, have a spring-is-almost-here Sunday, everyone! Susan