Mason Jar 3-Berry Cobblers

So, you would think that after that whole Cupcake Tower of Terror disaster that I would be staying away from baking for weddings, right? Well, that is the case where cakes are concerned-no more falling frosting fiascos! But, for the same wedding, I created some yummy individual three berry cobblers in little personalized mason jars as favors for the guests to enjoy. Those did NOT fail, or fall for that matter!

Three Berry Cobblers in Mason Jars Wedding FavorsThe recipe was a tried-and-true favorite from a co-worker (thanks, Krista!) that was adapted for the mini jelly jars, and two batches was enough for 6 dozen jars. Here is the how-I-did-it:

1. Prepare the jars. These are 1/2 pint, wide-mouth Kerr glass jelly jars I purchased from a local Ace Hardware store, ordering them online and picking them up at the store. Despite the fact that they were factory sealed in plastic, I still ran them through the dishwasher to ensure cleanliness.

2. Prepare the crumb topping/crust. This recipe is enough for one 13 x 9 pan of cobbler, or 3 dozen mini jars. So double it for the 6 dozen:

 TOPPING/CRUST

2 Cups All-Purpose Flour

2 Cups Rolled Oats (I used instant and it didn’t seem to matter at all)

1  1/2 Cups Packed Brown Sugar

1 Tsp Gground Cinnamon

1/2 Tsp Ground Nutmeg

1  1/2 Cups Cold Butter

Combine all dry ingredients in large bowl, then cut in butter until mixture is crumbly. Set aside.

3. Prepare the berry filling, literally just mixing the berries and sugar in a large bowl and set aside.

FRESH FRUIT FILLING

1  1/2 Cups Fresh Blueberries

1  1/2 Cups Fresh Blackberries

1  1/2 Cups Raspberries

4 TBLSP Granulated Sugar

I used fresh blueberries, blackberries and raspberries, but you can use any berry combination you would enjoy. This recipe was enough for three dozen jars, so I doubled it to make the 6 dozen. One thing I noted: the large whole raw berries (like the raspberries) take up more space, but once cooked, they collapsed and left extra room in the jar so it didn’t appear as full. Next time (and for these there will be a next time : )  I will slightly chop the larger berries so more fits into each jar prior to baking.

4. Preheat oven to 350 degrees. Place as many jars that will fit onto a cookie sheet and spray the insides with non-stick cooking spray.

Cobbler Mason Jars Non-Stick Spray
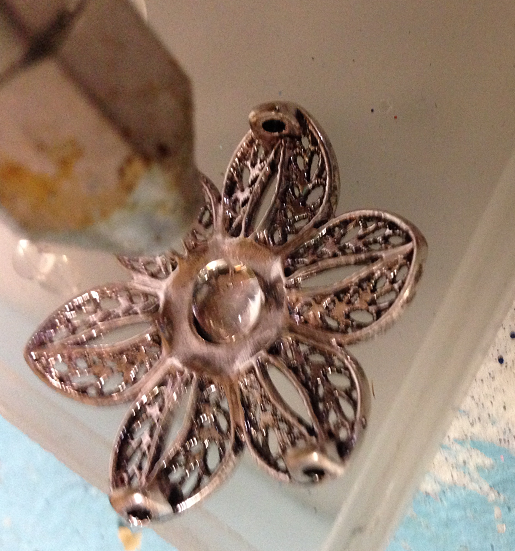
Take 1 TBLSP of the crumble mixture and lightly press down into the bottom of each jar. I used this wooden thing that was in my pastry drawer. Don’t know where it came from, don’t know what it is, but it worked perfectly! Continue until all of the jars have the base crust.

Cobbler Mason Jars Tamping Down Crust5. Fill each just with the berry mixture, until it is about 1/4 inch from the top. Leave room for the crumble topping!

Cobbler Mason Jars Filled with Fruit6. Add 1 TBLSP crumble topping to each jar, pat lightly to secure. You can adjust the crumb topping/crust ratio as you like, but remember to adjust the recipe as well!

Cobbler Mason Jars with Crumb Topping7. Bake for 20-30 minutes until the filling is bubbly and the topping is lightly browned.

Mason Jar Cobblers Baked8. Remove from oven and cool. You can serve these warm from the oven with a bit of vanilla ice cream or whipped cream, or save them for later. I kept them lightly wrapped, but did not seal the tops on until it was time to assemble them as favors. Which I did with the help of my dear friend-thanks Alice!

9. The personalized labels were purchased on Etsy from Snappy’s Boutique. The owner was great to work with and the labels were beautifully printed on vinyl round stickers, one for the top of each jar.

Vinyl Round Stickers for Mason Jars 
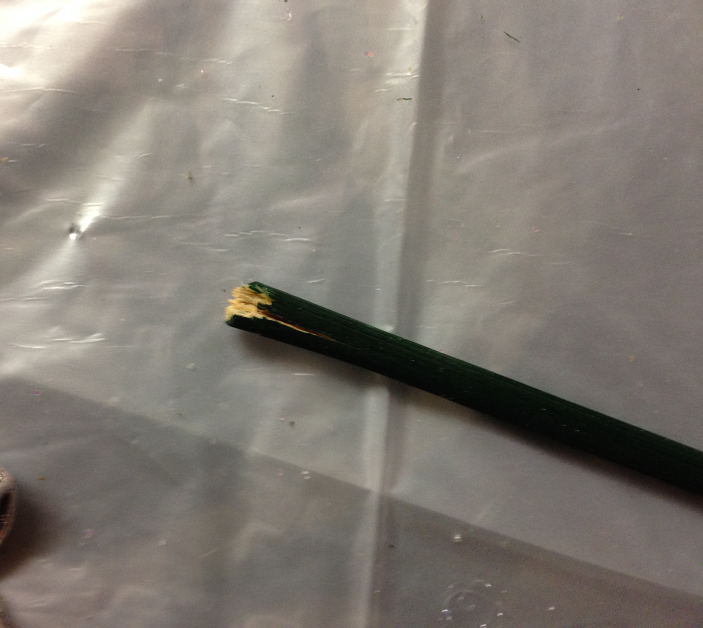
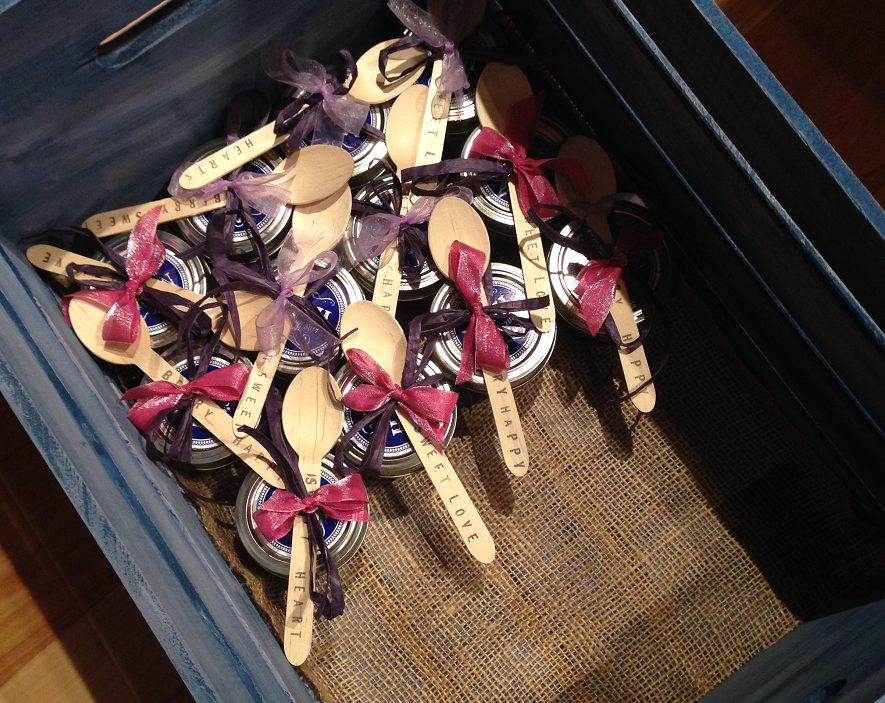
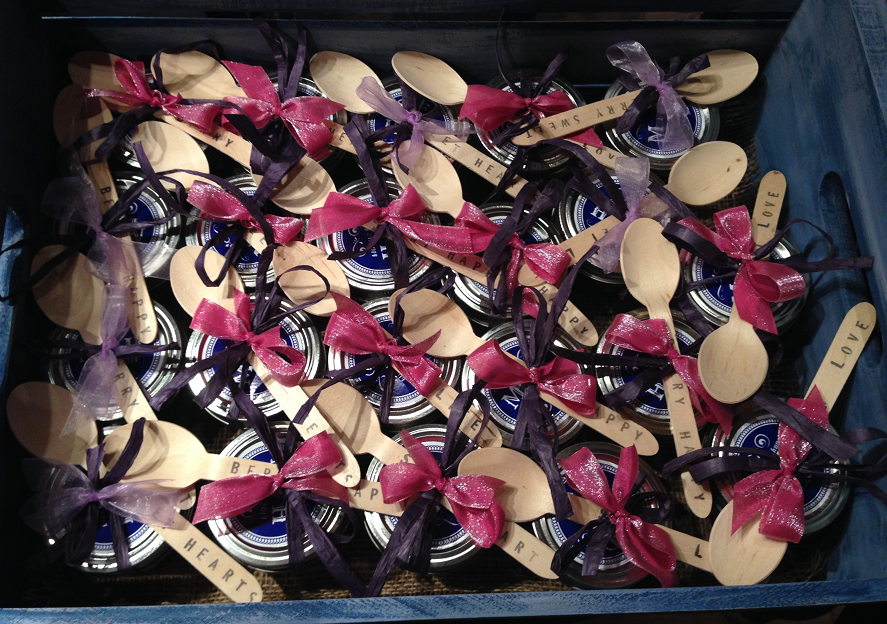
10. The bamboo wooden spoons I stamped with cute little sayings like “berry happy” and “sweet love”. Of course, you could paint them or decorate them or simply leave them blank.

Mason Jar Cobbler Wood Spoon11. The spoons were attached to the jars with purple raffia ribbon-the wedding color- (and a little scotch tape to keep them from sliding off!)

Mason Jar Cobblers with Bows
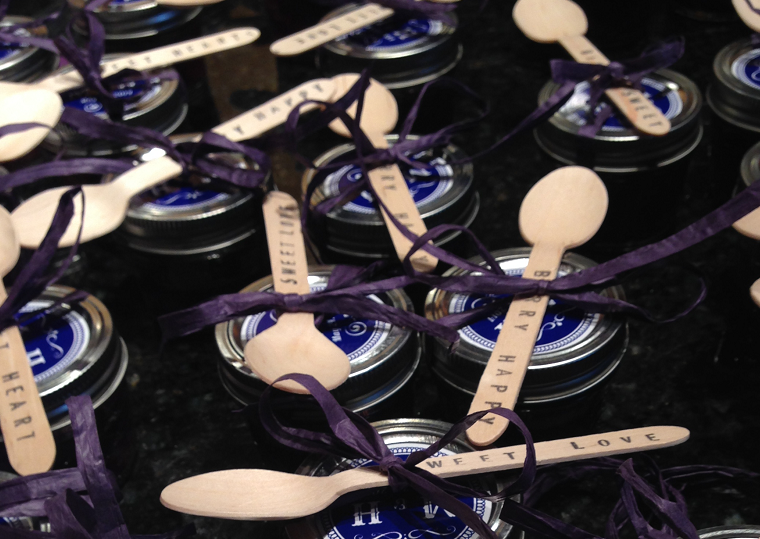
and then we added a second bow for pretty : ) This was the best tool-a fork stuck in a ribbon reel taped to the counter-to tie the tiny bows with the chiffon-like material. Ah, necessity is indeed the mother of invention. Shark Tank, here we come!

Cobbler Bow Tie Fork12. I picked up the unfinished crate at Joanns (with a coupon, of course : ).

Unfinished wood crate from JoannsIn order to make it appear somewhat rustic, I “stained” it with paint thinned with water,

Cobbler Crate Stained with Blue
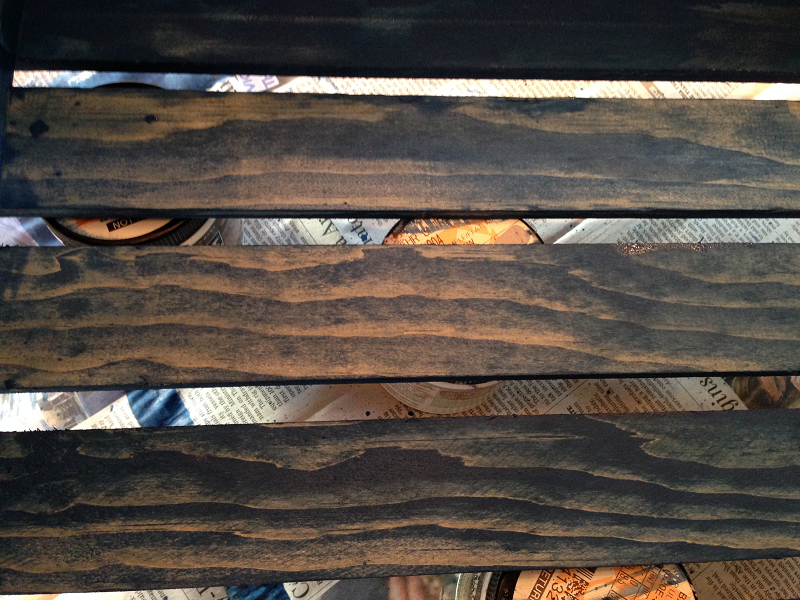
then added another coat of blueish-purplish-white paint that I dry-brushed to give it a more rustic look.

Dry brushed crate
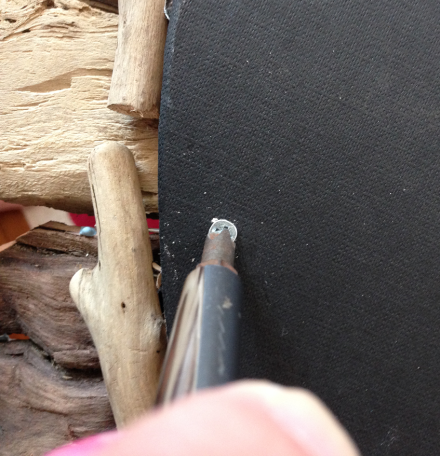
13. The little chalkboard was also from Joanns, that I backed with some fringed burlap, then added the chalk graphic.

unfinished crate from Joanns 
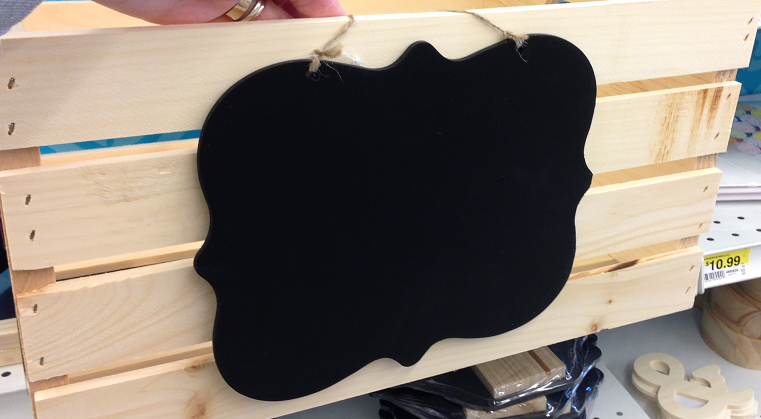
I used my easy chalkboard transfer method for the Three Berry Cobbler sign. Click the link for the DIY.

Three Berry Cobbler Graphic

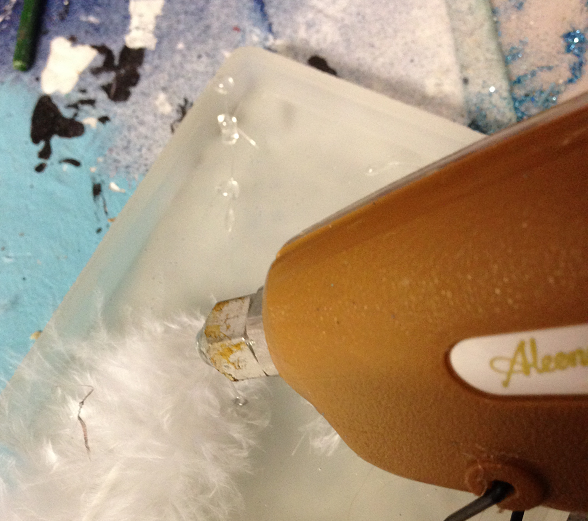
14. To safely stack the jars in the crate,

3 Berry Mason Jar CobblersI added separators made from burlap-covered cardboard panels.

Cobbler Crate Layer Separator
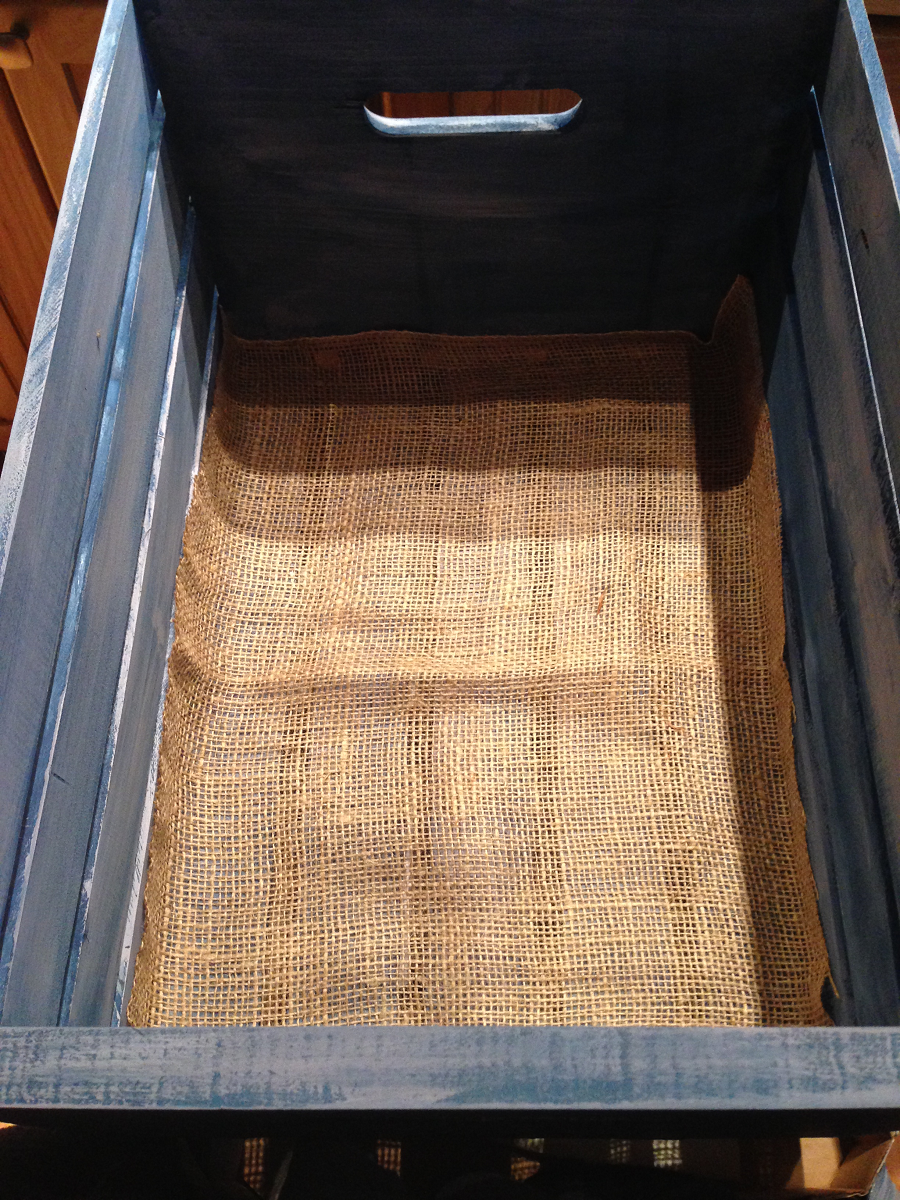
Done! Now who doesn’t love a rustic crate filled with pretty jars of yummy three-berry cobbler that is easily and safely transportable?!? Well, this girl does : )

Mason Jar Berry Cobblers in CrateAnd hopefully the guests did as well… Have a berry-licious Thursday everyone!! Susan

Creative Kitchen Makeover-DIY Series-The Prep

Recently, I was asked to sample and review a new paint primer called Kilz HIDE-ALL,

Kilz HIDE-ALL

which happens to be perfect timing for the kitchen makeover I have just begun! My mom, who lives in a townhome (that was once owned by my sister…long story) has been asking for a kitchen makeover for quite some time now. Although the budget does not allow for a full gut-job and remodel, we are using paints, glazes and some elbow grease to create that “French Country” look that she adores. The kitchen is circa 1980’s construction-grade with very dark oak cabinet doors and drawers and veneered plywood boxes. In the center of each door is a white vinyl panel that was glued into place, and the backsplash is alternating 4″ square ceramic tiles in black and white stripes that mirrors the white door panels.

Mom's Kitchen View 1The appliances are fairly new and white, so they are staying, and the floor is a sheet linoleum in a vintage black and white tile pattern, so that is most likely staying put as well. So, everyone knows that the key to a successful painting job is the prep work, which I personally despise, but it must be done! In this case, those white vinyl panels and the adhesive used to attach them had to be removed. I tried many, many de-glossing, de-gooing and de-sticking type products before I could get the edges ready for priming and painting.

Kitchen Cabinets with Vinyl Panels A messy job, but absolutely essential to ensure a good outcome!

Cabinet De-Greasing Fromula 409Once that was accomplished, it was time to try the new Kilz HIDE-ALL product.

Kilz HIDE-ALL PrimerThis is from their website:  “KILZ® HIDE-ALL™, a new primer sealer exclusively available at Lowe’s stores across the country. For home interior painting projects of all types—including covering dark colored walls, masking minor surface stains, smoothing out porous surfaces and more—the undercoat offers consumers excellent hide at an affordable price. KILZ HIDE-ALL helps prepare surfaces for painting by evening out porosity and creating a consistent canvas for adding the desired topcoat. With a multi-surface formula, KILZ HIDE-ALL can be used on drywall, cured plaster, woodwork, masonry, concrete block, brick and previously painted areas. The high-hiding, fast drying, latex primer sealer helps minimize issues caused by dark colors and minor surface stains to effectively transform bathrooms, kitchens, bedrooms and more.”

Did the primer live up to the hype? You betcha!! For only $26 and some change for a 2-gallon bucket, what I got was little to no prep work and no sanding-yay! Just a quick cleaning to remove any accumulated surface grease, dirt and dust-and that pesky glue.

Kilz HIDE-ALL PrimerThe odorless primer is a creamy white color with a slightly grayish hue. It has the consistency of a watered-down school glue. Very smooth, very little dripping, brushes on easily and cleanly without leaving brush stroke marks and creates a light, bright prepped surface. And a little goes a very long way! Since these cabinet doors have had a lot of wear, the surface finish in some areas was worn away, while other areas were still shiny. The primer covered all of that evenly so that you cannot see the difference. The directions indicate that the primed surface can be re-painted after one hour with oil or latex paint, but I didn’t attempt that, as I am doing this makeover in stages, which I will be sharing as I complete each one. Brushes easily cleaned up with soap and water.  Here is a before cabinet door

Kilz HIDE-ALL Cabinet Door Before

(note the taped #? Prior to removing the doors and drawers to paint them, remember to number them and make a map so you know where they go once you are finished):

Kitchen Cabinet MapHere is the primed cabinet door:

Kilz HIDE-ALL Primed DoorA perfectly smooth, matte surface awaiting the paint and glaze. But that will be in the next installment! I hope you are having a prime Tuesday, everyone!  Susan

Disclaimer: Although the product in this blog post was provided by the makers of Kilz HIDE-ALL, the opinions expressed are strictly my own and have not been edited or altered in any way. Susan

Cupcake Tower of Terror

These past few weeks have been so incredibly busy with 2 destination weddings and a law school graduation (with the accompanying parties : ) thrown in for good measure. All of which has left precious little time for blogging, never mind DIY’ing! For a spectacular wedding in the clouds this past weekend,

Wedding on Pinnacle Mountain

I had volunteered to make some desserts, specifically cupcakes and mini fruit cobblers in mason jars.

Mini Cobblers in Mason Jars

(I’ll share the successful cobbler story later. Today’s blog is about the cupcakes. And the tower.) Remember those Life-Changing Cupcakes I made last year for a wedding shower?

Chocolate Caramel Sea Salt Cupcakes

Well, I decided to use that recipe again, since those were such a big hit, but we had decided on two flavors for the wedding. The trouble really started with the lemon cupcakes. As I was baking the batches, one would come out OK, the next batch would collapse as soon as I took them out of the oven. As someone who has been baking since I was a kid, and having made my share of wedding cakes as well, I was baffled by this. But, I just kept baking until I had the necessary 6 dozen for the wedding guests. Those fallen lemon cupcakes were a sign…

Fallen Lemon Cupcakes

Now, everyone knows that the proper way to serve cupcakes at a wedding is to buy build a cupcake tower so that it has the appearance of a wedding cake, right? So, I did a little Pinterest research and came up with the best plans (or so I thought) for creating a strong and sturdy tower that would show off the decorated cupcakes. Here is the How-I-Did-It (but don’t you do this…)

5 stacked shelves were created, beginning with a 16 inch base and cutting them smaller in 2″ increments to the top. I purchased a package of cake rounds (these are moisture resistant cardboard that you can purchase at your local arts and crafts supply store).

Cupcake Boards and Foam Core Stacked

For added strength and support, I sandwiched a layer of foam core board that I cut to the same size for each shelf. For the supports in between, I took some old, empty, clean tin cans (OK, MISTAKE #1, they should have remained full to add extra weight to the tower), wrapped them in white craft foam cut to fit and hot glued into place

Cupcake Tower Wrapping Tin Can

(it looked like fondant, so I was quite happy with that).

Cupcake Cans Covered in Foam

But then I needed some sort of trim, so I used that foam faux wainscoting from my country cupboard makeover, cutting it along the ridges

Foam Wainscotting for Trim

and then hot gluing it into place for a nice clean edge. For a final trim, I glued purple satin ribbon around the edges.

Cupcake Tower Glueing Ribbon Trim

Once I had all the top layers ready, I stacked and hot glued as I built my tower, with the covered cans centered (MISTAKE #2-the top one was not quite centered, but once they were hot glued into place, there was no going back…) For an extra decorative touch, I cut some paper doilies

Cupcake Tower Lace Doilies

to fit around the edges and glued into place to create a lacy scalloped look.

Cupcake Tower Glueing Doilies

For the base, I used a 16″ scalloped plastic cake round on feet that is typically used for just this purpose. But, it was pretty plain, so I added the lacy doilies to that, but then also placed a scalloped, foiled cake round in the center. MISTAKE #3. Finally, I glued the entire tower to that foiled round (did I say MISTAKE #3 ?!?)

Cupcake Tower Completed

For the topper, I baked one six inch round, decorated it and then added a beautiful bouquet in shades of purple that was created by our friends at Parker Florist in Wakefield.

Parker Florist Cupcake Topper Bouquet

OK, everything was transported safely to the venue on the top of a mountain, the cupcakes tucked into these awesome boxes I picked up at Michaels (they have inserts with holes big enough to fit my fat fingers around the cakes to remove them once it was time to fill the tower.) Aren’t they so pretty!?

Cupcakes in Carrying Boxes from Michaels

Once the ceremony was performed and the delicious wedding dinner was finished, it was time to assemble the tower. So, with the help of my BFF’s,  we walked down the hill from the main house to the tent where the reception was taking place, me carrying the tower, them carrying the boxes of cupcakes (did I mention that it was raining as well?)

Wedding Venue Tent

The tower was settled down onto the designated table, which, because we were outdoors on the soggy lawn, had a bit of a tilt to it. (MISTAKE #4. NEVER ATTEMPT TO STACK A CUPCAKE TOWER ON A TILTED TABLE). I placed the floral round on the top (MISTAKE #5. DO NOT REST THE CAKE TOP ON THE TOP OF THE TOWER-IT MUST BE SECURED). As we were stacking the cupcakes on the tower, it started to wobble forward-remember, it was on a tilted table. So I decided to start stacking from the back to balance it. Reaching around behind to add more cupcakes, I accidentally hit the tower, which instantly fell forward, spilling cupcakes all over the table and ground.

Fallen Cupcakes in Grassy Box

And my shoes.

Cupcake Tower Frosting on Shoe

In an instant we went from Cupcake Wars to Cupcake Disaster. As the tower was plummeting to its grassy grave,  my dear friend Alice caught the flower topper as it was flying by, resulting in a splotch of bright purple frosting on her brand new jacket!! (Alice, please send me the dry cleaning bill : ) At one point, I attempted to put the tower back together, but if you recall MISTAKE #3, the piece that was glued to the foiled round based gave way, so there was no way to re-attach it to the base. Apparently, hot glue and foil don’t adhere well. Lesson learned.

Cupcake Holder After the Break

As we were scurrying around, attempting to save the remaining cupcakes, I was convulsed in laughter, thinking that this could have been an episode of I Love Lucy.  Turning around to see the table of guests directly behind me with their mouths agape, watching the spectacle unfolding before them,  I said “nobody saw that, right!?”, which resulted in more laughter from everyone involved. Now, if someone had been recording this, we most definitely would have won top prize on America’s Funniest Videos, which I then could have used to purchase a fabulous wooden cupcake tower like this one of these beauties on Etsy.  But, alas, I didn’t even have my camera with me until it was over! So, the remaining unharmed cupcakes were set out on the table for the guests to enjoy,

Cupcakes After the Fall

which they reportedly did. The bride graciously laughed it away and the party danced on into the night. My heartfelt congratulations to the bride and groom-hopefully this is the first and last disaster for many years to come. So, you ask, what’s my take-away from all of this? NEVER AGAIN. Don’t ask, I won’t bake them. I’m sticking to wood and paint, from this day forward. Hope you have a memorable Memorial Day, everyone! Susan

Mother’s Day Forever Bouquet

Several Mother’s Days ago, I received a small wooden painted sign from my children. It reads:

Forever My Mother SignThat day, it brought me to tears, and it sits on my windowsill, where it catches my eye and is a never-ending reminder of how blessed I am to have the most amazing children whom I love dearly. Every year it is increasingly difficult to come up with unique gift ideas for my mom; after all, how many HomeGoods gift cards can one woman use?! (Well, in my case, I can never have enough of those, but I supposed that’s just me : ). Inspired by a gorgeous wedding bouquet that was created by a co-worker using vintage brooches and pins, I decided to make a “Forever Bouquet”. This floral forever bouquet uses only silk flowers, crystal pins and beads and any other embellishments you wish to add. Nothing to water and something that will last forever.

Mothers Day Forever Bouquet Closeup

Here is the how-I-did-it: The supplies:

1. A glass vase or vessel. It can be transparent or not. You can actually use any style vase you would like, even a martini glass or mason jar! The options are only limited by your imagination!

2. Any crystal beads, barrettes, pins and buttons you wish to use to create your bouquet. It can be multi-colored or simple.

Mother's Day Bouquet Jewels3. Florists foam, green florists tape plus any embellishments: rhinestones, lace doily, beads and a hot glue gun.

Mother's Day Bouquet Supplies5. Faux flowers: again, any type. The base of my bouquet is one large white sparkly hydrangea, which I encircled  with roses and feathers and berries- all faux (faux sounds so much better than fake, am I right?!) I also used white, pink and green roses.

Simply take the vase and place the foam in the base and press down firmly.

Mothers Day Bouquet Vase with FLorist FoamI added a touch of bling by cutting a rope of rhinestones

Mothers Day Bouquet Rhinetone Cutterand hot-gluing it to the middle of the vase.

Mothers Day  Bouquet With Rhinestone Trim

To assemble the jewelry flowers, remove any backing (such as the barrette or the pin). Add a spot of hot glue to the middle of the underside of the flower.

Mother's Day Bouquet Glueing Stem to BasePress cut stem into glue and hold until secured. When I cut the wood stems, I actually make the end rather jagged to give it better gripping power.

Floral Stem CutWrap entire stem with florists tape. Repeat with as many sparkly blossoms you would like to use in your bouquet.

Mothers Day Bouquet Wrapping StemsNow is the fun part! Start building your bouquet, beginning with the lace doily at the bottom of the vase.

Mothers Day Bouquet Vintage Doily DetailThis creates a base, much like a wedding nosegay. Next up was the one large sparkly hydrangea, to which I added a drop of glue to the base before I stuck it into the foam.

Mothers Day Forever BouquetAdded the feathers around the base, gluing each at the base and pressing them into place.

Mothers Day Bouquet Feather DetailAfter that, I arranged the flowers. I am not a flower-arranging expert, so I am not going to instruct you in the proper techniques, only to say that you should make a “dome” effect of the bouquet. I wanted it to have a tightly-packed look, but you could certainly do a more woodsy, organic look as well.

Mothers Day Forever Bouquet Closeup

I used primarily white flowers to really show off the jeweled blooms, but then added one pink rose in the center for a spot of color. Once my shape was complete and flower-filled, I started adding the jewelry flowers, one at a time, until the entire piece was completed. The final touches were some green berries and eucalyptus stems. There you have it!

Mother's Day Forever Bouquet Vintage Vignette

A forever sign of love for your forever friend or mom to cherish. And, since I won’t be blogging on Sunday, I will just say Happy Mother’s Day to all of you!! And to my mom? Well, it goes without saying, Forever My Mother, For Always My Friend. XOXOX Susan


Michaels Crafts A Brand New Look

I’ve gotta say, I was more than a bit excited when I recently received an invite to attend a “Sneak Peek Blogger Event” at the newly remodeled Michaels Craft Store in Saugus, Mass.

Michaels Crafts Get Crafty Boston Sign

After all, I do spend quite a bit of time (and $$$!) there gathering materials for my very many, many DIY projects! And, I love to blog about them. So, I was delighted to have an opportunity to meet other area bloggers, take part in a craft session and have a tour of the fresh new look of my local Michaels store! Along with 27 other Boston area stores, the Saugus Michaels is unveiling a brighter, fresher style that is less cluttered, much more organized and shopper friendly.

Michaels Crafts Flower PlantersUpon our arrival, we were greeted and escorted into the Michaels Craft Room (which is, FYI, available to the public for group craft projects-good to know : ) After having a yummy bite and an Italian Soda (many of us had never heard of it, but so delish!), we were instructed in our craft projects, then left to our own devices and Exacto knives to create the perfect Boston Skyline from scrapbook paper and canvas.

Michaels Crafts Blogger IntroductionOnce our projects were completed, we were off on the store tour, led by Brett, the district manager along with several store employees, all of whom are now sporting bright red shirts so they are easy to spot when you need a crafty, helping hand.

Michaels Crafts DM TourHaving shopped here numerous times in the past, the first change I noticed was the wall banner circling the entire store, high enough to spot from any vantage point and identifying key shopping areas. Other new features include signage that not only identifies the area, but informs the shopper what is available in each aisle.

Michaels Crafts End Cap SignA newly expanded section, by customer request, is Home Decor, where you will find aisles stocked with latest trends in home fashions and accessories.

Sea Shell Statues Michaels CraftsLoving these ruffled pillows and ottomans!

Michaels Home Decor PillowsOne of the most noticeable changes throughout the store were the information boards associated with the products. I dabble in cake decorating from time to time, and I know my way around a pastry bag. BUT, what would be a simple cake decorating project for me could be an overwhelming task to an aspiring Cake Boss wanna be. So, Michaels solved this dilemma by not only stocking the shelves with the necessary tools, but also by adding these information and instruction boards (kind of like Pinterest in real life : )

Michaels Crafts Cake Decorating BoardThe chalk and chalkboard section, which is still so trending on Pinterest right now, has it’s own “Pin” board, where customers can get inspiration, then grab the necessary supplies to create the project of their choice.

Michaels Chalk Craft DisplayWhile on the tour, this new Tint It Spray caught my eye, (of course, with all the bright, pretty colors : ) with craft ideas and a color sample, plus supplies-brilliant!

Michaels Crafts Tint It Spray PMAs we turned each corner, I continued to be impressed by the overall look of the store with its colorful displays and variety of items for any imaginable craft project. AND, so excited to see that they are finally carrying my latest DIY obsession-Americana Chalky Paint by DecoArt!! I have just started using this product, and I can’t wait to share my first project with all of you. But for now, you will have to take my word for it that these paints and finishes are like nothing you may have worked with in the past.

Americana Chalky Finish PaintSo, now that I’ve given you the condensed tour, its your turn to head to your nearest Michaels to see what the blogging fuss is about! On Sunday, May 4th, there will be a grand re-opening of the Boston-area Michaels Stores featuring a 9:45 am ribbon-cutting ceremony, and over $1000 in gift card giveaways!! So, get crafty Boston, and…

Michaels Crafts Creative JourneyI hope you have a creative and inspired Sunday, everyone. And if you do happen to visit your local Michaels, tell them Sue from Country Design Home sent you! Susan 

Country Pine Commode Transformed

Another day, another DIY project done! This is an old commode Coach and I picked up at auction last fall for $25.

Country Pine Commode Before

Unfortunately, it was buried in the back of the barn until our most recent barn sale (which was quite a success, I must say). My mom had been searching for a nice storage cupboard for her entryway, and I knew this would be the perfect piece once I rescued it from under the piles of books and bric-a-brac!

Stacks of books in the barn

All it took was a bit of cleaning, a few coats of Annie Sloane Chalk Paint in Old White, a bit of sanding around the edges and a new product (more about this later), a crème wax by Americana Paints that you literally paint on with a brush and then buff off. It has no odor, has the consistency of a clear paint, leaves a nice, soft sheen and a very smooth protective finish. Our original intent was to paint the hardware as well, but once the piece was sanded and finished, we liked the dark contrast against the light wood.

Country Pine Commode Painted

But, the best part about this makeover is the staging that occurred once the commode was finished and moved into place. Because my mom is an artist, she sees everything a bit differently than most folks. The surfaces in her home become a canvas that she transforms from simple and unadorned to simply beautiful,  with a little help from her favorite HomeGoods store(s).

Country Pine Commode Staged

Each of these decorative items were purchased separately, but together they become a lovely vignette in shades of blues and silvers, with a few natural elements from the sea. Flanked by two antique ladder back chairs with gunny sack pillows, some of my mom’s paintings and the pediment mirror that is more than 25 years old, the vintage country pine commode has a new life greeting visitors in my mom’s entryway.

Painted Pine Country CommodeAnd that is what the three “R”‘s are all about- reclaim, recycle, relove. Have a lovely weekend everyone, the sun is about to shine!! Susan

Beautiful Bonita Springs

Luckily for me, I have friends and relatives on both (warm) coasts of the US. A few weeks ago, I traveled to California

View of San Diego Harbor from Coronado

for a bit of R & R. So, it was only fair that last week I hopped on a flight to Florida, returning just in time to host Easter festivities on Sunday! While the trip to Cali was merely for fun, my Florida jaunt had a more lofty purpose. My wonderful friend Jan-a two time cancer survivor-is quite involved with an organization called Relay for Life.

Relay for Life

If you have not heard of it, you can click here for more information and to get involved.

Relay for Life

The primary fundraising campaign for the American Cancer Society, Relay for Life events are staged throughout the country to raise funds for research and cancer awareness and hopefully, someday, a cure. Which brings me to last week, when I traveled to Florida to lend Jan a hand while she held a RFL fundraiser at her winter home in Bonita Springs.

IMG_6643The Relay for Life fundraiser event was held indoors, because (unfortunately, we had threats of rain. But it didn’t dampen the spirits of the people who came to participate in such a worthwhile event. The Luminaria bags are purchased in honor of, or in memory of loved ones who have bravely battled cancer.

IMG_6681On the evening of the event, the bags are filled with sand and tealights to illuminate the HOPE

Relay for Life HOPEin all of us that someday will lead to a CURE.

IMG_6702Of course, while I was there, we did do some sightseeing and shopping (have you heard of Charming Charlie and Ross Dress for Less?!? OMG!!!) and some power walking, (have you ever visited someone and decided to go for a walk in their neighborhood, only to discover after an hour, that you are lost and have to rely on Siri to guide you back home? No? So that’s just me…) admiring the scenery while enjoying some much-needed sunshine and warm tropical breezes.

IMG_6649A few pics from my weekend: Sunrise in Bonita (although it was overcast quite a bit, the Florida sunshine still managed to peek through the clouds : )

IMG_6718Breakfast at Flippers on the Bay overlooking the Gulf

IMG_6721The Easter Bunny came and hid tons of eggs for the kids

IMG_6720Beautiful inlaid mosaic sea creatures at the entrance to the Naples Pier.

Sea Turtle At Naples PierA fun, relaxing, but very moving weekend, as once again, I mourned the loss of beloved ones, but rejoiced in the continued good health of others who have fought the fight and are winning the battle against cancer!  Hope you have a sunny Friday everyone, and please wish Jan and her team good luck while participating in this weekend’s Relay for Life in Bonita Springs! Susan


Broken Mirror=Lucky Find!


HomeGoods Driftwood MirrorYou know that moment when you see something in a store and your heart starts beating faster and you think “wow, I really need to have that-I don’t care how much it costs!!” And then you discover it is marked down in the clearance section and you think “OK, you’re mine!!” Recently, I stumbled upon this large painted driftwood flower mirror in the clearance bin at HomeGoods. It is painted the perfect colors for my kitchen/family room, and I knew in an instant it was to be mine!

driftwood mirror beforeSo ridiculously cheap, and it was there because the center mirror was missing so it was being sold-I love these words-AS IS. To whomever broke the mirror- sorry about your seven years of bad luck. But for me, my lucky day!! Now, how to repair it and replace the missing mirror? Simple. The back piece was already pulled away from the frame. I am assuming that it was removed to clear away all of the broken glass shards. No problem, easier for me. I happened to have a large round unframed mirror that I had purchased from Ikea quite awhile ago, and it was just the right size to fit in the opening.

Ikea Mirror

So, I pried the backing off the frame,

Driftwood Mirror Backing Removedthen centered the mirror into the opening, ensuring that the little squares around the edges of the mirror were evenly distributed.

Driftwood Mirror Insert

Now, how to affix it to the irregular driftwood pieces of the frame? What else but duct tape? Super strong and pliable so I could wrap it around the circular shape and affix it to the frame. (of course, this is where I should insert the pic of the duct taped mirror, but alas, I was so excited I forgot!) Once secured, I re-attached the backing to the frame with some screws,

Driftwood Mirror Backing Screws

making sure I missed the mirror (that would have changed my luck in a flash!), and then re-attached the large hanging bracket, again avoiding the mirror with the screws and hiding it behind one of the large driftwood petals.

Hanging Bracket Behind Driftwood

And now it has a perfect new home in my kitchen, where it is a constant reminder of the hope of spring (yup, it’s coming…) and the thrill of bargain hunting. I received so many compliments about my latest find on Easter Sunday as well! Oh, and PS: the floral runner is from HomeGoods too!

Driftwood Mirror Easter Vignette PM

Always goes to show you, one shopper’s junk is another shopper’s treasure.  And, you don’t always need to go dumpster diving to find a hidden one that just needs a bit of TLC. Hope you are having a #HomeGoodsHappy Thursday, everyone! Susan 

Cottage Fresh Country Cupboard

A few days ago I shared a project that I had been working on: transforming a country cupboard from this ugly, broken, junky piece to a cottage fresh country cupboard. This was the before:

Country Cupboard Unpainted

this was the during

Country Cupboard Painted

this is now.

White Country Cupboard Signed

A simple fresh white country cupboard that is filled with some of my cherished blue and white pieces, including this vintage set of Block China that I have kept stored away for over 30 years!

Block China Blue Strawberries

I have treasured this dinner set with the luscious blue strawberries for so long, but have never had an open cupboard to display them…and now I do! In this close-up pic you can also see the wainscoting wallpaper that I had installed and painted. It just gives a little extra depth to the otherwise plain back of the piece.

Blue & White Country Cupboard

You can read about the initial transformation process, including the prepping and installation of the wainscoting wallpaper here:

https://countrydesignhome.com/2014/04/10/wow-wainscoting-wallpaper/

Once I had finished painting the cupboard, I wanted to add just a bit of glazing to the detailed trim to enhance it. BUT, I did not want to change the overall look of the piece. It needed to remain bright white to contrast with the red walls of my dining room. This concoction of DecoArt Metallic Pearl White Paint + Behr Custom Color Sample (kind of a soft tan-but I’m not sure of the color because it was in the OOPs bin at HomeDepot for 50 cents!) + Martha Stewart Tintable Glaze Effects.

Martha Stewart Glaze, Americana Metallic Paint, Behr

I mixed it all together- lets say 6 parts glaze to two parts metallic paint to one part tan paint. Very scientific.

Martha Stewart Glazing Mixture

Then I painted it only on the areas where I wanted the trim to be defined- then wiped it off with a damp rag.

brushing on glazing mixture

Just a hint of color was left behind to enhance the deep trim work.

Country Cupboard Trim Glazed

Once it dried, I then mixed the Metallic Pearl White paint and the Tintable Glaze (about 50/50) and painted over all of the raised detail and trim areas. So what I have now is an elegant piece with a pearlescent glaze finish that captures the light and makes the detail pop.

Country Design Home White Glazed Trim

Perfect. It just goes to show you what a little TLC and elbow grease can do to transform any ugly duckling into a beautiful swan. And just in time-now I can clean up the dining room and get ready for Easter, whew!! Have a terrific Tuesday, everyone! Susan


An Easter Bunny Pattern For You!

I know Easter is just around the corner, and you are probably Easter-crafted out, but I couldn’t resist the chance to share my chunky wood bunny with all of you! Many, many years ago, a dear friend of mine made this wooden Easter Bunny for me.

Pink Wood Easter BunnyFor all these years, he has been the center of my Easter decor, whether on the table, on the mantel or sitting on the buffet surrounded by yummy desserts. When Coach brought him down from the barn loft this year, I noticed that his pink coat had become dirty, worn and scratched. Not good for a bunny who needs to look his best while roaming the world delivering Easter baskets! I decided he was in dire need of a facelift. And, since I was taking him apart anyway, I thought I would trace the pattern and share it with all of you!  He was cut out of 1 1/2″ planks-very heavy and sturdy. But you could certainly use any width you would like. Here are the patterns (you just need to right-click and download them, then resize them to your specs)

The body is  14 3/4″ high by 8″ wide. You will need to cut one.

Wood Easter Bunny Pattern   The ears are  7″ long by 3 1/4″ wide. You will need to cut two of those, one for each side.

Wood Pattern Easter Bunny Ear

The arms are  7 1/2″ long by 3″ wide. You will need to cut two of those, one for each side.

Wood Pattern Easter Bunny Arm

The legs are  10″ wide by 6″ high.  You will need to cut two of those.

Wood Easter Bunny Leg

Once you have cut the pieces, you will need to cut three 3/8″ dowel pieces into 2 1/2″ lengths (assuming you are using the 1 1/2″ width wood for the bunny), one each for the arms, the ears and the legs. Using the proper size drill bit (it needs to be snug, so don’t use a larger one or else the extremities will just flop around!), drill the three hole completely through the bunny’s body. Tap the dowel through so there is 1/2″ protruding from either side.

With the same 3/8″ drill bit, drill 1/2″ deep holes into the extremities in the indicated spots on the patterns (the big black dot). Make sure you drill one on each side to create mirror images. Otherwise you’ll have a holy bunny!

The fun part: paint the bunny! Go nuts and make him polka dot or plaid or just plain and simple. He’s your bunny to keep, so have a ball. You can even have your kids give him the finger paint treatment : )If you do decide to make one, please share your pics!!

Painted Wood BunnyNow just gently twist the extremities onto the dowel sections of the body: Ears on top, arms in the middle, legs on the bottom. Or, you can mix it up and go all Picasso on him- that’s fine too. The fit should be snug so they stay in place and he stays upright. If you have made the holes too large, you will need to glue the pieces in place or add a little putty. And there you have it- a bunny that is ready to join in all the Easter fun! And my little guy? Well, he’s being painted right now, and he’s not quite ready to show off. But I wanted to get this pattern to you, just in case you need some last minute Easter fun. Have a warm and wonderful Wednesday, everyone! (I know I will : ) Susan