Saltwash Blues

Have you heard of Saltwash paint additive?

Saltwash BannerNo? Well, I hadn’t either until I was introduced to this product for this month’s Fab Furniture Flippin’ Contest. Amazing stuff made with real sea salt that creates a worn, rustic look on any piece! You mix it with any paint type and color, smoosh it on literally anything that accepts paint (wood, metal, plastic, you name it, it sticks). Then you paint an overcoat, allow to dry, sand it and stand back and admire your truly transformed piece! In this case, an old wooden trunk that had seen (much) better days,

Old Trunk Paintedtransformed into this gorgeous sea worthy trunk in various shades of blues.

Finished Trunk Staged LOGOHere is the how-to:

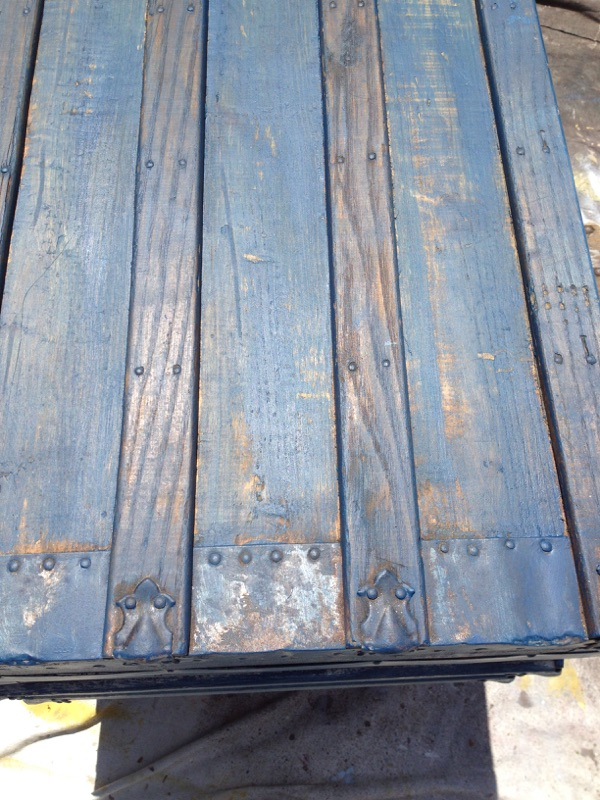
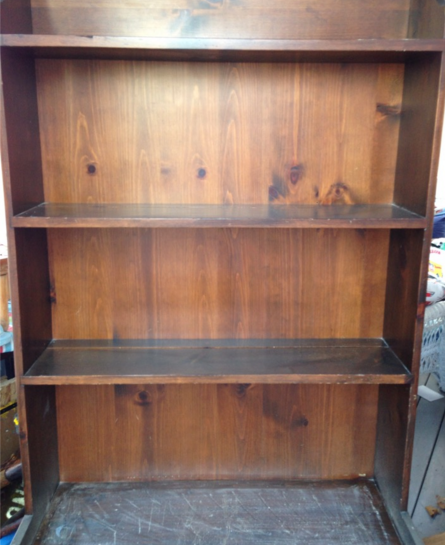
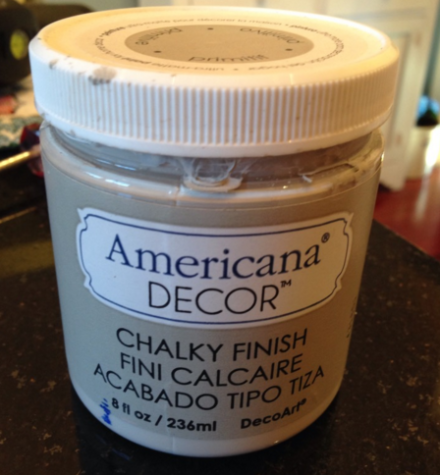
Find an old piece of furniture that needs a bit of TLC to bring it back to life. In this case, an old trunk that had cracks and dents. I had already started a transformation by painting it silver, but I wasn’t in love with it. Once I received the Saltwash, it was an easy decision to use it for this project. I Coach (yes, Coach got into the act with the project : ) painted the trunk with several shades of blue, covering all of the metal and wood and canvas surfaces.

Painted Trunk TopMix the paint with the Saltwash until is is the consistency of cake frosting.

Saltwash Mixture FrostingTaped off the wood slats because I wanted them to appear dry brushed but not textured.

Painted TrunkDabbed on the Saltwash Blue Mixture any where I wanted to have the textured surface, then allowed to dry. The trick is to dab it on thickly and heavily. The beauty of it is that is does hide any cracks or imperfections!

Dabbing Thick Paint on TrunkPainted on a lighter coat of blue over the textured finish and allowed to dry. Already looks pretty awesome right?!

Overpainting Trunk Topcoat
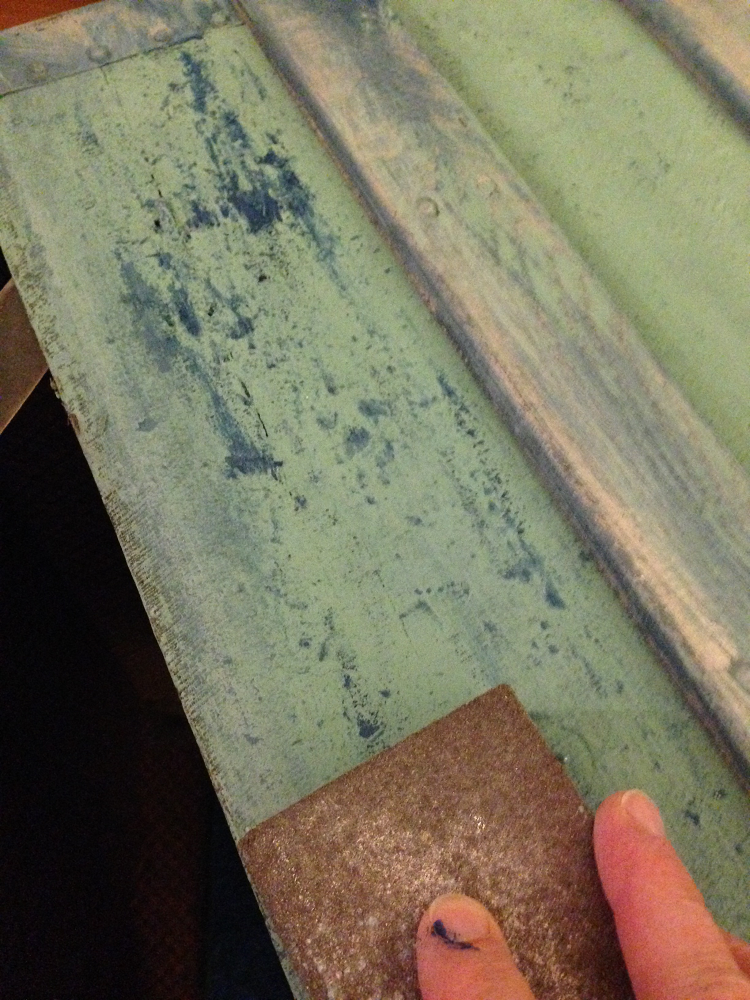
Sanded down everything, including the wood and metal trim (which allowed the original silver finish to show through)

Saltwash Trunk Sanding off Top LayerFinished with a spray coat of matte acrylic. Here is the finished trunk in beautiful shades of Saltwash Blues. (but you can use any color you wish- the Saltwash has no color in it!)

Finished Trunk Staged LOGOFor more outstanding transformations by this month’s sponsors, click the links below:

http://www.thirtyeighthstreet.com/2016/06/saltwash-coastal-inspirations-fab.html

http://www.58waterstreet.com/2016/06/fab-furniture-flippin-contest-saltwash.html

And if you might be interested in joining the Fab Furniture Flippin’ Contest, click this:

Fab Furniture Flippin Contest Poster

Have a great week leading up to the 4th! I will be out of blogging range, but will be back with more flipping fun projects when I return.

xoxoSusan
Compensation Banner 500


Flippin’ Fab Pure & Original Paint USA

Fab Furniture Flippin ContestThis month, I am participating in the #Fab Furniture Flippin’ Contest, an event featuring some of the best furniture flippers in blog-land. This contest is the brainchild of the bloggers from Evey’s Creations and Anastasia Vintage, both of whom love design, DIY and bringing new life to old pieces. Evey was even on one of my favorite DIY shows- Flea Market Flip! I had read about the contest a few months back, and since I am a devoted furniture flipper, I was eager to get started, so I submitted my application.  Of course, that was before the broken foot incident, which temporarily put me on the sidelines, but I am finally primed and ready to participate in this month’s contest. Which is this: each month, a theme is chosen, and different companies sponsor the contest, providing either supplies or prizes to the flippers (that’s me!). We are allowed to choose any item to work on using the products supplied, and we have approximately 3 weeks from start to finish to paint, stain, decoupage, sand, wax and finish our chosen pieces before photographing them for submissions for judging. Once the judging is completed, a winner is announced, and its on to next month’s flippin’ contest! It was my good fortune to be selected as a contestant this month, because I have now had the opportunity to sample an extraordinary paint from Pure & Original Paint USA,

Pure & Original Paint Boxeswhich was created in the Netherlands and is now distributed in the US through Luxury Dutch Importers, LLC. This paint...well, the only word to describe it is luscious…the colors are simply soft and natural.

Pure & Original Paint Spring PaletteIt has a creamy and smooth texture, brushes on like a dream (even with a not-very-new-brush)

Pure & Original Paint USAand get this, does not need any finish. Even though it has a matte appearance, there is no waxing or varnishing or polyurethaning needed, because, unlike other chalk paints, it does not leave a chalky residue mark when you touch or scratch it. It actually dries to a rock hard finish that can be used both indoors and out…amazing. And the brush cleaned up easily with just water. So, before I started working on my contest piece, I decided to give the paint a test run on a simple brown console table. I cleaned it, did not sand or prime it, just painted with two coats of Nautique Pure & Original Paint

Pure & Original Paint Nautiquethis beautiful green/blue color that caught my eye when I was choosing my 2 cans of free paint provided by Pure & Original for the contest- there are 140 to choose from!  The finish is a lovely smooth matte, but I decided to sand it just to see what would happen. Instead of just sanding off entirely, the paint had already cured and adhered to the wood finish, so the sanding exposed the now “stained” wood grain for a stunning effect.

Pure & Original Wood Grain Closeup BlueThe more I sanded, the prettier it looked and the smoother it was to the touch. And still no final coat needed. Wow. So now I am off to prepare my actual contest piece, with the addition of a few more colors. I will keep you posted as the work progresses. In the meantime, if you are interested in reading more about Pure & Natural Paint USA, click the pic below:

Inspired By ColorAnd, if you are interested in sampling this fabulous paint, you can do so by using this link- : https://www.pureoriginalpaint.com/usa/?ref=118  (I love this paint so much, I’m now an affiliate for Pure and Original Paint USA) A special thanks to the FFFC Team at the Fab Furniture Flippin’ Contest for allowing me to participate- this is going to be so much fun! Have a great weekend everyone! If you’re looking for me, I’ll be in the painting workshop : ) Susan 

Vintage American Heart Sign

Awhile back, I received this large wooden wall-hanging of an elephant painted on some slats.

Vintage Americana Heart BeforeIt was free, and free is good, but the graphic was just a bit too brown and black for me. Don’t get me wrong, I LOVE elephants, but it just seemed a little colorless and blah to me. I have had it hanging around in the workshop for quite some time, literally painting over it a dozen times with all sorts of blues and grays, awaiting some inspiration to hit me.

Vintage Americana Heart Dry Brushed BackgroundGenerally, I find that when all else fails, go with the American Flag with its bold colors and simple but striking graphics. So, stars and stripes it is! But, it was essentially a square, and of course, our flag is a rectangle, so I had to come up with a shape…a star? the map of the US? a rectangle? a heart : ) So I left the background as it was…dry-brushed with multiple shades of grays and blues and added the heart shaped design.

Vintage Americana Heart Red White and BlueThe easiest way to create a symmetrical heart of any size? Take a piece of paper (in this case, a newspaper because of the size I needed), fold it in 1/2, then draw out your shape on one side. Cut along the edge of the folded paper, and then when you open it up, voila!  A perfectly proportioned heart!

Vintage Americana Heart Newspaper PatternOnce I traced the heart shape onto the wood with some chalk, it was simply a matter of taping off the 13 red and white stripes…

Vintage Americana Heart Patternwhich was not as easy as you would have imagined…while leaving one block for the dark blue star field.

Vintage Americana Heart TemplateOnce the stars and stripes were completed, I stenciled in the stars…quite badly as it turns out.

Vintage Americana Heart Stripes and Star FieldBecause of the curves of the heart shape and the spaces between the slats, it was impossible to fit all 50 stars into the field in rows, as they are on the real flag. So I painted over the first go and tried it again.  I taped off the edges and winged it…just stamping them wherever there was an open space…not symmetrical, not perfect by any means.

Vintage Americana Heart StarsThere are a few states hanging off the edge…hello, Alaska and Hawaii! And there are a few states missing representation…then again, aren’t there a few states that are threatening to secede from the union if a certain candidate wins this year’s presidential election? But you get the general idea, right? Then I added the graphics above and below via my reverse chalking method.

Vintage Americana Heart Chalking PatternThat was the easiest part of the entire piece! Once I was reasonably happy with that, I sanded the whole thing down to give it a distressed look,

Vintage Americana Heart Sanding Stars Distressingthen finished with a coating of Krylon spray matte varnish

Krylon Matte Finish

(of course, that was a few days ago, when it was 60 outside, so I could spray it, as opposed to this morning’s temps, which are hovering in the 20’s). This graphic could easily be applied to a wood palette- another great project idea! Vintage Americana Heart LogoHave a totally terrific Tuesday, everyone (even if you’re buried in snow…) Susan

Things I Learned From Hosting Easter Dinner

With another Easter now done and gone, I am reflecting back on a few things that I could have done a little differently so that everyone would have had a safe and happy holiday! Such as:

1.  Use cheese in the garlic smashed potatoes-lots of cheese. This year I attempted to make things that were a little healthier and not so creamy and cheesy, so I omitted the cream and cheddar cheeses in the smashed red potatoes recipe…MY BAD. So instead of being yummy and gooey, they were kind of dry and chunky…even with the added melted butter. Use cheese, people!

Easter Dinner Roasted Potatoes2. On that same note, DO NOT USE FAT FREE CREAM CHEESE WHEN YOU ARE MAKING CREAM CHEESE FROSTING for the carrot cake. Did you read that? Well, remember it. Because otherwise, your carrot cake will have a oozy, bulgy middle and weird consistency and everyone will be saying “yeah, what happened to that cake- you usually make such good cakes!”

Easter Dinner Cream Cheese Disaster3. Secure the paintings to the wall with heavy duty screws, or else it may fall off and hit your mother and brother in the back of the head on its way to the floor. Heavy, framed pictures and little nail hangers from the dollar store do not go well together.

Easter Dinner Brackets PictureMake sure you use bolts to secure it to the wall or your dog will take a fall…fortunately it hit the chair rail before it hit them…

Easter Dinner Disasters Dog Pictre4. When you are done dusting the wine bottles on the cupboard shelves in the dining room while making the room pretty, make sure you push them all the way back into the rack so they don’t fall out during dinner and nearly take out your niece and your future daughter-in-law!

Easter Dinner Wine Bottles5. Make the damn green bean casserole. It has been a family tradition over the years to have green bean casserole on Easter, but I had been noticing that I was throwing more away than people were consuming. So I sent out a group text asking for a show of hands on who actually LIKED green bean casserole. The only yays were from my two kids. The remaining conversation looked like this:

Easter Dinner TextsClearly my family has a sense of humor…so I made lemon- roasted green beans with garlic, mushrooms and onions. I am throwing away most of that dish too.

Easter Dinner Roasted Green BeansI am thinking we need a new vegetable.

6. Ham has always been the go-to meat for this particular holiday, and as usual, I had Coach purchase one that was the “size of a basketball”.  This year, I also made some roasted turkey tenderloins for the guests who do not particularly care for ham. What I have noted is that, while the turkey is long gone, we still have a large platter of ham left over that Coach and I now have to eat.

Easter Dinner Leftover hamSo, for future Easters, we will be serving turkey or some other meat that is not pink and basketball-shaped.

Other than that, it was a wonderful holiday filled with fun and laughter…and thankfully, no fatalities. I hope yours was as well! Now, I need to find some recipes to use up the rest of that ham…any suggestions?? (Please do not say pea soup. I do not make, or eat, pea soup…) Susan


Friends of the Heart

This is a repost from 2014, but just a meaningful today as it was then, so I thought I would share it one more time. Many years ago, in a college psychology class, I participated in a group discussion regarding friendships: how we enter into a friendship, how we maintain it and how friendship fades away, despite the best of intentions. Although much time has passed, an observation that one of my classmates made has remained with me to this day. That there are essentially two types of friends: Friends of the Road and Friends of the Heart. What does that mean, exactly? Friends of the Road are those that we encounter along the way while being busy with life. A childhood neighbor, a classmate, a co-worker, a teammate or dorm-mate, these friendships are formed due to time, place and circumstance. At that moment, the friendship appears to be unstoppable, an unbreakable link formed from a common bond that you promise will last forever. But once you change jobs, move away or graduate from school, the friendship, despite your most ardent efforts to keep in touch, fades into fond memories and Facebook reminders.

Friends of the Heart PM

Ah, but Friends of the Heart. Those people you meet along the way whose paths are forever intertwined with your own. They are not your family, but these are the friends you can turn to in a moment’s notice, in joy and in sorrow, in illness or trouble. They are your people. Your back door friends. The “I-don’t-have-to-clean-up-the-house-because-I-am-having-company” kind of friends. Because they see you, know you and love you just the way you are. I have been so very blessed, in my life, to have found a group of friends of the heart. We started out as neighbors, bonded by our children who shared classrooms and ball fields. The dads coached, the moms cheered on, brought the water and snacks and patched up skinned knees. As we proudly watched our children grow and thrive, we stood side by side on the sidelines, in the bleachers and auditoriums and cheered them on, comforted their sorrows, rejoiced in their victories, agonized over their defeats. And while that business of life was happening, our friendships became those of the heart: strong, unstoppable, unbreakable bonds. And then, once our children were grown and happily on their own, our friendships did not waver, but instead, grew stronger. We traveled around the world together, planned birthday parties and weddings and showers together and spent many an evening over dinner and drinks just enjoying each other’s company.  Two years ago (but it seems like yesterday…), I lost one of my dearest friends of the heart after a much-too-short battle with pancreatic cancer. She was the youngest of our group, so much fun, full of life and eager to see whatever the world had to offer. Now, each passing day brings a fresh reminder of how very fragile and sometimes too short life can be on this earth.  If I could tell her one more time, if I could show her one more way, if I could only have a few more precious moments with her, I would let her know again just how special and truly blessed I was to have her in my life. Now, if you are fortunate enough, like me, to have a friend of the heart, choose today, this Valentine’s Day, to tell them you love them. But, it really doesn’t need to be a holiday or special occasion. You don’t need chocolate or fancy flowers, greeting cards or expensive gifts. Just text them or tweet them or Facebook message them or call them or even send them a copy of this and tell them how much they mean to you. It may be weirdly out-of-character, feel funny or awkward, but do it anyway. Because you never know when it may be your final chance to let them know how you feel.  And so, I would like to say to all of my dearest friends of the heart, I love you. You have enriched my life in immeasurable ways, and life will never be the same without all of you in it.

XOXOXO Susan 

DIY Country Door Chalkboard

Country Door Chalkboard Country Design HomeOver the holidays, I was working on quite a few projects simultaneously, neglecting to take either before or after pics or even no pics-my bad. Which makes for not very good DIY instruction-giving. But, I have managed to piece together enough photos of a couple of chalkboards I created so I could share them with you. Both of these chalkboards were originally vintage doors-the cupboards long gone, but the doors rescued for another purpose. One was very old pine

Country Door Chalkboard Before reversethat I painted and one was a beautiful cherry that I revived with stain and poly. The centers of both doors were painted with Benjamin Moore Chalkboard Paint (my personal favorite),

Ben Moore Chalkboard paintthen the hardware was added. In both cases, I used cup pulls, attached upside down, to create chalk holders (because what’s a chalkboard without some handy chalk?!). After much trial and error and incorrect measuring, I discovered that the simplest way to mark the drill holes for the handles is…paint. Place a tiny dab of paint on the edges of the posts…

Country Door Chalkboard Marked Holes…flip it over and press down on the surface of the wood. Lift up and voila, two holes spaced perfectly apart and ready for drilling.

Country Door Painted HolesFor the wood door, I used a copper cup pull, then added a matching copper knob for an interesting, more elegant detail.

Country Door Chalkboard Mahogany and CopperAwhile ago, Coach and I had been fortunate enough to find a bunch of old metal “stuff” at a yard sale- clamps and bolts and covers and registers and what not- which I have been using as needed for building and creating. When I first spotted this metal Country emblem,

Ford Country Squire Emblemit immediately brought back memories of all of us kids in the back of our Ford Country Squire station wagon (no seat belts or car seats back then, folks, just pile in and off you went!)

Ford Country Squire via Fordaddict.comSo I saved it until I could find just the right piece to use it on…and this is it! An old country pine door that was painted with a few coats of greens and blues and then waxed. (Sorry, I have no clue what colors these are- I just kept adding colors and sanding and then adding more colors til I got the desired effect.)

Country Door Chalkboard Detail CloseupI have about 100 of those little Behr paint pots in all different colors.

Behar Lavender Paint SamplesA little goes a longgggg way, so they just keep accumulating as I need another color for a project.

Once dried, I drilled a couple of holes at the top of my old door and tapped the “country” emblem into place.

Country Door Chalkboard Emblem in PlaceOf course, both of these pieces were intended for our shop in the Barn at Todd Farm, but I just couldn’t part with my Country Door Chalkboard. It now hangs proudly in our family room…for the holidays I used some children’s coloring page graphics for my message. This is so simple…reverse chalking for perfect chalkboard graphics! Print out your graphic on any paper,

Country Door Chalkboard Merry Christmas Graphicthen flip it over and rub chalk all over it.

Country Door Panel Reverse Chalking GraphicTape it into place on the chalkboard, then use a pencil and lightly trace the lettering (try not to press down with your whole hand, as any pressure on the chalk outside the lines will result in lots of smudginess.

Country Door ChalkboardWhich you will then clean off with a damp Q-tip.)

Country Door Chalkboard Q-Tip eraserOnce its time for a new graphic, simply wipe off with a damp cloth and say what you want to say! Which is:

Country Door Chalkboard Country Design HomeA gentle reminder to keep working towards my goals, not just keep thinking about them. So my goal for 2016 is to remember to take photos of my work to share, and my wish if for all of you to have a great weekend! Susan

Re-Loved Red Country Cupboard

Good morning everyone!  I hope you all had an incredible holiday…for us the past two days have been a whirlwind of family, food and so much fun! Even this little guy has gotten into the holiday spirit (this IS his happy face : )Bartlet on the Christmas RugAnd we still have the weekend yet to party! But, in the meantime, I thought I would share my latest project with you, since it is so merry and bright : ) This was a Craigslist purchase that Coach picked up about a month ago. It sat on the porch, waiting for my broken foot to heal (UGH) until finally, I just went ahead and worked on it, boot and all,

Walking Boot for fractured footbecause I needed to get it out of the family room before the holiday! The BEFORE: scratched, dark pine cupboard with a veneer plywood backing.

Red Country Cupboard BeforeAFTER: A Re-Loved Red Country Cupboard with a ship-lap planking background. A happy piece for (I hope) a happy home!

Re-Loved Red Country CupboardHere’s my how-to:

  1. Sanded down the surfaces, buffing out the deep scratches on the lowest exposed shelf. Re-Loved Red Country Cupboard BeforeLuckily for me, other than some scratches and dirt, this piece was in good shape. No mildewy or cigarette odors-that is the worst to try and remove!
  2. Painted with two coats of Annie Sloan Emperor’s Silk Chalk Paint- the most gorgeous color red. Annie Sloan Emperor's Silk Red But, the funny thing about the color red is, no matter what brand you use, it still takes several coats to get a uniform color throughout the piece, especially when painting over a dark surface. In this case, I was planning to distress it anyway so it really didn’t matter that it wasn’t a super uniform finish. I sanded down the edges, Red Country Cupboard Sanded Edgesthen finished it with a coat of Varathane Matte Interior Polyurethane. I love this stuff- has essentially no odor, dries quickly and leaves a soft, slight sheen.
  3. For the backing, I just couldn’t leave that dark pine veneer, so I added some ship-lap pieces of rustic pine planking Coach dug out of the barn. I cut them to the right size, fitting them behind each shelf like a puzzle.Ship Lap Pine Planking
  4. I then stained them a with a General Finishes Country Pine stain for some added contrast.General Finishes Country Pine Stain
  5. Dry-brushed them with a light coat of Americana Chalky Paint.Americana Chalky Paint
  6. I laid them all into place, then used Gorilla glue Red Country Cupboard Gorilla Glueto secure them to the back wall. Once dried, I used my staple/ finish nail gun to secure them permanently without making any apparent nail holes.Re-Loved Red Country Cupboard Interior Planking
  7. Of course, as I was lining up the planking, I created a few scratches on the already finished red cupboard.
  8. So I mixed some paint and poly together and re-applied to the scratched areas, blending into the already finished wood.Red Country Cupboard Paint and Poly Glaze
  9. I replaced the “colonial kitchen hardware” with a simple wood knob and some iron hinges and we’re done!
  10. AFTER: the Red Country Cupboard all decked out and ready for the holidays : )Re-Loved Red Country CupboardI hope you all had a magical holiday and that your new year will bring you much joy-I know we are all looking forward to 2016!! Have a great post-holiday weekend, everyone! Susan

Crafting With Wood Pallets

Do you ever look at the thousands of Pinterest pages filled with pallet projects and think: “well, that looks fairly easy, I think I can make that”. No? Well, I have. All the time. I actually have one of those Pinterest pages: Pull Apart A Pallet, which I am continually adding to as new and innovative ideas pop up (170 pins and counting…). But I have yet to actually make anything. Why? Well, wood pallets are the perfect medium for creating rustic wood items for your home and garden-for FREE. But, the trick is to figure out: 1.Where to get them-for FREE  2.How to take them apart  3.How to transform the wood pieces into something else that is useful and attractive and  4.How to finish them so they actually look like a rustic pine piece and not like a pile of wood that you nailed together. So I was delighted when I recently received a copy of the book “Crafting With Wood Pallets” by Becky Lamb. (Published Sept, 2015 Ulysses Press)

Crafting with Wood Pallets CoverIt is the answer to a DIY’ers pallet prayer. Not only does it have the pretty pics of the projects, it also includes the nitty-gritty DIY details: everything from where to find them to what type of tools and equipment you will need , how to actually take them apart, all of the measurements and dimensions for each project and the final finishing touches. Loads of super cute projects to choose from as well, like this Catch-All Caddy with the leather strap handle.

Crafting with Wood PalletsHow about some inspirational wall art? The lowly pallet has been transformed into a truly unique piece using colorful paint…

Crafting With wood Pallets…Becky instructs on the proper techniques for that as well. Loving this Entry Table/Wine Bar-it is simple and the perfect size for a narrow entryway or tuck behind a sofa while safely storing your glasses and bottles.

Wood Pallet Wine BarJust in time for the holidays (with not a moment to spare…) a porch star! As you can see in the photo, she includes all of the specs: supplies you will need, tools required and the skill level, plus the time it will take!

Wood Pallet Porch StarAnd finally, you can’t forget your favorite family pet who could be convinced that this (and NOT your bed) would be the perfect curl up and cuddle spot.

Crafting with Wood Pallets Dog BedMore than 25 complete project plans in all, with full instructions, cutting measurements and finishing techniques. So, I know you are wondering which project I have made?! Well, the truthful answer is none-YET. I have been sidelined for the past month with a few fractured bones in my foot. Yup. Suffice to say it is never a good idea to clean out and organize your basement workshop in your bare feet.

Walking Boot for fractured footBut, even though I haven’t yet created my first pallet masterpiece, I wanted to share this book with you because it would be the perfect gift for a DIY’er on your list. It is available on Amazon.com (with Prime, you can still get it shipped in time!) but also at Barnes and Noble. And I promise, once I am back in full-on DIY mode, a pallet bed for Bartlet

#bartletthefrenchiewill be tops on my list, thanks to Becky Lamb and her book, Crafting with Wood Pallets! Have a great Friday everyone- one week & counting until you know who arrives! Susan 

The Wedding…Party Time!

If you didn’t have a chance to view part one, check it out here:Bride and Dad UmbrellaOnce we had dried off our clothing…and our tears…it was party time! Heading into the cocktail area, our guests finally had a first glimpse of what we had been working on over the course of the previous year leading up to the big event.

Candle Light DecorWe had devoted quite a bit of time to the DIY decor representing international travel as the theme…since many of our guests…including the groom’s family, who hail from Northern Ireland, were traveling to the US to attend the wedding. Throughout the year we had gathered our supplies, creating centerpieces of painted globes (remember the global love project?)

Globe Pilephotographs of the bride and groom with their various travel selfies

wedding globesand vintage windows featuring little teeny, tiny airplanes holding the escort cards.

Airplane Escort CardsA mile marker was also constructed representing the 19 different cities and countries that our guests had traveled from to help our families celebrate this special union.

mile marker sign(A special thanks to our son’s lovely fiance, Ashley

#Crashley 1for all of the hand-painted signs…a tedious labor of love…) As a special surprise to the bride and groom, I had ordered a cupcake tower from Let Them Eat Cake featuring their little Frenchie Bartlet perched on top of the world.

Let Them Eat Cake Cupcake TowerSo sweet!

Let Them Eat Cake Bartlet FigureAlthough he’s not quite as sweet in real life…

#bartletthefrenchiebut we do love our little guy anyway…Once the speeches were completed and dinner consumed, the party really got started. Honoring the groom’s Irish heritage, the night lead off with a troupe of incredible Irish Dancers from the Stillson School of Irish Dance,

Carlene Stilson Irish Dancerswho soared and shook the old inn to the rafters

Irish Dancers Shoesin their colorful costumes,

Carlene Stilson Irish Dancersand had our guests at the ready to jump in and dance as well!

Carlene Stilson Irish DancersA difficult act to follow for sure, but no problem for our band Bearfight,

Bearfight and Crowdwho rocked the night away and had the guests on their feet until closing time! Add in a couple more tunes from Andrea and Ben of BeatRoot

Beat Root At the Partyand a bridal rap with her brother, Bearfight’s lead singer Chris…and the night played on.

yo DiggityAt the evening’s close, the crowd joined forces with the band for a rousing rendition of Piano Man

Piano Man Crowd Sings(an “end-of-the-night” classic by Billy Joel). Once outside in the cool (now dry) night air, the guests had a perfect view of the wedding-yup, even the bride in her gown-party’s Ice Bucket Challenge (in honor of their friend, Pete Frates, who leads the fight against ALS)

Ice Bucket Challenge Bridal Party…from the In Town Trolley, who would take them to the “after party” at a downtown pub.

In Town Trolley(Now I don’t know about you, but after being up at the crack of dawn and partying all night, attending another party was the last thing on my mind. Off to sleep for this exhausted MOB!)  An incredible (albeit wet) ending to a perfect (albeit wet) day and night that most of our guests will not soon forget.

Slainte SignLooks like it’s gonna be another warm (albeit wet) day in the Northeast! Slainte, everyone!  Susan


The Wedding: The Ceremony

This past weekend I met up with some dear family members that I’m not in touch with very often…except via social media. They were asking me about my daughter’s recent wedding, which made me realize that I never really wrote about it or shared any photos! So, three months later ( boy, how time flies…) here is the beginning of the story…

Kate & Chris in ArborWe had spent a full year planning this wedding, focusing on every detail from decor to dining to the ceremony and music. But what we learned that day is despite your best efforts,  you just cannot control Mother Nature. During the week leading up to the date, we all kept checking our iPhone weather apps and noted little sunny icons in a row with the exception of the zero hour- 5pm on the wedding day-which was clearly marked by a lightning bolt and dark rain clouds. Hmmm. So, with our wedding planner checking the weather continuously on his radar, he decided we should go ahead with the outdoor ceremony as planned and rehearsed, keeping our fingers crossed that we made it before the weather hit.

780The warm, sunny day started out rather promising, with the groom leading many of the wedding guests…

IMG_7944in a Wedding Day 5K along the rocky Maine coastline.


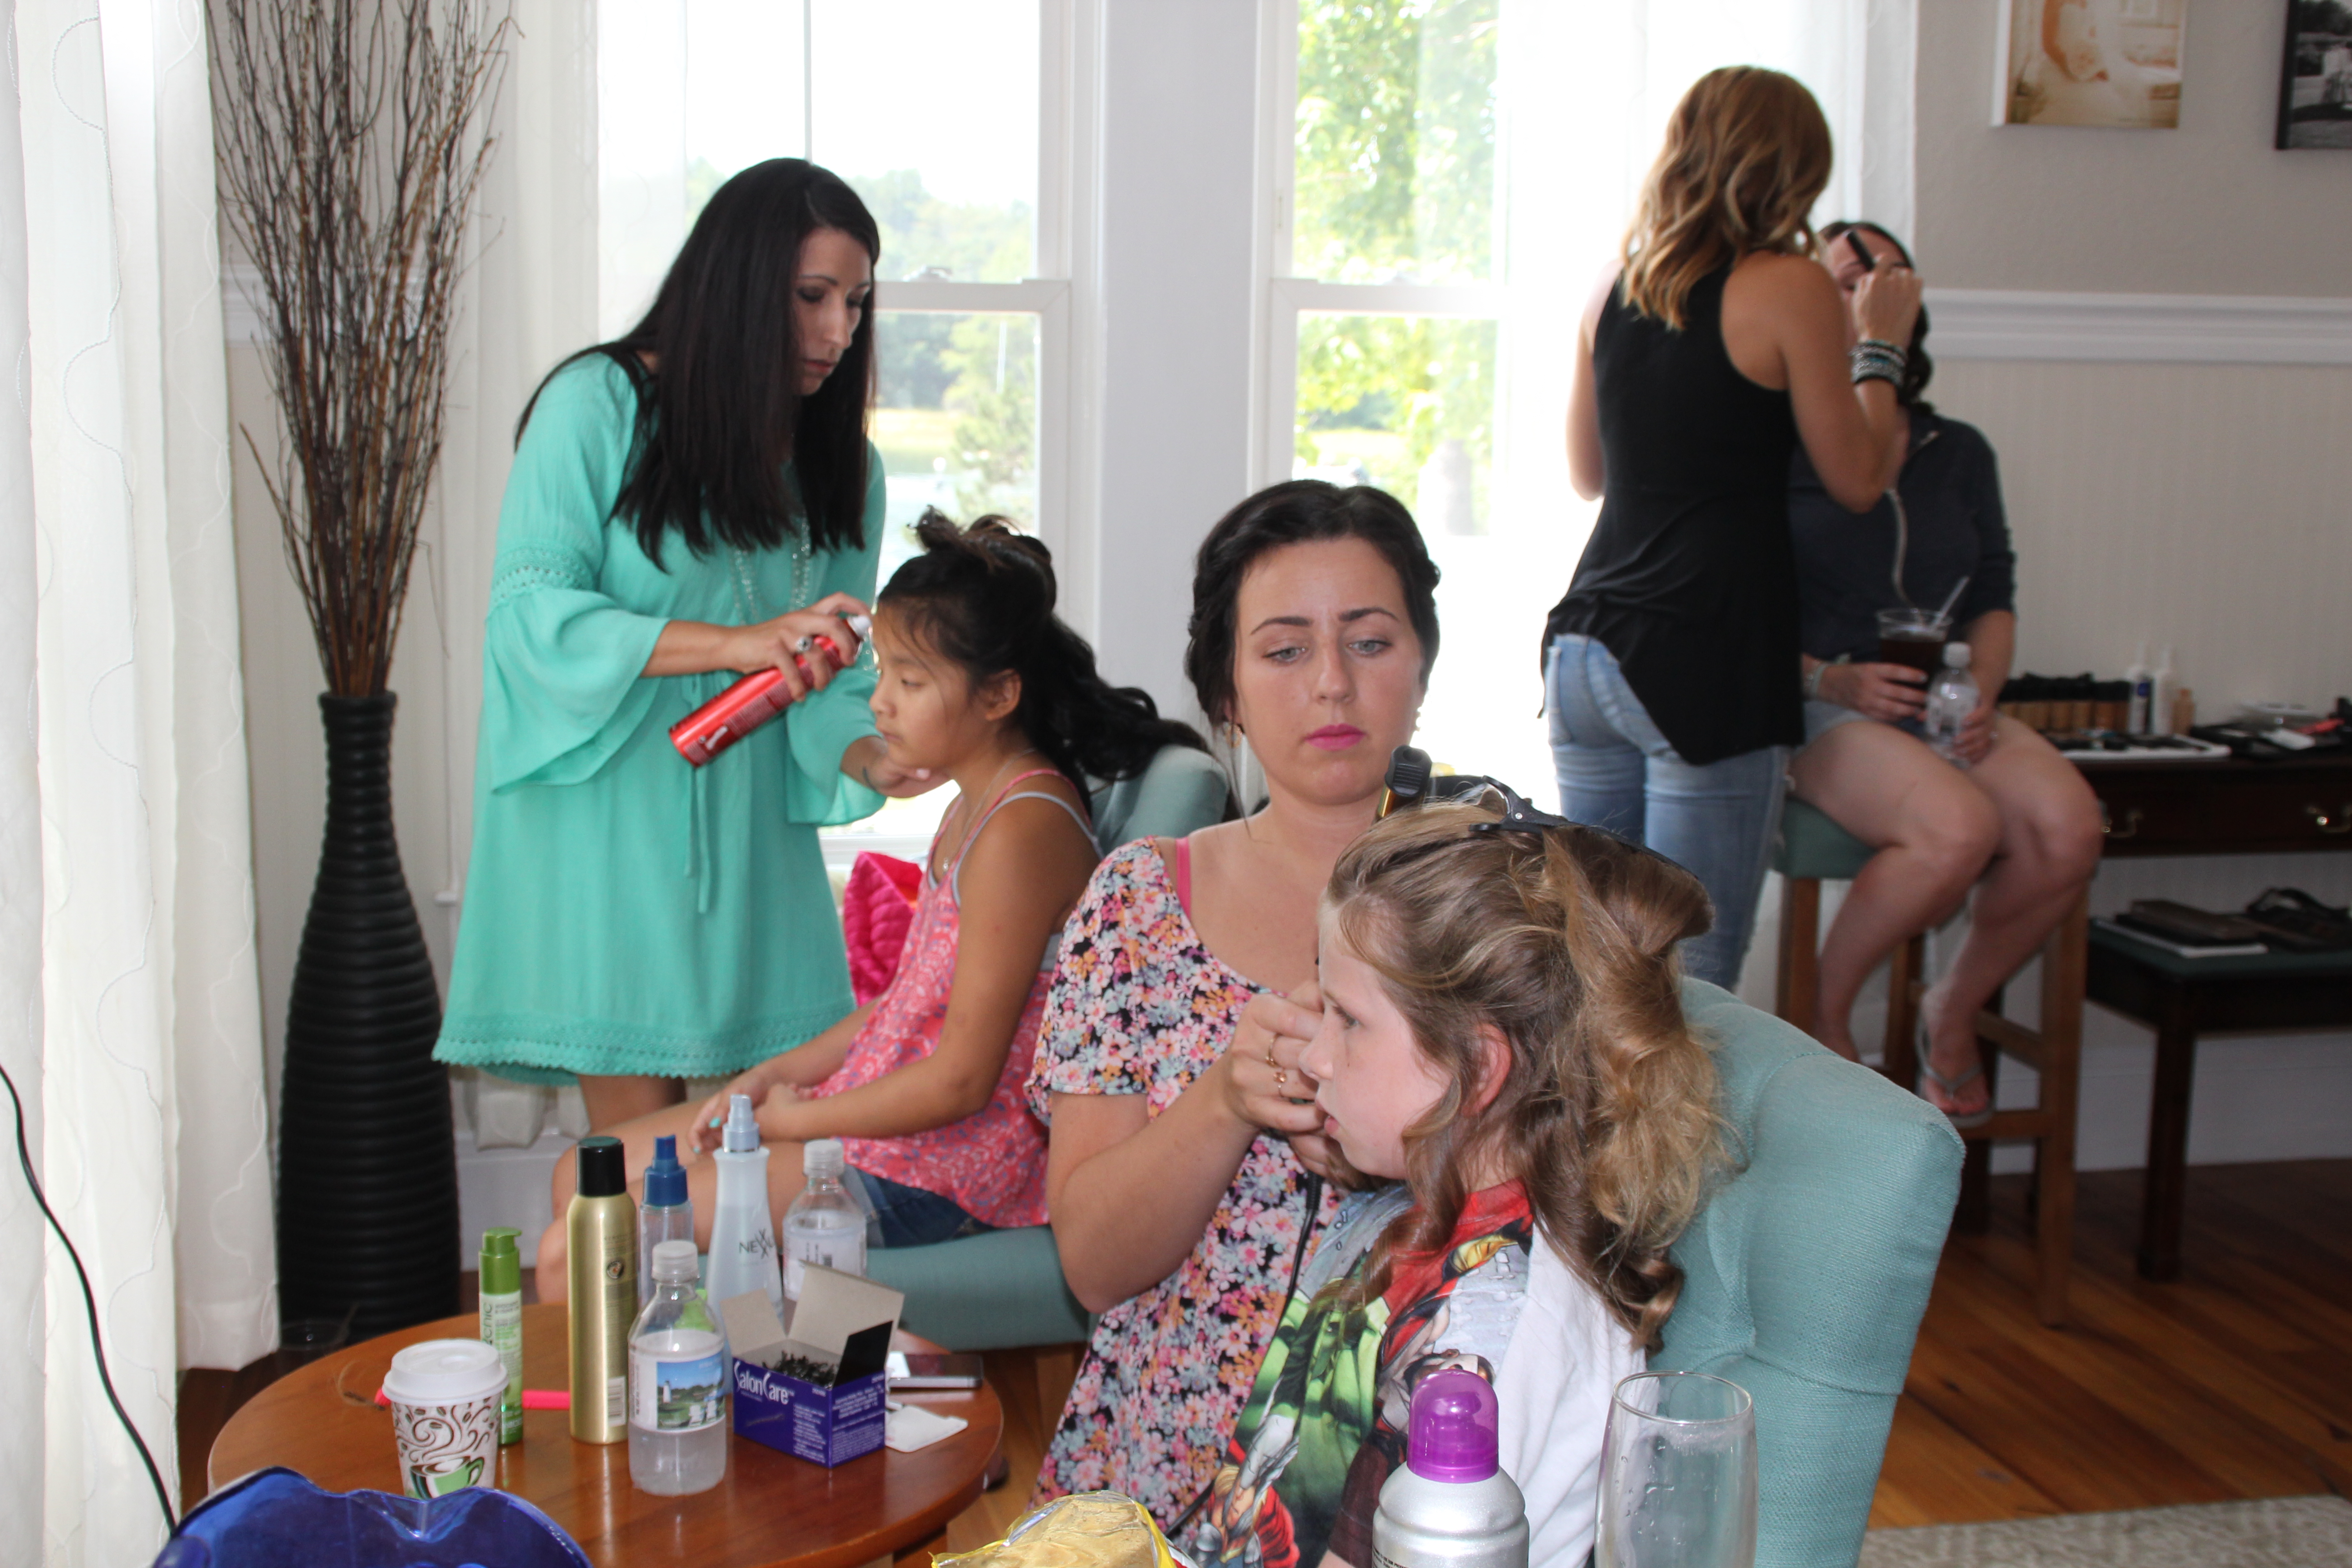
While the bride and her party were busy being primpedand pampered by hair stylists and the lovely Kate from Kosmetics by Kate…

IMG_8011preparing for the day ahead.

After their run, the groomsmen were also getting set for the big day

(hair and makeup consultants not necessary here, just a brew or two : )

After the groom and his entourage

made their way to the reception site,

it was time to get some dancing shoes on and get this party started!

As our amazing photographer, Paul Granese, of Paul Granese Photography and other family members snapped away, creating pictorial mementos to last a lifetime,

in the bright, hot sunshine,

IMG_8072there were umbrellas at the ready to protect everyone from the heat…

so we optimistically assumed it was all going to be fine.

But, as the ceremony time rolled near and our guests gathered in their seats on the green expanse of lawn near the lighthouse…

Seated Guestsominous, threatening black storm clouds gathered overhead,

so we quickly gathered the wedding party together to begin the ceremony. Just as the dashing FOB (Father of the Bride, for those wedding-uninformed : ) took our daughter’s arm to begin their walk down the aisle,

the first gentle raindrops fell. Someone from the crowd dashed over to hand him an umbrella to protect the beautiful bride…

IMG_8151and as the first notes of the lilting folk music were sung by the lovely Andrea Magee of BeatRoot– the ceremony was interrupted by a startling flash of lightning and a tremendous clap of thunder.

BeatRoot Ceremony SongAt which point the wedding planner raced down the aisle and asked the bride and groom if they would like to move the ceremony inside…which they agreed would be a good  fantastic idea…

…creating a scene right out of an adventure film…everyone ducking for cover and looking back over their shoulders

Guests Running from Rainwhile scrambling to race inside as the pelting rain soaked suit jackets and shawls and created a “bad hair day” for all…

…and a pond of water where the lawn games had been played just moments before.IMG_8189But then, something quite magical happened. Dampened by the downpour but not shaken, the bridal party quickly reassembled, then entered the small function room (not really meant for the size of this crowd) to cheers and applause,

something you don’t often see at a wedding ceremony…and exchanged their loving

Vowsand oftentimes quite humorous vows,

surrounded by a very close circle of family and friends.

Circle of LoveWas this our ceremony space of choice? Nope. But it was perfectly suited for this happy couple and their guests…providing a much more intimate and moving ceremony that ended with a rousing rendition of “All You Need Is Love” by BeatRoot (and our guests : ).All You Need Is LoveA crazy start to an unforgettable wedding day celebration!  Part Two: The Party is next! Have a great weekend everyone-hope it doesn’t rain on your special day! Susan