Mixing Milk Paint Misstep

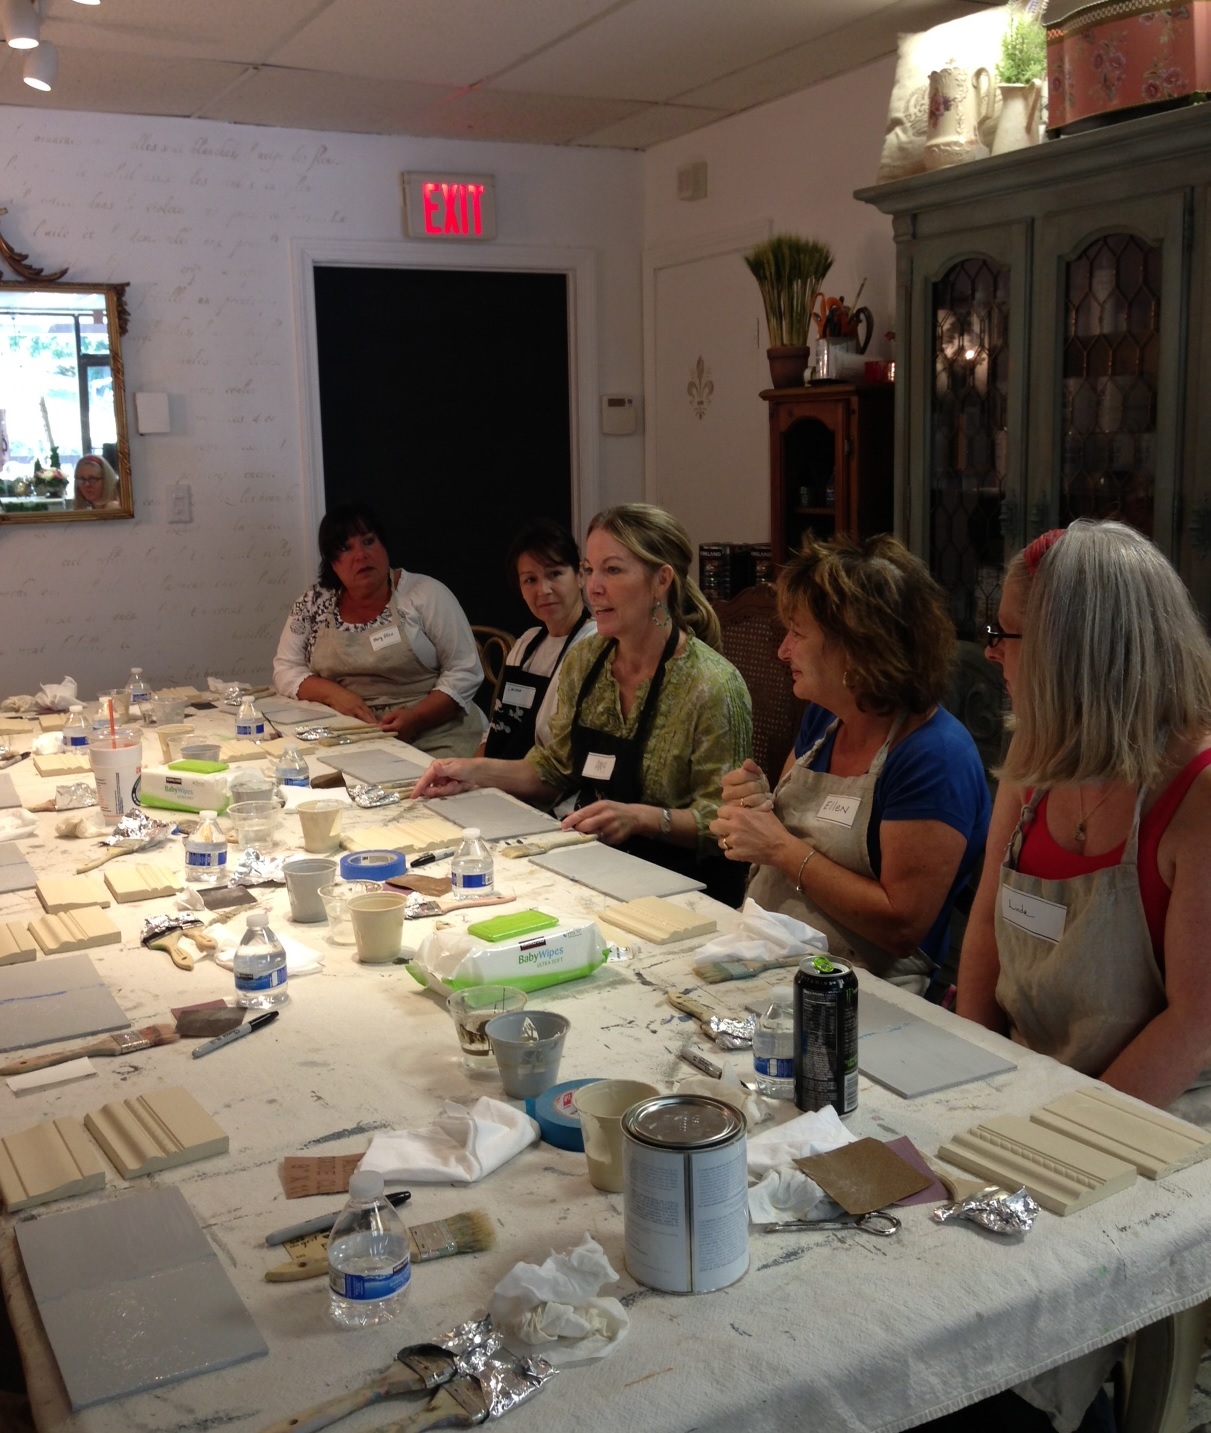
This past week I have been working on quite a few pieces for the upcoming Vintage Thymes Market in November. It’s fun, other than the fact that my house looks like a bomb hit it-I have bits and pieces of projects going on everywhere!

Family Room Workshop
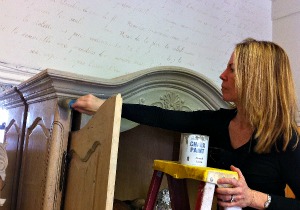
The smaller pieces I can do in my basement workshop, but the big pieces stay upstairs. Man, I really, really, really do need a studio! For my current project, I decided to use my Miss Mustard Seed’s “Eulalie’s Sky” Milk Paint for the back of a beautiful step-back cupboard I am working on.

Cupboard Back Before
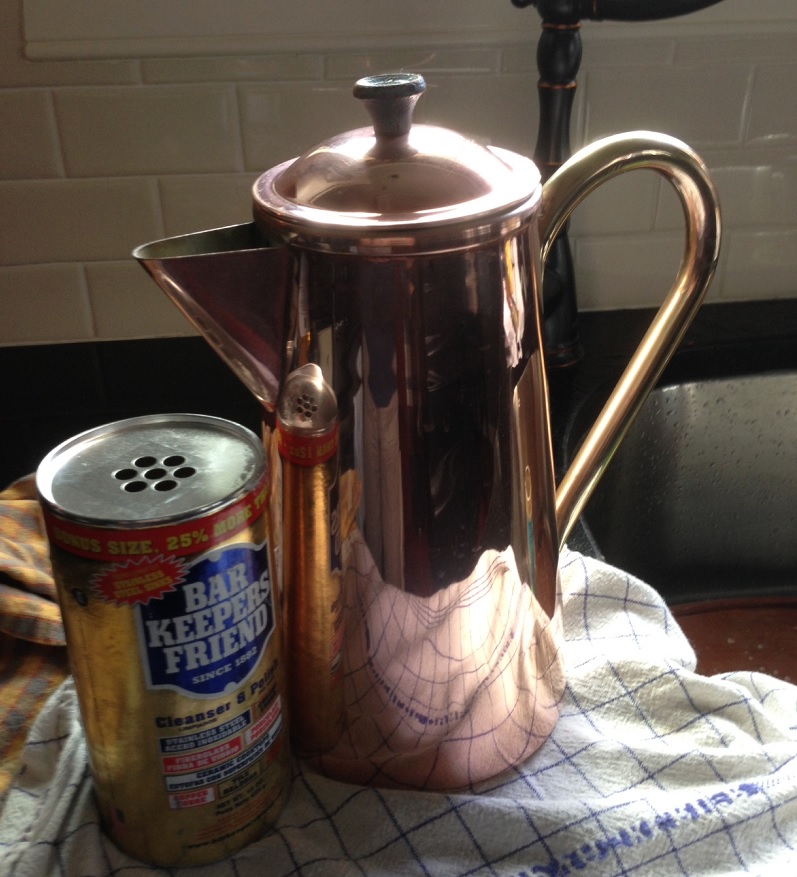
I read the instructions and set out my necessary tools: air-tight container, measuring cup, warm water, bag of milk paint, mixer-what?!?

Milk Paint Mixing ToolsYup, a mixer. You see, milk paint comes in powdered form, in much the same consistency as powdered milk we used to use as kids when we ran out of regular milk. (I can’t help but notice that in this advertisement, they are using a cocktail stirrer to mix the milk. Those were some crazy times…)

Non Fat Dry Milk
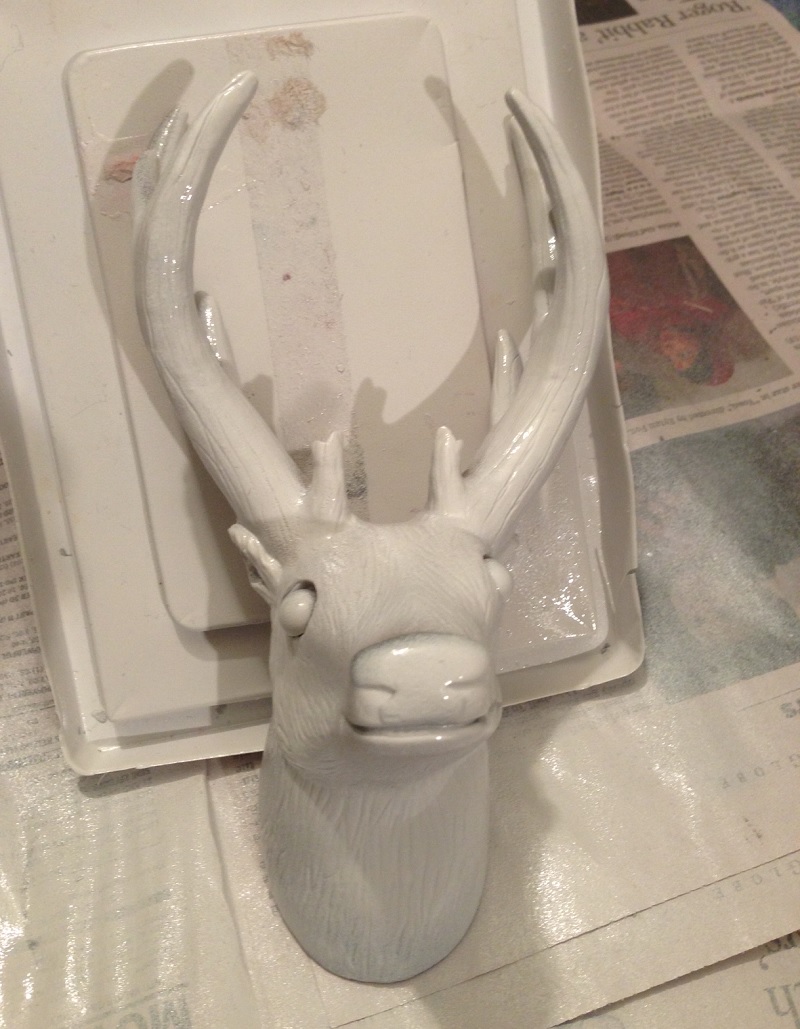
Interestingly, when I first opened the package, it appeared to be white.

Mustard Seed Paint Powder
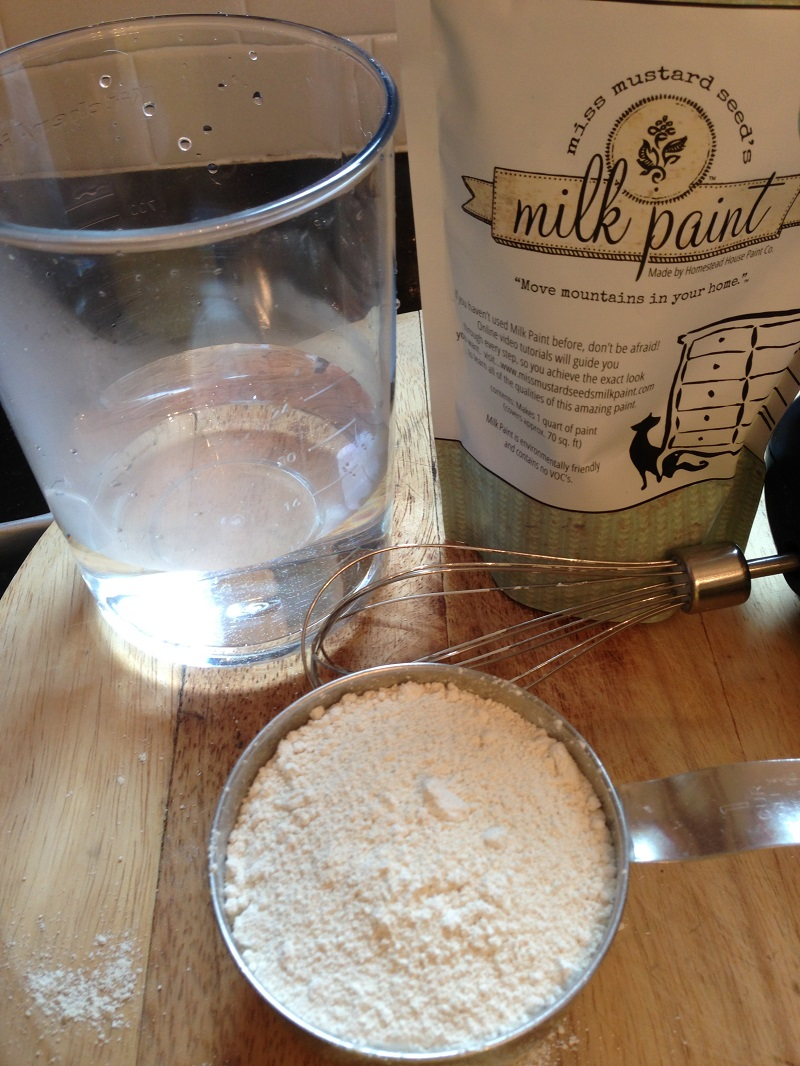
Uh, oh, I thought, they put the wrong color in here! But once I added the water, the magic began. Now, according to the instructions I had read, this paint needs to be blended for 3-5 minutes, which makes sense, to break up all the powder bits and get them blended smoothly.

Mixing Paint with MixerAnd it says you could use a blended or a stirrer stick. Well, my blended is reserved solely for frozen margaritas, so not using that! And, standing there for 5 minutes stirring paint didn’t seem like all that much fun, so I decided to use a single whisk on my mixer. FAIL. BIG FAIL. I should have stopped once I noticed that my paint was looking more like a blue vanilla frappe than a bucket of paint, but I didn’t. So once the 5 minutes were up, I had this:

Blue Frappe

A big container of frothy blue milk. You cannot paint with blue bubbles. I repeat, you cannot paint with blue bubbles. So, I put it in the fridge for awhile to allow it to settle-it is milk paint, after all! Once I removed it, it looked a lot less frothy, so I attempted to paint the cupboard. While it was actually useable, the color was very sheer, obviously from the aeration still present.

First Coat Sheer
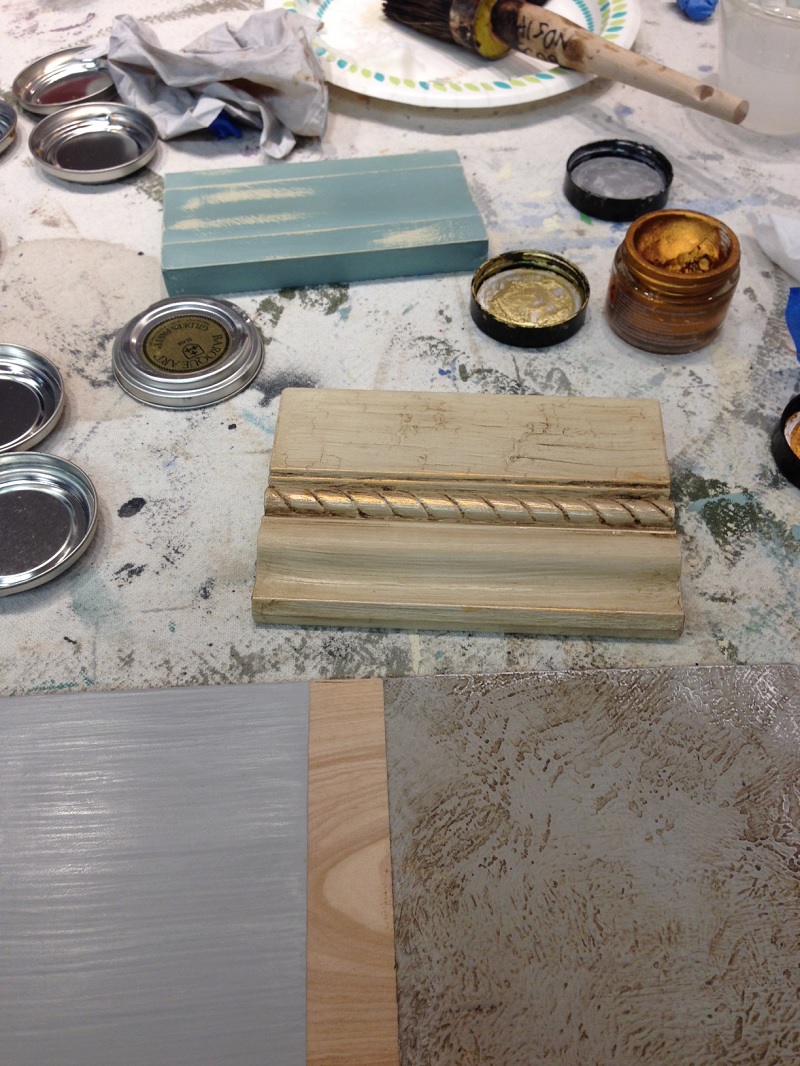
If I had wanted it to have a stained appearance, it would have been perfect. So I waited awhile, stirred up the paint again with a stick to smooth, then added a second coat.

Breaking Down the Foam
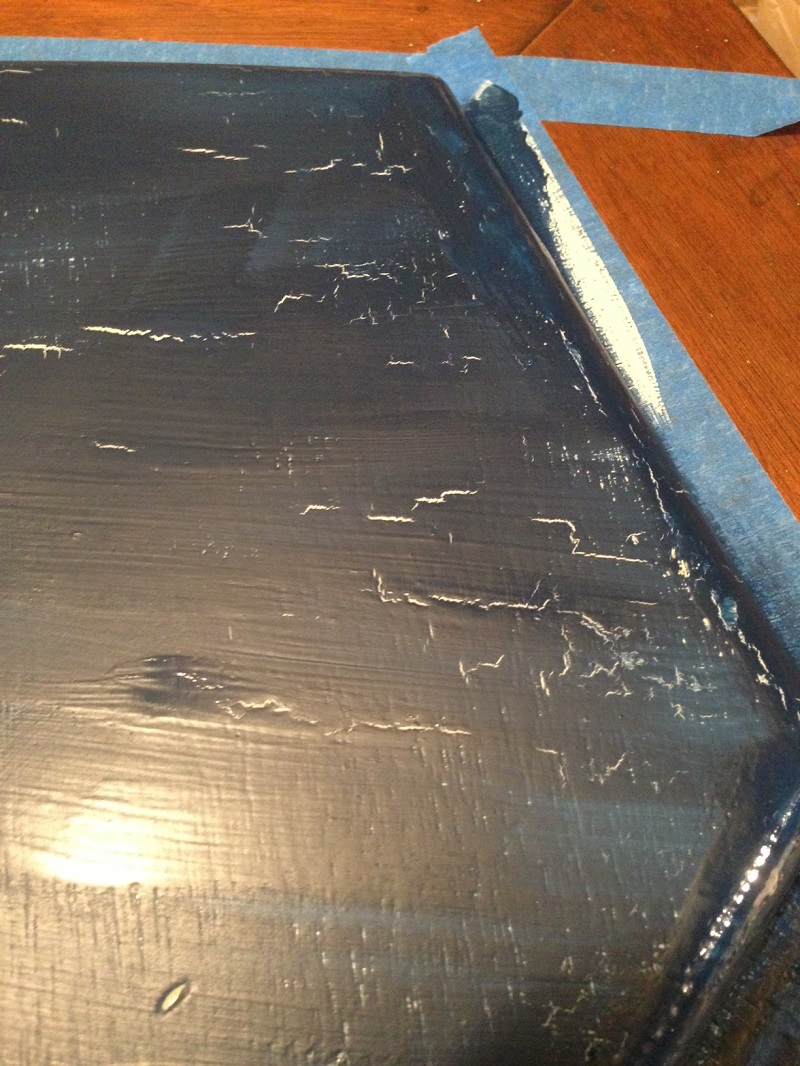
Better, but still kind of streaky and with a lot of color variation.

Second Coat Milk Paint

So, then I went online and watched all of the Miss Mustard Seed Tutorials to make sure I was doing this correctly.

Miss Mustard Seed Video

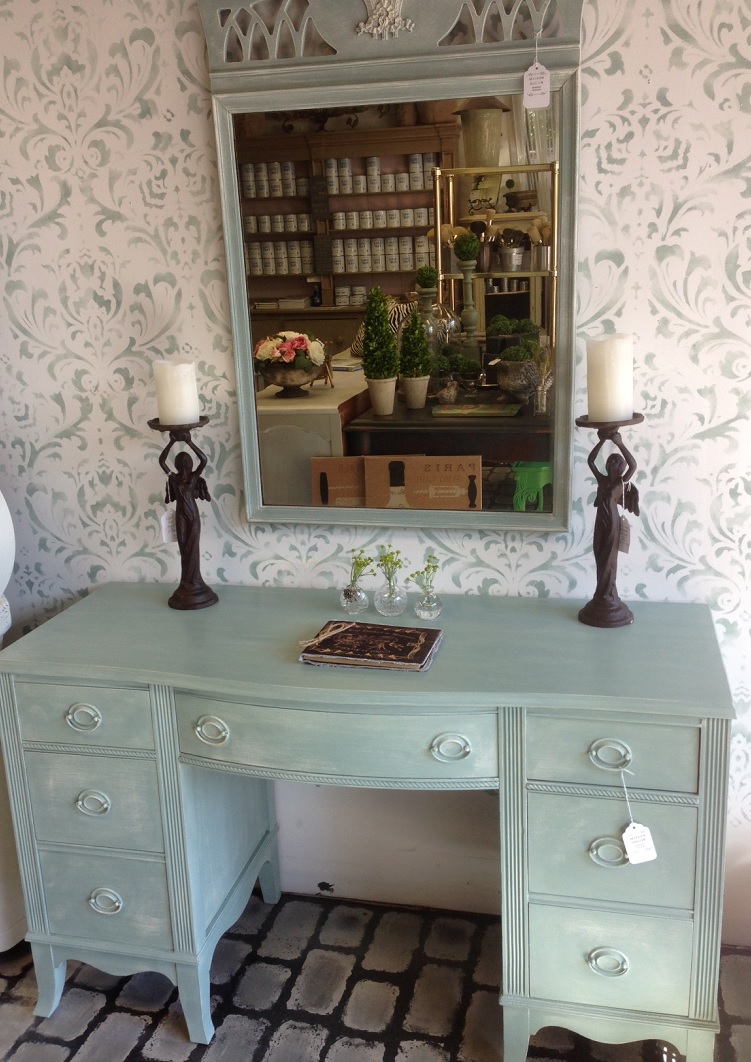
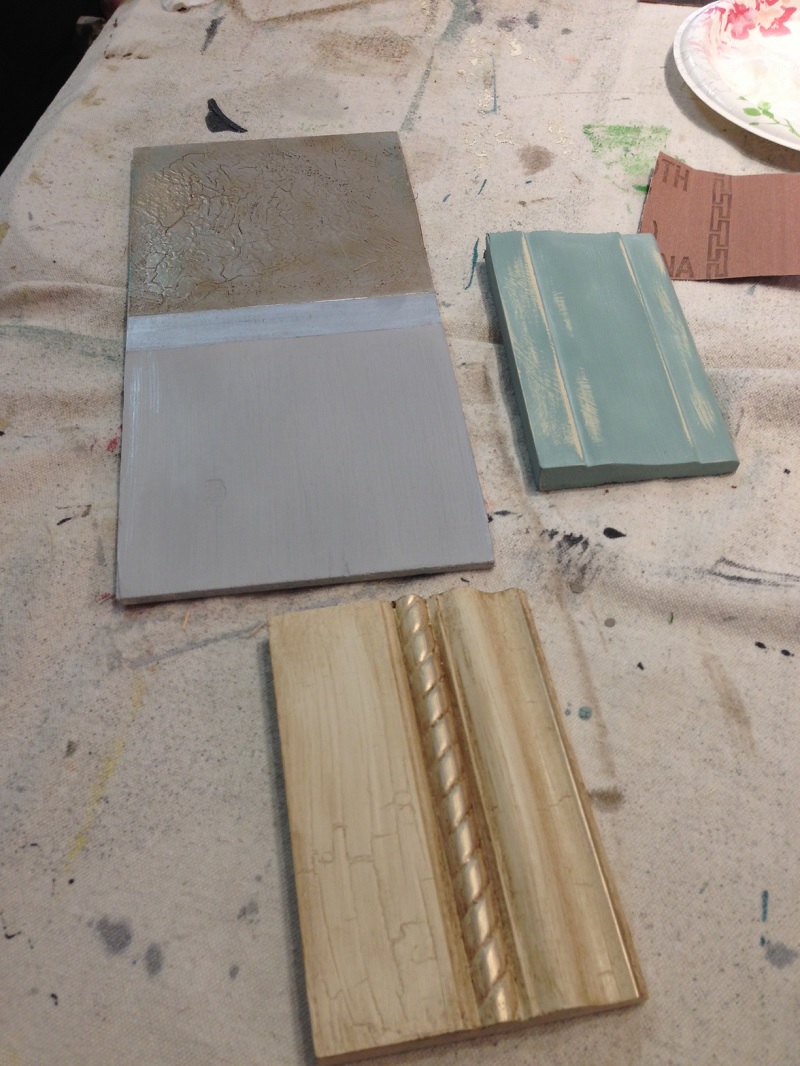
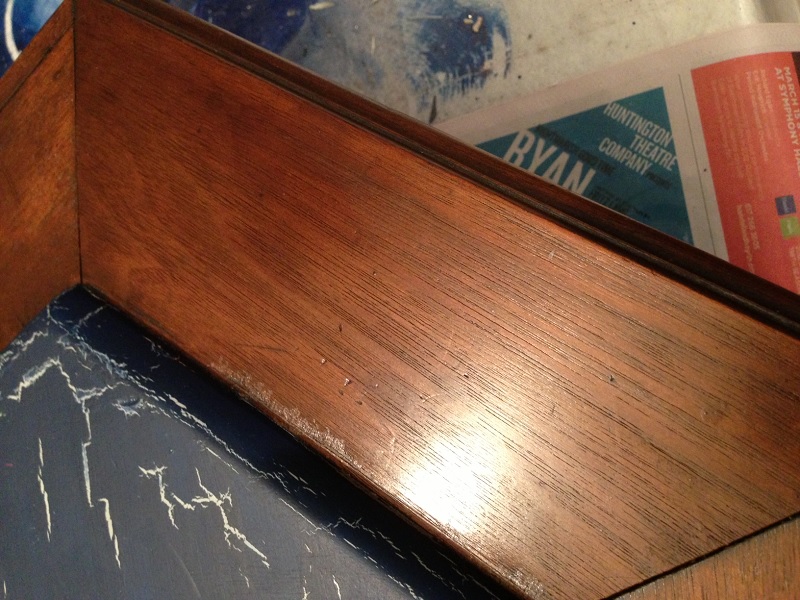
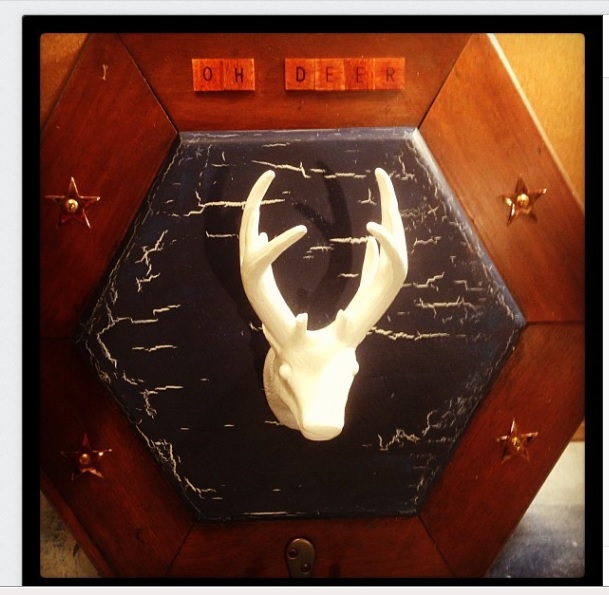
(You would have thought it would’ve been a no-brainer to do that first, right?) And I was doing it right, with that one fatal flaw-frothing the paint first. That was most definitely NOT in the tutorial. Oh, well, another DIY lesson learned. One more coat, and now the color is deep and true on the inside of the cupboard.

Final Coat Eulalie's Sky

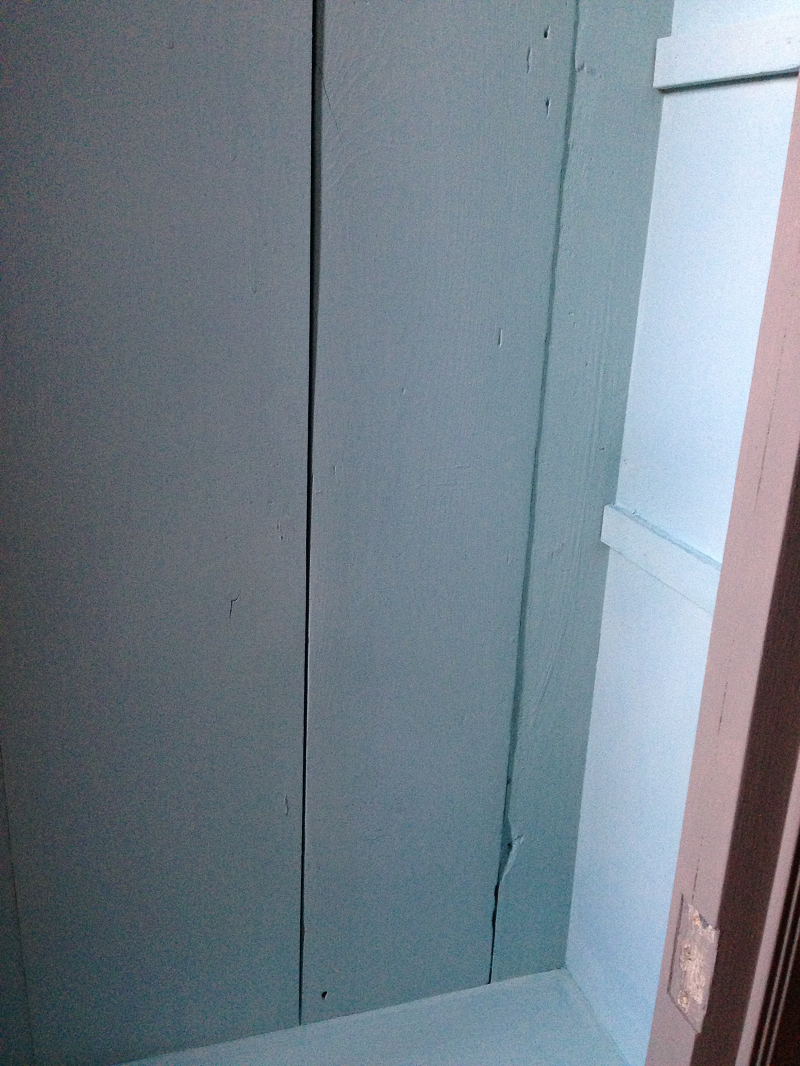
And, although there are variations and some streaks, it gives the piece some striations and depth of color-much like the sky itself. (I took this from my car yesterday-so beautiful!)

Rainbow Sky PM

Now I just have to finish the rest of it! And I will, while watching the Red Sox Duck Boat Parade from the comfort of our family room  paint workshop. In the meantime, anyone got a studio for rent? Happy weekend, everyone! Susan

Eulalie’s Sky

When I was a kid and old enough to realize I actually had a middle name, it was a very long time before I was comfortable sharing it with anyone. Kids are cruel, and the “I’ll tell you mine if you tell me yours” game did not set well with me, being the very awkward and shy child that I was.

Susan Eulalie PM

Because, while my friends’ middle names (and why do we have middle names, anyway?) were short and cute, like Ann and Jane and Beth, mine was unheard of, unpronounceable and French, no less! So, I would typically give the hint “It begins with an E” and let the games begin. First of all, there weren’t that many names beginning with “E”- Ellen, Elaine, Emily-kids could guess all day long and NEVER figure it out! Secondly, even if I divulged my middle name, the typical response was “WHAT?!?? no way, you’re making that up, how do you spell it?!” And so it was my well-guarded secret, shared only with my closest allies. But I never told my mother about my childhood angst because I was named after my beautiful and talented maternal godmother, my great-aunt Eulalie. (it’s pronounced you-la-lee).

Lally and John at our WeddingShe was a fashionista before it was a thing, all five foot nothing of her,

Lally, Arthur and Bernadette at Disneyand what she lacked in stature she made up for in spunk and style.

Lally ActressAccording to my mom, when she was a small child in boarding school, the teachers would stand her on the lunch tables and she would sing and dance-a born entertainer!

Child Lally with White BowWhat I remember most about her in my adolescent years was her fabulous spiky red hair, fishnet stockings, mini skirts and thoroughly modern style-even into her 80’s.

Lally & John at homeShe would have been a star in today’s social-media-driven world. Aunt Lally, as we called her, was an amazing musician, playing both piano and organ professionally.

Lally at the pianoAt every family gathering, there was always that moment when Lally sat down at the piano to play some jazz tunes, oftentimes accompanied by her sister Bernadette, a talented opera singer. So many fond memories…

Lally & Bernadette at pianoSo why am I sharing all of this with you now? Well, I would first like to think that I (and my friends-ahem…) are more mature now, and able to appreciate the name for what it is: a beautiful reminder of a wonderful wife and mother

Lally & Donaldwho was a role model for my generation of women-fabulous, talented & sexy.

Lally and Norma PMSecondly, in all of the years that I have carried my middle name, I have never once seen it in print, until recently, when a Google search (we didn’t have Google back when I was a kid. Heck, we didn’t even have blow dryers!) revealed that there is an 1845 poem by Edgar Allen Poe named Eulalie. And amazingly, a very short while ago, I spotted this on a blog that I follow,

What’s so interesting is that this beautiful shade of pale aqua-green milk paint called Eulalie’s Sky is one of my very favorite colors.

MMS Eulalie's Sky sampler

So now I am planning to use this color in some new pieces I am currently working on, leaving my own personal stamp. Last week, I drove out to Worcester to obtain my very first Miss Mustard Seed Milk Paint in my new favorite color, Eulalie’s Sky!

“Well-Spoken”. So perhaps the legacy my Aunt Eulalie left for me with her name was not her fabulous fashion sense (that’s for sure!) or her incredible musical talent, but the ability to communicate with all of you through the written word. To that end, I am eternally grateful that I was chosen to carry forward the beautiful name Eulalie.  Susan 

Drawer Pull Puppets

Did you ever decide that you wanted to paint some drawer pulls, but the pulling part that is hinged to the face plate keeps swinging back and forth while you are trying to hold it still to apply the paint? So frustrating! Simple solution: drawer pull puppets!

Pull Puppets

All you need is a place to hang the pulls while you paint, some thread, (you can use string, but the thinner the better so you don’t see the lines),

Thread and Scissorsscissors, painters tape and some newspaper, and of course, the paint. In this case I used Rustoleum Hammered Silver paint purchased at The Home Depot.

Hammered Rustoleumto give the old pitted brass a new old distressed look. Cut the thread and loop it over the wire. I used our cable wires in the basement that are attached to the beams in the ceiling over my work space.

Thread and wire

Now, obviously, if you have a nice, decorated basement, you would not be spray-painting in there anyway. I, on the other hand, have become a basement dweller surrounded by old pipes and cobwebs, concrete floors, hanging exposed wires and gray stone walls. No worries about ruining anything. So, I hung the hinges to just above the work table top, then taped them underneath to the table to stop them from swinging-uggh!

Pitted Brass Pulls

(if I ever tell you I want to add a puppeteer to my bucket list, remind me of this post, please).

Puppets in Window

Spray painted them, one coat needed. This paint adds a cool textured finish to the metal.

Hammered Silver Paint

Now, I wanted to add a little more interest to them, so I dry-brushed some of the Behr Stealth Jet Gray on top, the same color as the desk I had painted.

Antiquing pulls

Then I wiped most of it away, leaving just a hint of the darker gray to match the desk. Allowed to dry, then cut them down.

Hanging Pulls

This is the point where I typically show you the finished piece. Sadly, I forgot to take that pic! (sigh, I really need a camera crew to follow me around to take pics. Too many things to remember!!) Happily, I sold the desk at the Vintage Thymes Market this past weekend : ) But it did look pretty awesome, and that’s my unbiased opinion.

Desk Drawer Pulls

Have a non-distressing Tuesday everyone- stop hanging around and go do something today!! Susan

The Master in Class at Maison Decor

Recently, I had the good fortune to observe an Annie Sloan Chalk Paint class instructed by Amy Chalmers, owner of Maison Decor in Reading, Mass.

Amy Chalmers

With the perfect blend of skill, patience and great humor, Amy was able to successfully educate the attendees of the class on the basic techniques of using chalk paint to make their life more beautiful.

Maison Decor Life More Beautiful SignI first met Amy about a year ago, when I ventured into her store in Malden (now being used primarily as a workshop). Although we chatted that day about her blog and her company, I hadn’t really had an opportunity to learn about her own design experience until now. When questioned about her art background (when you see her shop, you know there is a very talented artist in residence), this was her response:

Amy Painting Armoire“I did study art at Northeastern and our program involved taking classes at the Museum of Fine Arts, which was amazing. But I was an English major in creative writing and art was my minor. I just always was the artsy kid, and my dad built me my own special art table when I was 12…it was modeled after an architects drafting table with a raised work surface and it had lots of cubbies on one side for me to put my art supplies. My parents just encouraged my creative leanings and I am glad they did. I painted a mural on my bedroom wall in high school~so it was just something that I found very natural. I think it was my first grade art teacher that ignited the fire inside of me, I was so excited about my art classes with her, and I remember thinking that I wanted to grow up to be an art teacher!”

After her schooling, Amy got into fabrics, making slipcovers and drapes, and started her own business in her late twenties sewing custom pieces. Interior design work followed, and for over 20 years she had her own business specializing in window treatments and color selections. Focusing primarily on residential interiors, she did do an occasional commercial space, including the McDonalds in Fanueil Hall in Boston! (what Annie Sloan colors are in that yellow and red palette?!)

Chalk Paints on Windowsill at Maison Decor

Fast forward to the present, where Amy spends the bulk of her time in the Reading Shop as an Annie Sloan “stockist” and teacher, offering painting workshops while creating and selling gorgeous pieces of furniture and decor, all finished with Annie Sloan Chalk Paint.

Maison Decor Chalk Paint SuppliesEntering into the store from Main Street, you feel as if you are stepping into an old chateau in the French countryside.

Maison Decor Shop VignetteHer style is quintessential French Country: loads of soft, muted colors, (Duck Egg Blue, oh yum!)

Duck Egg Bluestunning crystal chandeliers

Maison Decor French Crystal Chandelierand vintage pieces, all restyled and refinished using Annie Sloan paints and finishes.

Blue Painted DresserShe and her sons, Justin and Colin, also working in the business, created this cobblestone floor using sponges and chalk paint. Magnifique! FYI-the guys teach a “men’s-only” class, for the gents who would like to learn the painting techniques while not surrounded by women. Or maybe not.

Maison Decor Cobblestone FloorI arrived a bit early on workshop day, checking out the work table at the back of the shop, all set with the necessary tools and aprons her participants would need.

Maison Decor Class PrepOnce the class got rolling, Amy was a great teacher, at first educating her students on the paints, the company and furniture styles, but then it was time to get messy!

Time Clock @ Maison Decor

Amy’s charming teaching style is stand-up comedy meets mad scientist meets art professor.

Class PaintingShe knows her stuff, and is eager to impart her vast knowledge and expertise to her students, demonstrating technique and patiently answering any questions from her class. This is a hands-on workshop- no boring lectures here!

Amy Chalmers Teaching ClassAfter a few hours of painting and glazing and using blow-dryers (you’ll have to take the class to find out what those are for : ) the final reveal: These were Amy’s demo pieces:

Completed Samples, Teacher

and here are some samples from one of the class members: pretty close, agreed?

Completed Samples, Student

If you are interested in learning about Annie Sloan Chalk Paint, and if you don’t know what that is, check out Pinterest (and if you don’t know what that is, you clearly have not been reading my blog…)

Annie Sloan Chalk Paint

This unique paint, originating in England by a former rocker, is slowly making its way through the US and changing the way American craftspeople re-purpose and restyle their furniture.) Or, you can head over to Maison Decor at 150 Main Street in Reading, and learn everything you need to know from the master, Amy Chalmers, in one of her continually added workshops. They stock all of the necessary supplies there, or you can order online.  And if you do check her out, tell her Sue from Country Design Home sent you! Have a charming Sunday, Susan

It’s About Time

Vintage Clocks Bubby & Bean

A few of my favorite images on the Pinterest boards are of vintage clocks. I LOVE clocks. The bigger and bolder and older the better.

Large Blue Vintage Clock Shelterness

Photo via Shelterness.com

Since I am always so stressed for time, and oftentimes so immersed in my work that I forget the hour, clocks keep me in line and on time. (Except for the time when I was so busy sparkling up my holiday wreaths that I actually forgot to go to work!) Since I don’t wear a watch, I depend on my cell phone to tick away the hours and notify me when my time is up.

CDH iPhone clocks

But old timepieces, worn and shabby and oftentimes not even keeping time, evoke memories of simpler times passed by.

Cherubs and Clocks Indulgy

Photo Via Indulgy.com

Which is why, I believe, they are so appealing in today’s interior designs. No matter what the style, they blend perfectly and give a timeless presence.

Vintage Clock Shelterness

Vintage Clock Vignette via Shelterness

You will find vintage and shabby clocks on the pages of Pottery Barn

Vintage Clocks Pottery Barn

Pottery Barn Square Pocket Watch Clocks

 Ballard Designs

Vintage Clock Vignette Ballard Designs

Joss & Main

Clock Vignette Joss and Main

Joss & Main

and, of course, on Country Design Home! These are two of my favorites- this Paris clock sits in the alcove in my kitchen

CDH Kitchen Clock

and this one graces the glass and mirror bookshelves in my living room. Both are from, where else, Home Goods : )

CDH Living Room Clock

But my favorite vintage clock is this little beauty. Sooo love this! (Anyone happen to know where I can find one of these?)

Vintage Rhinstone Clock

So it’s about time for me to get back to work! One more week til the Vintage Thymes September Market– aptly name Vintage Thymes. To see more beautifully timeless images, click here.  Have a great time this weekend everyone! Susan

Blotting a Map

This week I have been up to my eyeballs in maps-all kinds, shapes and sizes-in preparation for next week’s Vintage Thymes Market.

Maps books

My September Theme is Back to School-you won’t believe all the cool retro school stuff we have found! But the maps are Coach’s thing, and these are not the hundred plus he already has at a Ward Maps Shop in Cambridge! This is an expansive collection of are all sorts of maps: countries, cities, roadways, the heavens, the earth, the ocean floors. My favorite is this gorgeous 1950’s Map of Outer Space- the colors are amazing!

Map of Outer Space

And they will all be available next week at the shop. Well, except one. I decided I needed a blotter for the desk I have been working on-also for the shop, so I grabbed an Upper Northeast map to cut up and use for the blotter.

This is the How-I-Did-It:
Supplies: foam board cut to size, fabric or paper (or one of the maps you will be purchasing at my shop next week : ), glue, vinyl sheet (optional), backing paper or mat board, cutter & T-square or scissors, tape
1. Measure out your foam core board to the size you wish to have the finished mat. Cut with scissors or rotary cutter and T-square.

Foam Board Cutting

2. Measure out the map, making sure the design you want to show on the front is positioned correctly. Before you cut it, make sure it is very smooth with no wrinkles. You can iron paper, BTW. Just use a no-steam, cotton setting and keeping moving the iron!

Ironing Map

Cut with at least a one inch border around the edges. You will be turning these under to give the edge a smooth finished edge.

Map Edges on Board

3. Spray adhesive on the foam board, then position the cut map with even edges on all sides.

Elmer's Craft Bond

I love this Elmer’s Craft Bond glue because it is temporary before its permanent, so it gives you a bit of time to reposition if you need to. It is quite messy, however, so make sure you mask the entire area you are spraying or you’ll end up glued to the table!
4. Add a layer of vinyl (this part is optional). I happened to have a roll left over from when we shrink-wrapped the porch last fall. I know, it’s almost that time of year again, yuck. This will give the blotter a wipeable, durable finish.

Vinyl Coated

Measure out the vinyl, leaving at least a couple of inches all the way around. This stuff is thick, so you need some extra to grab on to the back. By the way, vinyl is one of those things that tends to attract dust and dirt, especially in the basement. The cleaning solution? A dryer cling sheet!

Cling Sheets
5. Cut away the corners at an angle and then fold the vinyl in like a Christmas present corner. Tape securely to the back. (don’t worry, you are not going to see it anyway)

Vinyl Corners6. Add the sides.

Side Pieces

These are great for tucking in papers and paint chips and such. Measure out two pieces of foam or cardboard as wide as you like, but exactly the height of the blotter.

Side Pieces Measured

Measure out the map paper so that there is a few inches hanging over the ends.

Cutting Side Pieces

7. Position the side pieces, spray glue them, and then fold the ends over the edges and secure to the back with tape or glue. (The only thing I would have done differently would be to fold three sides over the edges to give it a cleaner look. The more you know…

Side Pieces Taped

8. Measure out a piece of backing to finish the reverse side.

Backing Paper

You can use paper, fabric, mat board, anything you would like, but remember, you are not going to see it anyway. If the surface is delicate or scratchable, I would definitely go with felt or fabric for softer protection. Glue the backing to the foam board, covering up all the messy folds and tape.

Glue on BackingAnd …

Blotter Completed

9. Voila! You have a customized, durable blotter for your desk! Have fun customizing it to your room- the skies (or the heavens) are the limit! Have a terrific Thursday, everyone! Susan

Mousetrap!

Mousetrap Game

As a kid, it was one of my favorite games. The little mouse was caught in the trap and the balls rolled around and if you did it correctly, it would untrap the mouse! Who would want to untrap a mouse in your house-what a nightmare! And, speaking of nightmares…you know when you have one of those restless nights at 3am when you just can’t sleep so you try to read and that doesn’t help so you decide to go down to your basement workshop and paint and as you are descending the stairs, you see this?!?

Mouse

No? So, that’s just me? The strange part was, he wasn’t scurrying around, just laying belly down on the concrete floor, commando style, but his mouth was twitching. Hmmm. Cancel that workshop idea. Went back to bed, making enough noise so that Coach asked if I was OK, to which I responded: “There is a mouse in the basement, can you go kill it?” I pretty much will do any home-renovating and restoring type projects, being the strong, independent, “I Can Do Anything” type of woman I am,

We can do anything

but that does not apply to rodent control. (Unless, of course, you count the time I captured the squirrel with the trash bag- read that saga here…)

squirrel trap!

Squirrel Trap!

His drowsy response: “You want me to go kill it now?!” So we went back to sleep, and Coach got up first thing and discovered the mouse in the exact same place I left it the night before. I don’t have any poison or mousetraps down there, and we haven’t seen one in quite awhile, so I am not sure exactly what killed the little guy. Coach suggested it was all of the chalk paint I have in my work shop-perhaps he got a taste of Duck Egg Blue or French Linen?

Chalk Paint French Linen

Since I think chalk paint is supposed to be non-toxic, it’s more likely he got a taste of some deadly paint remover or stain. Didn’t he see the skull and crossbones on the can!?

Skull and Crossbones

Obviously, I don’t need to set a trap, since I have some sort of mouse killer already in place. However, as a public service announcement, I will share with you my favorite mouse trap: The Ortho Max Defense Mouse Trap. We have tried them all, and this one rocks! This is a no-muss, no-fuss kind of gadget. Just set it, and when it’s done its job the little lever pops up. You don’t ever see the poor little country mouse who just got smooshed. Sad, but effective and necessary to keep your home rodent free. Why don’t they just stay outside with the other woodland creatures where they belong?

Ortho Home Defense Mouse Trap

So, with that, it’s time to return to the dark and dreary basement to work on some projects-but I’m thinking I need a new workshop! Something bright and beautiful and (preferably) not underground. Like this one I recently spotted on the blogs-can you believe that someone actually gets to create in this space? I’m certain you won’t find any mouses (meese, what’s the plural?) here-unless it’s attached to a Mac.

WorkRoom The Creativity Exchange

Workroom The Creativity Exchange

But a crafty girl can dream, right, even if she can’t sleep at 3am? Have a dreamy Friday, everyone-it’s a long weekend! Susan

Messages In My Garden

Over the weekend, Coach and I had a barn sale to get rid of some old books and old stuff (basically to make way for some new old stuff).

books

We did quite well, thank you, and managed to make some dough while making some space in the barn, so that’s a good thing. Our two story barn sits adjacent to our home, with a white picket fence and arbored entrance connecting them. The fence separates the driveway, where all of the “junque” for sale was displayed, and our back yard, which is sectioned into a stone patio, a perennial garden with a small pond, a rose garden, a second perennial garden divided down the center by a brick pathway leading to yet another arbor.

Red Rose Bush

As potential customers moved closer to the barn to search for treasures, the gardens were in full view, and I overheard more than a few folks exclaim “what an incredible yard”, “such beautiful gardens” and “it’s like an oasis” that we have hidden behind the fence. Now, I am not going to take any credit for this, as the green thumb in the family belongs to Coach. Other than an occasional “grab a few weeds as I am playing fetch with the dog” kind of gardening, I simply do not have the time nor the inclination to nurse the flowers, shrubs and occasional green frogs that habitate our back yard. This little guy is actually quite noisy!

Frog In Lilies Closeup

As luck would have it, I just finished reading “The Language of Flowers” by Vanessa Diffenbaugh.  Without revealing the plot, I will share that the book follows the story of a troubled young woman who finds her way in life through the meanings of flowers. Never having given this a thought, I nevertheless found the idea of flowers having true meaning quite compelling, and I started looking at our gardens in a new light. Although we have literally hundreds of varied flora and fauna, I am sharing just a few of my favorites. The Black-Eyed Susan’s that are scattered in bunches throughout stand for Justice. I like having those in the garden.

Black Eyed Susans

And the simple Daisy, my favorite flower,

Daisies

and the name of our much-beloved and now since passed best furry friend. She loved to lay out on the grass in the sun, surrounded by the gardens. Daisies stand for Innocence.

Daisy in the Garden

Intertwined with the Daisies are these pretty yellow flowers. Growing in abundance, we have to keep cutting them back or they overtake everything. I don’t have the meaning of them, because I don’t know their name, but I will call them Happiness. (If anyone can identify them, please tell me so I can share their true meaning!)

Daisies and Yellow Flower

We do have a Dogwood that just flowered for the first time this spring. Unfortunately, as with much of the garden this time of year, the beautiful flowers have gone by, and we are left with the leafy greens. But they will return next spring, so… Love Undiminished By Adversity.

Flowering Dogwood

There is quite a bit of fern that grows naturally in the shady parts of the yard. Simple and green and soft to the touch. Sincerity. 

Fern

An entire grapevine arbor behind the barn grows larger each season, sprouting curly tendrils that reach out in all directions.

Grapevine on Tree

The more you cut it, the higher and wider and stronger it grows, which is great for making grapevine wreaths!  Abundance

Grapevine

Just recently, the Hibiscus has blossomed, with massive, stunning blooms the size of dinner plates in multiple shades of pinks and reds.

Raspberry Hibiscus

But they shrivel and die quickly, to be replaced by even more exquisite blooms. Hence the meaning…Delicate Beauty

Peppermint Stripe Hibiscus

Along the entire length of the stone-walled perennial garden are the tightly-packed Iris.  Message

Iris

And along the porch are holly shrubs, like the kind you see at Christmas with the bright red berries. Presently they are yellow, but as the seasons change, so does the hue, a harbinger of winter to come. Their meaning is Foresight.

Holly Berries

And then there is Ivy, loads of it growing over the stones surrounding the pond, essentially hiding everything but the water. (I call it the chia pet pond).  A strong vine that grows freely but creates strong,protective bonds with everything within its green grasp. Fidelity.

Pond with frog

And scattered through all of the gardens are Phlox. In every shade of white, pink and purple. they constantly cross-pollinate (thank you, bees!) and sprouting new pastel shades each year. Our Souls Are United

Phlox

Periwinkle borders much of the brick walkways and stone-lined paths. For one short moment each season they display their pretty little purple buds. Tender Recollections

Periwinkle Border

The magnificent orange tiger lilies bloom for a very short time, then leave behind a wall of green stalks. But while in bloom, they are Majestic.

Tiger Lillies

And then there are roses. All shades of pinks and reds.

Hot Pink Rocket Roses

I am not particularly fond of roses. Why is something so beautiful apt to cause so much pain? And yet the messages are of Love (the reds)

Red Roses

and Grace (the pinks).

Pink Rose

So, the next time you stop to admire a beautiful garden, or choose a bouquet as a loving gift, just for a moment think about the meaning of the flowers, not just the colors or style. You’ll be surprised at the messages those blooms can convey. Have a meaningful Monday, everyone!! Susan

Big Rack Attack Towel Rack!

A few weeks ago, I started a mini-reno on our downstairs half-bath. Well, it started out as a mini-reno…

Bathroom floor

 While that project is still ongoing and will be unveiled shortly, my Big Rack Attack Towel Rack project is ready to share with the world!  Having seen them used for decorating, both in print and on TV, I had been searching endlessly online and in stores for a white porcelain deer head to add to an old tabletop (you’ll see…) without much luck. Everything was either too big, too small or too pricey to use for a budget bathroom remodel. It didn’t make sense to spend more on an decorative accessory than we did on the new toilet. So, while in Maine a few weeks ago, I grabbed this one in a flea market for three bucks and thought “perfect!”

Deer Head Before

Apparently this is intended to be stuck to the outside of your car window so that it appears he is busting through the glass. Is this 6 inch buck head with the super cute face supposed to be scary?! And who would be driving around with a deer crashing through the window anyway? But instead of hanging him outside the window, this little guy enjoyed the ride home on the dashboard in the blazing sun to soften him up so I could reform his antlers, because they were a little smooshed together.

Deer in Window

So while he was basking in the sun, I stuck a hair clip between the antlers, then allowed them to cool and we were good to go. So here’s the how-I-did-it:

Making a Big Rack Attack! Towel Rack From An Old Tabletop and a Plastic Deer Head

1.Used a decorative piece of wood for the base.  In this case, it was a small cherry tea table top without any legs. I cleaned it, then taped off the center for a decorative painting technique.

Prepped, taped wood plaque

2. I wanted an aged, colorful middle, so I grabbed my folkart crackle medium. To create a crackled finish, you paint the surface using an undercoat, whatever color you want to appear through the cracks, in this case white. Then you paint on a layer of the folk art crackle paint medium,

Folk Art Crackle Medium

then add the top coat. The crackle medium makes the top coat crack apart, instantly aging it like 100 years easily.

Wood Crackled Blue

This top color is Behr Midnight Dream , a color I chose to co-ordinate with the new bathroom color scheme. Behr Paint Midnight Dream

3. Waxed the frame edges to bring back the original cherry luster. Used my Annie Sloan Soft Wax for that. Really brings back that glow in the wood.

Wood Wax Finish

4. Propped the buck on something to allow spray painting on all sides. I placed it in an old mason jar, impaled on a screwdriver surrounded by a plastic bag (that’s even worse than crashing through a car window!) Poor deer…

Deer Head Shiny

5. Primed first. Since this was plastic, I wanted to make sure the paint adhered well. Used Rustoelum Speciality Plastic Primer.

Rustoelum Plastic Primer

5. Painted with gloss white paint to give the appearance of porcelain. Used Rustoleum Gloss White which made it super shiny!!

Rustoleum Gloss Paint

Deer Head Primed 2

6. A friend had suggested that I use a little brass plaque to give the deer a name or tell the date of his capture. I went with some old scrabble letters that spelled out “Oh, Deer” but use your imagination. The letters were too blonde (is there such a thing?), so I used this furniture scratch touch up marker to give them a little color. Love those pens!!

Oh Deer Letters

7. Adhered the deer head to the center of the plaque with hot glue. Now, unbeknownst to me, while all of this had been going on, my amazing children surprised me with a beautiful large white deer head from West Elm for my birthday!! Even David Bromstad said it was a really nice deer. So there’s that.

West Elm Deer Head

It’s much, much larger than my daughter’s little guy Bartlet, but he wasn’t scared, so much as just a wee bit worried, perhaps?

Deer and Bartlet

Unfortunately, the big buck was so big it didn’t fit in the middle of the plaque! So he has to go back to whence he came, West Elm, and since they don’t have any more of the small ones, we are going to shop for another beast instead. A rhino, perhaps? Who else would have a rhino in their bathroom? So, I didn’t permanently fixate my little deer head to the plaque, just hot-glued it for now, in the event that he needs to move on to greener pastures.

8. I needed to add a bit more rustic glam to my piece, so these metal stars were perfect. Again, used the stain marker pens to change the stars from silver to bronze. The result was kind of a mottled look, which was perfect.

Deer Stained Star

9. Attached the hook at the bottom. This is going to be the guest towel rack in the new bathroom so it needed a hook or two.

Hook for Rack

10. Stood back to admire my new Big Rack Attack Towel Rack!!

Deer Head Plaque Instagram

So, next time you stop by for a visit, you’ll be hard-pressed not to notice the big rack (insert joke here) Sometimes we just have to take things a little less seriously, folks. Now I just have to finish the rest of the room, seriously. Have a wicked awesome Wednesday, everyone and just remember: If a big rack attacks, turn him into a towel rack!  Susan

Copper Cleaning Accomplished!

Copper Coffee Pot Before

After much trial and tribulation and multiple attempts utilizing all sorts of natural and chemical cleaning formulas, my copper coffee pot is now perfect!

Copper Pot with flowers

Since my last blog, I have received multiple suggestions from several sources on how to get my copper pot clean and shiny. After posting the question on my “Antiques Are Green” LinkedIn group, the cleaning options were endless from the many dealers and collectors of all things copper! Among the home remedies mentioned were vinegar, salt, lemon, ketchup (yup, ketchup-apparently not just for hotdogs anymore…), 0000 steel wool pads, Brillo pads, Chore Boy pads, Never Dull wadding or just put the damn thing in the dishwasher.

Copper cleaners

I also tried my Magic Eraser sponge and my Cape Cod Metal Polish with some luck, but still not perfect.

Copper Mr. Clean Magic Eraser

Also mentioned on LinkedIn were lacquer thinner or acetone (nail polish remover) and kerosene (really?!?), or having it dipped. Not sure what that means, but it conjured up images of my helpless coffee pot being immersed in a boiling, bubbling hot vat, and that made me sad. Bubble, bubble, toil and trouble…

Copper Kettle Turbo Squid

Among the commercial polishes I could try were Siege, Wrights, MAAS, Liberty, Brasso, Twinkle, Silvo and Bar Keeper’s Friend. But I was hoping to keep it “green” clean, so I started out with the natural method, utilizing heated vinegar in a large pot.

Copper Vinegar Gallon

Once I placed the pot in there, the bits of bubbling lacquer appeared floating on the surface. Yuck.

Copper Floating Varnish

But it was working!

Copper Pot half dipped

Or so I thought. Flipped it over and immersed the other end. This was the end result. Double Yuck.

Copper Tarnish Mess

I finally decided to go for the commercial products, and the one that was mentioned more than once was Bar Keeper’s Friend, which I found on the shelf of my local Home Depot for $1.48. I got some Brasso, too, just in case that didn’t work.

Copper Cleaner Cans

Make a soft paste of BKF and started wiping the pot with a sponge, instantly removing years of tarnish and varnish and dirt! Copper Tarnish In about 3 minutes time, my copper coffee pot, and even the brass handle, was gleaming and shiny and pretty! So the Bar Keeper’s Friend is now my friend as well! As a disclaimer, I am sure the other products mentioned would have worked just as well. But this is the one I saw first, and the Brasso was at the hearty recommendation of the Home Depot clerk. Who, BTW, could not have been more that 17- I am curious as to just how many copper pots he has cleaned?!?Copper Pot Complete Since my Barkeeper’s Friend worked so well on the coffee pot, I grabbed a copper sconce I was planning on painting, but now it’s got a whole new shiny life as well! Copper Sconce Then this plaque, which was so dark and tarnished, I couldn’t even tell what the picture was until I started cleaning it. As I was rubbing the bunny, I noticed a signature at the bottom and the date was 1502. So I stopped. Did a Google search and discovered that the Young Hare was painted by Albrecht Durer in 1502. Copper Bunny You know when you’re watching “Antiques Roadshow” and the expert says “gee, it’s too bad you cleaned this. It would have been worth a million dollars but now it’s ruined and worth about twenty bucks”? I’m pretty certain that this copper engraving by Albrecht Durer isn’t the real deal because it’s mounted on a backing that appears to be a more modern substance than what would have been available in the 1500’s, but the tag says made in Germany, so I’d better check it out before I ruin it! So there you have it, 2 weeks of work on a $1 copper pot that finally came clean with Bar Keeper’s Friend. Have a super sunshiny Sunday everyone! Susan