Excentrique Design at Old Stone Farm

The very first time I visited and blogged about the Vintage Bazaar at Pettengill Farm (it’s this weekend, folks!) I featured a company named Excentrique in my blog post. Pretty sure this hot pink vintage table scape caught my eye : )

Excentrique Pink Chairs
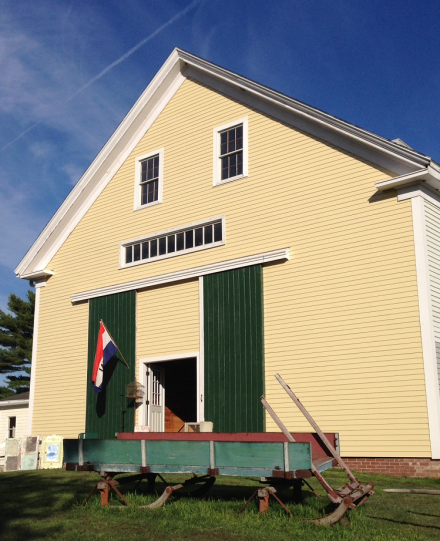
Since that post, over two years ago, Excentrique has moved from the fields of Pettengill Farm to their permanent home in this impressive two-story barn at Old Stone Farm in West Newbury, Mass.

Eccentrique Barn ExteriorAlthough the barn is a new build, it was designed with yesteryear in mind. Solid granite steps lead up to the massive wooden sliding doors that welcome you into the barn where you will be overwhelmed by the sheer beauty of the architecture and the decor as well.

Eccentrique Vintage Crystal Chandelier
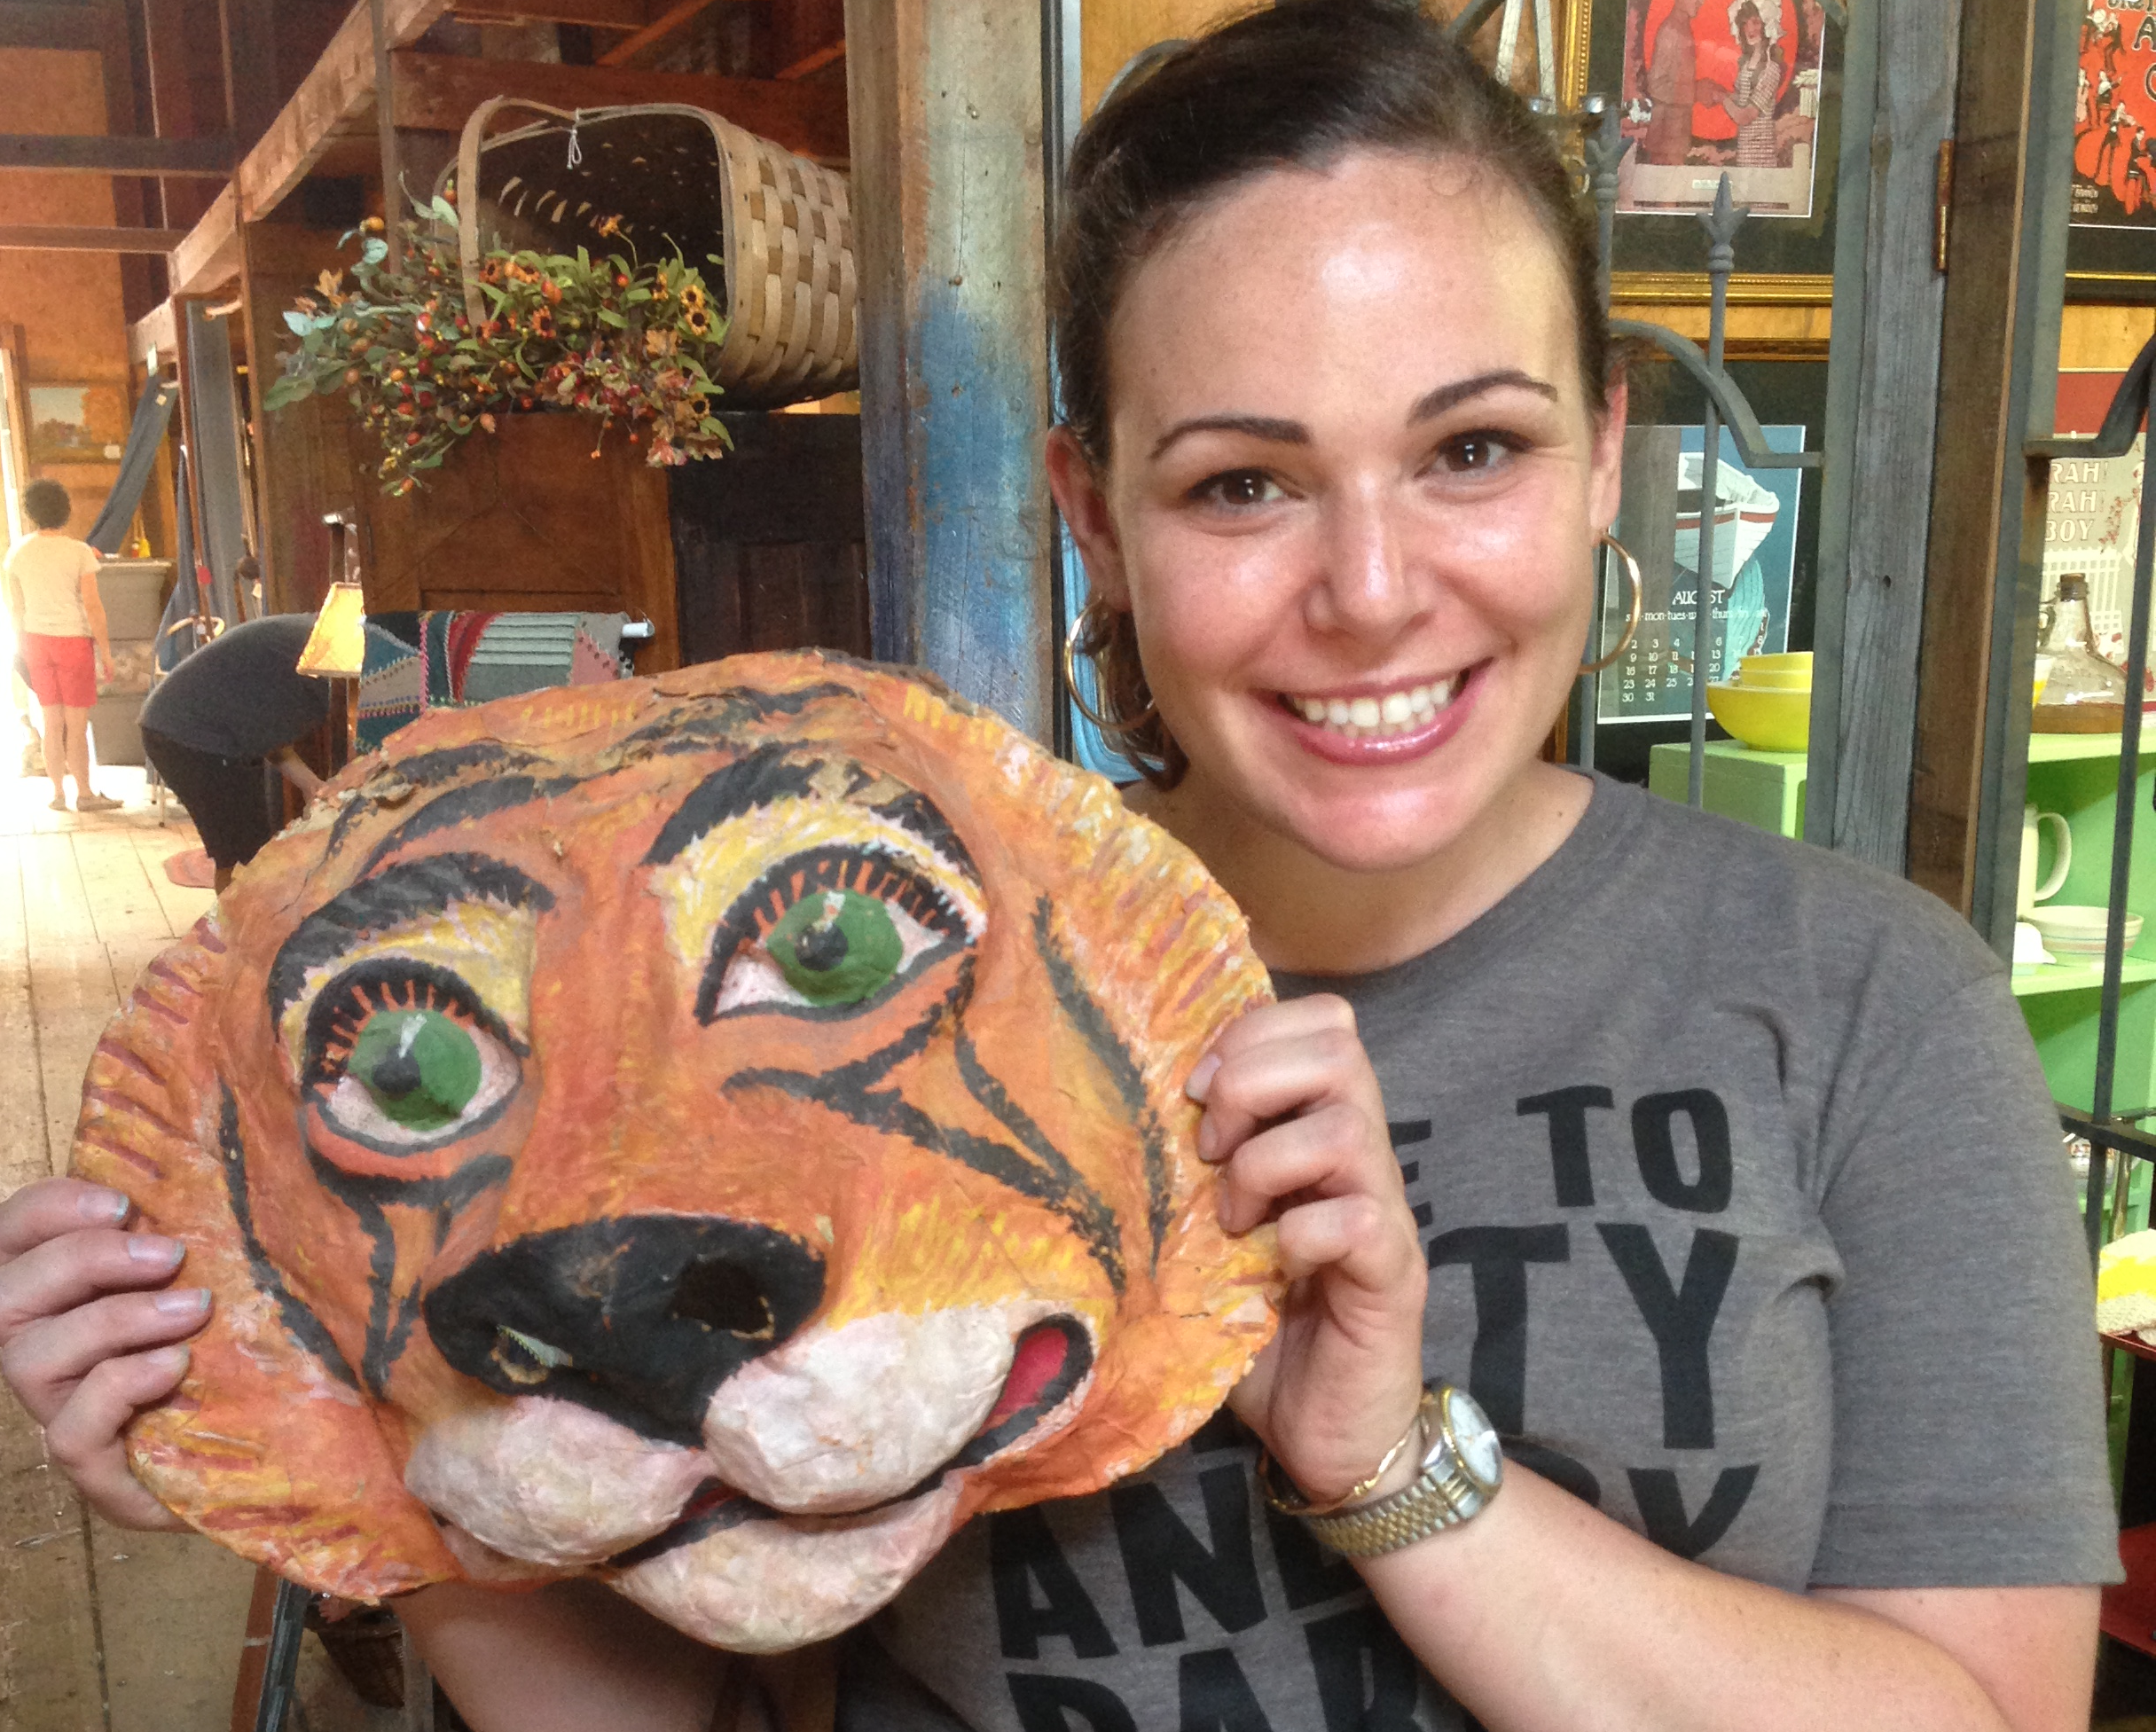
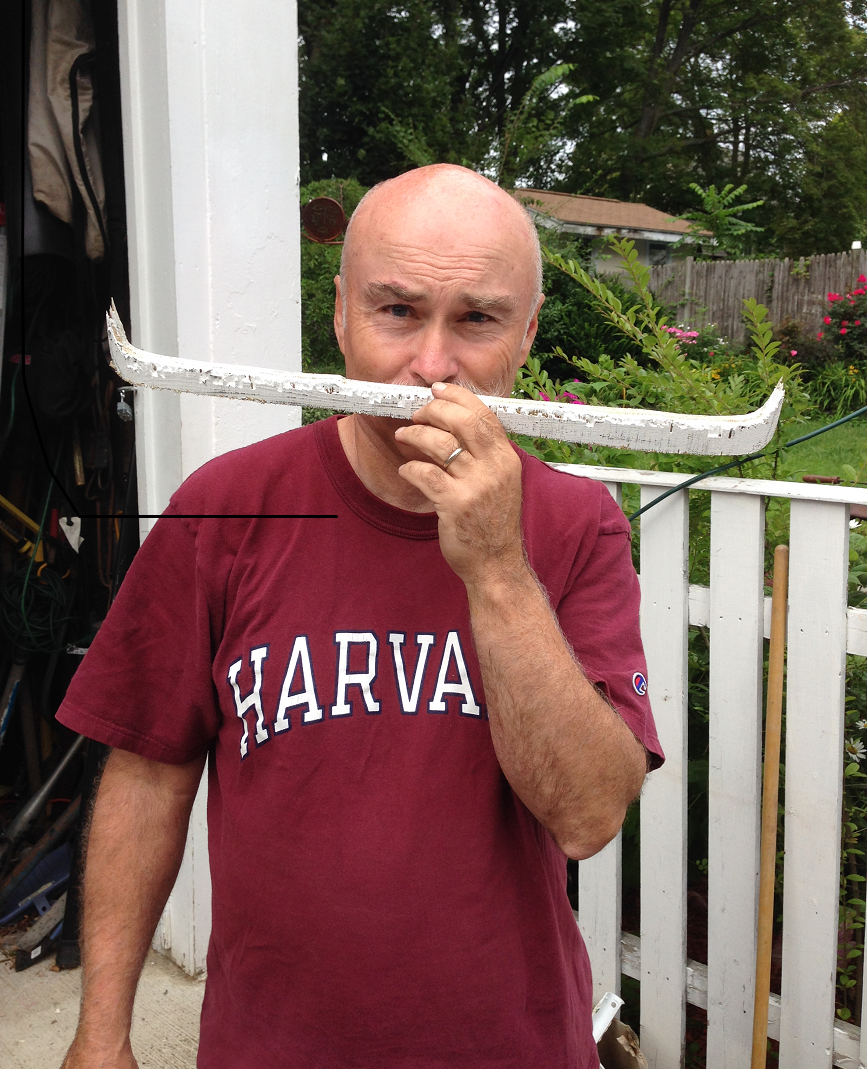
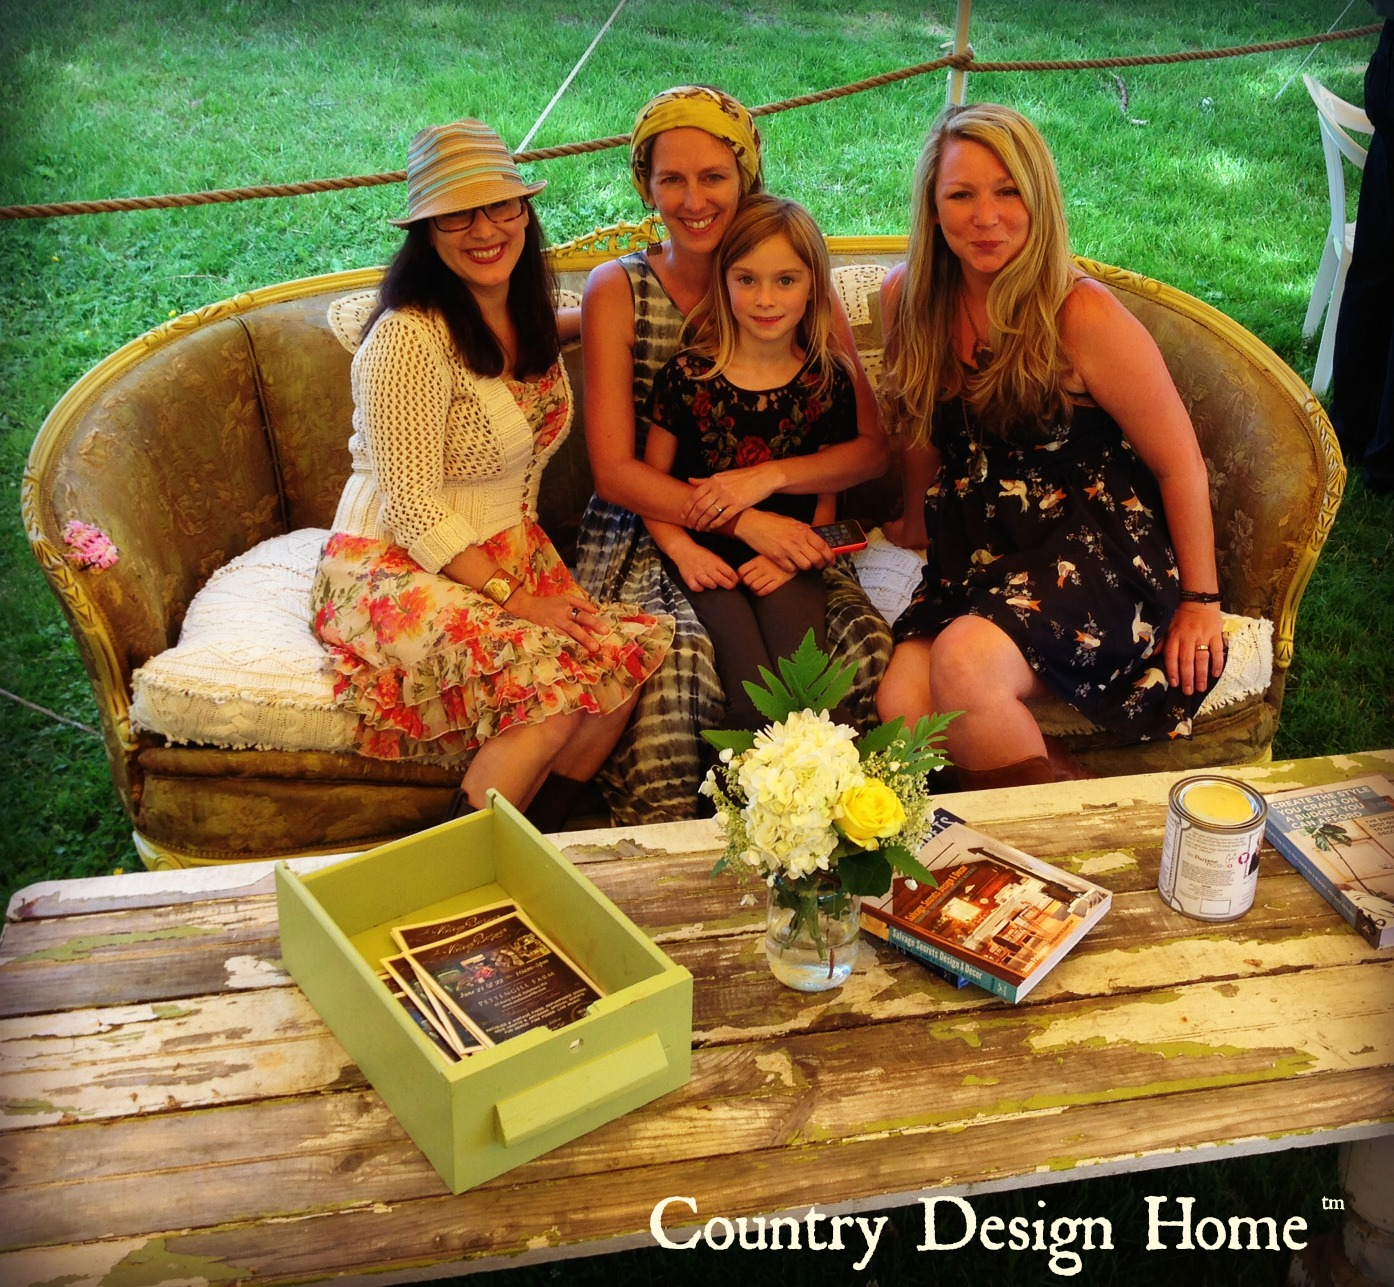
The barn shop is owned and operated by Brenda Lucci Bradley, shown here with her assistant Sam, who is presently studying design in Florence, Italy!

Eccentrique Brenda And SamThe barn is decorated with a combination of antiques and vintage finds,

Eccentrique Vintage Map Vignettealong with refurbished mid-century modern pieces paired with eclectic decorative accessories.

Eccentrique Needlepoint Chair and PillowIn the upstairs loft I discovered these amazing orange crocodile chenille side chairs,

Eccentrique Orange Retro Chairpaired with a mid century table and vintage lamps. The perfect spot to kick back, relax and have an afternoon chat.

Eccentrique Vintage Upstairs VignetteThere are several hand-crafted and painted fireplace mantels, styled for each season with candles and glassware, lanterns and vintage glassware.

Eccentrique Fireplace Mantel
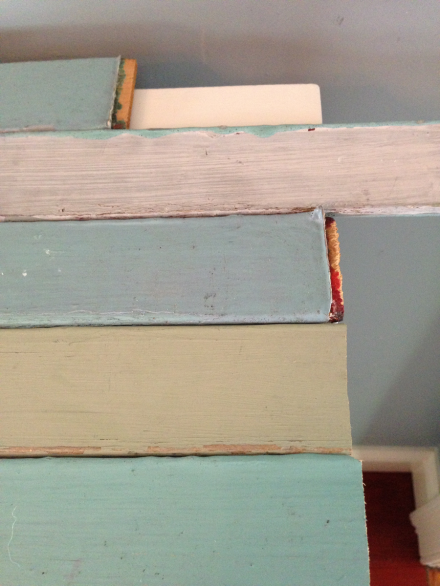
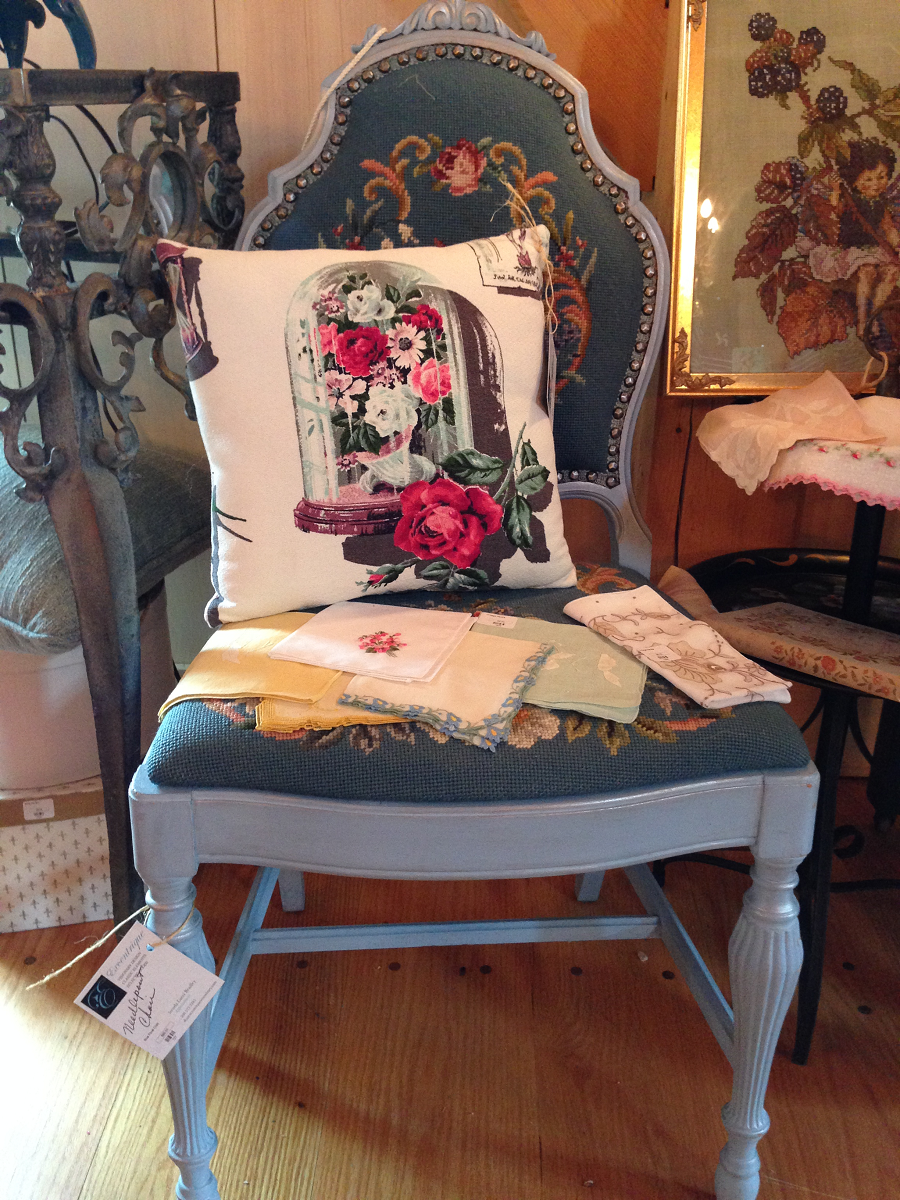
Scattered throughout the barn are colorfully co-ordinated corners that allow you to imagine how the pieces would appear in your own home. The mixed blues are striking.

Eccentrique Vintage Blues
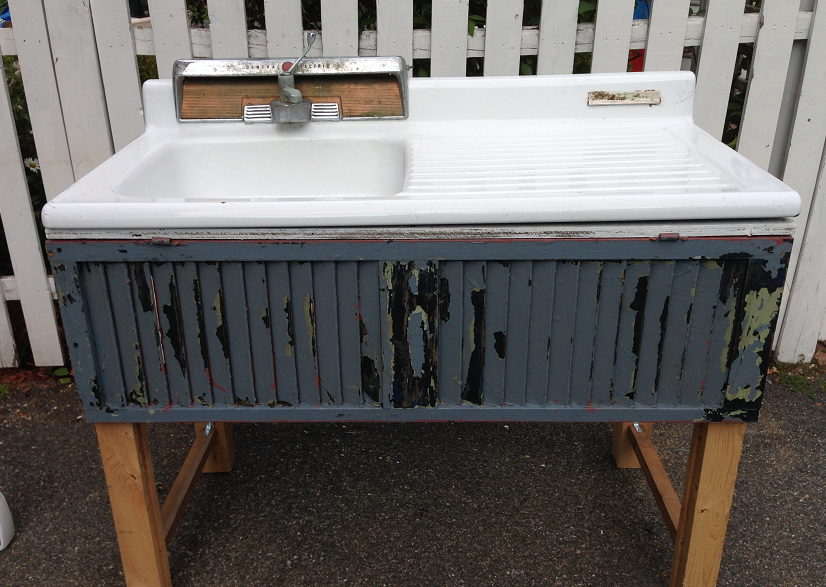
Loving this vintage look aqua fridge with the country-style vintage aprons.

Eccentrique Big Chill Vintage FridgeBrenda not only sells at her shop, she is also an accomplished interior designer. Presently working on an historic Vermont country inn, Brenda shared her mood boards with me and explained her overall design concept of the spaces she is transforming, one room at a time. Through her design company, Journey By Design, Brenda offers full service design consultations, offering her expert services from overall design concept and project management to the complete styling of your project.

Eccentique Vermont Design BoardsExcentrique is open by appointment or for special weekend events that highlight each season.

Excentrique AutumnThe next open barn is scheduled for Oct 4 & 5. Or, you can contact Brenda to set up an appointment to stop by and shop. She’ll be happy to show you around!

Eccentrique Happy Mannequin
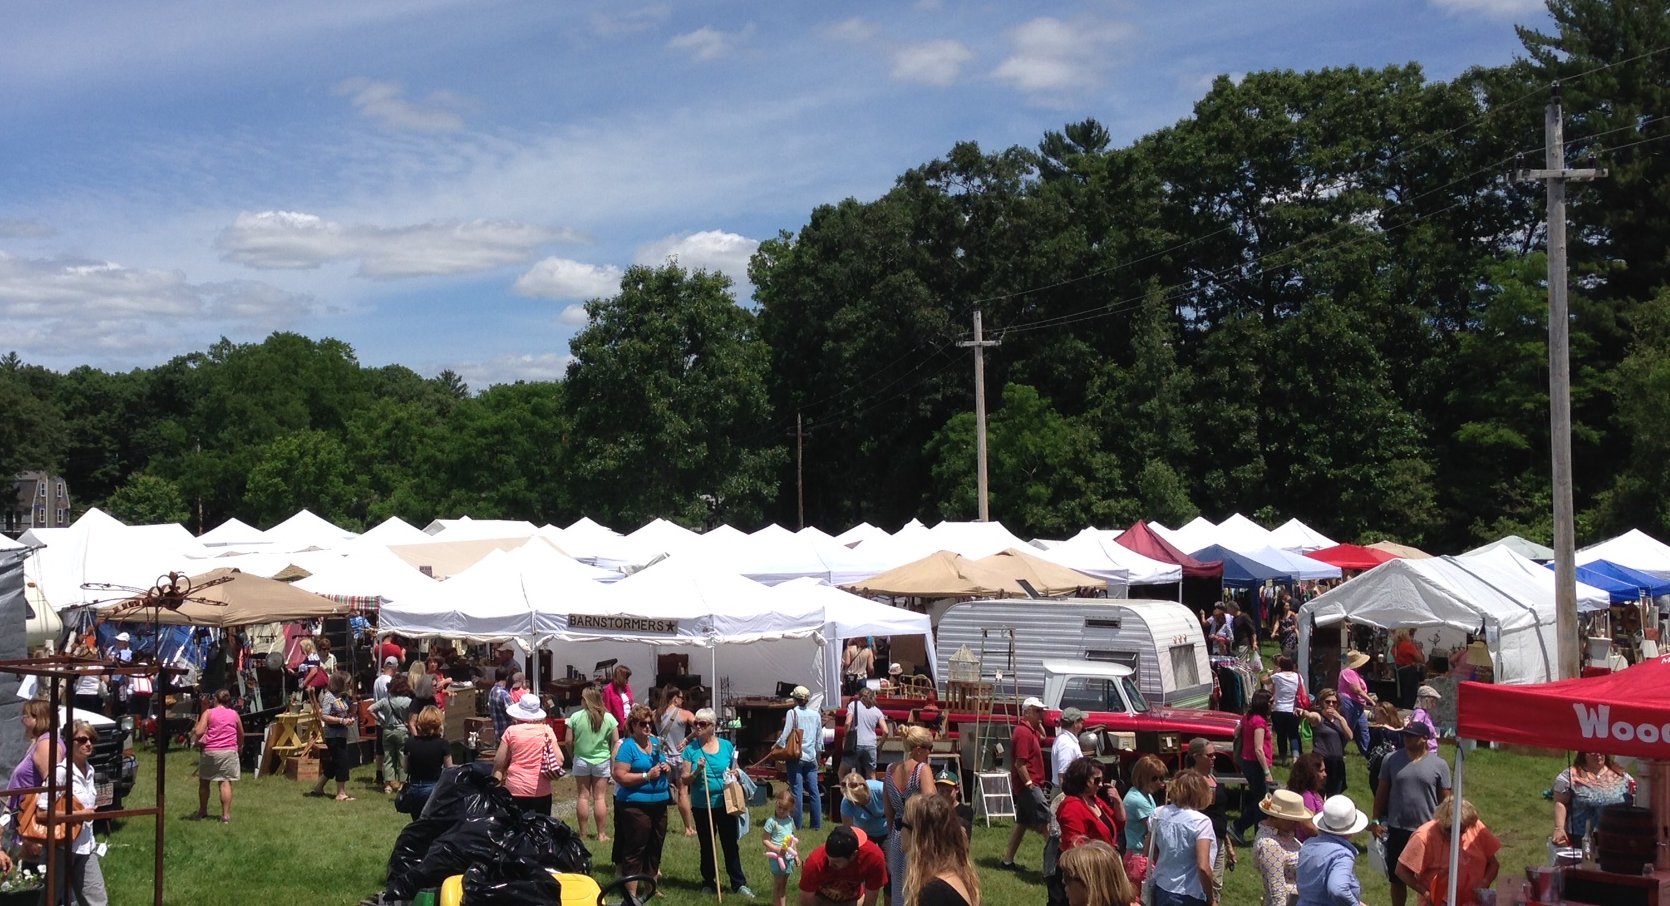
But lucky you! She will also be setting up shop at the Vintage Bazaar at Pettengill Farm this weekend! Make sure you stop in and say hello, and tell her Sue from Country Design Home sent you. Have a great weekend everyone-see you at the Bazaar! Susan


Polish It Up-Tuesday’s DIY Tip

Since you all think I am a slacker when it comes to completing my mom’s kitchen project, I just want to share with you one of the other projects I had been working on simultaneously. In the adjacent dining room area, I painted the walls the same color as the kitchen and freshened up the old hutch. We debated about whether to paint it or not, but since the wood is still quite lovely and a honey golden brown, we decided to keep it stained. The problem? It was faded from being next to the sliding glass doors that lead to her deck and scratched from years of daily use. This time, I turned to Old English Furniture Polish with Scratch Cover.

Dining Room Hutch Old English Stain BottleThis is an oil with stain in it, so it hides the scratches while it polishes and rejuvenates the surface, bringing back its original glow and shine. Very simple, just put some on a rag (use gloves folks, this stuff stains!) then wipe it over the surface.

Dining Room Hutch Old English ScratchesFor the really deep scratches

Dining Room Hutch Scratched surfaceI actually just poured a bit right into the area, let it sit for a moment and then wiped it away. This is a door before:

Dining Room Hutch Door Beforeand this is the same door after (these photos are NOT retouched in any way)

Dining Room Hutch Old English AfterUnfortunately, I never took a before photo of the entire hutch. BUT, this is the hutch today:

Dining Room Hutch AfterDeep, rich, glowing color and depth of shine. Super easy and quick. No buffing necessary. Just wipe on

Dining Room Hutch Wiping On Old Englishand then wipe off.

Dining Room Hutch Buffing DoorDone. And no, I was not compensated in any way for pitching this product. I have been using it for years and think its awesome. I thought you should know about it too. Simple as that. That’s my DIY Thrifty tip for Tuesday. And it just goes to show ya-sometimes you don’t need to start from scratch…just cover them up! Susan 

Rusty Bedsprings Marquee Lights

Hi, all ! Happy Labor Day!

Rusty Bedsprings Marquee Light Closeup PM

So, ever since Coach acquired that first set of rusty bedsprings, I had an idea for creating a marquee light for the barn shop. Inspired by the rusty bedspring coil lights in Salvage Secrets Design & Decor by Joanne Palmisano, I figured I could just take the bedsprings and attach some lights in the shape of an arrow to the back of the bedframe using pieces of wire.

Rusty Bedspring Light Plan and WiresIt worked, somewhat, and the arrow became a beacon in our shop in the barn. (This is another one of my creations that, like the vintage sink, that is NOT FOR SALE…says me.) But it bothered me because the cords showed,

Rusty Bedspring Light Clipsthe lights were all crookedey and I wouldn’t be able to change the light shape without removing them and starting all over. Plus, because the background was the antique brown wood of the barn walls, you really couldn’t see the form unless you squinted. Or took a photo.

Rusty Bedspring Arrow LightOr looked at it in reverse in the mirror across the barn. So, I decided to take it down and remake it into a true marquee sign. Here is the how-I-did-it:

1. Removed all the little pieces of wire and the lights from the bedsprings. THAT was fun. 2. Went to Home Depot and purchased a 4 x 8 sheet of lightweight plywood.

Home Depot Plywood SheetThey have a nifty wall-mounted cutter thing and a very nice guy who will do the cutting for you, which is pretty awesome. LOVE Home Depot!

Home Depot Plywood Sheet Cutting MachineThe plywood was cut down to the size of the rusty bedsprings with a 2 inch edge all around to allow for framing.

Rusty Bedsprings on Plywood Base3. I built a frame out of 2 x 4’s and secured it to the back of the plywood to give me something to screw the brackets into that would hold the springs in place.

Rusty Bedspring Framing for Board4.  Measured and marked the holes I would have to make for the light sockets to be installed.

Rusty Bedspring Light Socket Holes in PlaceOf course, rusty old bedsprings are not necessarily even, so once I measured and marked the holes, then put the springs back onto the board, I noticed that several did not actually line up with the markings. So I tweaked them just a bit, and then a bit more, and then I drilled the holes.

Rusty Bedspring Light Measuring HolesAfter drilling, I used this handy sheet metal grinder bit to make the holes smooth and just big enough to fit the sockets so that they were snug.

Rusty Bedspring Sanding Holes for Light Sockets5. Painted the board with Rustoleum High Heat spray paint.

Rusty Bedspring Rustoleum High Heat Spray PaintNow, these little patio globe lights (from Target, LOVE these!) do not get up to a temperature of 1200 degrees Farenheit, but it’s good to know I’ll be safe just in case.

Rusty Bedspring Coil Light Closeup6. Painted a base coat of dark gray. Why gray, you ask? White would be too bright so the lights wouldn’t show up when lit. Black would be too dark so the bedsprings wouldn’t show up. Gray seemed like the perfect neutral alternative. This can of dark gray was a yard sale find, but a very nice quality paint from Mythic Paint.  Went on smoothly, minimal drippage, good coverage and is completely non-toxic. Unfortunately, there aren’t any local stores near me that sell it : (

Rusty Bedspring Marquee Light Gray Paint Back Board Mythic7. I wanted the plywood to not look like plywood, but more like some antique barn board or metal. So I dry brushed some darker gray streaks over it.

Rusty Bedsprings Marquee Light Board Dry Brushing Paint8. Once the paint was dry, I placed the bedsprings back on the board to make sure everything lined up nicely, which it did.

Rusty Bedspring Marquee Light Sockets in PlaceTo attach the springs to the board, I used some steel plumbing clamps that I spray painted.

Rusty Bedsprings Drill Hole MarksFirst with some metallic oil-rubbed bronze, but then with a rusty metal primer, both by Rustoleum.

Rustoleum Rusty Paint PrimerI know the primer was supposed to go on first, but I really wanted the bracket and screws to look rusted to match the springs. Done.

Rusty Bedspring Rusted Painted Clamp9. Attached the springs to the board, then flipped the board over and placed the light sockets into each hole. Note that the wires are now nicely hidden behind the board where they are not all tangly and messy.

Rusty Bedspring Marquee Lights Wires in Back

10. Tested out the board by screwing in the lights into the shape I wanted just to ensure they were in proper working order before transporting it back to the barn. In this case, just Hi!. Sent a text to my friends and family : )

Rusty Bedspring Hi! Marquee LightThere is one problem with using rusty bedsprings as your form: there are exactly 66 coils, so there are 66 lights in total: 6 down and 11 across in straight horizontal and vertical rows. Which means that I can’t really make any curved letters. Block letters it is.

11. Re-installed the “light bright” board onto the rear wall of the barn using some big-ass brackets to make sure it didn’t come tumbling off the wall and onto someone’s head! This thing is HEAVY!!  Here is the new, improved Rusty Bedspring Marquee Sign that is now the beacon of light on our shop.

Rusty Bedspring Marquee Light In Shop PMWhich is really fun and draws a lot of attention. And, I heard more than a few browsers say “that must be a new sign, it was an arrow before.” Which is great, because that means they are returning to the Barn at Todd Farm to shop some more! Yay!

12. We do a lot of standing around at the shop (oftentimes the booth is so full of shoppers, we can’t fit in it-which is a very good thing!) Sometimes we’re just taking a break from all of the furniture moving, like this old girl.

Dog in Shop Other times we’re just goofing off-good thing we’re the bosses…).

Lisa and Tiger HeadSo we had some time to try to come up with other words for the light board, now that we can easily change it out. Subliminal messages like BUY could work, but I am thinking HUH? or MEH might draw a smile. Do you have any suggestions?? (no profanities, please : 0 Remember, we only have 11 letters across, 6 letters down and no curves!! Have a great holiday Monday, everyone! Hope you are enjoying the fruits of your labor : ) Susan


Everything AND The Kitchen Sink!

As you all know by now, we have now opened our vintage shop in the Barn at Todd Farm,

Barn Postcard no emailsand so far things are going very, very well! Lots of our rescued, re-cycled and re-furbished pieces have been sold, and shoppers appear to be very excited about the variety of vintage goods we are offering.

Todd Farm Display PMFollowing our first Sunday (which seems like a lifetime ago, but was actually just a mere three weeks ago!) I realized we needed to make a change in our displays. When we set everything up and stepped back to admire our work that first day, we all said “this is great, as long as nobody buys these big pieces that have all of our dishes and pottery on them”.

Todd Farm Kitchen Display Area BeforeBUT, that is exactly what happened, leaving us scrambling to find new spots for pie plates and Pyrex and pots and pans. So, I decided that we needed a permanent, dedicated spot to safely and attractively display our kitchen wares. The perfect solution, in my mind, was an old kitchen sink and countertop with shelves above it, so off to Craigslist land I ventured and found this awesome old General Electric porcelain sink for $40!!! A steal!!!

Vintage Kitchen Sink BeforeOnce I had acquired the sink, it really was just a matter of building a solid base that would be sturdy enough to hold the weight of the sink and anything else we put on it. I started with a plywood top, cut with an extra 1/2 inch around the perimeter, and a hole cutout for the sink. Which turned into several cuts, which in turn created a nice new Mustachio for Coach.

Vintage Sink Coach's MustachioWho, by the way, was really not on board with this whole sink thing. He did help me, but reluctantly, not seeing my vision and thinking that I was wasting valuable time that could have been spent working on other “saleable” projects.

The legs were built from 4×4 scraps Coach had hanging around somewhere behind the barn, cut to standard countertop height of 35 inches.

Vintage Sink Plywood Base for SinkI simply attached those with large L brackets and some screws, then created some cross-pieces for stability, attaching those with smaller L brackets as well.

Vintage Sink on BaseI would show you the rough-cut details, but they are really not very pretty and you can’t see them anyway : ) Once that was completed, I added an old, chippy shutter for the front panel,

Vintage Sink on Base with Blue Shutterand then I added some of these little metal strips (I have a big bin of these I grabbed at a yard sale. Have no idea what they are for, but they make a nice 1 inch decorative edge. Got plenty more if you need any…)

Vintage Sink Metal Bracketsfor the decorative edge trim. Conveniently, there are holes already drilled in the strips, so I just used some brass tacks to attach them to the plywood edge.

Vintage Sink Metal Bracket TrimFor the sides, I affixed some burlap panels with a dowel and some tacks. Nothing fancy. We don’t really have any kind of a storage area in the barn shop, so the burlap panels allow us to use the under-sink for keeping bags and tools, etc.  The sides are simple blue burlap panels, but the front panels are actually made from old burlap potato sacks (which we have plenty of for sale in the shop : ).

Vintage Sink Burlap Potato SacksNot crazy about how those look, so I’ll be changing those this upcoming weekend. Once we brought the sink to the shop, it was simply a matter of finding the perfect spot to build it in, then adding the shutter shelving and filling it up with our kitchenware and painted mason jars.

Vintage Sink adding Shutter ShelvesWe even added an old window because everyone loves to look out the window when they are at the kitchen sink, right??

Todd Farm Kitchen Display AfterSo, what happened when we opened up the shop 6 am Sunday morning?? Every person walking by and into the shop went right to my sink display and admired it, inspected it, asked how much it was. Initially shocked that folks were interested in buying my old sink, Coach quickly recovered and started asking $650. Wait, what?!?!?! THE SINK IS NOT FOR SALE. REPEAT. THE SINK IS NOT FOR SALE!

Todd Farm Vintage Sink Side Profile PMBut both Coach and Lisa (his partner in crime this week) were hell-bent on selling that sink out from under me. Soooo, I compromised and used the old “if I really don’t want to sell it, then ask a ridiculously high price and if someone really wants it, they can have it trick”. $1000. FIRM. In the meantime, I am off to paint the pieces that I didn’t get a chance to paint because I was building the kitchen sink. Have an unsinkable Wednesday, everyone!! Susan


Rustic USA Chalkboard Map-DIY!

Remember the time when I built the cupcake tower for the wedding and then it broke apart and toppled over and the cupcakes went tumbling onto the wet grass? No? So that’s just my bad luck…

fallen cupcakes in grassWell, the one good thing that came of all of it was that I spotted this USA plank map that is proudly hanging in our friend’s log cabin home where we stayed for the wedding weekend.

USA Map Pottery Barn

It is an amazing focal point for their great room! Naturally, when I first admired it, my initial response was “that’s amazing”, quickly followed by “gee, I wonder if I can make that?!” Soooo, here is my version of the Pottery Barn Rustic USA map.

USA Map Displayed on Mantel PM

I created it using an old, very large framed print that Coach had picked up at a yard sale, some balsa wood slats, glue, stain and chalkboard paint. Here is the how-it-did-it:

1. I kept the print in place, since it was just a piece of fiberboard that had been printed on and adhered to the frame. Sorry about those creepy flowers, but they just had to go…

USA Map Before Photo…but the frame, however, is gorgeous, so that remained as is!

2. The balsa wood slats came from a bin we purchased at a yard sale last summer. Tons of pieces of wood in various widths and lengths. Love this stuff-super easy to work with! Just mark with a pencil,

USA Map Marking Wood Cutscut with scissors,

USA Map Cutting Balsa Wood with Scissorsthen glue down. I chose random pieces so it would look more rustic and deconstructed,

USA Map Balsa Wood Pattern on Picture

rather than just using all the same widths and lengths.

USA Map Balsa Wood Patterned

3. Once I had placed the wood into position, I lifted each piece and spread wood glue onto the base, using a foam brush to create a nice even surface.

Rustic USA Map Painting Glue4. I lifted one slat at a time, then placed the slats back down onto the glued surface, then weighted them down with various cans and bottles I had handy. If you do this, make sure you don’t use anything porous or it will stick to your project!

USA Map Weighting Down Balsa Wood Glued

5. Once dried, I had to decide which stain to use.

Rustic USA Map StainsOnce the color was chosen, I simply followed the stain instructions (for the record, I went with the Minwax). You brush it on,

Rustic USA Map Staining Slatswait a minute, then wipe off any excess with a soft, clean cloth. Then allow to dry. You see all those little white dots? Apparently, I wasn’t as neat with the glue as I thought! No worries, I am going to dry brush some paint on there anyway, so they won’t be visible : )

Rustic USA Map Stained Slats

6. For the dry-brushing, I taped off the frame edges,

USA Map Stained and Taped for Dry Brushingthen dry-brushed the surface with two tones of Americana Chalky Paint.

USA Map Americana Chalky PaintI knew if I just left it stained, the black map itself wouldn’t show up against the dark background.

Dry Brushing USA MapDry brushing allows you to see the stained wood underneath.

USA Map Dry Brushing Completed7. Once that was dry, I needed to add the map. Initially I tried to print out a USA map outline, but of course, the first one was too small and then my printer ran out of ink.

USA Map Printed OutlineSo, I grabbed one of Coach’s USA maps and cut around that. (No worries, this wasn’t one of the antique ones, just one of a few hundred he has hanging around)

USA Map Outlined8. Traced the map outline onto the prepped surface with a pencil. Then I painted it with three coats of chalkboard paint. This one is from FolkArt by Plaid,

USA Map Folk Art Chalkboard Paint

but there are many other manufacturer’s and they all seem to do the trick.

USA Map Completed Chalk Paint

9. Once the chalkboard paint was dry, I “primed” the surface by covering the entire map with chalk. )It needs to be primed so that when you do write on it with chalk, the images will easily wipe off. Otherwise they will leave “ghost images”)

USA Map Surface Chalked(rub with the side of the chalk)

USA Map Chalking the Surface

then wiped it off with a damp cloth.


USA Map Wiping Off Chalking10. With my mouse sander, I simply roughed up the surface and softened the edges with fine sandpaper to give the entire piece the rustic look.

USA Map Sanding Edges of Map

11. This is the finished piece, proudly displayed on my mantel.

USA Map Displayed on Mantel TMAnd remember, imitation is the sincerest form of flattery! Thanks Pottery Barn for the inspiration! Have an inspired weekend, everyone! Susan

The Barn at Todd Farm

Greetings!! Back from my blogging break and ready to start sharing some very exciting news! Beginning Sunday, August 3, Coach and I, along with Lisa from RitaJosVintage will be setting up shop in the Barn at Todd Farm!! Woo Hoo!

Barn Postcard no emailsMany of you already know about the historic Todd Farm in Rowley, Mass-the amazing Sunday flea markets with hundreds of vendors selling everything under the sun-and even a kitchen sink or two. (to read about our outdoor selling experience, click here)

Todd Farm SignBut what many of you may not know is that the beautiful huge yellow barn

Barn View Closeupin the center of the property has undergone a restoration and has been transformed from an antique functioning dairy barn

Todd Farm Dairy Cows Phototo an antiques co-operative. Inside the barn there are many vendors (with more to come) that have filled each of the old cow stalls with antiques, collectibles, junque and recycled, refurbished and reloved furniture and accessories. So, what will we be selling?? Some of the items you have seen me transform on the blog will be there,

Vintage Painted Cabinet PMalong with an ever-changing stock of old and really old and newly old stuff from our barn (and porch, and yard, and deck, and dining room and living room…) along with Lisa’s vintage kitsch collections. I will be posting pics of new items and stock each week on this blog, but also on my Facebook pages, as well as Craigslist (look under north shore garage and yard sales and just search Todd Farm). For now, we will be open at the crack of dawn on Sundays…or by chance…or by appointment. But, for now I have to sign off-the truck is arriving shortly and the packing and moving begins now! See you at the Farm

Rusty Bed Spring Arrow Marqueejust look for the stall with the rusty bedspring arrow marquee : ) xoxox Susan


Hey, I Made That! Artistic License with Aaron Foster

Right around the 4th of July, I posted a pic of this amazing USA license plate map that I spotted at HomeGoods.

USA Map HomeGoods

It received thousands of hits and shares on Facebook and Pinterest, and so many folks commented on its colorful beauty and unique construction-every state is represented with its own license plate! Then, I spotted this note on my Facebook page:

Aaron Foster USA License Plate Map

Naturally, I had to follow up and find out who the mystery artist was who created this patriotic masterpiece because I always strive to give proper credit to artists and makers. His name is Aaron Foster, he is an artist, an entrepenuer, former standup comic and an aspiring actor as well!

Aaron FosterCheck out this quite hilarious Who is Aaron Foster? video. Turns out, he was on HGTV in its early days, as the host of a show named Freestyle-where rooms were re-decorated using only furniture and decorative accessories already on hand. He created his first USA license plate map back in 2001 to impress a female artist friend. Not sure how that worked out, but the license plate art biz took off. So now, he sells his artwork online via his website, Aaron Foster Designs, at shows and by commission-he has created his artwork for CNN

Aaron Foster CNN logoHost of The Colbert Report, Stephen Colbert

Aaron Foster Art Stephen Colbert

Stephen Colbert with Aaron Foster USA Map Art

& network television. This super large Liberty Flag was for ABC’s Extreme Makeover Home Edition for the NYC Firefighter’s edition.

Aaron Foster Liberty FlagHe also sells on Etsy, where he is presently offering some of his artwork at discounted prices, so you should definitely check that out here:

Aaron Foster EtsyHere is my recent Q & A with Aaron

Me: Hi, Aaron! I was surprised to see your comment on my Facebook page and am wondering if you could share how that all came about? I have a few questions:

1. Is the photo of the one I shared on my page a picture of the actual one that you created? I took that photo at HomeGoods in Danvers, MA
    Aaron: Yes, that is a photo of one of many USA License Plate Maps I have created since 2001 when I made my first one to impress a woman who was an artist and inadvertently
   began a career as an artist.
2. Did you create it specifically for HomeGoods?
    The piece pictured was created specifically for Home Goods in the sense that they decided the style for the background, rough cedar planks aged and distressed, but I have been
    making the USA Map out of license plates since 2001.
3. Have you made any others?
    While there are well over 100 designs in my collection, everything from American Flags, Classic Cars, Cowboy scenes and iconic American Highway signs such as Route 66 and the 
    Hollywood sign, the USA map has always been my most popular piece.  I have created 1200+ of them. (blogger’s note: 1200+!!!!)
4. How did you obtain all of the license plates?
     I have been doing this a long time and have many suppliers of the vintage plates throughout the country.  At any given time I probably have somewhere in the neighborhood of    
    20,000 license plates in my workshop. (blogger’s note: 20,000!!!)
5. Do you have a website/Etsy page where you sell handmade items such as this online?
     The Etsy Page:  https://www.etsy.com/shop/AaronFoster  
     The Aaron Foster website where you can purchase and/or commission works of license plate art is http://www.aaronfoster.com/
6. Are you interested in sharing the actual construction details?
    While it’s certainly not rocket science, this is how I make my living, pay my mortgage, feed my family, etc., so for those reasons, I’d rather keep my methods to myself. Sorry!
No apologies necessary. Everyone needs to make a living, and Aaron certainly does that with this amazing and unique license plate artwork. A few of my personal favorites:
USA Heart Map (every state represented)
USA Heart Map Aaron Foster License Plate Art
Aaron Foster USA Flag
Vintage Pickup Truck (from any state)
Aaron Foster Pickup Truck
CU-Boulder Logo (my daughter’s alma mater-GO BUFFS!!) Hmmm, I wonder if he makes a Sparky the Sun Devil too??
CU Boulder License Plate Art Aaron Foster
To contact Aaron (whether to purchase a piece or offer him an acting gig) you can reach him at Email: info@aaronfoster.com or Phone: 323-302-3908. And if you do happen to contact him, please tell him that Sue from Country Design Home sent you : ) Now I’m giving you license to have a terrific Thursday, everyone! Susan


Coastal Kitchen Cupboard DIY Makeover

Blogger’s note: NO REAL WOOD WAS HARMED IN THE MAKING OF THIS CUPBOARD**

This past weekend, I completed a few more projects while awaiting the granite guy’s countertop installation at mom’s house. I have been working on this piece in my kitchen for quite awhile, and am happy to finally have it done! This is the before:

Coastal Kitchen Cabinet Beforea red cupboard (made of MDF) we purchased a few years back at Jordan’s Furniture Colossal Clearance Center in Avon, Mass (if you haven’t been there, it is so definitely worth the trip! Lots of great furniture at significantly discounted prices!) This piece fits nicely in the narrow passageway between our kitchen and dining room and holds a ton of stuff like paper towels, napkins and several pieces of kitchen equipment that just won’t fit anywhere else. The problem is, since it’s in the highest traffic point of our home, it had been scratched and worn-the finish was like a plastic veneer and scratched off quite easily (and I was tired of the dark red anyway…). Time for a fix, so this is the after: a pretty, light coastal cabinet with a top created from reclaimed window shutters!

Coastal Kitchen CupboardHere is the how-I-did-it: Sanded everything down to rough up the shiny veneer plasticy surface, and sanded the edges to round them off a bit.

Sanding the edges Nothing says “mass-produced” more than sharp, clean edges on furniture. Primed with my go-to primer: Glidden Gripper (you can find this at Home Depot in the paint dept)

Coastal Kitchen Cupboard Glidden Gripper Primer

The Americana Chalky paint I planned on using says it doesn’t need a primer, but the before color was so dark, and the new color was so light, I figured I had better just to be safe.

Coastal Kitchen Cupboard Chalky Paint Palette DecoArt

Before I painted the entire piece, I accented the frames around the door panel inserts with the Americana Chalky Paint Called Vintage. It is a soft blue/green color that ties in beautifully with the shutter slats on the top.

Coastal Kitchen Cupboard Framed Cabinet Doors with Chalky Paint

Then I applied some wallpaper wainscoting (LOVE this stuff too!) to the inside of the panels to give a more country feel to the piece. (For the DIY  how-to on using the wallpaper, click here.

Coastal Kitchen Cupboard with Wainscoting Wallpaper Panel Inserts

I then painted the entire cupboard, including the inside panels, with two coats of Americana Chalky paint in the color Everlasting-so soft and pretty white.

Coastal Kitchen Cupboard Chalky Paint for Knob Americana

The more I used this paint, the more I love it. No brush strokes, so easy to apply and clean up. I then sanded the edges to give it a bit of character and contrast.

Coastal Kitchen Cupboard Wainscoting Wallpaper Doors

The final coat was the Americana Ultra Matte Varnish from DecoArt. No shine, protects the white paint from fingerprints.

Coastal Kitchen Cupboard Ultra Matte Varnish Americana

For the star of this show, the top, I used some old shutter slats that Coach and I had picked up off the side of the road on a drive to Cape Cod. That was one of my very first blog posts, and also one of the first times we trash picked on the side of the road. What a score! The colors are all the original ones-so coastal pretty!!

Coastal Kitchen Cupboard Arranging Shutter Slats

I have been using parts of them for several projects, including some little hanging chalkboards which I decided to reclaim for this project. As I was arranging the slats on the top, my original plan was to flip the chalkboard ones over and use the reverse side. But then I thought, why not just leave them so I could write cute little sayings on the surface? Fun!

Coastal Cupboard Makeover Chalkboard

Once I had placed all of the slats, there were a few that hung over the edges, which I quickly remedied with a few jigsaw cuts.

Cutting Shutter slats with jigsawThen sanded the edge smooth with my Black & Decker Mouse sander, which I also picked up at my local Home Depot.  Honestly, I spend more time at Home Depot and Home Goods than I do at home!!

Coastal Kitchen Cupboard Cut Shutter Slat Edges

While I was sanding, I made sure that I sanded the top edge just a bit so that the cut pieces had the same worn edge as the rest. (this is the area that fits into the frame of the shutters when they are whole).

Coastal Kitchen Cupboard Mouse Sander Edges

Once they were cut and sanded, I glued them into place with this strong sticky stuff-didn’t even require any nailing!!

Coastal Kitchen Cupboard Wood Glue

The original knobs were a nice heavy iron, but I wanted something lighter so there wasn’t as much of a contrast. These mercury glass knobs I found at (where else) HomeGoods, but I couldn’t find handles for the doors that I really liked.

Home Goods Mercury KnobsSo, I grabbed a pair of stainless ones I kept from my old kitchen and painted them with the chalk paint. What, you say?! Painted knobs? But, of course! This week’s Tuesday DIY Tip: you can paint any hardware quickly and easily, especially with this chalk paint! You just paint it on, Painting knobs with chalk paintmaking sure you get in all the tiny holes and crevices, then wipe it off,

Wiping off Chalk Paintallow to dry and done. Wipe away as much or as little depending on the look you are going for.

Painted knobs with chalky paintThe finished cupboard now stands in the space under my incredible driftwood mirror I purchased at (where else) HomeGoods a few months back, along with some other coastal-inspired decor.

Coastal Kitchen Cupboard After Shutter Slat Top PM

Which will all go so nicely in my coastal dream home (if I ever get a coast dream home…) In the meantime, have a dreamy Tuesday, everyone!! Susan

**PS: That disclaimer at the top of this article is for all the wood enthusiasts who think that no wood furniture should ever be painted…


Vintage Reclaimed Rules!

While all of the kitchen reno and vintage shopping has been going on, I’ve been working on quite a few projects at home in the few stolen moments I have available. This week’s project: Vintage Reclaimed Ruler Side Table-my new favorite piece!!         Vintage Rules Reclaimed Side Table PMGotta give Coach credit where credit is due. Once I mention that I have something in mind to try to create, he goes all out to find me the proper materials at his yard and estate sales. Little old side table? $3.

Vintage Rules Old TableVintage rulers? Not free, but he’s been collecting them for awhile and stands at about 50 & counting!

Vintage Rules Table and Rulers UncutWhat I love about these rulers are that they originated from old and defunct local businesses, many of them with original phone numbers-no area codes! Brings a little nostalgia to the piece. How sweet is “Make It Your Rule To Graduate From School??”

Vintage Yardsticks and RulersSo, with Lisa from RitaJosVintage’s assistance, we created this cute little reclaimed side table using nothing more than some paint and varnish, wood glue, a brad nailer, painter’s tape and of course, rulers-some for actually measuring and the remainder for decoration (some Coach wouldn’t even allow us to cut because they were too vintage!) Here is the how-we-did-it: Cleaned the table and of course, noted the large crack in the top.

Vintage Rules Old TabletopThat was repaired with some wood glue and a couple of nails. It wasn’t going to be visible so no need for fanciness, just security. I painted the table with two coats of this awesome new chalky paint from DecoArt called Americana Chalky Finish that I bought at Michaels (with a coupon, of course : )

Americana Chalky Paint RelicThis deep graphite gray color is called Relic, which fits in nicely with the piece, don’t you agree? After the paint dried, I sanded it with a damp sponge sander.

Vintage Rules Sanding with damp brickI have discovered with this paint that since it is quite chalky, dry sanding results in a very fine dusting of the adjacent surfaces, but the wet sander smoothes the surface and removes the edges cleanly.

Vintage Rules Wetting the Sanding BrickI attempted to remove the drawer pull to clean and polish it, but it was fastened in a way that it just kept twirling around but would not budge. So, I did the next best thing: painted it, then sanded it. Gives it an antique, finished look.

Vintage Rules Drawer Pull CloseupFor the top, we decided on a design based on an old  “Log Cabin Quilt” pattern, one of my favorites. We measured the first length, then cut it and taped it into place. Then repeatedly cut and taped until the entire top was covered.

Vintage Rules Taped Cut Ruler PiecesYou know, I gotta say, its a lot easier when someone else is doing the cutting and I am photographing them-thanks Lisa! (So, what’s wrong with this picture?? Lisa is not wearing goggles or glasses-my bad! That is a big no-no when using power tools. After all, if you damage your eyes while using power tools, then you won’t be able to see to use power tools any more. Don’t do this at home!!)

Vintage Rules Lisa from RitoJosVintageOnce the top was completed, we lifted each piece as we went along, added the wood glue and then resecured the piece,

Vintage Rules Glueing the Slats into placethen waited until the glue was dry (which was pretty quick because it was about 95 degrees that day!). After that, the tape was removed

Vintage Rules Tabletop Detailand the edges were sanded to smooth out any imperfections or uneven edges.

Vintage Rules Sanding the EdgesThen we secured all of the pieces using a brad nailer. This is the mini version of a nail gun, shoots both staples and tiny little finish nails that you can barely see.

Vintage Rules Brad Nailer GunAt this point we stopped for the day, as the sun was setting, as evidenced by the blue hue of daylight. Not safe to work in the darkness!

Vintage Rules Sanded TableThe next day, I added two coats of this Americana Decor Ultra-Matte Varnish from DecoArt

Vintage Rules Americana Matte Finishto finish the entire piece, including the top (which I had initially glazed to enhance the colors of the different woods of the yardsticks, but then decided I wanted it to have a matte finish as well). This stuff is simple to use, brush it on, allow to dry, no buffing needed. It leaves a slightly textured, very matte finish that works perfectly on pieces where you want to accent the color but not add any shine. After all, this is a relic, right?

Vintage Rules Matte Finish DetailsIt stands now in my dining room with some simple staging.

Vintage Rules Completed Tabletop Closeup PMA sweet salvaged side table that works as both a decorative piece and a handy tool (how many times do you go looking for a ruler to measure something and can’t find one?! Now it will be at your fingertips-as long as you only need to measure 12 inches or less : ) I hope your Friday rules, everyone-TGIF!! Susan

A Whale Of A Good Time @ The Vintage Bazaar

Is it possible that two weeks have already flown by since the latest (& greatest, IMHO) Vintage Bazaar at Pettengill Farm?!

Vintage Bazaar BannerEvery time I attend this ever-growing event, the sheer breadth and talent of the artists who sell their wares is so inspiring, and slightly overwhelming! Honestly, spending a day there just doesn’t allow enough time to savor every inch of this beautiful working flower farm decked out in its vintage finery.

Pettengill Farm Flower GardensIn September I may just curl up inside one of these adorable vintage trailers and stay overnight…

Sweet Spot Styleto get the best shot at the early morning and late evening goings-on before the shopping masses arrive.

Vintage Bazaar Crowd ShotTo name just a few favorite highlights seems so unfair to the 130+ vintage vendors who make the trek from near and far to join the cast of characters that make up the Vintage Bazaar. But, I can’t name them all, so I’ll do my best to show you my memorable moments. These stunningly hand-crafted whales

Whale of a Displaywere striking, not only because of the colors, but the detail as well

Vintage Bazaar WhaleI kept thinking about buying one but we already have so many. Do you think that you can NEVER have enough whales?! (BTW, if anyone happens to know who created these beauties, could you let me know?! I want to give credit to the artist.)

These hand-painted floorcloths were some of the nicest I have ever seen.

American Colonial FloorclothsCreated by artist Michelle Julian of Newburyport-based American Colonial, the floorcloths were expertly crafted and vividly illustrated works of art. Almost too pretty to use on the floor!!

American Colonial Floorcloths But with 7+ coats of varnish on each one, rest assured, they are created to last a generation or two. A few of my favorites vendors, like Nancy the Linens Lady, were hard at work in the bright sunshine, chatting about and selling their vintage finery.

Nancy the Linens LadyHere is the lovely Lisa-my vintage shopping buddy-from RitaJosVintage proudly wearing her “new” apron!

Lisa from Rita Jos VintageAnd I can’t mention the Bazaar without showcasing the artistry of Creative Glass Works , who always bring along their oversized flower pot filled with unique, fanciful glass flowers. I recently featured them on a post, which you can read here.

Creative Glass Works BostonLoving these adorable dinosaur bookends from R & S Living

Dino Bookends from R & S Living(Robin & Stuart traveled all the way from the Cape to be at the Bazaar!), but this little pooch was a scene-stealer when he just hopped up onto one of their recently salvaged and re-loved side chairs. Cute!!

R & S Living Yorkie PerchedWith loads of vintage and collectible stuff, the Swampscott River Antique & Salvage AKA “The Wooden Box Guy”  featured crates and wooden boxes filled with assorted everyday objects, like baseballs and rulers.

Swampscott RIver Antique & Salvage PMSingularly, they don’t make a huge impact, but grouped together, they catch the eye and become an artistic vignette. But the eye-catcher of the day: this huge tent staged by Howard’s Entertainment of Essex, MA. (I know what you’re thinking, didn’t you see the sign that says “no pictures?!” I did, but I asked, and was granted permission to take pics for my blog. The power of the press : )

Howards EntertainmentChanning Howard is the proprietor, and a wholesale supplier of vintage and nostalgic props.

http://www.howardsvm.com/These are available to rent for parties or functions for both private and retail events. If you are finding yourself in need of some Steampunk props,

Howards Entertainmentor perhaps some vintage cowboy paraphernalia, or any other imaginable vintage props for your special event,

Vintage Hats and Suitcases Howards EntertainmentHoward’s is your go-to! Since we had our VIP tickets in hand (thanks Devon : ) we were invited to a meet and greet featuring the weekend’s presenters,

Joanne, Desha & Devon at Vintage Bazaar Tentincluding Cari Cucksey from RePurpose Shop, Desha Peacock from Sweet Spot Style and Joanne Palmisano from Salvage Secrets whose DIY demo we attended later on in the day. She was a great presenter, funny and full of anecdotes and very helpful DIY tips! Like how to create an instant “old” wooden Lobster sign with paint and a screwdriver (without getting stitches : )

Joanne Palmisano Salvage SecretsHow to re-imagine old lamps using paint and jute rope

Joanne Palmisano Lamp DIYand creating a twig vase out of some sticks and an old glass jar (well, in this case, she used a plastic one-but who knew?)

DIY Vase Joanne PalmisanoOn this day, she was selling her latest book, Salvage Secrets Design & Decor and donating the proceeds to Juvenile Diabetes Foundation-SOLD. And autographed to me : )

Salvage Secrets Joanne Palmisano AutographedThis book is so chock full of all kinds of DIY’s using salvage materials in newly inspired ways. I had literally just opened the book when I got to page 16 and yelped-old coil bedsprings! re-purposed into decorative candle holders! It just so happened that Coach and I recently sprung for two of those old-timey bedsprings-a twin and a full size-and were contemplating where to begin re-purposing them…once we got them off the roof of my CRV. (OK, full disclosure. Coach got one a few weeks ago and then we saw another one at an estate sale last week and I refused to buy it because our back yard is already full and did we really need a second one?!? Until I opened up the book and saw the candleholders so we went back to the estate sale and bought the second one…)

Bedsprings on Car RoofWell, page 16 is a very good place to start : ). So, there you have it. Another amazing Vintage Bazaar come and gone with September waiting in the wings. Have an inspired Thursday, everyone! Susan