Blotting a Map

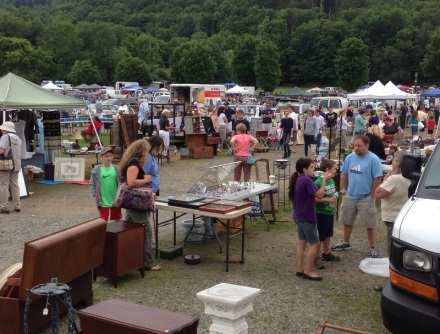
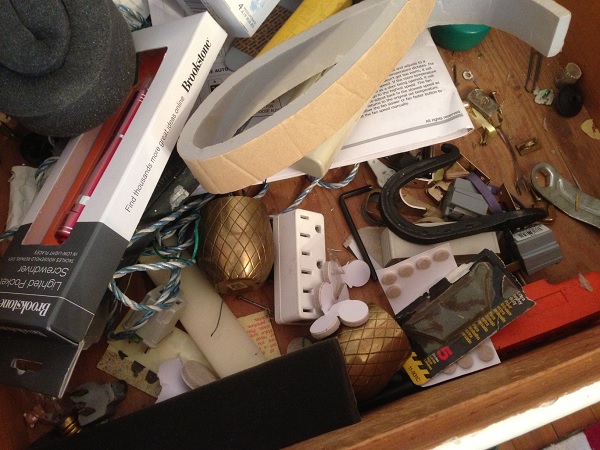
This week I have been up to my eyeballs in maps-all kinds, shapes and sizes-in preparation for next week’s Vintage Thymes Market.

Maps books

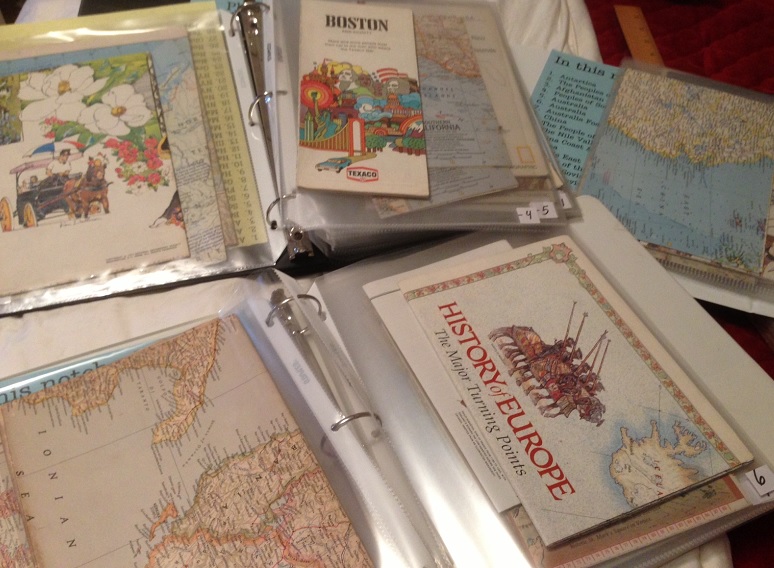
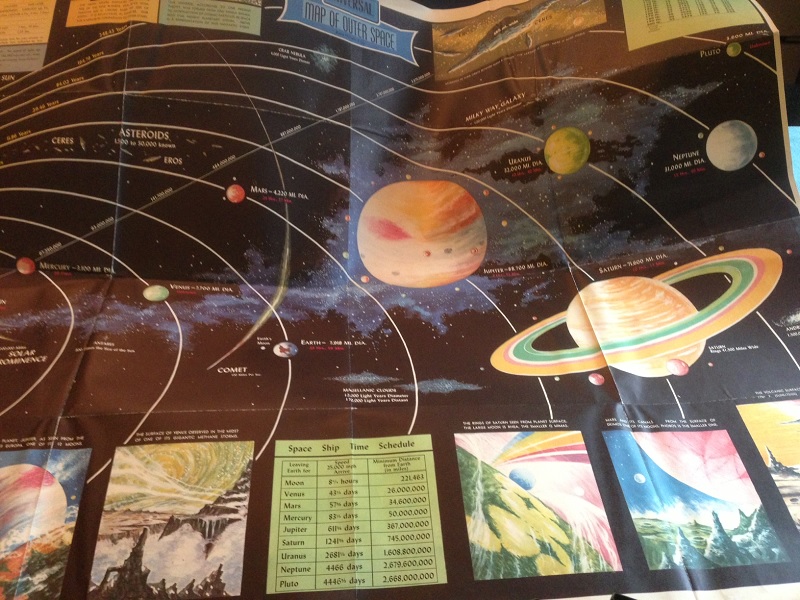
My September Theme is Back to School-you won’t believe all the cool retro school stuff we have found! But the maps are Coach’s thing, and these are not the hundred plus he already has at a Ward Maps Shop in Cambridge! This is an expansive collection of are all sorts of maps: countries, cities, roadways, the heavens, the earth, the ocean floors. My favorite is this gorgeous 1950’s Map of Outer Space- the colors are amazing!

Map of Outer Space

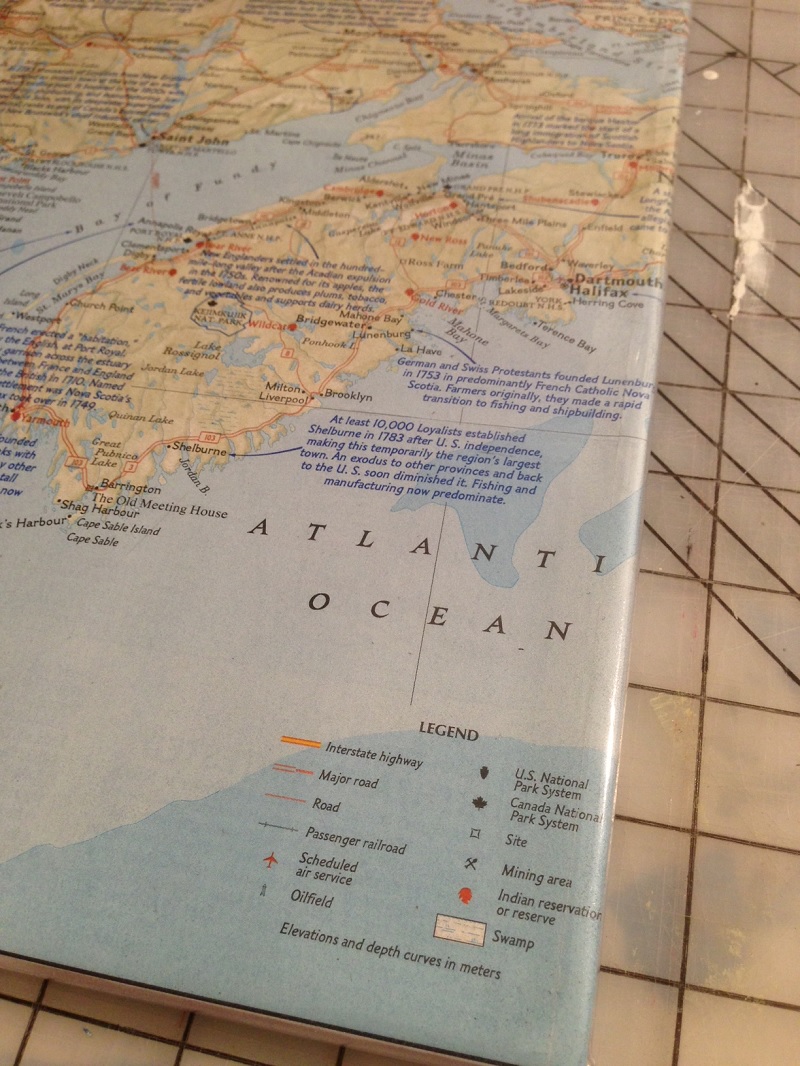
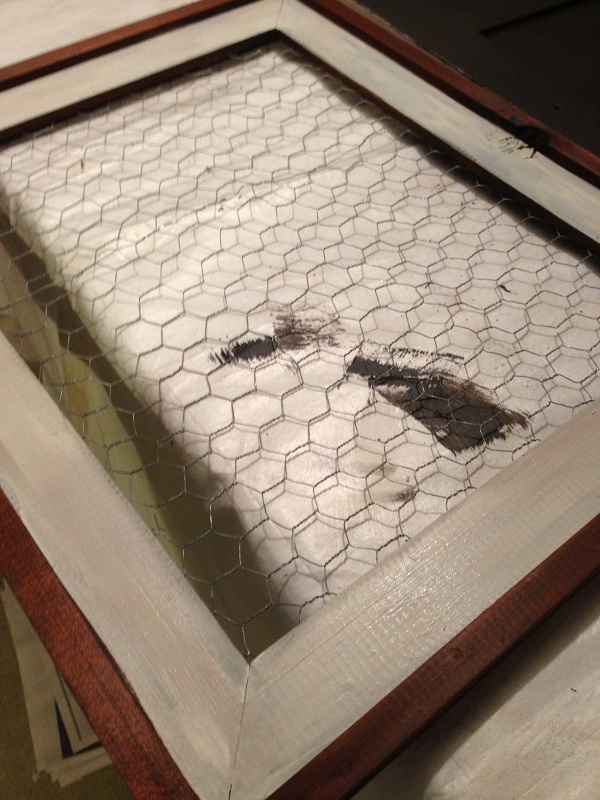
And they will all be available next week at the shop. Well, except one. I decided I needed a blotter for the desk I have been working on-also for the shop, so I grabbed an Upper Northeast map to cut up and use for the blotter.

This is the How-I-Did-It:
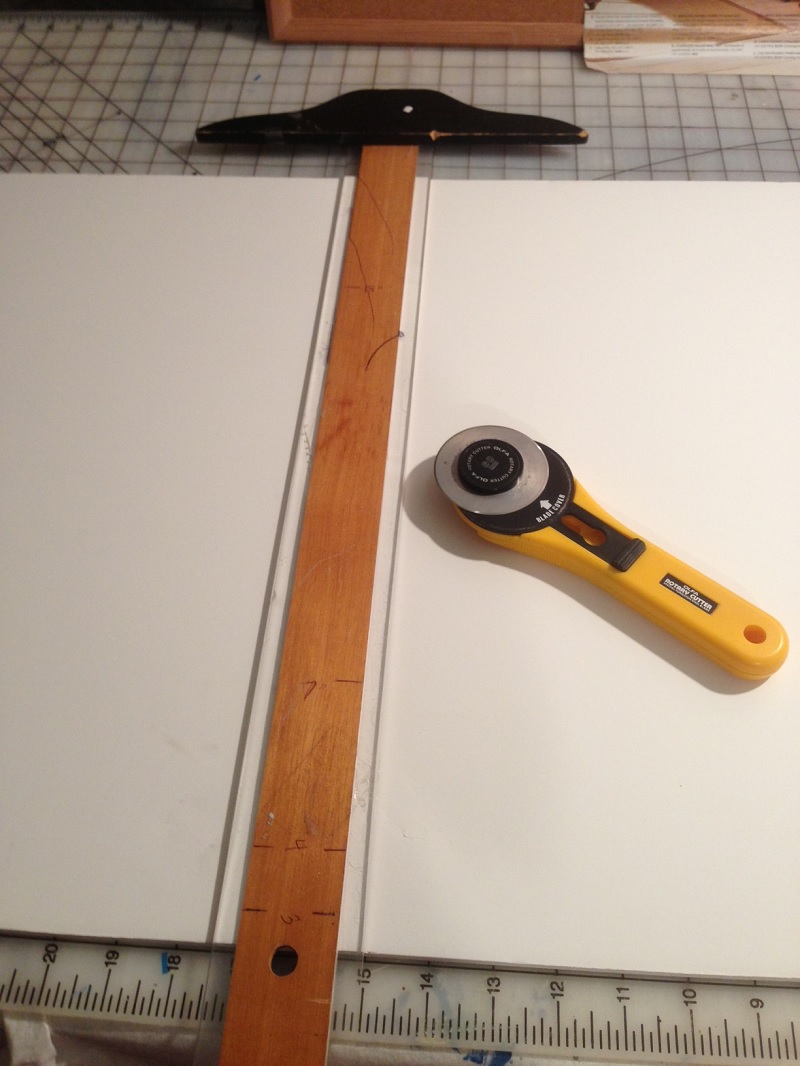
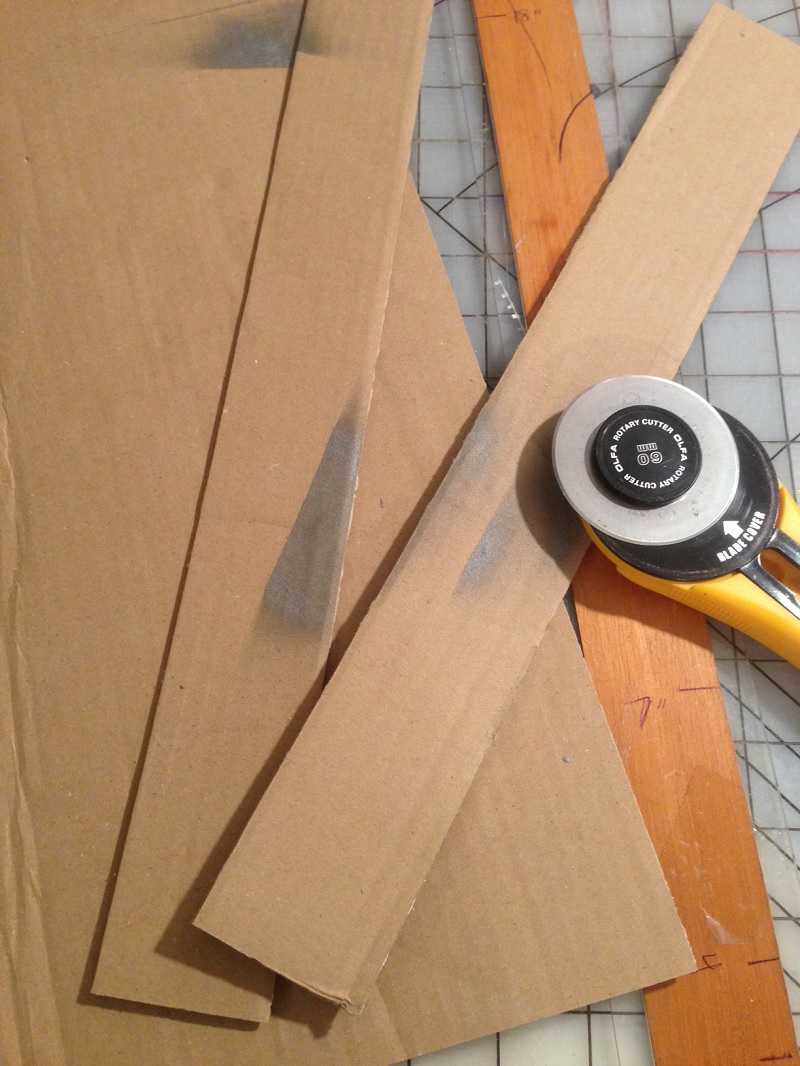
Supplies: foam board cut to size, fabric or paper (or one of the maps you will be purchasing at my shop next week : ), glue, vinyl sheet (optional), backing paper or mat board, cutter & T-square or scissors, tape
1. Measure out your foam core board to the size you wish to have the finished mat. Cut with scissors or rotary cutter and T-square.

Foam Board Cutting

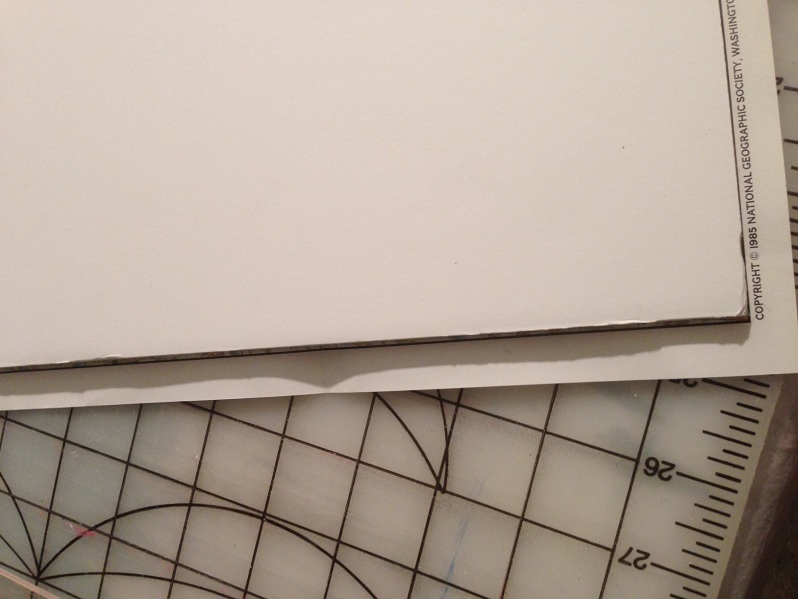
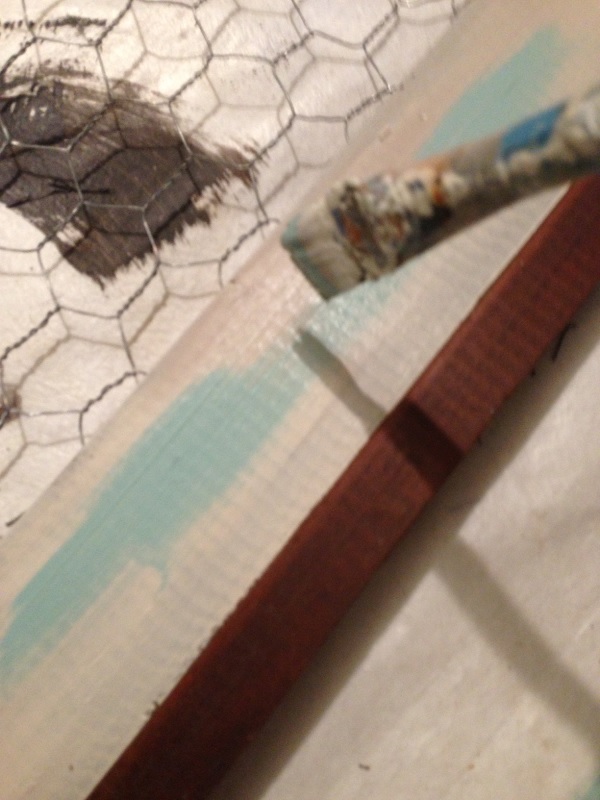
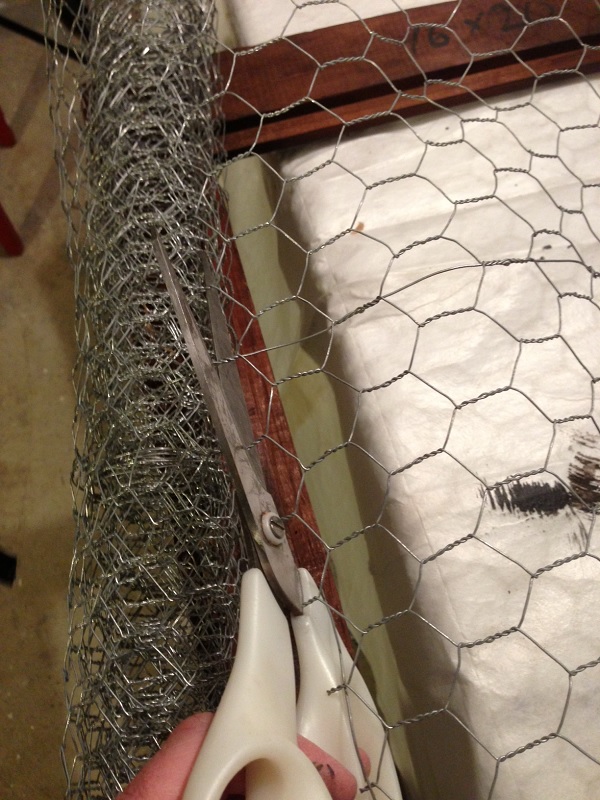
2. Measure out the map, making sure the design you want to show on the front is positioned correctly. Before you cut it, make sure it is very smooth with no wrinkles. You can iron paper, BTW. Just use a no-steam, cotton setting and keeping moving the iron!

Ironing Map

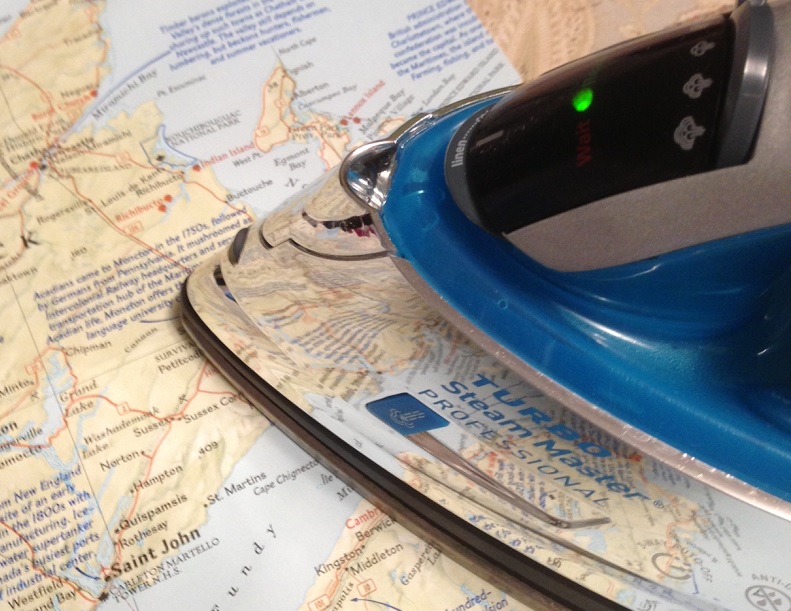
Cut with at least a one inch border around the edges. You will be turning these under to give the edge a smooth finished edge.

Map Edges on Board

3. Spray adhesive on the foam board, then position the cut map with even edges on all sides.

Elmer's Craft Bond

I love this Elmer’s Craft Bond glue because it is temporary before its permanent, so it gives you a bit of time to reposition if you need to. It is quite messy, however, so make sure you mask the entire area you are spraying or you’ll end up glued to the table!
4. Add a layer of vinyl (this part is optional). I happened to have a roll left over from when we shrink-wrapped the porch last fall. I know, it’s almost that time of year again, yuck. This will give the blotter a wipeable, durable finish.

Vinyl Coated

Measure out the vinyl, leaving at least a couple of inches all the way around. This stuff is thick, so you need some extra to grab on to the back. By the way, vinyl is one of those things that tends to attract dust and dirt, especially in the basement. The cleaning solution? A dryer cling sheet!

Cling Sheets
5. Cut away the corners at an angle and then fold the vinyl in like a Christmas present corner. Tape securely to the back. (don’t worry, you are not going to see it anyway)
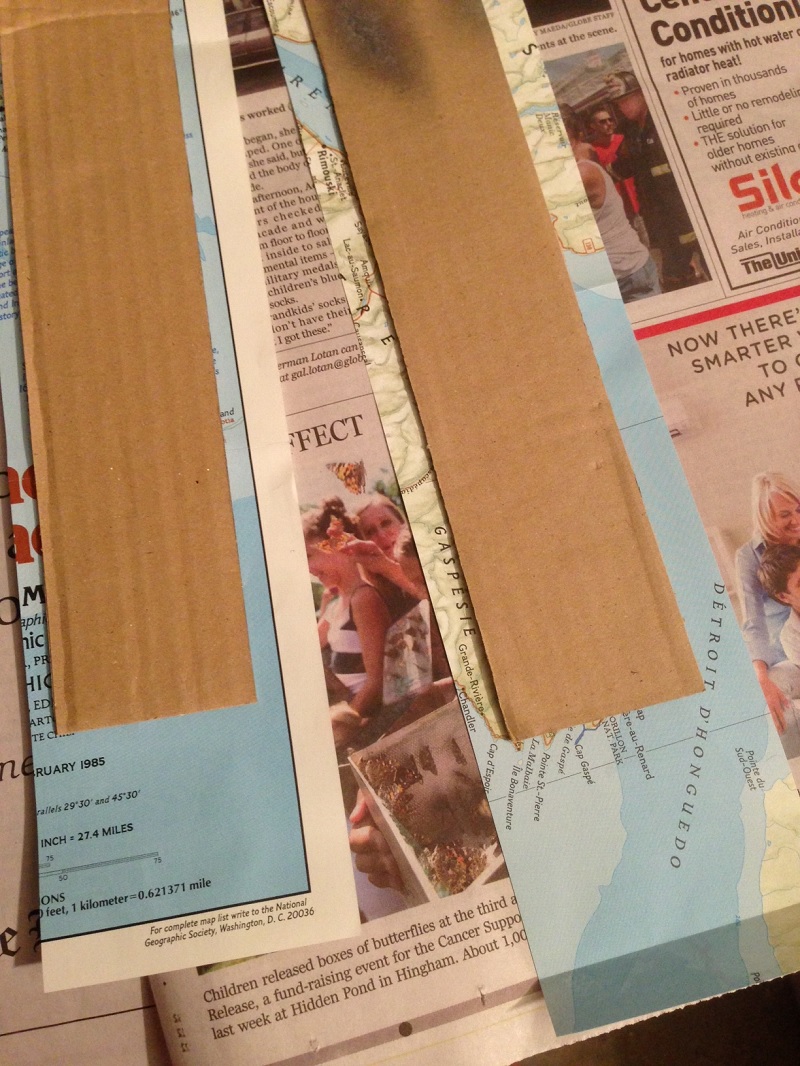
Vinyl Corners6. Add the sides.

Side Pieces

These are great for tucking in papers and paint chips and such. Measure out two pieces of foam or cardboard as wide as you like, but exactly the height of the blotter.

Side Pieces Measured

Measure out the map paper so that there is a few inches hanging over the ends.

Cutting Side Pieces

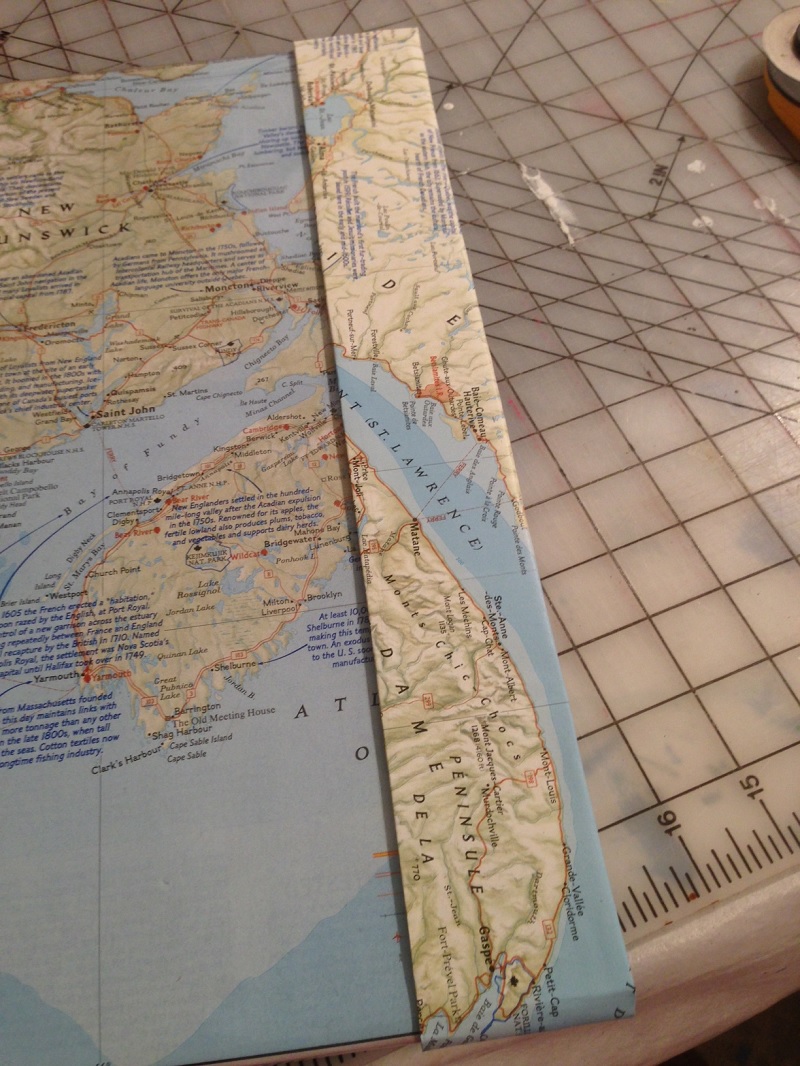
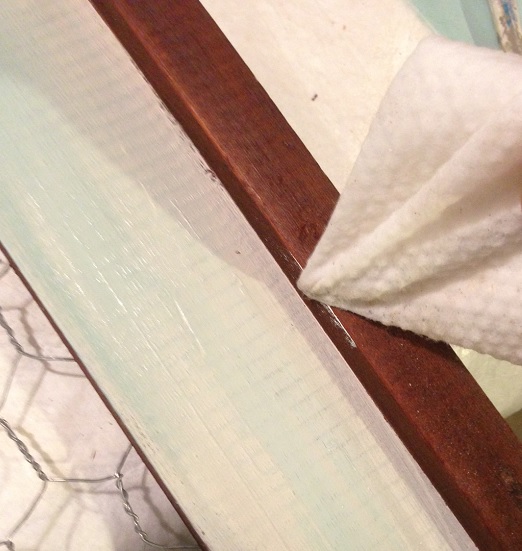
7. Position the side pieces, spray glue them, and then fold the ends over the edges and secure to the back with tape or glue. (The only thing I would have done differently would be to fold three sides over the edges to give it a cleaner look. The more you know…

Side Pieces Taped

8. Measure out a piece of backing to finish the reverse side.

Backing Paper

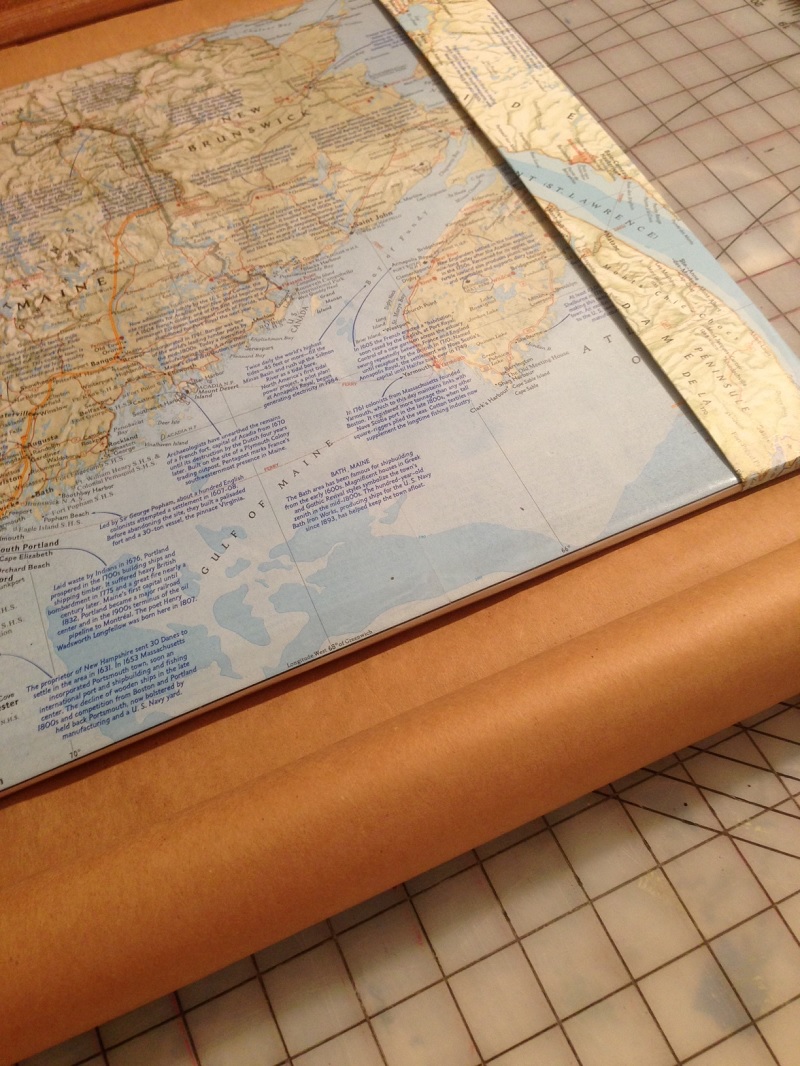
You can use paper, fabric, mat board, anything you would like, but remember, you are not going to see it anyway. If the surface is delicate or scratchable, I would definitely go with felt or fabric for softer protection. Glue the backing to the foam board, covering up all the messy folds and tape.

Glue on BackingAnd …

Blotter Completed

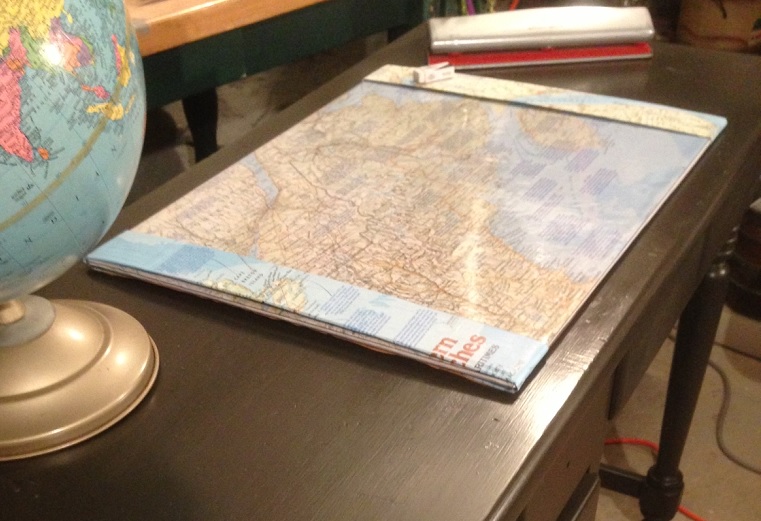
9. Voila! You have a customized, durable blotter for your desk! Have fun customizing it to your room- the skies (or the heavens) are the limit! Have a terrific Thursday, everyone! Susan

Big Rack Attack Towel Rack!

A few weeks ago, I started a mini-reno on our downstairs half-bath. Well, it started out as a mini-reno…

Bathroom floor

 While that project is still ongoing and will be unveiled shortly, my Big Rack Attack Towel Rack project is ready to share with the world!  Having seen them used for decorating, both in print and on TV, I had been searching endlessly online and in stores for a white porcelain deer head to add to an old tabletop (you’ll see…) without much luck. Everything was either too big, too small or too pricey to use for a budget bathroom remodel. It didn’t make sense to spend more on an decorative accessory than we did on the new toilet. So, while in Maine a few weeks ago, I grabbed this one in a flea market for three bucks and thought “perfect!”

Deer Head Before

Apparently this is intended to be stuck to the outside of your car window so that it appears he is busting through the glass. Is this 6 inch buck head with the super cute face supposed to be scary?! And who would be driving around with a deer crashing through the window anyway? But instead of hanging him outside the window, this little guy enjoyed the ride home on the dashboard in the blazing sun to soften him up so I could reform his antlers, because they were a little smooshed together.

Deer in Window

So while he was basking in the sun, I stuck a hair clip between the antlers, then allowed them to cool and we were good to go. So here’s the how-I-did-it:

Making a Big Rack Attack! Towel Rack From An Old Tabletop and a Plastic Deer Head

1.Used a decorative piece of wood for the base.  In this case, it was a small cherry tea table top without any legs. I cleaned it, then taped off the center for a decorative painting technique.

Prepped, taped wood plaque

2. I wanted an aged, colorful middle, so I grabbed my folkart crackle medium. To create a crackled finish, you paint the surface using an undercoat, whatever color you want to appear through the cracks, in this case white. Then you paint on a layer of the folk art crackle paint medium,

Folk Art Crackle Medium

then add the top coat. The crackle medium makes the top coat crack apart, instantly aging it like 100 years easily.

Wood Crackled Blue

This top color is Behr Midnight Dream , a color I chose to co-ordinate with the new bathroom color scheme. Behr Paint Midnight Dream

3. Waxed the frame edges to bring back the original cherry luster. Used my Annie Sloan Soft Wax for that. Really brings back that glow in the wood.

Wood Wax Finish

4. Propped the buck on something to allow spray painting on all sides. I placed it in an old mason jar, impaled on a screwdriver surrounded by a plastic bag (that’s even worse than crashing through a car window!) Poor deer…

Deer Head Shiny

5. Primed first. Since this was plastic, I wanted to make sure the paint adhered well. Used Rustoelum Speciality Plastic Primer.

Rustoelum Plastic Primer

5. Painted with gloss white paint to give the appearance of porcelain. Used Rustoleum Gloss White which made it super shiny!!

Rustoleum Gloss Paint

Deer Head Primed 2

6. A friend had suggested that I use a little brass plaque to give the deer a name or tell the date of his capture. I went with some old scrabble letters that spelled out “Oh, Deer” but use your imagination. The letters were too blonde (is there such a thing?), so I used this furniture scratch touch up marker to give them a little color. Love those pens!!

Oh Deer Letters

7. Adhered the deer head to the center of the plaque with hot glue. Now, unbeknownst to me, while all of this had been going on, my amazing children surprised me with a beautiful large white deer head from West Elm for my birthday!! Even David Bromstad said it was a really nice deer. So there’s that.

West Elm Deer Head

It’s much, much larger than my daughter’s little guy Bartlet, but he wasn’t scared, so much as just a wee bit worried, perhaps?

Deer and Bartlet

Unfortunately, the big buck was so big it didn’t fit in the middle of the plaque! So he has to go back to whence he came, West Elm, and since they don’t have any more of the small ones, we are going to shop for another beast instead. A rhino, perhaps? Who else would have a rhino in their bathroom? So, I didn’t permanently fixate my little deer head to the plaque, just hot-glued it for now, in the event that he needs to move on to greener pastures.

8. I needed to add a bit more rustic glam to my piece, so these metal stars were perfect. Again, used the stain marker pens to change the stars from silver to bronze. The result was kind of a mottled look, which was perfect.

Deer Stained Star

9. Attached the hook at the bottom. This is going to be the guest towel rack in the new bathroom so it needed a hook or two.

Hook for Rack

10. Stood back to admire my new Big Rack Attack Towel Rack!!

Deer Head Plaque Instagram

So, next time you stop by for a visit, you’ll be hard-pressed not to notice the big rack (insert joke here) Sometimes we just have to take things a little less seriously, folks. Now I just have to finish the rest of the room, seriously. Have a wicked awesome Wednesday, everyone and just remember: If a big rack attacks, turn him into a towel rack!  Susan

Copper Cleaning Accomplished!

Copper Coffee Pot Before

After much trial and tribulation and multiple attempts utilizing all sorts of natural and chemical cleaning formulas, my copper coffee pot is now perfect!

Copper Pot with flowers

Since my last blog, I have received multiple suggestions from several sources on how to get my copper pot clean and shiny. After posting the question on my “Antiques Are Green” LinkedIn group, the cleaning options were endless from the many dealers and collectors of all things copper! Among the home remedies mentioned were vinegar, salt, lemon, ketchup (yup, ketchup-apparently not just for hotdogs anymore…), 0000 steel wool pads, Brillo pads, Chore Boy pads, Never Dull wadding or just put the damn thing in the dishwasher.

Copper cleaners

I also tried my Magic Eraser sponge and my Cape Cod Metal Polish with some luck, but still not perfect.

Copper Mr. Clean Magic Eraser

Also mentioned on LinkedIn were lacquer thinner or acetone (nail polish remover) and kerosene (really?!?), or having it dipped. Not sure what that means, but it conjured up images of my helpless coffee pot being immersed in a boiling, bubbling hot vat, and that made me sad. Bubble, bubble, toil and trouble…

Copper Kettle Turbo Squid

Among the commercial polishes I could try were Siege, Wrights, MAAS, Liberty, Brasso, Twinkle, Silvo and Bar Keeper’s Friend. But I was hoping to keep it “green” clean, so I started out with the natural method, utilizing heated vinegar in a large pot.

Copper Vinegar Gallon

Once I placed the pot in there, the bits of bubbling lacquer appeared floating on the surface. Yuck.

Copper Floating Varnish

But it was working!

Copper Pot half dipped

Or so I thought. Flipped it over and immersed the other end. This was the end result. Double Yuck.

Copper Tarnish Mess

I finally decided to go for the commercial products, and the one that was mentioned more than once was Bar Keeper’s Friend, which I found on the shelf of my local Home Depot for $1.48. I got some Brasso, too, just in case that didn’t work.

Copper Cleaner Cans

Make a soft paste of BKF and started wiping the pot with a sponge, instantly removing years of tarnish and varnish and dirt! Copper Tarnish In about 3 minutes time, my copper coffee pot, and even the brass handle, was gleaming and shiny and pretty! So the Bar Keeper’s Friend is now my friend as well! As a disclaimer, I am sure the other products mentioned would have worked just as well. But this is the one I saw first, and the Brasso was at the hearty recommendation of the Home Depot clerk. Who, BTW, could not have been more that 17- I am curious as to just how many copper pots he has cleaned?!?Copper Pot Complete Since my Barkeeper’s Friend worked so well on the coffee pot, I grabbed a copper sconce I was planning on painting, but now it’s got a whole new shiny life as well! Copper Sconce Then this plaque, which was so dark and tarnished, I couldn’t even tell what the picture was until I started cleaning it. As I was rubbing the bunny, I noticed a signature at the bottom and the date was 1502. So I stopped. Did a Google search and discovered that the Young Hare was painted by Albrecht Durer in 1502. Copper Bunny You know when you’re watching “Antiques Roadshow” and the expert says “gee, it’s too bad you cleaned this. It would have been worth a million dollars but now it’s ruined and worth about twenty bucks”? I’m pretty certain that this copper engraving by Albrecht Durer isn’t the real deal because it’s mounted on a backing that appears to be a more modern substance than what would have been available in the 1500’s, but the tag says made in Germany, so I’d better check it out before I ruin it! So there you have it, 2 weeks of work on a $1 copper pot that finally came clean with Bar Keeper’s Friend. Have a super sunshiny Sunday everyone! Susan

Mainely Antique Attractions

Recently, Coach and I spent a few days in Maine at the Bethel Inn and Resort for a little R & R. On our way there, we stopped at the Undercover Flea Market in Oxford Maine

Undercover Flea Market

(they don’t appear to have an internet presence, so no direct link. Ah, so maybe they are really undercover…) Thought long and hard about this table, but decided against it-too pricy to paint and flip.

Table

While in Bethel, we discovered not much going on downtown, so we ventured out to find some antique shops in the area that were listed in several brochures he had picked up at the visitors center. The Steam Mill Antiques

Steam Mill Collectibles

was right around the corner from our hotel. Looked promising, with a vast array of junk and stuff all around the property. We visited, several times, but it was never open! Will definitely have to return another time…Next stop, the Picker’s Paradise in Welchville (again, no links here).

Pickers Paradise Sign

We were drawn in by the beautiful Great Canadian wood canoe in the parking lot.

Pickers Paradise Canoe

Inside was a variety of antiques and collectibles. Wishing I had grabbed this chubby old cow doorstop. I often experience what I refer to as “non-buyer’s remorse.” I see something that I love, hem and haw about it, because I don’t need ONE MORE THING, so I leave it, then lust for it when I am back home. Oh, well.

Pickers Paradise Cow Doorstop

This shop featured several pieces that were reclaimed and repurposed, like this LOVE sign, created from old frame pieces and lace. LOVE.

Pickers Paradise LOVE

On our shopping expeditions, I noticed quite a few “Boston” items,

Pickers Paradise Boston Beans

which made me feel very nostalgic for the place we call home. Across the street was this shell of an old building, now being dismantled and sold for parts.

Burned Out Antiques Building

In year’s gone by it was the Welchville Methodist Church turned antique shop.

Burned Out Building Sign

But after being on the market for quite some time with no bites, the owner decided he could no longer afford the upkeep. So everything, including the bell tower,

Bell Tower 
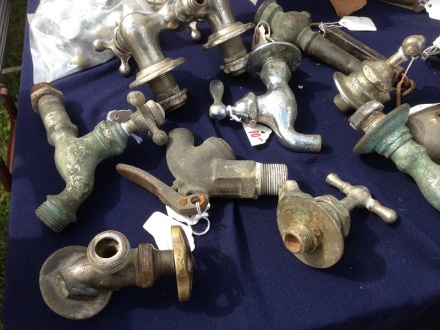
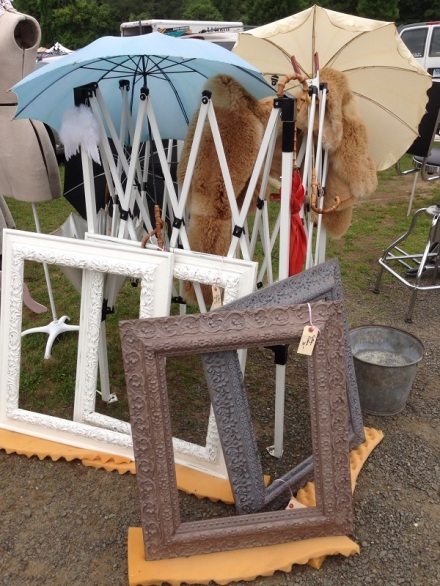
is for sale. If you are in the market for some architectural salvage, this might be your place! Next up, Pa’s Tradin Company in Oxford, Maine.

Pa's Tradin Company Sign

…a huge co-op shop that was neatly organized into departments like furniture & outdoor gear-snowshoes, anyone?

Pa's Tradin Company Snowshoes 
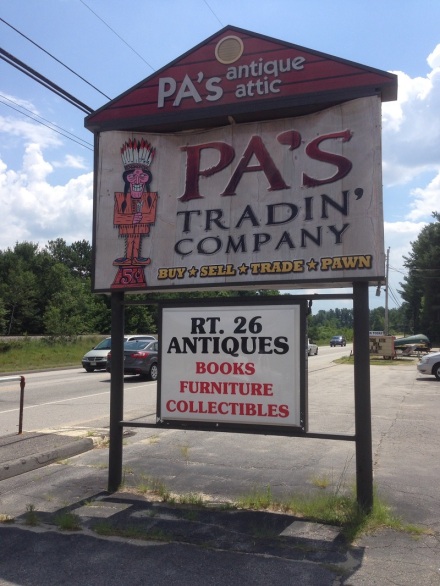
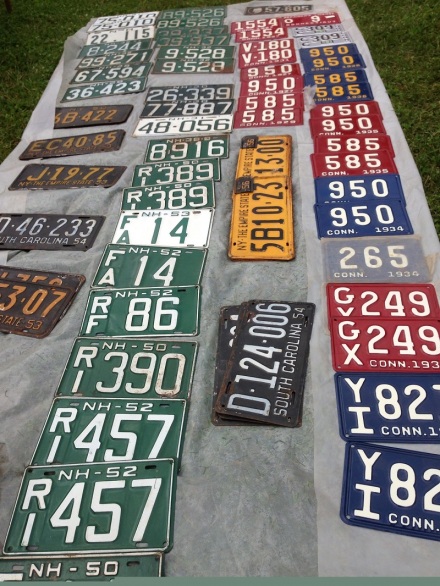
and more Boston collectibles.

Melrose Crate

I did score a couple of great items, like this gorgeous cupboard (the vendor literally was loading it in the back door when I spotted it, and he and Coach moved it right back out the back door into my CRV!)

Pa's Tradin Company Cupboard

and my little buck (projects in progress : )

Pa's Tradin Company Buck

Drove by this place, Pic-N-Paw in Norway, Maine a couple of times, but again, it never was open! What’s up, Maine?!?

Pic N Paw

On our way home, we discovered Bridgton, Maine, a country town with some fun shops- again, many not open. But we did find Harry Barker’s Emporium and Harry Barker’s Two, antiques co-operative shops, with some donated items being sold to raise funds for the local Harvest Hills Animal Shelter.

Harry Barkers

There I found Exit, stage left.

Harry Barkers Exit Sign

Nearby was Flowerbed Farm Antiques in Bridgton. True to its name, there were exquisite, colorful flower beds surrounding the property. There are so many massive white homes in Maine with attached barns! Can you say barn envy?!

Flowerbed Farm Antiques Sign

Outside and in, an array of restored, repurposed and reclaimed items for your shopping pleasure.

Flowerbed Farm Entrance

Beautiful minty green bedroom set. Sooo country pretty!!

Flowerbed Farm Mint Green Set

Adorable rustic antique horse cart.

Flowerbed Farm Antiques Horse

Following Rte 302 South to Portland on our way home, we happened upon Naples, a picturesque resort town. And there we discovered Antique Revival. Again, no media presence, but this guy doesn’t need it. Sprawling property loaded with anything and everything you could possibly want or imagine you need!

Antique Revival Sign

A.M.A.Z.I.N.G.

Antique Revival Entrance

Enormous, three story barn,

Antique Revival Two Story View

packed to the rafters-literally

Antique Revival Rafters

Greeted by the human-sized roosters at the entrance,

Antique Revival Rooster

once you step inside, you are transported back in time.

Antique Revival Boston Beans

Room after room of antiques and collectibles and junk,

Antique Revival 2nd Floor

an overwhelming assortment of furnishings, goods and finds.

Antique Revival Store

For the serious collector (may the Force be with you)

Antique Revival Star Wars

or the casual collectibles shopper,

Antique Revival Patches

this is one spot that’s worth the trip!  So I’m adding a few more pins to my map, and we’ll be heading out again soon. But for now, it’s good to be back home.

Boston Embroidery Print

Have a great weekend, everyone! And if you are in the mood for some antiques shopping overload, head up Rte. 302 to Maine.

Maine Map

It is so worth the trip. OK, it’s TGWB (time to go wallpaper the bathroom)… Susan 

Cleaning Copper Caper

This past weekend, I scored this beautiful copper coffee pot at an estate sale.

Copper Coffee Pot Before

It even had the cute little card inside, but that did not have any cleaning instructions inside.

Copper Pot Portugal

So once I brought it into the house, I decided to give it a quick wash just to remove the surface dust. Then I thought I might try to polish it up just a bit. Then I decided I liked the polished finish, so I kept cleaning. So first, I tried my trusty Cape Cod Metal Polish, which typically does the job with little effort, and a pleasant scent too.

Copper Cleaner Can

It was working, but that required a lot of elbow grease. So, I pulled out my Mr. Clean Dry Eraser Sponge.

Copper Mr. Clean Magic Eraser

That also worked, but I was still using a lot of elbow grease. And I am all about getting stuff done quickly and not using up all of my energy so that I can’t go tile the front hall or build a table top. So now I had dull coffee pot with shiny spots. My mom suggested salt and lemon juice-nope. So I went online to see if anyone else had come up with a non-elbow-grease solution to clean tarnished copper. Some guy on You Tube had created a magical formula from everyday kitchen items: salt, flour and white vinegar. So because everything you see on the internet is true, and I liked the idea of not using chemicals anyway, I decided to try it. Here is the recipe: Place 1 tsp salt and 3 tsp flour in a small bowl, then slowly add enough white vinegar to make a creamy paste. Looks good enough to eat, right?

Copper Salt and Flour

At first I added too much vinegar and it was watery, so I added another dose of the flour and salt. Bingo! Nice smooth paste, ready to make my copper pot shiny and new. The video said to pat it on the item with a rag-I used a moist sponge, but you get the idea, you want to coat the surface.

Copper Solution Sponged

Then allow it to sit for thirty minutes.

Copper Timer

Then rinse. No rubbing or buffing required!

Copper Rinse

In the video, his copper-clad saucepan came alive with pretty copper color-away old tarnish! In my kitchen sink, this technique was a big FAIL. No difference after I had rinsed, then rubbed, then rinsed again. Hmmm. So now I have a beautiful copper coffee pot that is shiny and bright in the middle of each side, but tarnished all around the bottom and tops.

Copper Pot Half Shined

So, thus far, this is the collection of stuff I have tried.

Copper cleaners

Anyone else have any bright ideas? Susan

A Whale of a Weekend!

Over the 4th of July weekend, I traveled to Cape Cod to spend the holiday with a good friend at her family’s beach-side cottage in Falmouth. Is there anything more quintessentially Cape Cod than magnificent blooming hydrangeas against grey cedar shingles? Beautiful!!

Whale Table Flag

We ate too much, drank margaritas, chatted for hours, watched the neighborhood fireworks and delighted in the joy of her two adorable tow-headed grandsons. The cottage is circa 1930’s, with dark beadboard walls and ceiling in the living room,

Whale Table Bead Board Walls

a vintage kitchy kitchen and many of the original furnishings still in place. Since she is slowly attempting to freshen and lighten the decor, her most recent flea market find was a white rattan living room set with green and blue striped cushions-so comfy and pretty!

Whale Cushion Colors

But the dark brown, pressed-board, veneered-top coffee table had seen many better days,

Whale Table Before

so the choice was to toss it and get something new or refurbish it-nothing that a little paint, tape and time can’t fix! Since she has often admired my whale table,

This Old House Whale Table

our original plan was to cut the top of this table into the proper shape and then paint it. But the base was too wide, which didn’t leave  a lot of room for cutting definition. The next choice was to define the background with a contrasting color and then paint the whale-perfect! The red, white and blue of my whale table would not have cut it in her beachy blues room, so we chose the Behr sample pots

Whale Behr Paints

that most closely matched the stripes in the cushion fabric.

Whale Side View

(Funny story, when we went to the mixing counter to order our colors, the clerk said “Why is everyone calling these paint pots? They are jars!” I guess we can thank the British invasion for that one-so thanks, Annie Sloan!)

Here’s the how-to:

1. Get a table that fits a whale shape well. This one is oblong in shape so it was a natural fit with a curved middle and rounded edges. But since most coffee tables are rectangular, they lend themselves to the whale shape well. Prime it. I usually use Glidden Gripper

Glidden Gripper

for its awesome priming ability to stick to pretty much anything.

2. Decide on a pattern

Whale Chalk Outline

and then draw a whale on the primed table top surface.

Whale Pattern Pencil

It you don’t have any drawing skills, the next best thing is to find the shape online and then print it. My skills are primitive, at best, but they get the job done.

Whale pattern

Whales are pretty simple though. They are kind of just a big old long blob with a mouth and a tail.

3. Paint the background color. In this case, we used the darker green to give it a good definition. That also wrapped around the edge of the table. Then we painted the skirt and the legs the other contrasting colors of Mother Nature, Grape Vine and Blue Fox.

Whale Table Color Palette

4. Painted the background color of the whale. In this case, it was a Behr plain white.

Whale Painting White Coat

Now you can really see the shape taking shape against the darker green background.

Whale White Undercoat

5. Tape off the stripes. I originally measured true center, then started a line across using the table edge as a guide. However, I soon realized that since the table is oblong, it gracefully slopes down as it nears the edges. We could have followed those lines and created a curved effect, but we were going with pin-striped preppy whale so we just started with the center lines, then pulled the tape taut across.

Whale Taped Stripes

A quick tip: instead of measuring each individual stripe row spacing, we just placed a small piece of tape, then started the next row-quick and easy!

Whale Tape Spacers

6. Painted the blue lines and tail. Make sure that when you are painting along the tape, you use light coats and strokes so it doesn’t bleed underneath the tape lines! Two light coats are better than one heavy coat. This paint takes so little time to dry, especially in the hot Cape Cod sunshine, that it was only a matter of minutes between coats.

7. Pull the tape and step back and admire the cute preppy whale emerging.

Whale Blue Tail

8. Decorate the tail. We wanted to make him look a little more fresh and beachy, so we used a starfish shape cut from an old sponge.

Whale Sponge Starfish

With the white paint, we began sponging the stars on his tail in a random pleasing pattern. This is your chance to use your creativity! Don’t want stars? Use circles or spirals! Anything you can think of you can cut out of a sponge or potato or find a stencil or stamp at your local craft store.

Whale Tail with Stars

Tip: try to stamp a couple along the edges with a partial pattern so the overall effect is more even and not cramped into the defined space.

Whale Tail with Star Edges Defined

The sponge effect is lighter and makes for more realistic starfish.

Whale Completed

9. Add an eye. This is a personal choice, but since whales have eyes and we wanted to add a touch of the soft green to the top, this half-moon shape worked beautifully.

Whale Table with Eye

10. Stand back and admire. The table is back in place in front of the new sofa, and it instantly added a bright, whimsical touch to the living room.

Whale table complete

At that point, it was time for me to head back home (to avoid the notorious Cape bridge traffic). So she’ll be finishing her whale with a touch of glazing and a couple of coats of polyurethane. Need to protect our project from the battle beasts that were once played with by her sons, and now by her grandsons.

Whale Battle Beasts

So thanks for a whale of a weekend, Mary! See you very soon. I’ll bring the sandpaper…and the margaritas. Susan

PS: Check out my links on the Thirty HandMade Days Pity Party and on My Repurposed Life!

Up S***’S Creek…

…with not one, not two, but three paddles! When Coach brought a pile of old wooden paddles home last year (5 in all), I was pretty ticked off, because at the time, we just didn’t have any place to store them and I had no use for them. These are not the type of paddles you would use for kayaking, and since that is the watery mode of transportation we are sporting these days,

Kayaking- The Launch

it just didn’t make much sense to have a collection of wooden paddles. (For the record, these are paddles, not oars, as I kept calling them until Coach corrected me enough times.) Paddles Before

So they sat in the barn over the winter until 1. I sold a couple of them to Pat from Perfectly You, A Decorating Service for her awesome nautical hallway project

Perfectly You Hallway Paddles

and 2. I discovered this decorative box at, where else, HomeGoods,

Paddle Book Box

which became my inspiration for this month’s nautical theme at the Vintage Thymes Market. With three paddles remaining, I decided to paint and distress them to look the ones pictured above. Except those are oars, so I am taking some artistic license here. Do you know the difference?! I made the necessary repairs to the handles, sanded them down, taped off the lines and stripes,

Paddle 3 Taped

painted in the red and white and blue,

Paddle Red Stripe Taped

added the number 3 (found the one I wanted online and printed it out on a piece of paper. Cut it out, traced it on and painted it in. Easy!! You know you don’t have to paint perfectly when you are planning on sanding and distressing a piece, right?

Paddle Painting 3

I re-sanded the painted sections for that worn-out, been used to row across the ocean and back kind of look,

Paddle Sanding

then added a coat of Annie Sloan Soft Wax,

Paddle Annie Sloan Soft Wax

which restored the original luster of the exposed, unpainted wooden areas.

Paddle Waxed

Lovely. So I brought them, and the box to market, and only the #3 sold! So now there are two paddles remaining, which are presently hanging proudly in our summer porch.

Vintage Porch Paddles

The good news is that they are all painted and shiny and pretty. The bad news is that there is one short and one long-in case you have a lop-sided canoe. Which, thankfully, I do not. Hope you don’t spend your entire day paddling upstream!! Susan

Flipping Over The Elephant’s Trunk-Part 2

As promised, here is the second half of the Connecticut adventure to The Elephant’s Trunk Flea Market-this is the good stuff! So we arrived around 8am to a sea of parked cars

Flea Parking lot

in a large open field surrounded by rolling hills and trees. This place is huge-not Brimfield huge, but there are 55 acres with hundreds of tents and tables. Lined up in orderly rows and flanked by food trucks, it made for quite an excursion for the thousands of shoppers already rummaging and haggling for goods and wares.

Flea Crowd Shot

As we keep attending more flea markets, antique shows and auctions, I am noting that this year’s trends are still holding strong: industrial, schoolhouse, old tools and of course, animals. Taxidermy,

Flea Antlers

metal work roosters,

Flea Rooster and Fence

deer old lawn ornaments (aren’t these two so sweet?)

Flea White Deer

and mounted deer heads

Flea Deer Head

were all right at home in what once was vast alfalfa farmland. At this flea, there was not a lot of repurposing or repainting, everything was pretty much “as is”. With a few notable exceptions. One booth had many painted and distressed tables and cupboards. Nice work.

Flea Green Table

This amazing metal-work coffee table was created by Jepsen’s Restoration.  He uses everyday items like signs and horseshoes and boxes and pipes and creates custom industrial works of art.

Flea Welded Table

This hand-painted flag trunk

Flea Flag Trunk

and this vintage decorated suitcase using old census listings were re-designed by Don S. Wing. Very well-crafted and vintage pretty.

Flea Suitcase

So as we were strolling, Coach taps me and says “look, there are cameras!”.

Flea Camera Crew

Sure enough, a camera crew was running after a couple of contestants from the HGTV show Flea Market Flip! If you haven’t seen the show, Lara Spencer (the Lifestyle anchor for Good Morning America-an avid flea marketer herself and author of NY Times Bestseller I Brake for Yard Sales) hosts a televised flea market competition- two teams get $500 each to spend in 1 hour. Here, she was chatting with the vendor who had just sold a table to a team for the show.

Flea Lara Spencer Closeup

Then, they repurpose their items to resell at the Brooklyn Flea Market. The team that earns the highest net profit wins $5000! We watched for a couple of minutes, then moved on, only to encounter Lara and her entourage chatting and laughing.

Flea Lara Spencer

Back to shopping and not stalking the game show host. As I continue to work on styling my own shop at the Vintage Thymes Monthly Market, I notice that my eye is always drawn to groupings (must be my touch of OCD at work?). Trays of jewels sparkling in the morning sun,

Flea Brooches

Vintage brass pipes and faucets make an industrial statement

Flea Faucets

colorful license plates all in a row.

Flea License Plates

This collection of colorful circles-gears and wheels-is art in itself.

Flea Gears

Anyone got a welding torch? I always wanted to look like Jennifer Beals in Flashdance with my own personalized welder’s mask.

Flea Jennifer Beals Welder

Well, actually, I always wanted to look like Jennifer Beals. I did have me some rad leg warmers…

Flashdance Jennifer Beals Dancer

OK, back to the flea. This collection of broken statue heads was intriguing and I stood there thinking “what could I do with these?”, but nothing came to mind.

Flea Heads

As was this collection of metal junk pieces. Tiny Monopoly tokens, vintage jewelry pieces, broken barrettes, metal tokens, little bits of everything and nothings. Looked like a miniature Armageddon in a bowl.

Flea Trinkets

But I am really kicking myself for not grabbing some of these. I had seen a mirror once where they had glued all sorts of miniature items around the frame and then sprayed the entire thing white. That would have made a great conversation piece! This vignette caught my eye- not sure if it was the pretty umbrellas or the fake furs or the antiqued frames, but the pastel palette was pleasing to look at!

Flea Frames

I always enjoy hearing the stories of where people acquired their offered items. We came upon this truck with piles of these beautiful art prints on heavy parchment paper.

 Nantucket Prints

The sellers said that they were cleaning out a shop in Nantucket and hundreds of these prints were hidden away in a back storage room. They had been there for years, yet the colors were so vivid and brilliant! Of course, a couple right before us grabbed the whaling print we really loved. Moving along, we bumped into the Flea Market Flip entourage again. This time with different contestants, and Lara had changed her outfit. It appears that they shoot more than one episode per shopping day? Surrounded by cameras-both the crew’s and onlookers’-they seemed to be having quite a bit of fun.

Flea Lara Spencer and Contestant

And then we found The Duke…John Wayne.

Flea John Wayne

We never did get a chance to chat with the owner of this booth, but he appeared to have props-from an amusement park, perhaps? Menacing Jaws (he could definitely use some floss…),

Flea Jaws

pint-sized choo-choo trains

Train

20 foot signs and larger-than-life-sized statues (this one looks a bit like Coach, don’t you think?)

Flea Soldier

He also had these amazing rusted wheels that came from a vintage coffee grinder from the Enterprise Manufacturing Company. Each wheel weighs about 20#-they must have been some giant coffee beans! Coach and I looked at them, discussed what we would do with them, and then walked away. Enterprise Coffee Grinder Wheels

Word of advice-if you really want something at a flea market, buy it right away, because someone may come along behind you and scoop it up! In this case, we doubled back and a potential buyer was standing there negotiating with the owner for them! Coach swooped in and grabbed them-our prize for the day, along with this antiqued brass National Cash Register drawer faceplate. What are we going to do with them? You’ll have to tune it to a later blog post to find out. But for now, rest assured, we will be heading out again to the next big market in our own home state. No more Bates Motels for me!! Have a bargain of a day everyone! Susan

Bench Dressing

Not to be confused with ranch dressing,

Bench Ranch Dressing

which has much more white than this restyled country bench does! So the bench is finally done and done. From the painting poll that I took on a recent blog post, the colors that won were distressed aqua/blue/gray/mint.

Behr Paint Palette

I have to admit, I tried the mint and it didn’t really work with my nautical vision, so I stuck with the blues and grays. Before I committed to the final colors, I wanted to find the co-ordinating fabrics I was planning to use for the cushions and pillows. Made a trip to my local Joann’s and-go figure-I fell in love with these lobsters.

Bench Fabrics

(Folks that know me realize that this is rather puzzling, as I think that the best part of any lobster is the melted butter : ). Fanciful fellows, bright reds on a background of dark teal. Perfect! Had some difficulty choosing the cushion fabric, but then discovered 1.this gorgeous aqua and navy block fabric that looked to me like nautical flags

Bench HGTV Fabric

2. and then discovered that, of course, it’s from HGTV-sold! So starting with the old worn bench,

Bench Pediment Detail

I added a layer of Annie Sloan French Linen, mixed with water to give it a washed look.

Bench Annie Sloan French Linen

Then I added on layers of Behr’s Gulf Wind Blue, Peaceful Night, Battleship Gray and Gray Morning

Bench Annie Sloan Gray Wash

by dry-brushing to allow the lower layers of paints to be more transparent and add another dimension to the finished product. To enhance the spiral detail at the bottom, I added a touch of dark blue.

Bench Painted

Time to dress the bench! We all know that any delicious salad is just a bunch of veggies in a bowl until you add the spice and flavor with the dressing. Same holds true with decorating-it’s the finishing touches that define the piece. I love layering mis-matched co-ordinating pillows to achieve a casual, comfortable effect. So I started with the HGTV Home nautical flag cushion.

Bench Cushion

Added a large middle pillow-soft and sinkable for maximum comfort, created with two cotton kitchen towels from HomeGoods).

Bench Towel Cushion

The sailboat pillow came next-again, created with an embroidered kitchen towel (also thank you HomeGoods!) that I added the “SAIL” to.

Bench Sail Pillow

The next pillow was lobsters and sailboats with star buttons, both of those from Joann’s Fabrics.

Bench Three Pillows

When I stepped back to admire the bench, utilizing the squint test, I realized it needed one red item in the center. One more nautical towel, surrounded by the flag fabic, completed the vignette.

Bench Completed

The finally finished, decorated bench is now sitting proudly in the perfect spot on my country styled summer porch that is now patiently awaiting spring. Which cannot come soon enough! Susan


Chicken Wire Memory Frame

Today I am sharing a simple D.I.M. (Do It Myself) project that’s fun and quick and pretty simple, assuming you have the right tools and stuff. I saw something similar to this at HomeGoods awhile back and thought, gee, I have some chicken wire and an old frame, I can make that!

Chicken Wire Memory Frame Blue

So I did. Here’s the how-to:

1. Ask Coach if he knows where that old frame and the chicken wire is. He disappears into the barn, and a few minutes later he emerges with both in hand.

Frame and Chicken Wire

2. Fix the frame- it was a little old and dinged and faded, so I glued the edges and added a touch of Minwax to brighten it up.

memo board minwax

I painted the inside edge, first with a coat of off-white, then I dry-brushed it with Gulf Winds.

Dry Brush on Frame

Dry-brushing technique is what it sounds like: take a small amount of paint on the brush, then wipe most of it off onto paper.

Dry Brush Technique

You lightly brush the surface with the remaining paint, which gives you a soft, aged look.

Chicken Wire attached to frame

I always keep a supply of wet wipes to clean up the many errant paint marks I make along the way. To get into really tight spaces, just wrap it around the end of a flat head screw driver-perfect edge!

Wipes on edge of frame

3. Cut the chicken wire-turns out that scissors work just fine. But not your good sewing scissors, unless you want to go with the raggedy look the next time you are cutting taffeta!

Cutting Chicken Wire

4. Attach the chicken wire to the back of the frame. This got tricky because I couldn’t figure out what would work. Tried my electric staple gun- those staples were too big. Then I tried thumb tacks. Well first I had to find some thumb tacks, which you would think would be a breeze considering I have a “thumb tacks” drawer in my little nail organizer. NOT. Anyone need a giant bolt?

Thumb Tack Drawer

So I went to the junk drawer- please tell me you all have a junk drawer that looks like this?!

Junk Drawer

Nope, none there, either. Finally found a few, along with an American flag pin-so that’s where that went!- in my desk drawer.

Tacks in Drawer

And so, after all that, I tried the tacks and guess what-big fail!

Chicken Wire with tack

I would push them into place, then as soon as I tugged on another corner, the wire would slide over and the tack would pop off! Next option, my trusty old Bostitch stapler, which worked great.

Stapler and Chicken Wire

5. Add the decorative lettering. I had a bag of old “fake” Scrabble letters hanging around (doesn’t everyone?), so I used those.

Scrabble Letters

You could put whatever you want, but no profanities please : ) Well, I suppose you could, but it probably wouldn’t sell very well. Then again, maybe it would. Something like The F***ing Egg Plate might work. (If you have no idea what I am referring to, click the link for a good laugh…) So, now you measure out the amount of twine you will require to fit all of the letters.

Measuring twine

Hot glue the letters to the twine and affix twine to the frame with the glue.

Scrabble Tiles Attached

6. Color the clothespins. I threw them in a little can with some watered down paint and stirred them around, then let them sit for awhile.

Paint wash for clothespins

Hung them to dry-the reverse clothespin effect.

Clothespins drying

You’re going to use the clothespins to affix the photos or whatever else you would like to display.

Memory Board Completed

7. Add a picture hanger to the back and you’re done! Cute, simple project. I like the fact that there is no backing, that way you can use it on whichever wall you would like to have as the background color (like the red shown here from my dining room, or the blue above from my hall).

Chicken Wire Memory Frame Red

8. So, I guess for this week’s High Five for Friday will go to chicken wire! It’s cheap, pliable, cuttable with scissors and adds a rustic, country charm to any project you might be considering. Happy weekend everyone! Susan