Antiqued Mirror on the Wall

Antiqued Mirror Completed PM

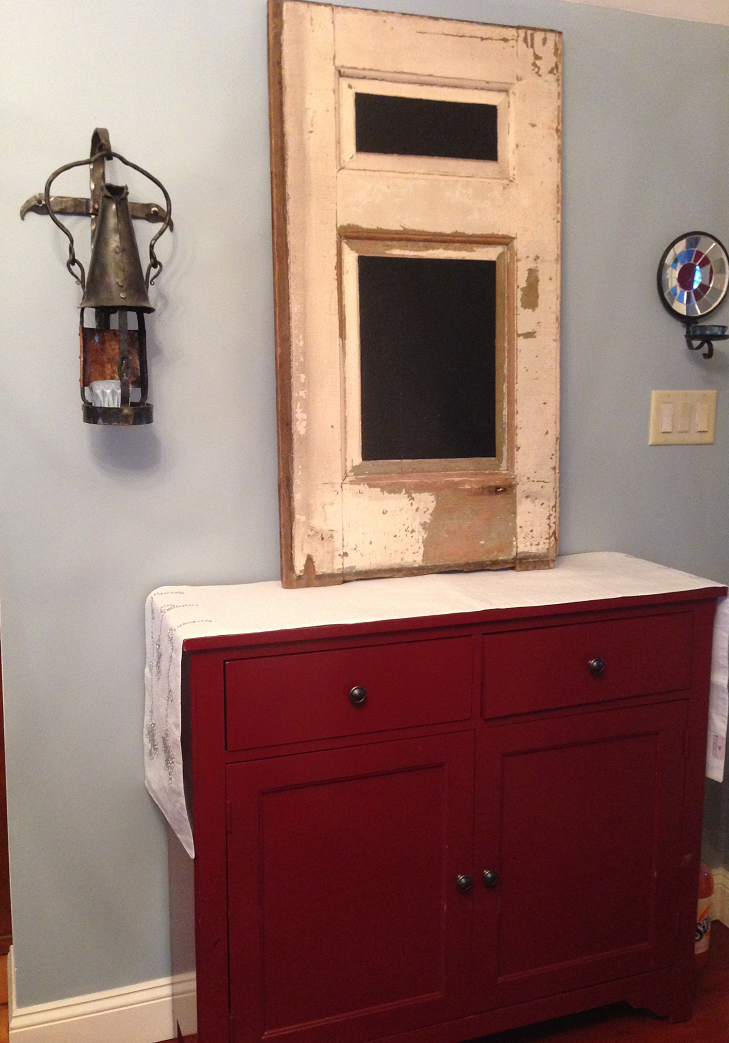
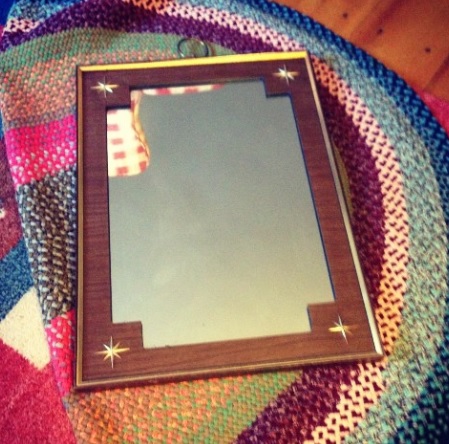
Who’s the fairest (and most rustic, vintage and gorgeous!) of them all? This mirror was another “throw-away” Coach found “somewhere”. I don’t ask anymore. It’s like a magic cupboard-I need something, I open up the barn door and voila! Instant DIY subject! Today’s project was this old, dirty, chipping and peeling dark brown mahogany mirror. Despite it’s sorry, drab exterior in dire need of some TLC, the actual structure itself was totally solid and quite heavy, I might add. I transformed it from this in a few simple, easy steps.

Antiqued Mirror Before
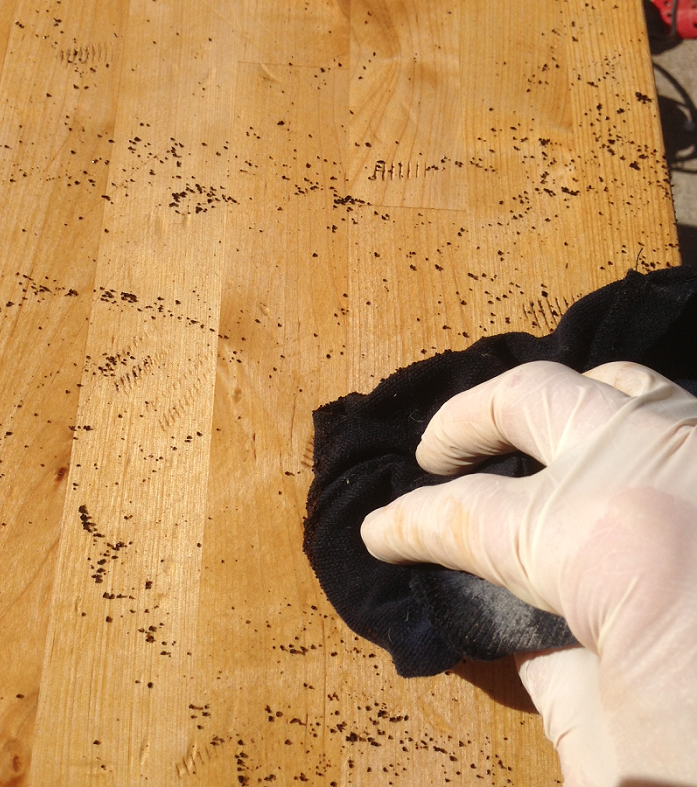
Here is the How-I-Did-It: 1. Cleaned the mirror and frame thoroughly with heavy duty cleanser. The mirror is not in perfect condition, but that’s fine by me. Adds to the charm, and it stills reflects the light, which is most important. Lightly sanded the frame just to remove any loose particles of old varnish.

2. Primed with Gripper by Glidden. LOVE this stuff. Seals in stains, odors, evens the color and preps the wood to accept the topcoat.

Glidden Gripper Primer
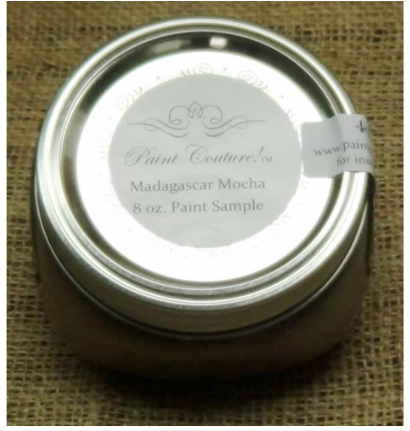
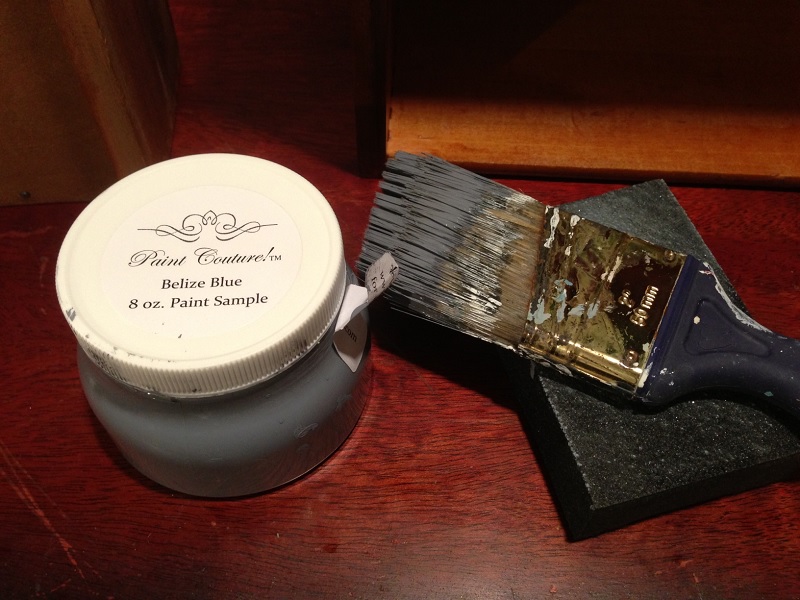
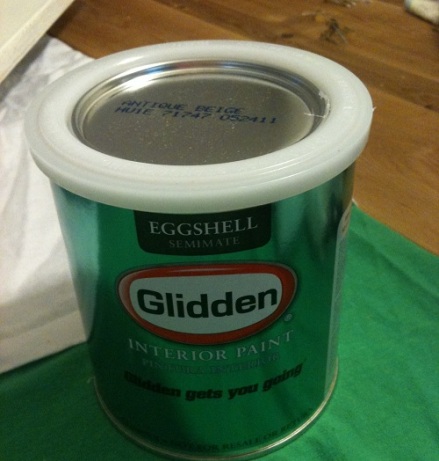
3. Painted with one coat of Glidden Antique Beige

Glidden Antique Beige Can

that I added my “chalk-like-paint” mixture to. It is a nice, soft, matte finish that accepts glazes and waxes very well. That recipe here:

Antiqued Mirror Painted

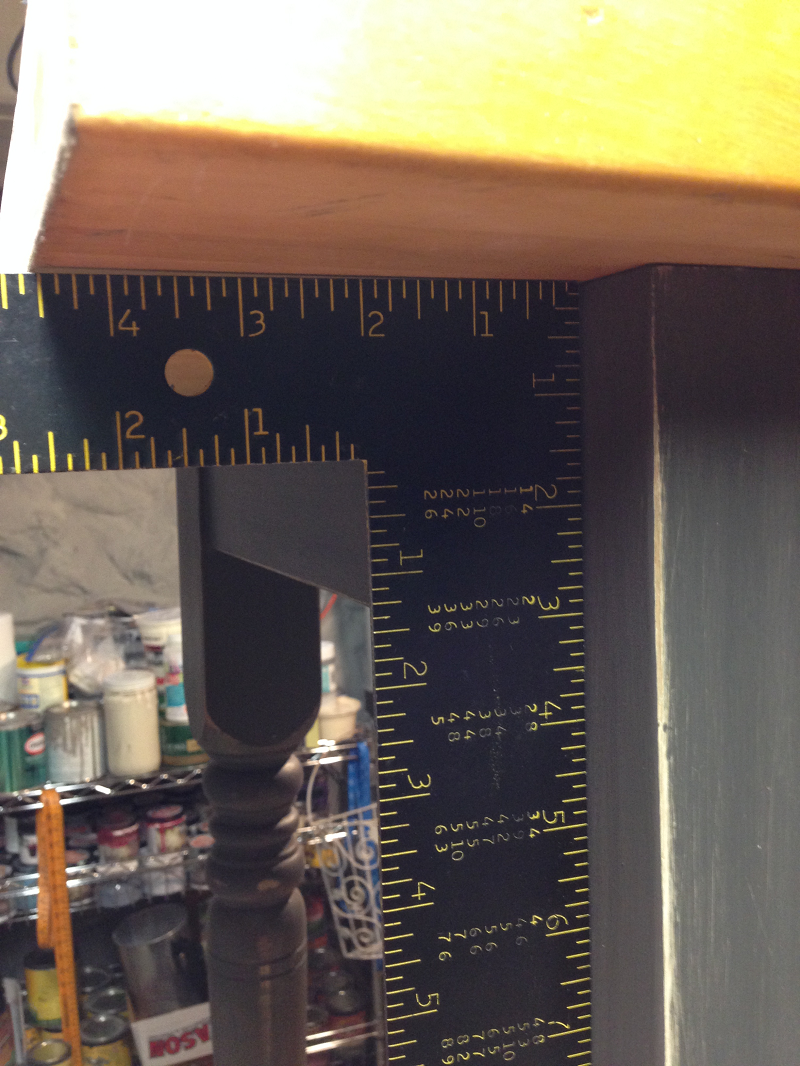
4. Added the unfinished medallion to the top for detail.

Antique Mirror Unfinished MedallionI purchased this one at Michaels for a couple of bucks. Just glued it on with Gorilla Glue . You have to brush it on, then weight it down

Antiqued Mirror Glueing Downand wait until it’s dry to ensure a good solid bond. Then I painted it with the same Glidden top coat and allowed to dry.

Antiqued Mirror Medallion Primed5. Lightly sanded the whole mirror frame and detail to expose some of the dark wood beneath.

Antiqued Mirror Detail Sanded 2
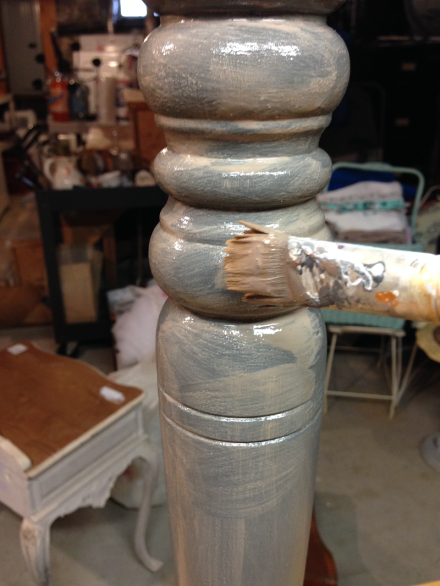
6. Painted on this Antique Wax in Scrub Pine from General Finishes. I like this one because you don’t have to work it in with a rag. You literally paint it on!

Antiqued Mirror Scrub Pine Antique Wax
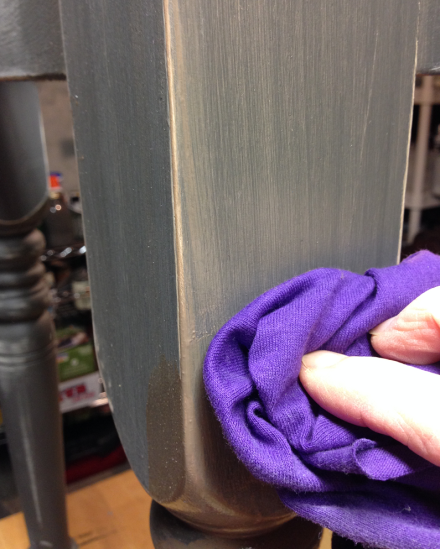
Brushed it on with a foam brush, then wiped off with a rag, leaving the dark wax in places to enhance all of the crevices and lines and detail.

Antiqued Mirror Glazed and Sanded

It leaves some color, but it also adds a nice matte finish to the entire piece. Allowed to dry.

7. Scraped off the excess paint and stain insdie the frame of the mirror. Cleaned the mirror.

Antiqued Mirror Scraping Glass
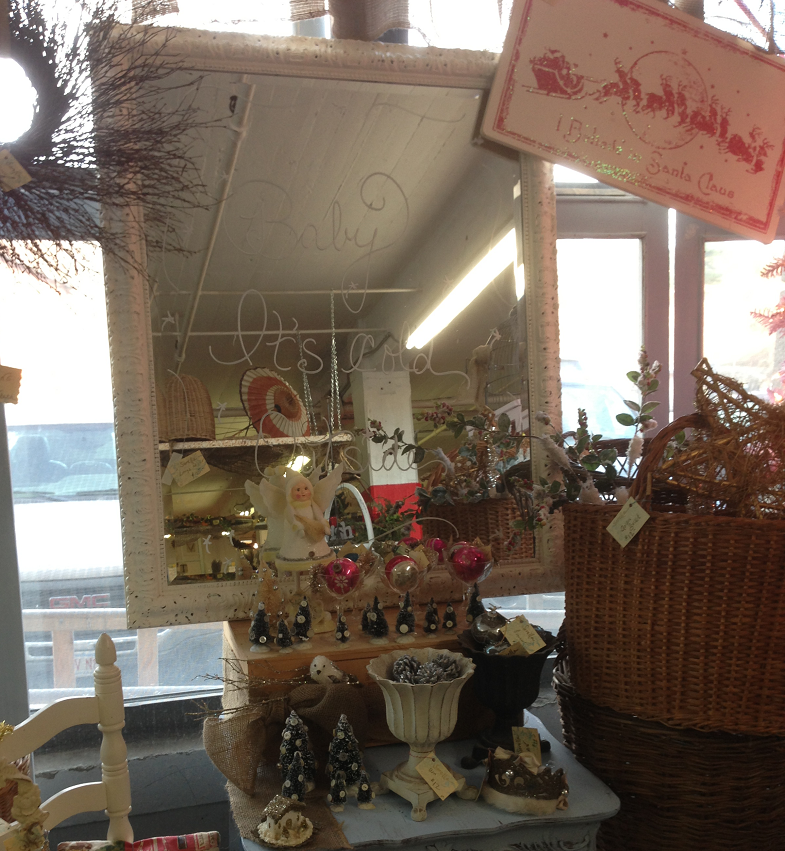
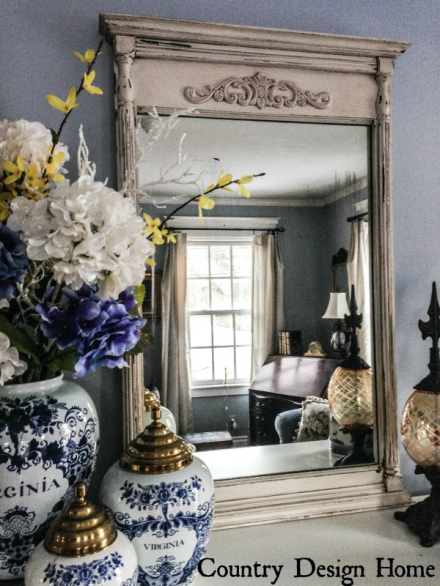
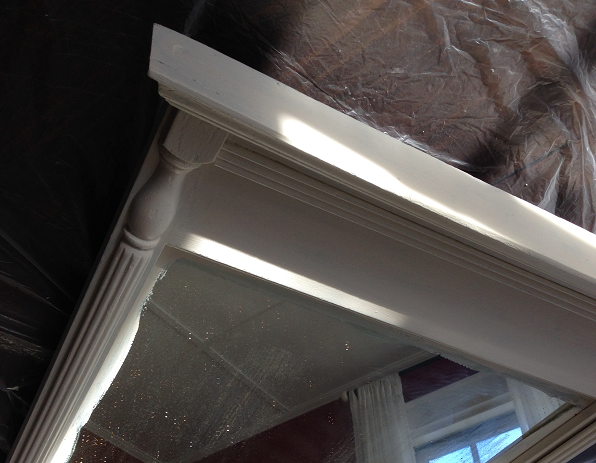
8. Here is the finished closeup of my antiqued mirror. I love it, but what do you think? Should I have left it alone or did I give this piece some love? (BTW, if anyone knows the trick to photographing mirrors without me being in the shot, I would love to hear it!!!)

Antiqued Mirror Top Details

This is a very simple DIY project, it just takes some time and a little patience to allow each layer to dry before adding the next. If you are thinking of trying this process, test it out on a sample piece of wood before taking on a big, detailed mirror or frame. But remember, it’s supposed to look old and messy, so perfection is not an option! Sometimes a little messy is a good thing… Hope you have a reflective Thursday, everyone! Susan

Vintage Butcher Block Table

Yet another DIY project to share. This butcher block table was actually in two pieces-the bottom had been kicking around the barn loft for the past 15-20 years, and the top was a throw-away Coach picked up over the summer at a yard sale.

The bottom looked like this:

Butcher Block Base Before

The top looked like this:

Butcher Block Top Before

And now the whole piece looks like this!

Finished Butcher Block Table CDH LOGO

I started with the base, painting it in my favorite dark charcoal gray home-made chalk-like paint.

CDH Parisiian Gray Paint

You can find that recipe here. Then I sanded down the edges, added a glaze finish with Martha Stewart Antique Glaze  mixed with Madagascar Mocha Couture Paint.

Paint Couture Madagascar Mocha

The glazing technique is so simple: Mix the glaze and paint together, paint it on your piece,

Martha Stewart Glaze painting on

then wipe it off where you don’t want it.

Martha Stewart Glaze wiping off

Allowed the entire base to dry. Finished with a coat of Fidde’s Soft Wax, which gives it a nice glowing finish.

Sanded and Glazed Leg

The top required a bit more elbow grease and some heavy implements.

Butcher Block Top Distressed

I wanted to rough it up just a bit to give it a more “antiqued” appearance, but since there will be food prep on it, I didn’t want it to be so rustic as to have holes in it where food could get caught!

Butcher Block Distressing ToolsUsed a chain, a hammer and a screwdriver and just banged it around a bit. (I wonder why my hands are so cracked and bleeding…) Since I wanted this to be a food safe butcher block top, but also wanted a shade or two darker, I attempted a technique I had found online: staining with brewed coffee grounds.

Staining with Coffee Grounds

Really didn’t work out too well, but it smelled great! The butcher block top is finished with Howard Butcher Block Conditioner. This is a product that I picked up at Home Depot -its FDA food safe-perfect!

Howard Butcher Block Conditioner

To secure the top to the base, I used some old black iron decorative brackets Coach got from somewhere…(seems to be a recurrent theme, right? I tell him what I need, he finds it.)

Ornamental Brackets

The brackets were a little too black and “new-looking”, even though they are pretty old, so I sprayed them with Rustoleum Gray gloss paint,

Rustoleum Gray Painters Touch

but that was a bit too shiny, so I resprayed them with Rustoelum soft flat iron black spray paint.

Rustoleum Metallic Paint for Brackets

to complement the antiqued gray base color. I found that the simplest way to attach the top to the base was to place it on top, measured the four corners to ensure they were evenly spaced,

Measuring corners

marked the holes with a sharpie, (apologies for the blurry pic-too much leftover coffee, perhaps?)

Marking holes for drillingthen drilled starter holes for the screws,

Predrilling holes for bracketsflipped the top upside down and secured the brackets to the underside of the top.

Brackets affixed to bottom of butcher block top

Slipped the top back onto the base and secured it with screws. For the embellishments, I added this cool, rustic, vintage, winged front piece to be used as a towel or utensil hanger.

Bracket on front of Butcher Block

I am told it was the handle to an old wood planer. These side pieces

Butcher Block Hooks

are old window lock parts.

Butcher Block Side Ring Hangers

Perfect for hanging a pot or pan with an “s” hook. Old wooden rulers are kind of a thing right now, so I added one from “A.J. Wilkinson, The Oldest Hardware Company in Boston” across the front (perfect for measuring out dough!) and secured it with some rustic corner brackets to give it industrial “old general store” kind of vibe. Then I rubbed that with the Howard Butcher Block Conditioning to finish it.

Butcher Block Ruler and Corner BracketsDone and ready for some butchering, or pie-making, or whatever. But it won’t be in my kitchen, or my daughter’s (sorry, Kate-I promise I will make you another one), because it was sold this past weekend at the Vintage Thymes Monthly Market-yay! And, if you are in the market for an old wooden ruler, drop me a line. Since I mentioned to Coach that I needed a few, he’s been on the lookout, and now I have an immeasurable amount to choose from!

Rulers

Have a “block-buster” Tuesday everyone! Susan

Rustic Wooden Wreath

Ok, so I realize that most of you don’t have an old small green barrel hanging around in your barn, but you could definitely re-use or recycle any other type of old wood like shutter slats, shims or lathing to create this rustic wooden wreath.

Country Wreath on Door PM

This is my kind of greenery-the kind that will last forever-despite my desperate lack of a green thumb. Case in point: this woeful poinsettia has been in my house for just a few days…

Dead Poinsettia This small barrel was in pieces, and short of tossing it in the trash, I needed to come up with some useful way to use the wood.

Old Barrel Staves for Wreath

Since it was green anyway, I figured “what the heck, I’ll make a wreath!” Here’s the how I did it:

1. The iron ring that was holding the barrel together (until it wasn’t holding the barrel together) was the perfect circular form for the wreath base. The staves had little slits at the bottom that the ring fit into. I laid them out in the circle pattern that I liked.

Barrel Staves with Wire Hoop

2. Used my trusty electric stapler to secure the ring into the slots all the way around on the back side of the wreath to form the circle.

Wreath Fixation with Staples

3. Filled in the slits with hot glue all the way around, securing the iron ring into place in the slits. If your wood pieces don’t have slits, just glue into place.

Barrel Stave Wreath Adding Glue to Slots

4. To neaten the appearance, I cut small pieces of black foam core board and glued them into place over the glue-filled slits.

Barrel Wreath Fiberboard Backing

5. Since the wood pieces did not entirely cover the iron ring, I needed something to cover the gaps. Cut some burlap into small pieces and knotted in between each stave all the way around.

Barrel Wreath Burlap Bows

6. Created a bow with some more burlap cut into strips, along with a swag of greens and bright red berries to contrast the green wood.

Rustic Wreath Burlap Bow

7. Added a wire ring on the back for hanging.

Rustic Wreath Wire Hanger

8. Hung the wreath on the front door. Took a photo of the wreath on my front door.

Country Wreath on Door PM

Took the wreath to the Vintage Thymes Market, sadly leaving my front door blank. Sold the wreath at the market.

Barrel Wreath At Vintage Thymes Market PMNow I have to make a new wreath. Sigh. Susan

Country Christmas Santa-scape

This holiday season has been flying by! So much to do, so little time. Because I had been spending so much time decorating my booth for the Christmas market,

Cupboard Stocked Open DoorsI have not had much of a chance to decorate my own home for Christmas! So what I am doing, I am doing in bits and pieces. Open a storage bin, pull out some stuff, set it up-decorating on the fly. Tablescapes are a quick, simple way to add some holiday cheer to a tabletop, cupboard or hutch. The trick is in the layering. This is my little storage cupboard in the kitchen. Before…

Red Hutch Before

After…

Jingle All The Way Tablescape

Here is the how-I-did-it: Started with a base. In this case, a white sparkly runner from HomeGoods to brighten up the top of the cabinet, which is dark red.

White Snowflake Runner on tablescape

Added a backdrop. I had this aged, chippy piece of wood (I believe it is an old cabinet door, sans cabinet, so I painted the raised panels with chalkboard paint so I can write whatever I want, depending on the season or holiday.) I just stood it up against the wall, no need to hang it.

Santa Tablescape Door BackgroundAdded the swag-this sparkling BELIEVE sign on a jute rope was the perfect size to hang from each corner.

Santa Tablescape Believe SignNext comes the plant or flower. I like to have something flowering on one side and then a candle or lantern on the opposite side to create a full vignette with the background. The heights don’t need to be the exact same size, but you should have some balance between the two sides. In this one, I used a poinsettia in an old raspberry jam bucket we picked up at a consignment shop over the summer. Loving the bright red colors!

Raspberry Pail with Poinsettia

Added an old Santa and the red lantern on the opposite side, which provides the height and color balance I was looking for.

Santa Tablescape Santa and LanternPlaced the reindeer next to the poinsettia in the bucket.

Rustic ReindeerSince I was going with a Santa-themed vignette, I decided to write some fun Christmas lyrics on my chalk board. Very simple process: go to Avery.com and find whatever size template fits the space you are going to write on with chalk (in this case, I used an 81/2 x 11) Choose your words, choose your font and print. (My printer is just about out of ink, so the print was very faint, but I only needed the outline so no worries there!)

Santa Tablescape Tracing DesignFlip over the paper to the reverse side and “chalk it up” rubbing the entire paper with the side of a piece of chalk.

Santa Tablescape Chalking Paper DesignFlip it over, tape to the chalkboard, then trace the edges of your design with a pencil.

Santa Tablescape Design OutlineRemove the paper and voila-you have a chalking template in place!

Jingle All The Way ChalkboardNow you just fill it in with your sharpened chalk and you are done.

Santa Tablescape Sharpening Chalk++TIP++ keep a damp Q-tip nearby as you chalk so that you can easily clean up any edges or marks.

Chalking the outline Jingle All The Way

Looks so festive, right?! Added the greens, just weaving them in and around the items on the tabletop.

Santa Tablescape Rustic Reindeer and SantaSprinkled on a bit of fake snow for some sparkle

Santa Tablescape Fake Snow Sprinkles

and some twinkle lights to give it that holiday glow. Done. 30 minutes from start to finish. Really gives the kitchen a holiday feel.

Country Design Santa DisplayNow its time to start baking for our cookie swap! Only 9 days left everyone! Keep HoHoHoing! Susan

The Stockings Were Hung…

At the Vintage Thymes Monthly Market! Just a few pics of this weekend’s market, today, Saturday and Sunday.

VT Merry Christmas Box with Greens

Some of the most beautiful and creative items I have see yet! My booth is chock full of vintage items including this antique buggy bench-which I love.

VT Buggy Bench

I have been working on the cupboard since the summer, when I purchased it at a flea market in Maine. Somehow I managed to get the whole thing in the car and take it home. Now it’s your turn : )

Cupboard Stocked Open Doors

This antique jewel-encrusted dress form is astounding!

VT Jewel Encrusted Dress Form

The artist, Nancy Rafi, reports that it took her 100 hours of construction, using pins, buckles, belts and buttons from all over the world. This is a truly one-o-f-a-kind piece. Simply Amazing.

So many cute vintage signs,

VT Merry & Bright

and if you don’t have a tree yet, you might like one of these! They are not real but they are so fun! These are glittery shabby chic.

 VT Shabby Chic Trees

This one’s wrapped in red plaid ribbon and already lighted

VT Red and White

And this one was created using old book bindings-so creative!

VT Bookend Tree

There are plenty of stocking stuffers,


VT Hand Painted Snowflake Blocks

vintage wreaths (this one was created from old barrel staves)

VT Barrel Stave Wreath

and perfect gifts for everyone!

VT Vintage Picks by Jen

So come on down to the Vintage Thymes Market

VT Vintage Vignette

and stop in to my booth at Country Design Home to say hello!

VT Candy Cane Vignette

If this doesn’t put you in the holiday spirit, I don’t know what will! Happy holiday shopping everyone! Only 12 more days til Christmas! Susan

Jelly Jar Soy Candles

Nothing like a fun DIY project to get ready for the upcoming holidays! I had a box full of vintage jelly jars kicking around,

Jelly Jars Empty Stackso I decided to make some candles as stocking stuffers. This is really quite easy, as most of the products I used from Country Lane

Candle Making Kitcame with very explicit instructions on the packaging. I purchased the starter kit, plus all of the additional materials including the colorants

Country Lane Candle Colorant

the scent bottles (so many yummy flavors to choose from!!)Country Lane Candle Scentsand extra wicks

Waxed Wicksat AC Moore, but you can also buy in quantity from various candle makers through Etsy or Ebay as well. I figured I would give it a try on a smaller scale before I got into wholesale lots of wax and wicks. Here is the How-To-Do-It:

1. Wash the little jars or whatever you are planning on using. In my case, if the tops were really rusted, I spray painted them so you could see the embossed Jelly Jar writing.

Jelly Jar Pre-Washed2. Bring water to a boil in a pan large enough to hold the candle melting pot, but with only enough water to submerge the bottom of the pot!

Pot of Simmering WaterThe melting pot has a handle so it hangs onto the edge of the pan of boiling water. Once the water is boiling, reduce to simmer. Place pot filled with wax chips into the hot water, making sure you don’t splash any water into the melting pot!

Melting Wax3. Leave the pot in the simmering water until the wax melts completely. DO NOT ALLOW THE WAX TO BOIL!!! Soy wax melts very quickly on the lowest setting, so it only takes a couple of minutes to melt the entire bag.

Soy Wax Chips4. Get the little wicks and dip them into the melted wax, then adhere them centered in the bottom of the jar. Allow to cool completely!

Jelly Jar EmptyThat way when you go to pour the wax in, they will stay upright. Nothing worse than a crooked wick!

5. Add scent and colorant to the desired colors and scent levels. Obviously, the more you add, the darker the color and the stronger the scent. The melted wax appears darker than when it cools and sets, so color accordingly.

Adding colorant

6. Pour melted wax carefully into prepared jars, making sure you avoid the centered wick, so it won’t melt and warp. Allow to cool.

Pouring Wax7. To create some labels, I went to Staples and got these cute little Martha Stewart Brown Kraft Paper labels numbers 72428 and 72429. (If the packages look a little ink-stained to you, that is not your computer screen. They were in a bag with a jar of black grout and I was fumbling for my keys and dropped the bag in the driveway and…you can guess the rest.)

Martha Stewart Brown Kraft Paper Labels8. Go to Avery.com Design & Print Online, and plug in the label numbers in the search box.

Avery Design and Print

A template will pop up and you can design it however you would like your label to look. Remember, these are enlarged on the computer screen, so when you actually print them in sheets of 6, the print will be smaller!

Jelly Jar Label Reverse9. I have a pretty old printer, and it doesn’t take kindly to adjusting for different size cards and papers. So I simply taped my labels onto a sheet of standard copy paper in the proper position,

Labels Taped to paperthen printed them-perfectly placed and spaced!

Jelly Jar Candle Label

10. Add the printed labels to the jars and put the tops on. Cute! And they smell great too! If you have questions or are looking for additional information, go to Soap Expressions.com and they have lots of candle-making tutorials using their Country Lane product line.

CDH Jelly Jar Soy Candles

Have a fab Friday, everyone! Time to start preparing for Turkey Trot Thursday!! Susan

Todd Farm Dawning

Sunday morning, Coach and I ventured to Todd Farm in Rowley, not as shoppers, but for the first time ever, as vendors.

Todd Farm Sign

Coach had been yard and estate-saling all summer long, and the barn was bursting at the seams. This weekend was the last available one for us (but the flea markets are still going on until December 1) where we could try to move some stuff, to essentially make room for more stuff. Alarm went off at 4am. Groan. Pitch black outside, damp and freezing cold @ 31 degrees.

31 Degrees at Game Time!

Fortunately, we had packed both cars the night before so we were ready to travel to Rowley, arriving at 5am under the cloak of darkness. We were ushered to a row of parking spaces marked with orange cones, next to the lovely Lisa from Rita Joes Vintage, who was already set up and ready to sell! As we began untying the ropes to take down our display tables from the roof of the car, we noticed flashing lights in the foggy distance,

Flashlight Posse

reminiscent of an old western where the sheriff and his posse are desperately searching for the escaped fugitive. The only things missing were the baying bloodhounds. An amazing and surreal sight. And simply AWESOME. These were the many dealers with head lamps and flashlights swarming the incoming vehicles,

Dealers checking cars

checking the interiors for hidden treasures and asking “any old toys, any old artwork?”

Dealers at Dawn

 So once we set up shop,

Its A Sign

I strolled around to take a few photos as the sun began to rise over the fields.

Todds Farm Truck At Dawn

Pink sky at morning…

Pink Sky at Morning

Finally in daylight, I was able to see what some of the other vendors were offering, and discovered a few of my favorite things:

A very jaunty Mr. Snowman

Frosty the Snowman

I have never seen a mannequin like this one, but I would be happy every day if I had her in my dressing room…

Laughing Manequin

This is an entire Marionette’s traveling road show suitcase.

Marrionette Suitcase

As the breaking daylight illuminated the quickly-occupied fields, it became apparent that there are many levels of sellers. Those, like us, who packed their mini vans and SUV’s with household wares and crafts,

Mini Van Unloading

and then there are those who press their company trucks and vans into service for the day.

Junk Removal TruckAnd then there are the big guns, the vendors who we see every time we shop at Todd Farm, with large cargo vans

Unloading vanand trailers packed to the rafters with furniture and goods.

Unloading trucksI love the Christmas vignette from this vendor with the antique sleigh and vintage life sized Santa…Holly Lane…Ho Ho Ho!

Holly LaneIf you happen to be searching for anything unusual, like an antique circus wagon

Circus Wagonor a weathered stone mermaid,

Mermaid of Stoneor a box of gorgeous bright blue bulbs from an airport runway,

Blue Bulbs

Todd Farm is the place for you! And if you are interested in selling some of your prized possessions, they make it so easy. You drive up, park your car, pay your $35 and you are in business! Just remember, the early bird gets the worm,

Early Bird with Wormso getting there before daybreak is the best way to showcase your wares to dozens of dealers before the general public arrives. As for Coach, what exactly did he sell? The signs in the above photo? Pretty much gone. As a matter of fact, some of the old metal auto and cigar signs were purchased by another vendor who promptly walked across the pathway and resold them in his booth! Shades of Killer Stuff and Tons of Money.

Market Tasco SignThose antique coffee grinder wheels we scored at The Elephant Trunk? Sold.

Enterprise Coffee Grinder WheelsThis antique retro table with the cool graphics. Gone to a good home. Top included, just not in the photo.

Retro Rocket TableThis gorgeous aqua metal trunk? Sold. (That one killed me. I loved that thing! But just had no where to put it!)

Market Aqua Steel BoxCoach did alright selling his stuff, and I loved the people-watching, the photo-taking, getting rid of a bunch of stuff and the donuts from the canteen truck that was conveniently situated nearby. The amazing Marty’s donuts. OMG.

Marty's DonutAnd since Coach did so great selling his finds, I think we have may have just found his new summer job! But for now, it’s time to get out there and find some new stuff to sell! Happy treasure hunting, everyone! Susan

The Crompton Collective

A few blogs ago, I wrote about a road trip out to Signature Finishes in No. Grafton to pick up some Miss Mustard Seed Milk Paint. While there, I also traveled into Worcester (pronounced “Woos’tah, for those of you not from the Boston area) to visit the Crompton Collective,

Crompton Placea collection of local artisans and vintage vendors housed in a beautifully renovated brick mill building in the canal district. The Collective is the brainchild of Amy Chase,

Amy Chasewho also owns Haberdash Vintage, America’s very first mobile vintage shop and she is a co-founder of The Swapaholics-quite a resume! You enter the Crompton Collective store through the pretty fancy lobby of Crompton Place, go down the stairs (just follow the antique signs), but once inside the Collective you feel as if you have stepped into someone’s vintage home

Fire King China Set

and an antique parlor wrapped in the warm glow of lace and lamplight.

Lace Window Vignette

The store is separated into 70+ loosely defined vendor spaces,

Vintage China Cupboardeach one offering unique,

vintage

Transformational Divas Dressersrepurposed

Simple Home Life

re-loved

Scrabble Cupboard

items for sale.

Reclaimed and Resalvaged

At every turn, I spotted lovingly repainted,

Painted Pine Commode

refurbished furniture

Antique Therapy

and home decor accessories,

Antler Table

as well as one-of-a-kind pieces (cocktail table from an old drum? Brilliant!)

Drum Cocktail Table

and this bit of Americana created from old license plates.

Reclaimed and Resalvaged Flag

One of my absolute favorite spaces was The Junk Drawer

The Junk Drawer

The owner created this cozy, welcoming booth that was completely packed with inspired goods.

The Junk Drawer Sign

Have you ever seen a vintage lamp with a shade made of crumpled old sewing patterns?! Perfectly poufy Beehive ‘do!

Junk Drawer Sewing Pattern Lampshade

How about a hot pink deer head? (Had I seen that first, I might have altered my color palette for the bathroom reno…)

Junk Drawer Pink Deer

From there, I ventured into the Haberdash space,

Haberdash Vintage

chock full of fabulous vintage clothing and accessories.

Haberdash Faux Fur

Of course, this was back in October, so the fur coat seemed unnecessary, but after those snow flurries yesterday, I may need to return to grab it! This is a co-operative shop that you need to walk through at least a few times, Transformational Divas Cupboard

there is so much to take in! Stopped short in my tracks when I spotted these letters in the window.

LOVE sign Flea Circus

Offered for rent for weddings and showers and happy occasions, I can imagine that they are well-used and LOVED in each venue they are featured. No gift purchases made today, it was Halloween season, but I did grab my Eulalie’s Sky Milk Paint from the Signature Finishes booth.

Signature Finishes Milk Paint

But now that the holiday shopping season is upon us, it is definitely worth a trip back to the Crompton Collective to see the shops decked out in their holiday finery.

Antique Mason Jar Candle Holder

They are at 138 Green Street, Worcester, MA. Have a wander-ful Wednesday everyone, and if you happen into the Crompton Collective, tell Amy that Sue from Country Design Home sent you! Susan

Seasonal Scenes from the Market

This weekend marks the November edition of the Vintage Thymes Monthly Market, Farmhouse Holiday.

Stockings Were Hung

It seems like we just wrapped the October show with pumpkins and Halloween, and here we are barreling into the holiday season!

VTM November

I was blown away when I walked through the double red doors

Joy

on Friday morning. So much sparkle and Christmas cheer!

Pink Tree and Santa

(Of course, I was thinking Thanksgiving, not Christmas, because I am most definitely a one-holiday-at-a-time kind of gal.

Country Design Home

So when I conceptualized my booth, I was planning Thanksgiving dinner and making pies! So my space is a little less sparkly

Green Tree Sparkle

and Santa-inspired than many others…

Santas Clogs

but I am pulling out my cans of sparkly snow and adding some bling for the December market!)

Get Your Holiday On

If you haven’t made it to the Vintage Thymes Market yet

Berries in Barrel

and I can’t imagine why not!?!

Skates and Skis

This month’s market is a great introduction

Christmas Country

to view all of the extremely talented artists,

Simplify

craftsmen

Fleurish Home and Garden

and designers

Screen Door Vignette

who create amazing pieces for their magazine-worthy vignettes,

Peace on Earth

using simply vintage everyday items that they’ve dolled up and made beautiful,

Baby It's Cold Outside

and it’s all for sale : ) Something for everyone on your shopping list!

Fleurish Home SIlver

The Vintage Thymes Market is open today, Saturday from 9-6 and tomorrow, Sunday from 12-5.

Owl in Snow

And owl be seeing  you in December! Susan

Paint A La Cart

Coach and I did a LOT of picking this weekend and scored many great items for some upcoming markets. Mirrors, and oak bookcases, furniture, rugs, and more mirrors-all amazing!

Rug and MirrorSaturday morning, I was busy doing house sort of stuff, so Coach went off himself, only to call me within a few minutes to tell me that someone was selling cases of paint for $1 per can! So he grabbed the first boxful of colors he thought I might use.

General Finishes Case of Paint

I went back with him later and struck up a convo with the homeowner. Turns out he had owned an unfinished furniture store for years, and had recently closed it down. These were the leftover paints, stains and finishes.

General Finishes Paint Supply

So I grabbed some stains (now, I know Hunter Green is not in style right now, but you never know when it might return to its former backwoods glory)

General Finishes Green Stain

some Milk Paints-can’t wait to try these

General Finishes Milk Paint

and Glazes- so many colors to choose from.

General Finishes Black Glaze

This ought to be fun! But my best yard sale buy of the weekend? This awesome heavy-duty stainless steel rolling kitchen cart!

Paint Cart Cleaned

The guy was asking $10 and Coach asked if he would take $5. He said “sure, quick, just take it before my wife comes back outside-she has an emotional attachment to everything!” LOL!! We all know how that goes! So, I brought it home with the intent of finally organizing all of my paints, stains and finishes into one spot instead of scattered all over my work shop.

Workbench Paints

Before I could use it, though, I spent about 2 hours with many household products including Awesome Orange cleaner, vinegar, baking soda, bleach spray, scrubbing brushes and many kettles of boiling water to clean off layer upon layer of grease-yuck! I am not sure where this thing had been, but I sure as heck didn’t want it in my basement attracting critters! Finally, the finished cart was sparkly and ready to go. I made quick work of filling it with so many cans and bottles and pots of paints and finishes.

Finish Cans

So now its filled with my newest additions

Filled Paint Cart

to go along with my ever-growing collection of Behr paint sample pots I get at Home Depot,

Behr Sample Pots From Home Depot

plus a new paint with some amazing colors

Paint Couture Color Samples

from a company called Paint Couture

Belize Blue Paint Couture

and my first ever Miss Mustard Seed Milk Paint (in a very special color, more on that later..).

/Miss Mustard Seed Milk Paint

Boy, do I have a lot of work to do in the next couple of weeks! As I try each new product, I will give my unbiased opinion on the overall painting experience. But tonight is game one of the World Series, so paintbrushes away! And Go SOX! Susan