One of our annual Thanksgiving family favorite desserts is chocolate cream pie. Over the years, I have baked many an apple, pumpkin or squash pie, only to see them get pushed aside in favor of the creamy-chocolate-graham-cracker-crust delight. This year, I made the chocolate pies (shhh, no one knows that I served one, but there is another one left in the fridge), but also created a new family favorite: S’Mores Chocolate Pie Bites!
 These yummy little clouds of toasty chocolate goodness were a fam favorite, and sure to become another traditional holiday treat! I originally saw these marshmallow melted cups transformed into shot glasses, but since this was a kid-friendly holiday, I decided to create the pie bites instead. Here is the How-I-Did-It:
These are quite simple to make and only require four key ingredients: Chocolate Pudding Mix… I used the Jello Cook and Serve Chocolate Fudge Pudding.

I was making the pies at the same time and planned to use the pudding as the filling, but you could certainly save some time and make the instant stuff. Milk to make the pudding according to the box, Large Marshmallows…these Jet Puffed Marshmallows
 are just that-large and fluffy. These misshapen sugary lumps were sent off to the land of misfit marshmallows.
 I figured if they weren’t straight before I toasted them, they would become melted molten messes once the heat hit them. Saving them for some hot cocoa action : )
Keebler Graham Cracker Crumbs…
 you can make your own crumbs, but I happened to have these already crushed and ready to go. OK, ready?
1.Toast the marshmallows. If you are lucky enough to live in a part of the country where freezing cold weather is not a factor, then do this outside on your firepit or campfire. We, unfortunately, had quite a snow fall on the day I was making these, so the stove top burner it was. Mine is a glass topped burner, so I just cranked it to high.
 WARNING!!!! Do NOT TOUCH THE HOT BURNER. THIS IS NOT A KID’S PROJECT. DO NOT ATTEMPT TO DO THIS AFTER HAVING A WEE BIT TOO MCUH SPIKED CIDER… THIS IS DANGEROUS!!!!
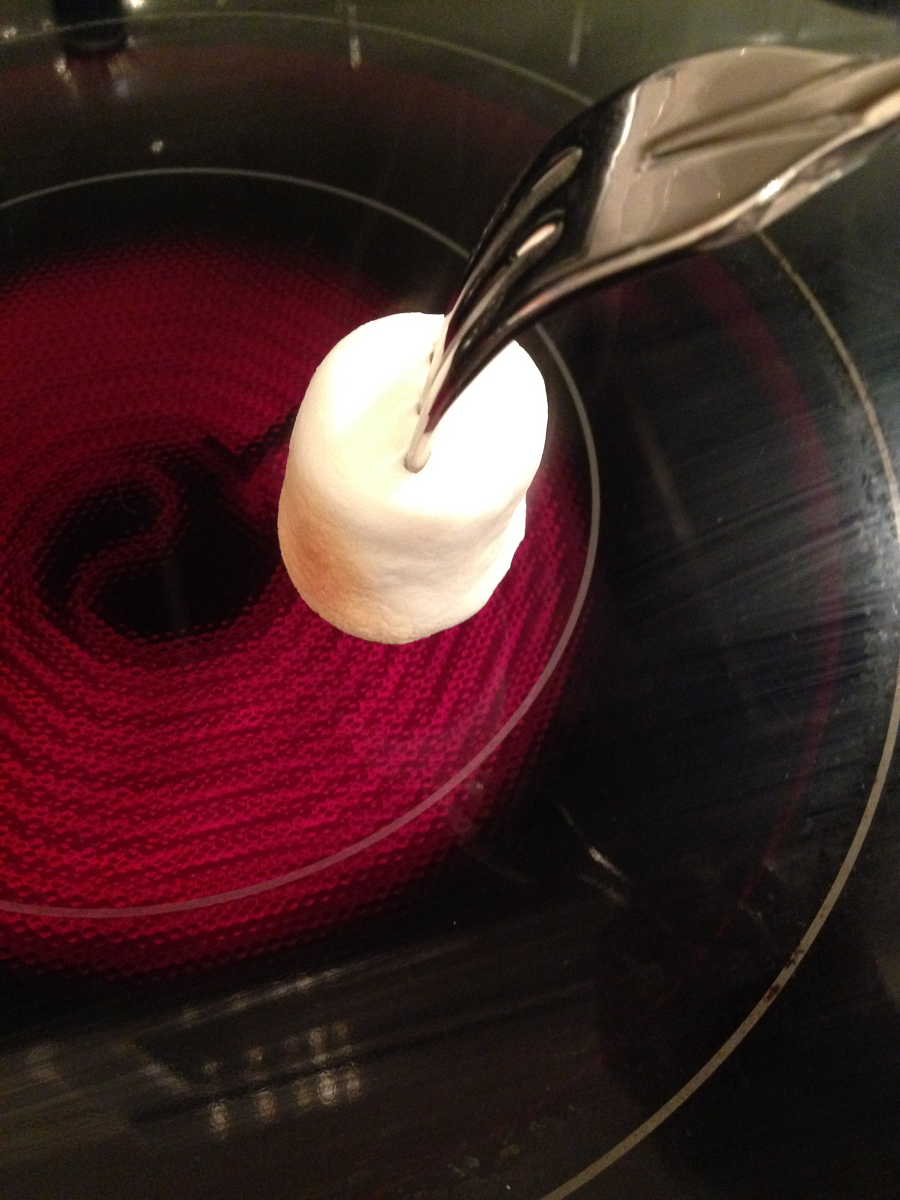
2. Spear the marshmallow with whatever implement you wish to use. I tried a single metal skewer but the marshmallow kept turning as the inside melted. This three-tined fork was the perfect length and the tines created heating holes that caused the inside of the marshmallow to melt more evenly.

Now, don’t ask me why, but the fork handle never got hot to the touch. Which was interesting, because the hot glow from the burner on HIGH made me feel like I was under a sun lamp!
3. Starting with the bottom, hold the marshmallow over your heat source approximately 1-2 inches above the surface.
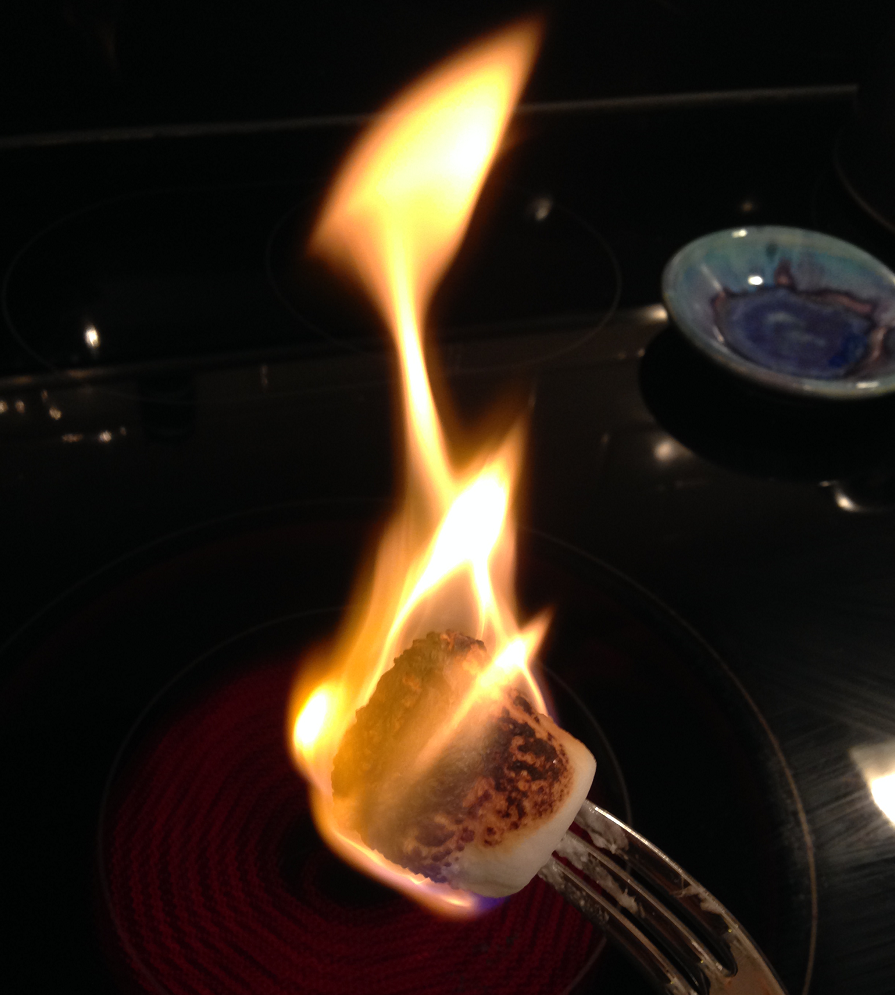
DO NOT TOUCH THE BURNER. Hold it there until you see a light smoking from the marshmallow, this means the sugar is starting to melt. Time to turn the marshmallow. Look at that-a thing of golden sugary beauty!

4. Repeat around the sides, turning when you see the pale smoke trail as you lightly brown each side until the entire marshmallow,
 except the top, is a light golden brown.
…this is what happens when Coach distracts you and asks a question about the upcoming Holiday Fair in the Barn at Todd Farm.
5. Remove the marshmallow from your fork using another implement- DO NOT USE YOUR FINGER!! The interior of the marshmallow is HOT and melty.

6. Place toasted marshmallow on foil to cool. Not wax paper, that will melt. And then you’ll have a S’Mores Pie Waxed Paper Bites. As they cool, you will notice that the marshmallow centers begin to implode, but the toasted exteriors stay upright. The hot melted middles sink down, creating the cup vessel you will need to hold the pudding. So cool!!

7. Make your pudding according to the instructions on the box. This is the cook-‘n serve style, so it takes a few minutes cooking in a sauce pan to get to the molten lava stage.

8. Using a teaspoon, fill the toasted marshmallow cups to the top (each one will take about a teaspoon of pudding). I was a bit worried that the hot pudding would disintegrate the marshmallow cups, but they were little toasty troopers and stood up fine.

9. Immediately sprinkle with the graham cracker crumbs. This is a sprinkle-as-you-go project…you have to add the crumbs to each one after you fill them.
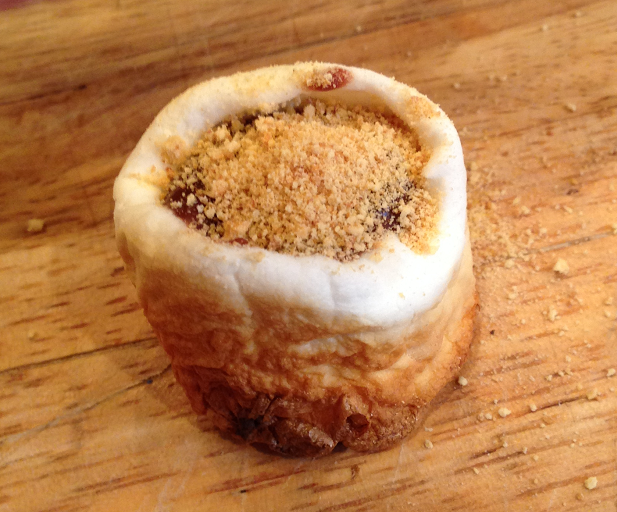
If you wait until the pudding has cooled, the crumbs will just fall off. And you cannot have a S’Mores Chocolate Pie Bite without graham cracker crumbs!
10. Cool in fridge. An hour or so should do, since each S’Mores Chocolate Pie Bite only holds about a teaspoon of pudding.
 11. Arrange on pretty platter and serve. The best part is no serving implements required, just pick up with your fingers and enjoy!
I hope you all had a lovely Thanksgiving that you shared with family and friends. Now it’s time to go continue with the kitchen clean-up…hope you’re planning s’more fun today! Susan
PS: If you like this blog post and would like to receive emails containing my awesome inspired designs and DIY’s, please add your email to the subscribe button in the column on the right! We promise, we don’t use your emails for anything other than messages from me! Thanks!


