Wall Decals Pop!

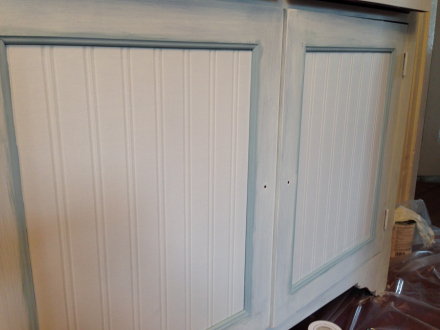
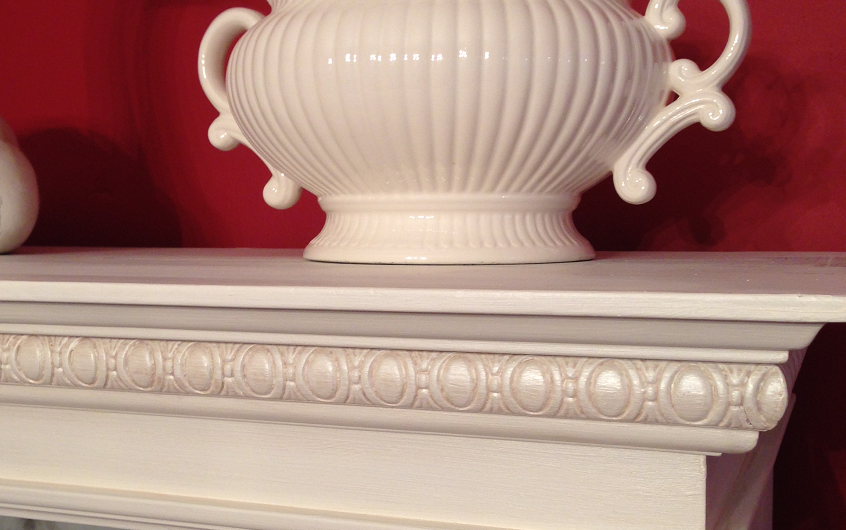
In the midst of all of the DIY’ing for the shop, I decided to “freshen up” my daughter’s old bedroom, which now serves as a guest room/ironing board room. (doesn’t everyone have one of those?) Since her high school days, when we added white wainscoting and painted the walls sage green, her favorite color,

Wall Decal Green Wall Alcove
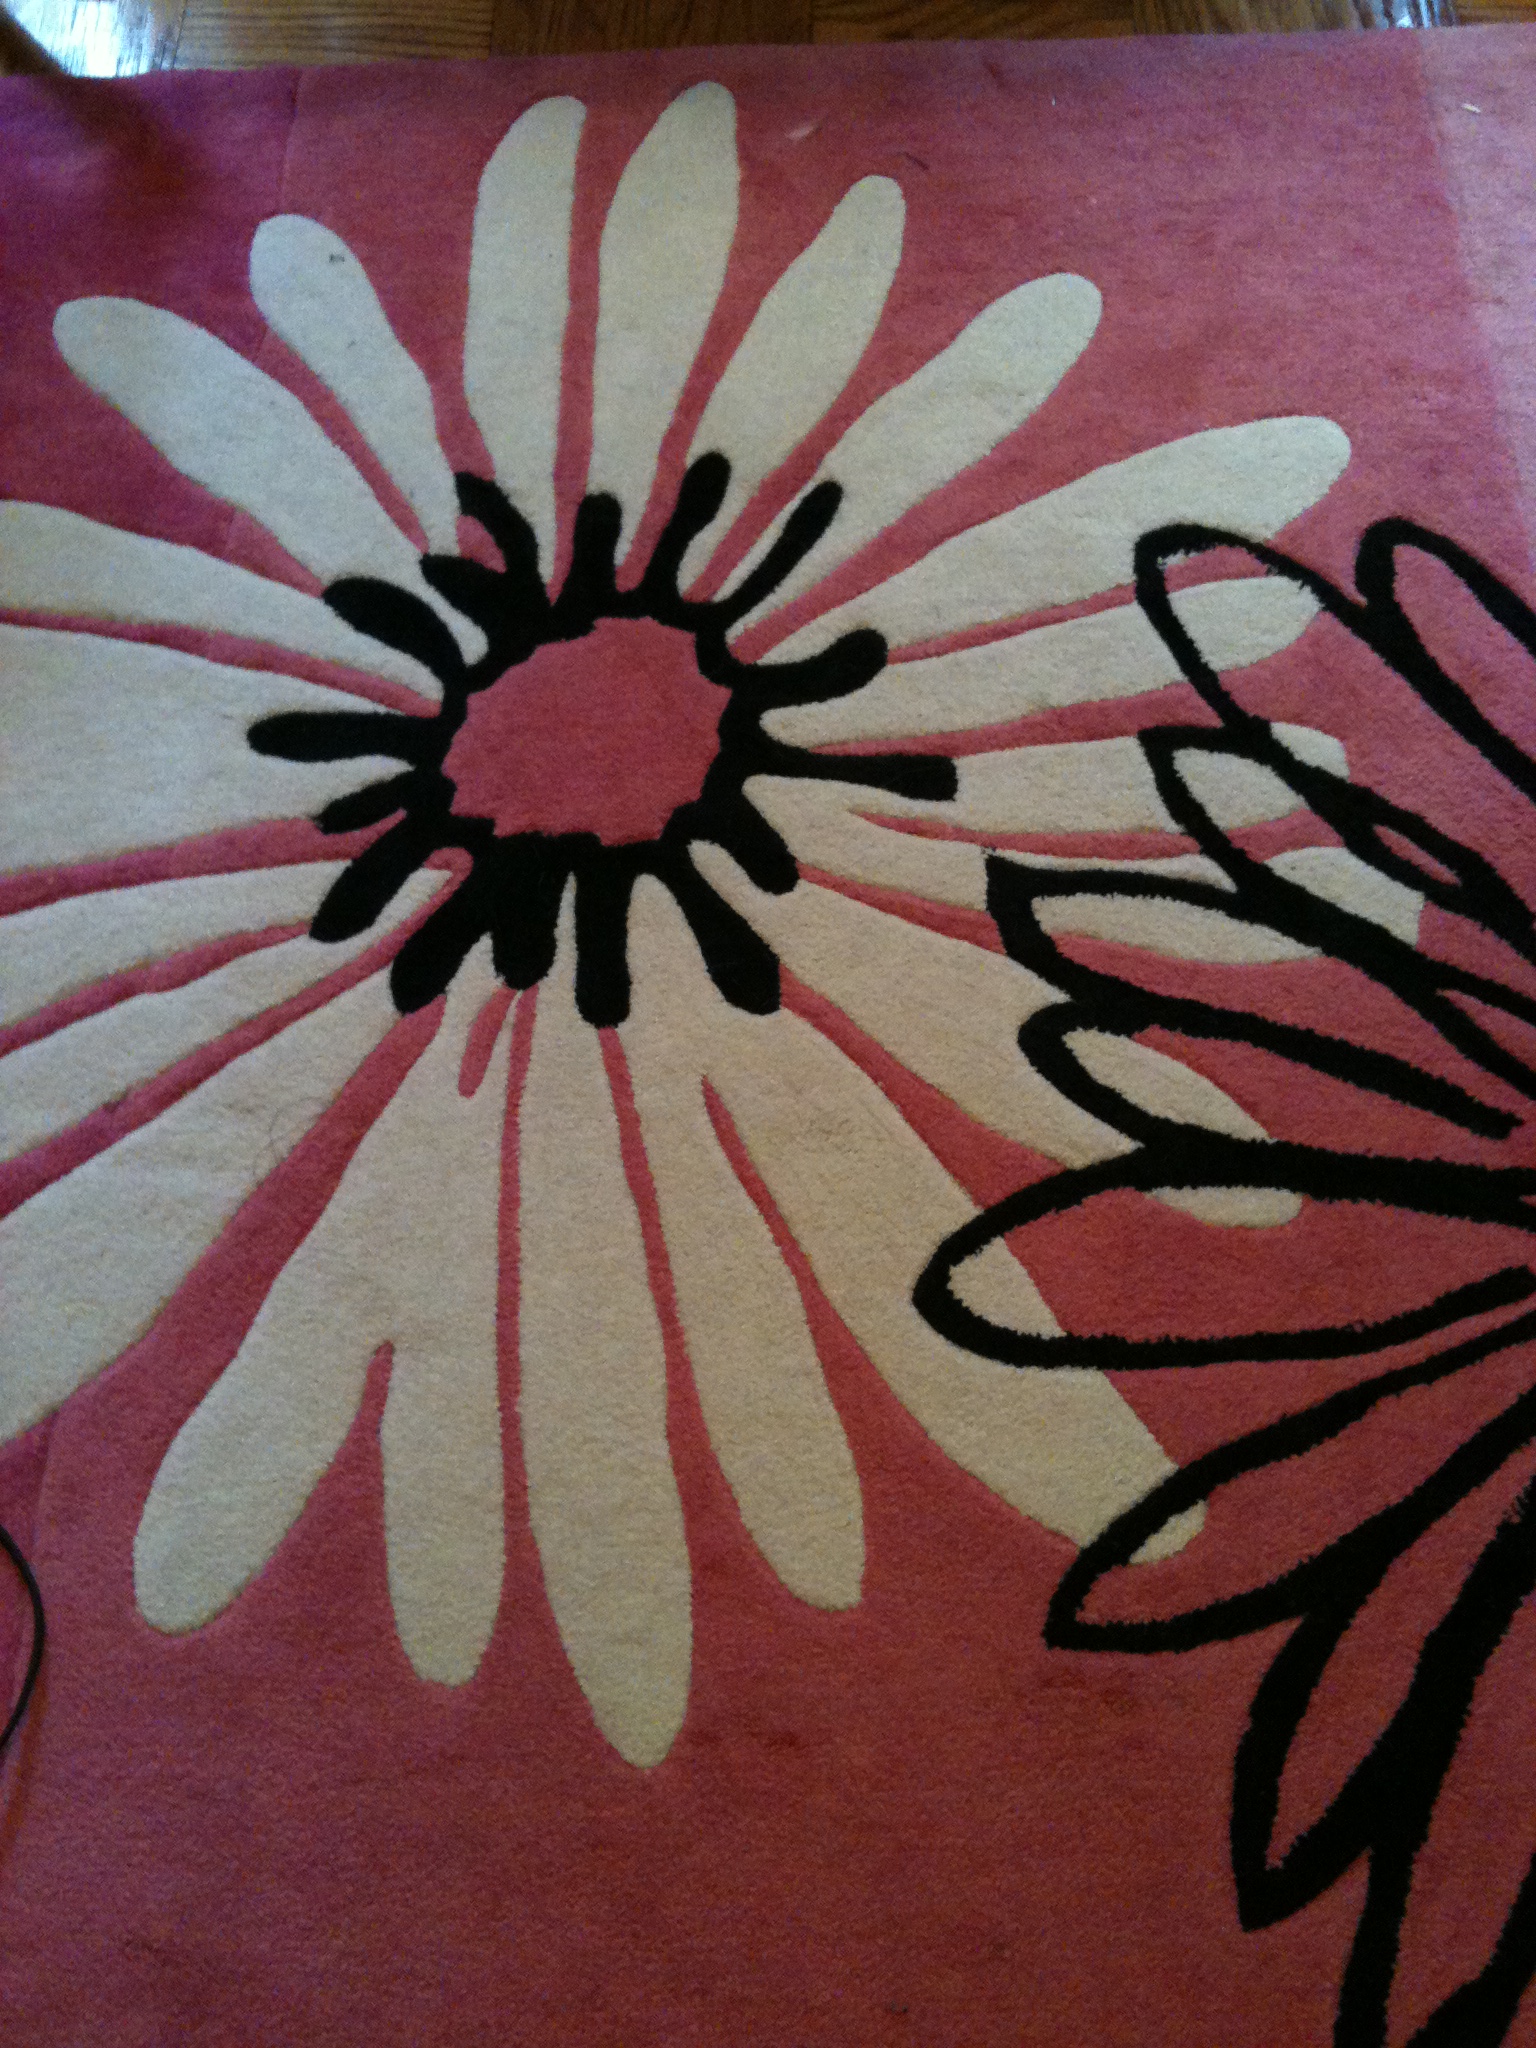
I have always thought that someday, after she “flew the coop” I would paint it something a little ” softer and prettier”. Although I am a lover of mother nature, I am not necessarily a “green” person and prefer lighter, brighter colors for my walls. PINK, I can live with that, and since there is already a fun pink floral area carpet in place,

Daisy Rug
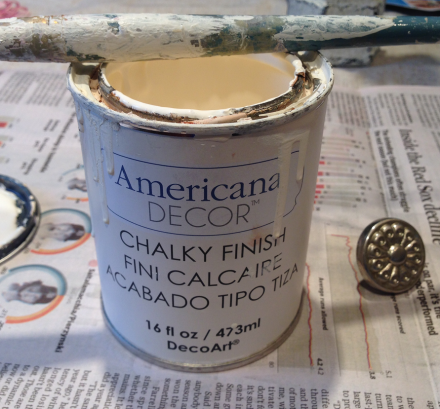
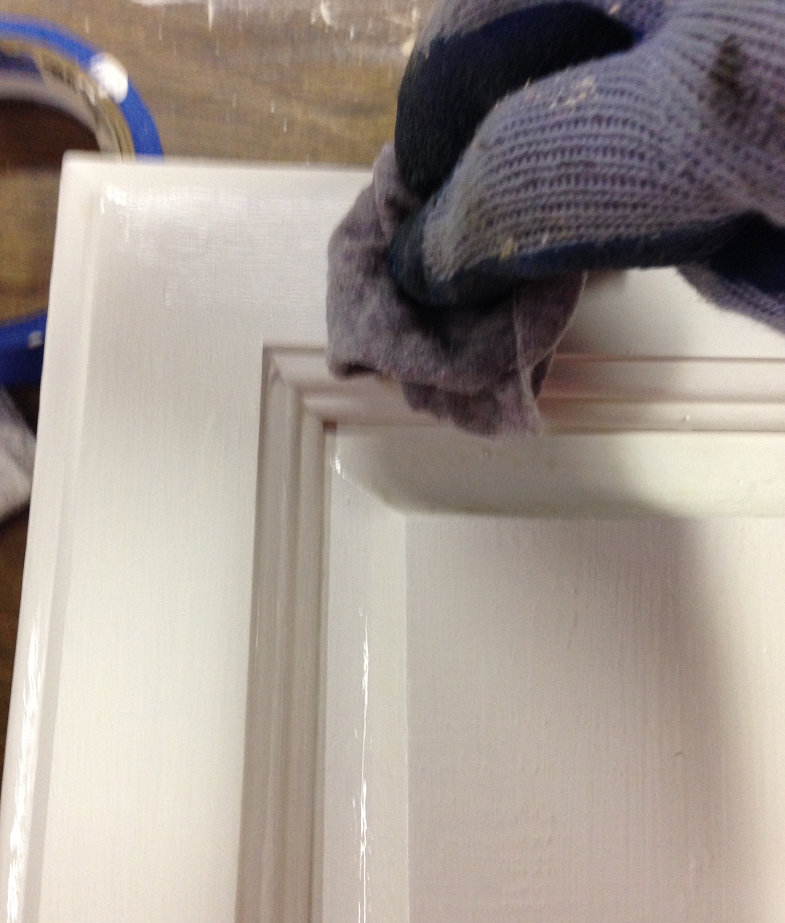
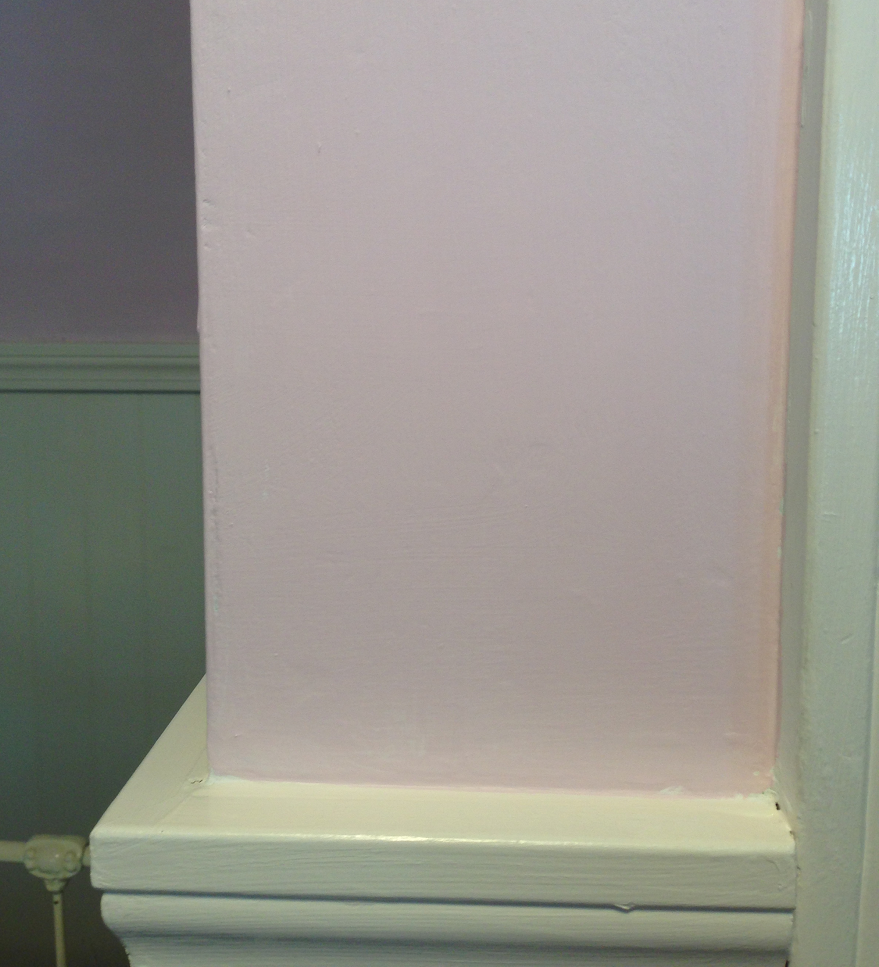
I mixed up a can of bright, light pink for the walls. I had a can of flat white on hand, to which I mixed some bright pink and soft gray to avoid that “bubble gum” tone.

Wall Decal Soft Pink Wall PaintThe room is a square shape, with a small alcove at one end where there is a day bed tucked under the eaves. Which leaves an oddly-shaped, off-center wall for hanging pictures or mirrors. So when I was contacted by the folks at www.vinylwallartdecal.com

DecDecals

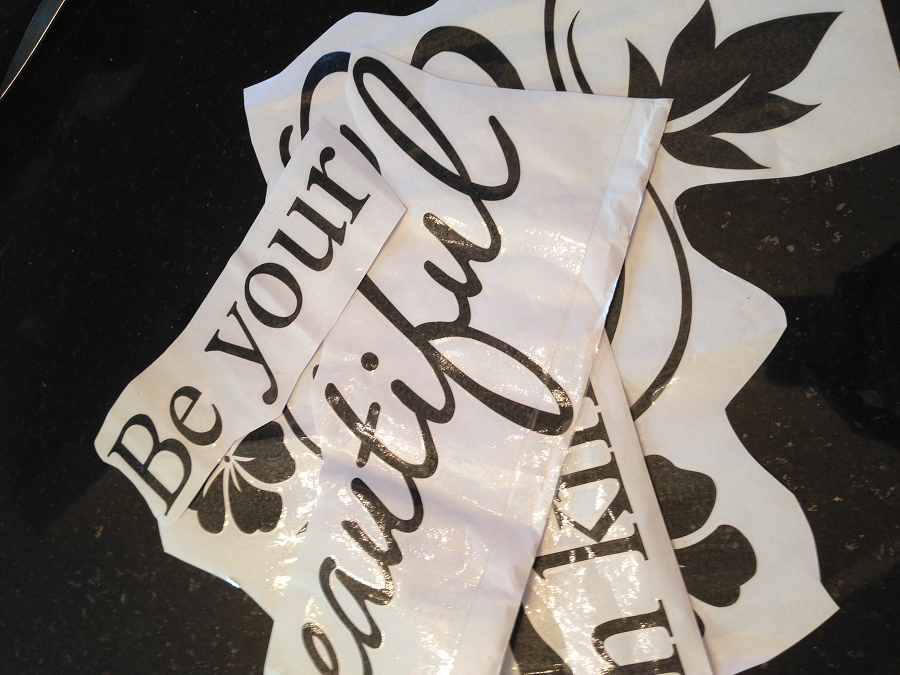
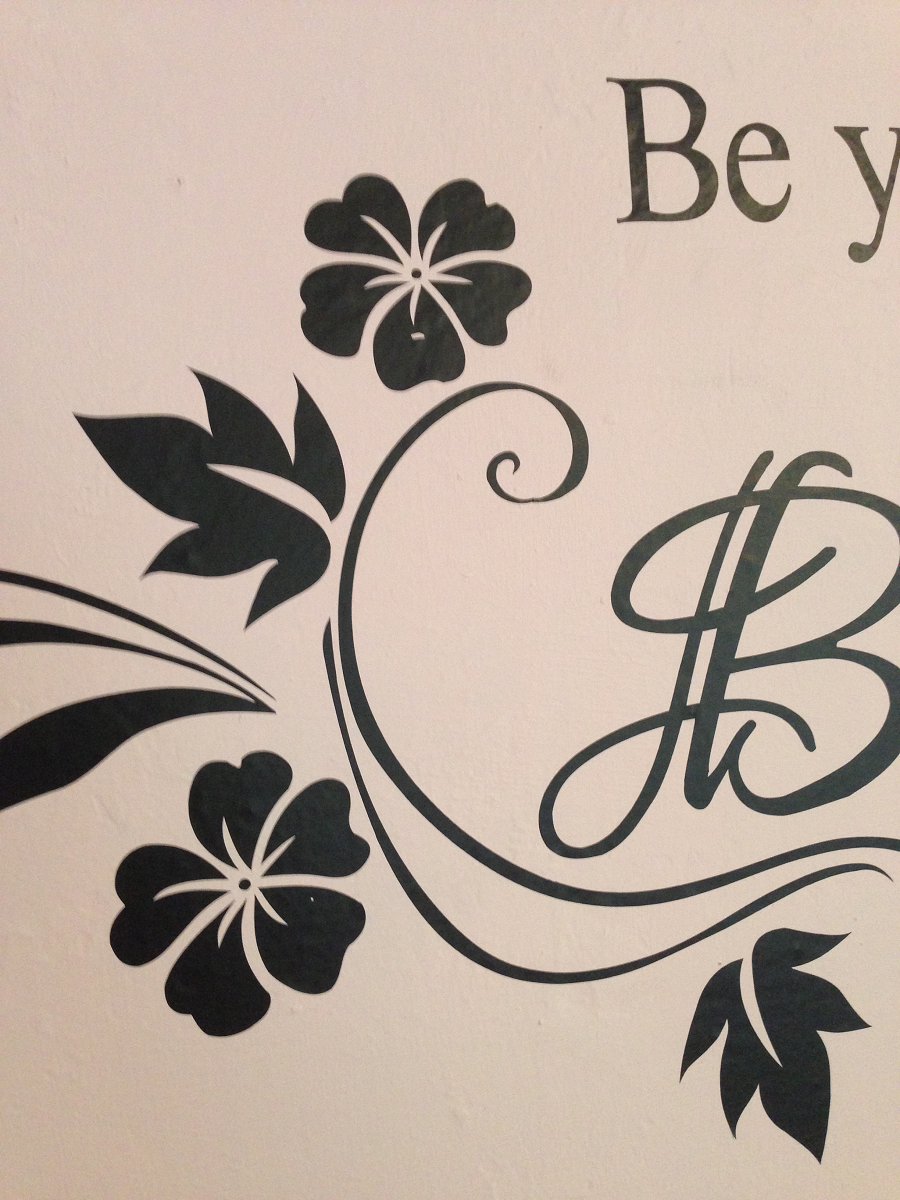
to sample their product, I knew this would be the perfect solution! The graphic I chose was “Be Your Own Kind of Beautiful”, which is such a powerful statement, especially in a little girl’s room.

Beautiful Closeup
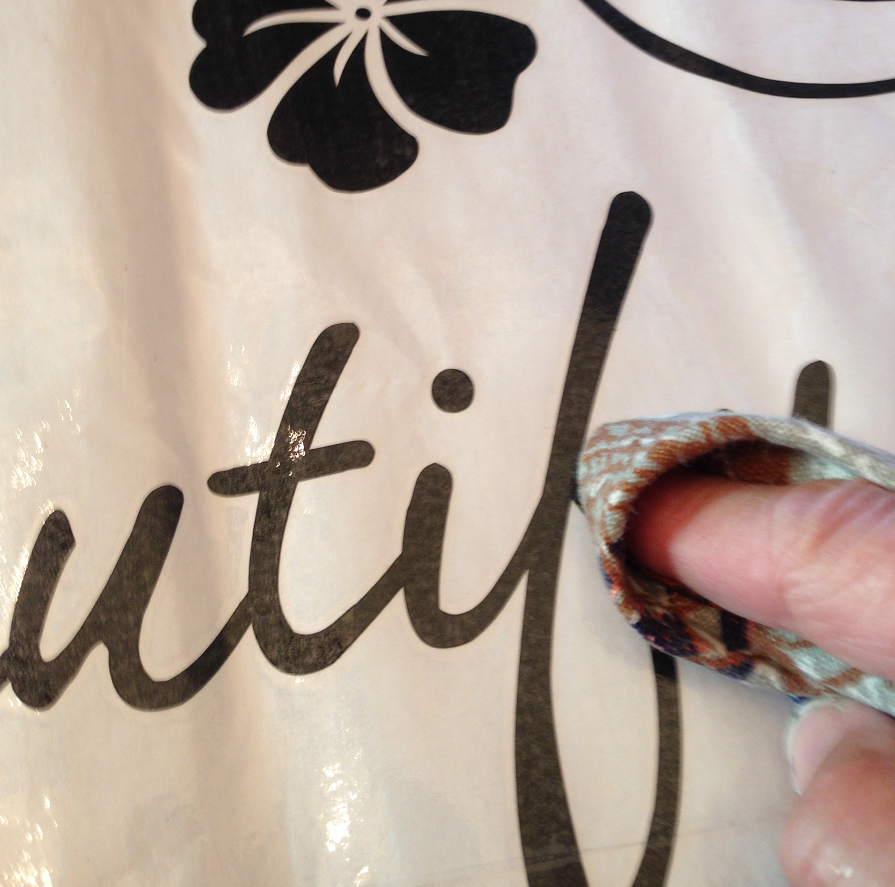
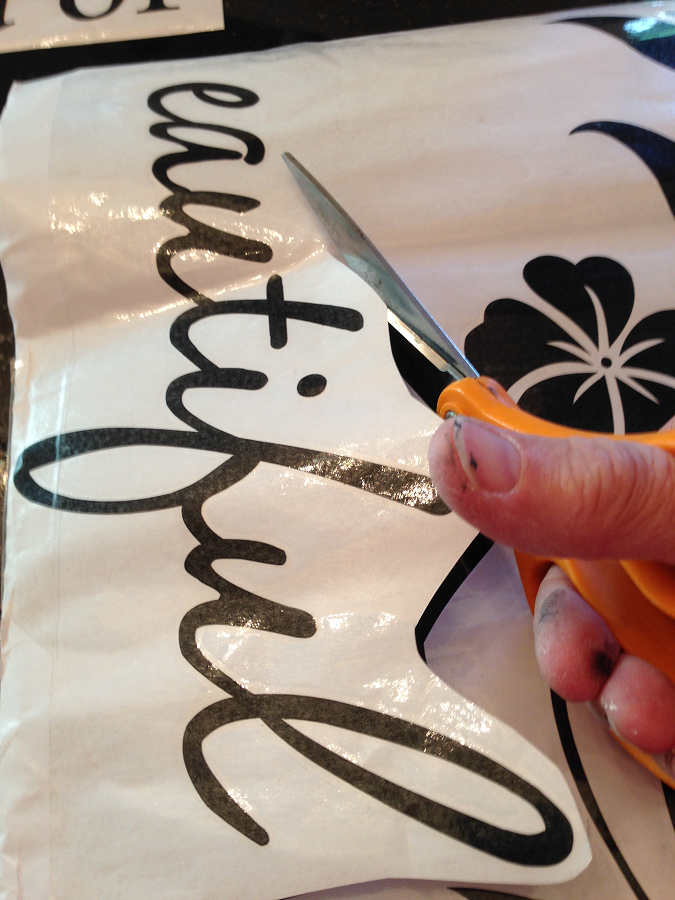
The graphic is stunning, was very easy to apply and looks amazing. I like that it was actually in smaller pieces once I cut it apart, making it much easier to handle than one large graphic.

Wall Decal Closeup DetailHere is the “how-to apply the graphics” instruction sheet, included in the package,

Wall Decal Instruction Sheetwhich I have enhanced with some additional instruction and illustrations, as it was just a bit unclear. Also, the package did not include a pic of the original graphic, so I had to go online to make sure I had it right, since I had to cut it apart and re-align it prior to hanging on the wall. Here we go:

Step 1: “Take the transfer film out”, which initially I took to mean you remove it from the mailing package. There are two separate sheets in the package, both on white paper backing. One is the transfer film and one is the graphic. The instructions don’t say to actually remove the transfer film from the backing and place the tacky side on to the graphic, but that is what you do. Here is the graphic sheet with the shiny transfer film on top of it.
Wall Decal with Transfer Film Applied
Step 2: Then step 2 makes more sense, that you rub the clear transfer film with a towel to adhere it to the graphic, removing any wrinkles or bubbles.
Wall Decal Rubbing Transfer Film with Soft Cloth
Note: the included clear transfer film wasn’t quite as large as the actual graphic, so I had to do a bit of cutting and pasting for that. But that didn’t matter because it is removed once the graphic is transferred anyway.
Wall Decal Cutting And Pasting Film Transfer
Step 3: Cut out the images and clear transfer film together, leaving room around the edges of the graphic for handling.
Wall Decal Cutting Out Pieces
Since I now had a pile of cut-apart sections,
Wall Decal Cut Pieces
at that point I actually taped the entire graphic to the wall to make sure I had it positioned correctly.
Wall Decal Taped Design on Wall
Step 4: Peel off clear transfer film from the white paper graphic backing with the graphic attached and press that onto wall or dry surface in the position you’d like it to be.Wall Decal Peeling off White Backing Paper
Step 5: Rub clear transfer all over with your fingertop, making sure you rub the edges of the graphic for full adhesion onto the wall.
Wall Decal Rubbing on With Fingertip
I did one section at a time and left the others taped to the wall until it was completed. Wall Decal Applied with Taped Sections
Step 6: Peel off the clear transfer film from graphic on wall. If it starts to pull graphic with it, just rub again to adhere graphic to wall.
Wall Decal Peeling Off Transfer Film
Step 7: Step back and admire : ) I know it sounds like quite a few steps, but the final product is just lovely and in this room, creates a statement next to a B&W photo of the iconic Jackie Kennedy Onassis, who was the epitome of being her own kind of beautiful.
Wall Decal Completed Wall & Bed
So thank you to Vinyl Wall Art, who provided the graphic sample for me to review. You can check out their website here: where you will find so many thoughtful quotes and adorable graphics for your home! Loving this Cute Owls and Cute Tree– so whimsical!
Cute Owls in Tree Wall Decal
They even offer large black board stickers-brilliant!!
Wall Decal Blackboard Stickers
If you have any questions, you can check out their blog Notepad Corner, which provides you with lots of information about their products. So, if you do get a chance to shop their beautiful website please tell them that Sue from Country Design Home sent you! Hope you have you’re own kind of beautiful Monday, eveyone!! Susan
PS: Although I was provided with the sample from the company Vinyl Wall Art, the written opinions are strictly my own.


Thrifty Kitchen Transformation-Granite Day!

Yesterday was such an exciting day in the thrifty kitchen transformation process-granite installation day! Thanks to Alpha-Granite in Wakefield, Ma, we secured this gorgeous hunk of granite called Steel Gray at a great price, with great service.

Alpha Granite Wakefield, MA

Ten days from choosing the granite to the install, they arrived on time, worked quickly and efficiently and cleaned up before they left.  As promised, the truck rolled up at 8am and the process of removing the old formica countertops commenced.

Granite Kitchen 8am ArrivalNow, as an avid DIY’er, I  like to think that I can pretty much do most everything myself. That is, after all, what DIY means: Do It Yourself. However, I do know my limits, and fabricating and hauling around giant slabs of very heavy granite just was not in my job description for this particular project.

Granite Slabs in TruckSo, here is the before: yucky yellow 1970’s Formica with the over-counter-installed stainless sink which they quickly removed and junked.

Granite Kitchen Stove Countertop Before


Granite Kitchen Sink BeforeAnd here is the after: shiny black with flecks of grays and browns, which really complements the painted white cabinets and the awesome hardware!

Granite Stove Side Counter AfterAs we’ve continued the work on the kitchen, the one thing mom and I keep noticing is how much lighter and brighter it appears now.

Granite New Undermount SinkOf course, painting out the dark oak cabinets really helped, but the new, shiny dark gray granite reflects the light as well. LOVE. More importantly, mom is so happy to have gorgeous granite countertops in her kitchen! Next up, the backsplash. You’re not gonna want to miss this one! But that won’t be for another week or so, because I am taking a quick blogging hiatus to upgrade my computer server (this ought to go well) and prepare for our newest junking adventure! So, until August 1, I’ll be seeing you on Facebook and Pinterest and Instagram-so come on over and say hi! Hope you are all having a great summer!  Susan

Coastal Kitchen Cupboard DIY Makeover

Blogger’s note: NO REAL WOOD WAS HARMED IN THE MAKING OF THIS CUPBOARD**

This past weekend, I completed a few more projects while awaiting the granite guy’s countertop installation at mom’s house. I have been working on this piece in my kitchen for quite awhile, and am happy to finally have it done! This is the before:

Coastal Kitchen Cabinet Beforea red cupboard (made of MDF) we purchased a few years back at Jordan’s Furniture Colossal Clearance Center in Avon, Mass (if you haven’t been there, it is so definitely worth the trip! Lots of great furniture at significantly discounted prices!) This piece fits nicely in the narrow passageway between our kitchen and dining room and holds a ton of stuff like paper towels, napkins and several pieces of kitchen equipment that just won’t fit anywhere else. The problem is, since it’s in the highest traffic point of our home, it had been scratched and worn-the finish was like a plastic veneer and scratched off quite easily (and I was tired of the dark red anyway…). Time for a fix, so this is the after: a pretty, light coastal cabinet with a top created from reclaimed window shutters!

Coastal Kitchen CupboardHere is the how-I-did-it: Sanded everything down to rough up the shiny veneer plasticy surface, and sanded the edges to round them off a bit.

Sanding the edges Nothing says “mass-produced” more than sharp, clean edges on furniture. Primed with my go-to primer: Glidden Gripper (you can find this at Home Depot in the paint dept)

Coastal Kitchen Cupboard Glidden Gripper Primer

The Americana Chalky paint I planned on using says it doesn’t need a primer, but the before color was so dark, and the new color was so light, I figured I had better just to be safe.

Coastal Kitchen Cupboard Chalky Paint Palette DecoArt

Before I painted the entire piece, I accented the frames around the door panel inserts with the Americana Chalky Paint Called Vintage. It is a soft blue/green color that ties in beautifully with the shutter slats on the top.

Coastal Kitchen Cupboard Framed Cabinet Doors with Chalky Paint

Then I applied some wallpaper wainscoting (LOVE this stuff too!) to the inside of the panels to give a more country feel to the piece. (For the DIY  how-to on using the wallpaper, click here.

Coastal Kitchen Cupboard with Wainscoting Wallpaper Panel Inserts

I then painted the entire cupboard, including the inside panels, with two coats of Americana Chalky paint in the color Everlasting-so soft and pretty white.

Coastal Kitchen Cupboard Chalky Paint for Knob Americana

The more I used this paint, the more I love it. No brush strokes, so easy to apply and clean up. I then sanded the edges to give it a bit of character and contrast.

Coastal Kitchen Cupboard Wainscoting Wallpaper Doors

The final coat was the Americana Ultra Matte Varnish from DecoArt. No shine, protects the white paint from fingerprints.

Coastal Kitchen Cupboard Ultra Matte Varnish Americana

For the star of this show, the top, I used some old shutter slats that Coach and I had picked up off the side of the road on a drive to Cape Cod. That was one of my very first blog posts, and also one of the first times we trash picked on the side of the road. What a score! The colors are all the original ones-so coastal pretty!!

Coastal Kitchen Cupboard Arranging Shutter Slats

I have been using parts of them for several projects, including some little hanging chalkboards which I decided to reclaim for this project. As I was arranging the slats on the top, my original plan was to flip the chalkboard ones over and use the reverse side. But then I thought, why not just leave them so I could write cute little sayings on the surface? Fun!

Coastal Cupboard Makeover Chalkboard

Once I had placed all of the slats, there were a few that hung over the edges, which I quickly remedied with a few jigsaw cuts.

Cutting Shutter slats with jigsawThen sanded the edge smooth with my Black & Decker Mouse sander, which I also picked up at my local Home Depot.  Honestly, I spend more time at Home Depot and Home Goods than I do at home!!

Coastal Kitchen Cupboard Cut Shutter Slat Edges

While I was sanding, I made sure that I sanded the top edge just a bit so that the cut pieces had the same worn edge as the rest. (this is the area that fits into the frame of the shutters when they are whole).

Coastal Kitchen Cupboard Mouse Sander Edges

Once they were cut and sanded, I glued them into place with this strong sticky stuff-didn’t even require any nailing!!

Coastal Kitchen Cupboard Wood Glue

The original knobs were a nice heavy iron, but I wanted something lighter so there wasn’t as much of a contrast. These mercury glass knobs I found at (where else) HomeGoods, but I couldn’t find handles for the doors that I really liked.

Home Goods Mercury KnobsSo, I grabbed a pair of stainless ones I kept from my old kitchen and painted them with the chalk paint. What, you say?! Painted knobs? But, of course! This week’s Tuesday DIY Tip: you can paint any hardware quickly and easily, especially with this chalk paint! You just paint it on, Painting knobs with chalk paintmaking sure you get in all the tiny holes and crevices, then wipe it off,

Wiping off Chalk Paintallow to dry and done. Wipe away as much or as little depending on the look you are going for.

Painted knobs with chalky paintThe finished cupboard now stands in the space under my incredible driftwood mirror I purchased at (where else) HomeGoods a few months back, along with some other coastal-inspired decor.

Coastal Kitchen Cupboard After Shutter Slat Top PM

Which will all go so nicely in my coastal dream home (if I ever get a coast dream home…) In the meantime, have a dreamy Tuesday, everyone!! Susan

**PS: That disclaimer at the top of this article is for all the wood enthusiasts who think that no wood furniture should ever be painted…


From Sea to Rustic Sea

I recently spotted this amazing rustic wood and license plate USA map in my local HomeGoods store (lucky me, I actually have three local Home Goods stores!!)

USA Map HomeGoodsI took a pic and posted it to my Facebook page, where it has had 3800+ views!!

HomeGoods pic on Facebook

Clearly, this is a popular piece. What is it about this particular USA map that folks love so much?? There are all kinds of rustic USA map renditions out there, like this one available at Pottery Barn,

Pottery Barn USA Mapor this one from World Market (when are they coming to Boston, BTW?!?)

World market USA Plank Mapor in the Pinterest world-including this one I created myself.

Map and Sign on Wall SignedBut, the HomeGoods map is so colorful and unique and has so much detail-if you look closely you can see that every state is created from its own license plate!! Can you imagine the work and time that went into this project? Now, you ask, if you love it so much, why didn’t you just buy the damn thing? Truth be told, I don’t have a wall big enough to hang it on : (  But, I keep thinking about it and wondering if there is a way that I can reproduce it on a smaller scale. Which means I would need a miniature license plate from every state in the union. I guess I’d better start searching…ideas, anyone??

Cape Cod HydrangeasIn the meantime, have an inspired (and hopefully not too soggy, Independence Day!! Susan

Thrifty Kitchen Transformation-DIY Series-Wax On!

The final step of the kitchen cabinet transformation was the finish coat on the doors, drawers and boxes. To this point, we have painted 2 coats of primer, 2 coats of paint + I coat of tinted glaze to give the cabinets a slightly aged look.

Glazed Tinted White CabinetsBut they still required one last coat of protection-this is a kitchen, and kitchens get messy right? Don’t want some splashing spaghetti sauce messing up my hard work! First, I tried a satin polyurethane, but it was too shiny. I also have a can of absolute matte finish, but I knew that would be too flat. So I decided on a wax finish that would provide protection while adding just a touch of shine. In the past I have used paste waxes that you wipe or stipple brush on, then buff off. They do give a nice finish, but I don’t like the odor and the elbow grease necessary to get the job done. Having recently discovered a new Crème Wax from Americana, I knew this was the perfect solution!

http://decoart.com/chalkyfinish/finishesYou literally brush this odorless opaque, white creamy liquid on with a foam brush,

Foam brushing wax onto cabinets allow to dry (about 1/2 hour), then buff it. The more you buff, the brighter the shine. I purchased this product at Michaels Crafts (with a coupon, of course : ), but it is available online at HomeDepot.com as well. Now, this is Tuesday’s DIY Tip: I use my little mouse sander to buff my finishes (if auto detailers can do it, why can’t I??)

Using mouse sander to buff waxSimply remove the velcroed sandpaper, stick on a soft cloth or rag in its place and buff away!

Buffing Waxed Cabinets with Mouse SanderUse a soft flannel or fleece, not terrycloth, as the loops in the cloth will make it a rougher finish. Unless, of course, that is the look you are trying to achieve. The buffed finish is perfect-smooth and with a low satiny shine-the look we had imagined when we first decided to make over mom’s kitchen. The wax finish is essentially colorless, so it doesn’t tint the finish, but it did enhance the glazing color I had already applied. So, this part of the transformation is complete and we’ve gone from this:

Kitchen Cabinets with Vinyl Panelsto this:

Waxed and glazed white kitchen cabinetsIf you are just joining us now, you can check out my Pinterest page with all of the links starting at the beginning here. But we still have a long way to go! Up next, the hardware. Have and buffed and shiny Tuesday everyone! Susan

Thrifty Kitchen Transformation-DIY Series-Painting & Glazing

As you recall, part one of this series was the cleaning and priming of the cabinets: doors, drawers and boxes. Since the wood was so dark. each required 2 coats of primer and 2 coats of paint. The paint we chose was a Benjamin Moore Eggshell in a custom color called Design Studio White-very soft and creamy white, but not ecru.

Benjamin Moore Eggshell Design Studio WhiteSince the appliances are bright white, the cabinet color needed to be just the right shade of white. Since we wanted the cabinets to appear somewhat aged and glazed, a pure white would have been too stark. However, choosing a beige or a white that was too creamy would have highlighted the difference between the cabinets and the appliances. Here are the painted doors all lined up and ready for glazing! I chose the eggshell finish because I knew I would be finishing the doors with some sore of glazing or waxing, and the matte finish is more porous which may have resulted in too much glaze being absorbed into the paint

Painted Cabinet DoorsThe same decision went into the glazing process. Initially my mom wanted to just keep the cabinets white, but I convinced her that glazing them would highlight the door detail that was completely hidden when they were dark oak with the white panel.

Kitchen Cabinet Doors BeforeGlazing them with a faintly tinted glaze highlights the edges and moldings and creates a nice antique look without darkening the cabinets too much.In this case, I used Martha Stewart Antique Effect Glaze.

Martha Stewart Glaze EffectsI found these in a mark-down bin at Michaels awhile ago and they were so cheap I grabbed a bunch of them!  I figured this was the perfect glaze for the cabinets, because it allows you to tint the color and then use as little or as much as you like to create the perfect glaze. I poured all of the little bottles, plus my colors into one large mason jar, ensuring I had enough for the entire kitchen.

Kithcen Makeover Glaze MixtureFor the tint color, we decided on a very light combination of the wall paint, which is a Benjamin Moore Whitestone and some Rustoelum Java Brown Cabinet Glaze I had left over from another project. 1 teaspoon of each went into the quart jar of glaze. You know that old adage, “measure twice, cut once’? Well, that applies to mixing colors as well! I had to know the exact formula, in the event that something catastrophic happened to my jar of mixed glaze so that I could replicate it if need be. (Sooo, remember the time when I was testing out my new paint in the hall and I got distracted and dropped the whole can? No? You can read about that here: The Hall of Shame-Color-Splash!)

Hall of Shame Color SplashSo the formula for this jar of glaze is: 1 quart of glaze + 1 teaspoon of Rustoleum Java Brown

Kitchen Cabinet Glaze Rustoleum Java Brown+ 1 teaspoon Benjamin Moore Whitestone

Mixing Glaze color 1 tsp paintSince all three are water-based, they mixed together easily with just a paint stirrer. Yum-looks like mocha swirl!!

Glaze in mason jarApplying the glaze is simple. You simply paint the glaze onto the entire piece, using a foam brush. If you are planning on doing both sides of the cabinet doors, you have to allow each side to dry and cure (approx. 24 hours, depending on the humidity) so they don’t stick to the work surface once you flip them over.

Kitchen Cabinet Brushing On Glazelet it sit for a moment, then begin wiping it away with a damp rag. Gloves, people!

Kitchen Makeover Wiping GlazeThe more you leave, the darker the piece. Conversely, the more you remove, the lighter the piece. Once I went over it with the rag, I allowed it to sit for a couple of minutes, allowing the glaze to settle into the corners. Then I wiped away any excess I didn’t want. The final look: a soft white with just a hint of darker glaze in the corners and moldings.

Cabinet Door Glaze and DryNext up: the finishing wax! We are getting there! Have a great (hopefully not too wet) Thursday, everyone!! Susan

Creative Glass Works At The Vintage Bazaar

For all of you vintage lovers out there (and by that I don’t mean old folks, I mean folks who love vintage stuff. But then, again, old folks-like me-can love vintage stuff too…) it’s the weekend we’ve been waiting for- The Vintage Bazaar at Pettengill Farm!

Vintage Bazaar LogoThis weekend, June 21st & 22rd, make the journey to Salisbury Mass to discover some of the finest country hand crafts, vintage furnishings and accessories, jewelry, clothing and a few DIY television personalities (Yup, that’s me and Cari Cucksey from HGTV’s Cash & Cari at the Country Living Fair a few weekends ago. Gosh, I hope she doesn’t think I am following her like a vintage fair groupie when she sees me again…)

Sue & Cari from RePurposeall in a bucolic setting on a real working farm complete with live country music, vintage trucks

Vintage Bazaar Truckand this chick. Love this chick.

Chicken @ Vintage BazaarEach time I have visited the Vintage Bazaar, I’ve discovered new and innovative merchandise, all from re-purposed, re-cycled and re-loved everyday household items. One of my favorites has always been this spectacular planter filled with gorgeous glass flowers created with vintage glassware and plates from Creative Glass Works Boston. 

Creative Glass Works Bouquet PMRecently, I had the pleasure of chatting with the owners Ann Marie and Robert and visiting their home-based workshop.

Creative Glass Works Anne Marie and Robert PMThis husband and wife team began creating these gorgeous pieces for a local Artisans Workshop Market over four years ago. Anne Marie, whose background was in IT before becoming a master glass flower-crafter, reports that she was searching for a way to use the extensive collection of glassware she had accumulated over the years. Her husband, Robert owns and operates a renovation and restoration construction company-so beauty met brawn and the rest is history!

The workshop is bursting with shelves and tables laden with sparkling glass in every color, style and shape.

Creative Glass Works Flowers Laid Out PMThere are vases and dishes and tall blown glass sculptures.

Creative Glass Works Blue Glass Stand PMand jars filled with colorful glass beads and baubles.

Creative Glass WorksFrom light-catching dangling pendants

Creative Glass Works Pendantsto larger than life blossoms.

Creative Glass Works Red FlowerEach is individually hand-crafted, with carefully choosen pieces that complement one another and that together, resemble the anatomy of a life-like flower. Along with the clear and colored glass, Anne Marie and Robert work with ceramics and pottery,

Creative Glass Works Teapots PMcreating whimsical, one-of-a-kind teapot lamps

Creative Glass Works Teapot Lamp PMwith fashionably vintage shades.

Creative Glass Works Lampshades PM

So, make sure you visit The Creative Glass Works Boston booth while you are at the Vintage Bazaar this weekend. And if you see Anne Marie or Robert, say hello and tell them that Sue from Country Design Home sent you : ) Have a (hopefully not too bizarre) Thursday, everyone-see you at the fair! Susan


Creative Kitchen Makeover-DIY Series-The Prep

Recently, I was asked to sample and review a new paint primer called Kilz HIDE-ALL,

Kilz HIDE-ALL

which happens to be perfect timing for the kitchen makeover I have just begun! My mom, who lives in a townhome (that was once owned by my sister…long story) has been asking for a kitchen makeover for quite some time now. Although the budget does not allow for a full gut-job and remodel, we are using paints, glazes and some elbow grease to create that “French Country” look that she adores. The kitchen is circa 1980’s construction-grade with very dark oak cabinet doors and drawers and veneered plywood boxes. In the center of each door is a white vinyl panel that was glued into place, and the backsplash is alternating 4″ square ceramic tiles in black and white stripes that mirrors the white door panels.

Mom's Kitchen View 1The appliances are fairly new and white, so they are staying, and the floor is a sheet linoleum in a vintage black and white tile pattern, so that is most likely staying put as well. So, everyone knows that the key to a successful painting job is the prep work, which I personally despise, but it must be done! In this case, those white vinyl panels and the adhesive used to attach them had to be removed. I tried many, many de-glossing, de-gooing and de-sticking type products before I could get the edges ready for priming and painting.

Kitchen Cabinets with Vinyl Panels A messy job, but absolutely essential to ensure a good outcome!

Cabinet De-Greasing Fromula 409Once that was accomplished, it was time to try the new Kilz HIDE-ALL product.

Kilz HIDE-ALL PrimerThis is from their website:  “KILZ® HIDE-ALL™, a new primer sealer exclusively available at Lowe’s stores across the country. For home interior painting projects of all types—including covering dark colored walls, masking minor surface stains, smoothing out porous surfaces and more—the undercoat offers consumers excellent hide at an affordable price. KILZ HIDE-ALL helps prepare surfaces for painting by evening out porosity and creating a consistent canvas for adding the desired topcoat. With a multi-surface formula, KILZ HIDE-ALL can be used on drywall, cured plaster, woodwork, masonry, concrete block, brick and previously painted areas. The high-hiding, fast drying, latex primer sealer helps minimize issues caused by dark colors and minor surface stains to effectively transform bathrooms, kitchens, bedrooms and more.”

Did the primer live up to the hype? You betcha!! For only $26 and some change for a 2-gallon bucket, what I got was little to no prep work and no sanding-yay! Just a quick cleaning to remove any accumulated surface grease, dirt and dust-and that pesky glue.

Kilz HIDE-ALL PrimerThe odorless primer is a creamy white color with a slightly grayish hue. It has the consistency of a watered-down school glue. Very smooth, very little dripping, brushes on easily and cleanly without leaving brush stroke marks and creates a light, bright prepped surface. And a little goes a very long way! Since these cabinet doors have had a lot of wear, the surface finish in some areas was worn away, while other areas were still shiny. The primer covered all of that evenly so that you cannot see the difference. The directions indicate that the primed surface can be re-painted after one hour with oil or latex paint, but I didn’t attempt that, as I am doing this makeover in stages, which I will be sharing as I complete each one. Brushes easily cleaned up with soap and water.  Here is a before cabinet door

Kilz HIDE-ALL Cabinet Door Before

(note the taped #? Prior to removing the doors and drawers to paint them, remember to number them and make a map so you know where they go once you are finished):

Kitchen Cabinet MapHere is the primed cabinet door:

Kilz HIDE-ALL Primed DoorA perfectly smooth, matte surface awaiting the paint and glaze. But that will be in the next installment! I hope you are having a prime Tuesday, everyone!  Susan

Disclaimer: Although the product in this blog post was provided by the makers of Kilz HIDE-ALL, the opinions expressed are strictly my own and have not been edited or altered in any way. Susan

Michaels Crafts A Brand New Look

I’ve gotta say, I was more than a bit excited when I recently received an invite to attend a “Sneak Peek Blogger Event” at the newly remodeled Michaels Craft Store in Saugus, Mass.

Michaels Crafts Get Crafty Boston Sign

After all, I do spend quite a bit of time (and $$$!) there gathering materials for my very many, many DIY projects! And, I love to blog about them. So, I was delighted to have an opportunity to meet other area bloggers, take part in a craft session and have a tour of the fresh new look of my local Michaels store! Along with 27 other Boston area stores, the Saugus Michaels is unveiling a brighter, fresher style that is less cluttered, much more organized and shopper friendly.

Michaels Crafts Flower PlantersUpon our arrival, we were greeted and escorted into the Michaels Craft Room (which is, FYI, available to the public for group craft projects-good to know : ) After having a yummy bite and an Italian Soda (many of us had never heard of it, but so delish!), we were instructed in our craft projects, then left to our own devices and Exacto knives to create the perfect Boston Skyline from scrapbook paper and canvas.

Michaels Crafts Blogger IntroductionOnce our projects were completed, we were off on the store tour, led by Brett, the district manager along with several store employees, all of whom are now sporting bright red shirts so they are easy to spot when you need a crafty, helping hand.

Michaels Crafts DM TourHaving shopped here numerous times in the past, the first change I noticed was the wall banner circling the entire store, high enough to spot from any vantage point and identifying key shopping areas. Other new features include signage that not only identifies the area, but informs the shopper what is available in each aisle.

Michaels Crafts End Cap SignA newly expanded section, by customer request, is Home Decor, where you will find aisles stocked with latest trends in home fashions and accessories.

Sea Shell Statues Michaels CraftsLoving these ruffled pillows and ottomans!

Michaels Home Decor PillowsOne of the most noticeable changes throughout the store were the information boards associated with the products. I dabble in cake decorating from time to time, and I know my way around a pastry bag. BUT, what would be a simple cake decorating project for me could be an overwhelming task to an aspiring Cake Boss wanna be. So, Michaels solved this dilemma by not only stocking the shelves with the necessary tools, but also by adding these information and instruction boards (kind of like Pinterest in real life : )

Michaels Crafts Cake Decorating BoardThe chalk and chalkboard section, which is still so trending on Pinterest right now, has it’s own “Pin” board, where customers can get inspiration, then grab the necessary supplies to create the project of their choice.

Michaels Chalk Craft DisplayWhile on the tour, this new Tint It Spray caught my eye, (of course, with all the bright, pretty colors : ) with craft ideas and a color sample, plus supplies-brilliant!

Michaels Crafts Tint It Spray PMAs we turned each corner, I continued to be impressed by the overall look of the store with its colorful displays and variety of items for any imaginable craft project. AND, so excited to see that they are finally carrying my latest DIY obsession-Americana Chalky Paint by DecoArt!! I have just started using this product, and I can’t wait to share my first project with all of you. But for now, you will have to take my word for it that these paints and finishes are like nothing you may have worked with in the past.

Americana Chalky Finish PaintSo, now that I’ve given you the condensed tour, its your turn to head to your nearest Michaels to see what the blogging fuss is about! On Sunday, May 4th, there will be a grand re-opening of the Boston-area Michaels Stores featuring a 9:45 am ribbon-cutting ceremony, and over $1000 in gift card giveaways!! So, get crafty Boston, and…

Michaels Crafts Creative JourneyI hope you have a creative and inspired Sunday, everyone. And if you do happen to visit your local Michaels, tell them Sue from Country Design Home sent you! Susan 

Cottage Fresh Country Cupboard

A few days ago I shared a project that I had been working on: transforming a country cupboard from this ugly, broken, junky piece to a cottage fresh country cupboard. This was the before:

Country Cupboard Unpainted

this was the during

Country Cupboard Painted

this is now.

White Country Cupboard Signed

A simple fresh white country cupboard that is filled with some of my cherished blue and white pieces, including this vintage set of Block China that I have kept stored away for over 30 years!

Block China Blue Strawberries

I have treasured this dinner set with the luscious blue strawberries for so long, but have never had an open cupboard to display them…and now I do! In this close-up pic you can also see the wainscoting wallpaper that I had installed and painted. It just gives a little extra depth to the otherwise plain back of the piece.

Blue & White Country Cupboard

You can read about the initial transformation process, including the prepping and installation of the wainscoting wallpaper here:

https://countrydesignhome.com/2014/04/10/wow-wainscoting-wallpaper/

Once I had finished painting the cupboard, I wanted to add just a bit of glazing to the detailed trim to enhance it. BUT, I did not want to change the overall look of the piece. It needed to remain bright white to contrast with the red walls of my dining room. This concoction of DecoArt Metallic Pearl White Paint + Behr Custom Color Sample (kind of a soft tan-but I’m not sure of the color because it was in the OOPs bin at HomeDepot for 50 cents!) + Martha Stewart Tintable Glaze Effects.

Martha Stewart Glaze, Americana Metallic Paint, Behr

I mixed it all together- lets say 6 parts glaze to two parts metallic paint to one part tan paint. Very scientific.

Martha Stewart Glazing Mixture

Then I painted it only on the areas where I wanted the trim to be defined- then wiped it off with a damp rag.

brushing on glazing mixture

Just a hint of color was left behind to enhance the deep trim work.

Country Cupboard Trim Glazed

Once it dried, I then mixed the Metallic Pearl White paint and the Tintable Glaze (about 50/50) and painted over all of the raised detail and trim areas. So what I have now is an elegant piece with a pearlescent glaze finish that captures the light and makes the detail pop.

Country Design Home White Glazed Trim

Perfect. It just goes to show you what a little TLC and elbow grease can do to transform any ugly duckling into a beautiful swan. And just in time-now I can clean up the dining room and get ready for Easter, whew!! Have a terrific Tuesday, everyone! Susan