Do Something Worth Writing (About)

Hey! It’s been a minute, but I think I finally found something worth writing about. A few years ago, I purchased this print from Fleurish Home and Garden

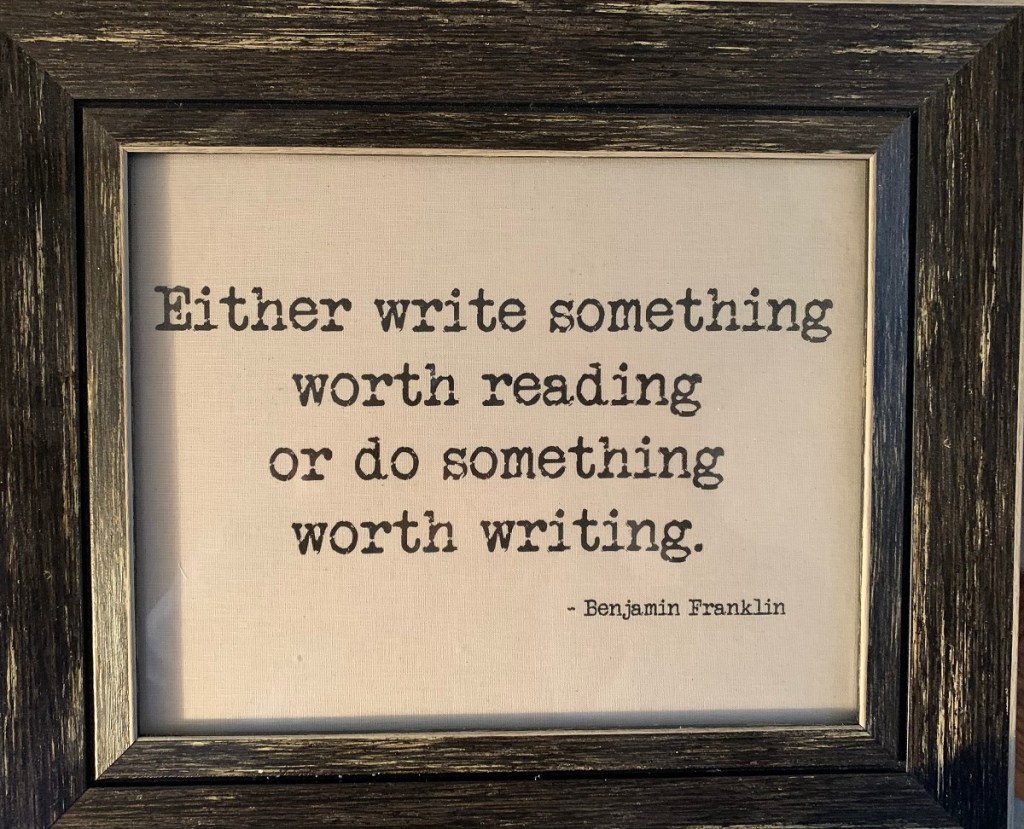
at a Vintage Bazaar. Ben Franklin had it write*; interesting reads begin with purpose. This month, after two years of languishing in some sort of pandemic hell malaise, I have found just that purpose. Recently, I happened upon a TikTok video on my FYP. (for those who’ve not had the pleasure of this time-wasting activity, scrolling through videos about nothing and everything, FYP is the for you page-the algorithm that TikTok uses to determine what you’d like to watch, because apparently, you’re not able to do that on your own). The video I happened upon was of a woman’s voice-over, explaining how she was putting together some bedding to give to a refugee family while displaying her choices on screen.

And so, I discovered

Intrigued, I kept watching…and watching…the videos are short but incredibly heartfelt and places on full display what happens when people leave dire situations where they cannot exist peacefully or thrive. More often than not, moving with nothing more than the clothes on their backs and with little to no resources, these are the people: friends and neighbors, moms and dads, brothers and sisters, grandparents and teens, and so many little children who have nothing, that turn to Project Home Again for assistance in setting up their new living spaces-all free of charge. If you watch the video below, it will give you a better sense of what they are all about.

The brainchild of founder Nancy Kanell, Project Home Again has been in existence for over 19 years in the Lawrence/Andover area of Massachusetts. You can read all about the origins in their bio, linked here. Suffice to say that the fateful decision of Nancy’s to help one friend-a domestic abuse survivor-to replace a broken stove, has changed the lives of so many, many more. So why are they on Tiktok and where do I fit in this story? For years, they have simply relied on the kindness and generosity of their neighbors and friends in their surrounding towns-everything from bedding to kitchenware to furniture was donated, sorted and then readied to give to someone in need.

The clients would then go into the warehouse where everything is displayed, and they would choose what they wanted. Once the pandemic hit, the warehouse had to be closed to visitors, so Nancy would make the choices herself with the guidance of the social workers who were representing the clients. What a precious selection for a dino-loving little boy : )

Also, since people could no longer visit the facility or donate their goods, Nancy turned to Tiktok as a means of telling the story of Project Home and spreading some “good vibes” during such difficult times. Never in her wildest dreams did she imagine what would come next. Currently with 420K+ followers and over 10 million likes, her legion of donators log in to hear her stories and the thoughtful process in which she chooses the household goods to be given to each recipient. As her following has increased, so have the donations-from across the country and around the world. Bedding, bath, lamps, rugs, household appliances, curtains, decorations, kitchenware & furniture…

if she mentions a need, or it is listed on their wish list, it is fulfilled by her amazingly generous followers via Amazon and Target and Walmart and so many more. With the increased online exposure, the donations are increasing, but the requests from agencies and social workers are also growing exponentially. The beauty of this is that the more Project Home Again receives, the more they are able to give to the over 160+ agencies across the state requesting assistance.

As for me, since the town where they are based is literally 20 minutes north of me, I reached out to ask if they needed any volunteers (one of the great perks about being retired is having the time to give). And they did, so I am now a member of the volunteer army at Project Home Again. The volunteers that I am honored to be working alongside of are so generous with their time and happy to help out in any way necessary. This week, we hauled mattresses, opened mountains of boxes

(and BTW- to whomever the person is that invented those air-pocket plastic shipping pillows- UGH), sorted, marked and shelved the donations, moved furniture, and put together a full display of items for clients as they arrived to pick up their newly acquired goods. The work is gratifying, sometimes heavy, a lot of fun and quite emotional when you realize how those less fortunate are struggling just to survive.

To read more about this incredible organization, please visit their website. There, you can learn how to donate goods or money, request assistance or become a partnering institution or a volunteer (like me!). And as for TikTok, go ahead and take a look at her almost daily posts. I promise that you will be just as profoundly moved and awed as I am while watching Nancy’s videos. In this time of continued pandemic strife and amid all the negativity in this world, Project Home Again shines a bright light on the goodness and generosity of our fellow humans. Have the best day you deserve. XOXOXO Susan

*right

Soft and Sweet Nursery Furnishings

Decorating is all about layering-doesn’t matter if its a castle or a nursery. You start with a blank canvas, then slowly add colors and textures until you have achieved your desired effect. Along with paint and wallpaper and furniture, the baby nursery décor wouldn’t be complete without soft goods- draperies, sheets and pillows and a blanket or two.

Mural and QuiltI put together this flannel quilt with fabrics I chose from the vast selection at Joanns. Who knew that black and white nursery prints were a thing?!

Black and white quilt fabric.JPGThere were so many to choose from, I had a difficult time deciding.

Arrow quilt fabricBut, in keeping with the overall woodland theme, I went for the same types of fabrics-

Dream Big little one fabrictrees and mountains and leaves and baby animals-along with a few inspirational quotes for the baby-to-be.

Follow your dreams quilt fabricAll in black and white and framed in graphic black and gray buffalo check.

Black and white quilt frontThis soft flannel quilt is not hand stitched-at this point in my life I have neither the patience nor the inclination to produce that type of quilting masterpiece. Instead, it is machine stitched and machine washable-perfect for a typical messy baby : )

When I create these types of quilts, I just lay all the pieces out in whatever pleasing pattern seems to work. I often utilize the very scientific “squint test”: place everything, then stand back and squint- this blurs the prints but gives you an overall sense of the balance of colors. Then I cut. The stitching is fairly simple: the squares are first stitched to the borders, then filling and backing is added. If you can sew a straight line, you can create a quilt like this in just a few short hours.  Along with the mountain mural, it adds another layer of interest to the room.

Along with the quilt, I crafted one of these fleece blankets- you see them everywhere, and they are absolutely the simplest thing in the world to make!

Black and white fleece throwTwo pieces of fleece, any size, back to back. Cut squares into the corners, cut along the edge in 1-2 inch increments all the way around. The wider the cut, the fatter the fringe. The deeper the cut, the longer the fringe. Then you just tie knots to attach front to back. Warm and soft and very cute-and also machine washable!

My daughter chose these sweet pin-dot black out panels from Target.

Mural and CribEven though they are white, they do a nice job of blocking out the late afternoon sun that beams into the nursery. Pillows-the graphic one from Ikea, the Arbra pillow from some quilt fabric scraps I had left over.

Arbra Pillow

That one’s from me (I’ll explain later : ) Moving on to the next project! Still waiting for baby to arrive : ) xoxo Susan

Going Green

Since it is almost St. Patrick’s Day, and I just recently did a post on green (it is, after all, Pantone’s Color of the Year!), I thought I would share some eco-friendly products from companies that are committed to “going green”. All of these companies earn our High Five for Friday!!

Going Green Redwood Forest

We hear that phrase in marketing and advertising all the time- but what, exactly does it mean? This quote, from the website Save The World states it perfectly: “Living a green lifestyle – or going green – can begin in small, easy to manage ways. Recycling is a huge, obvious part of helping to save the world through green living. Reducing one’s reliance on oil-based energy sources is another popular method employed in trying to save the world. Purchasing only all organic, chemical free products is another way that many people begin going green, and is considered a very effective method at trying to save the world and all of its resources. Green living is infiltrating all parts of daily life, and the planet is sure to be better for it.”  So, I searched around for some readily available products that do just that- use only plant-based, chemical free and recycled products.

Method Cleaners (available at Target)- Developed by two young roommates- Adam Lowry and Eric Ryan, “their powers combined, they set out to save the world and create an entire line of home care products that were more powerful than a bottle of sodium hypochlorite. Gentler than a thousand puppy licks. Able to detox tall homes in a single afternoon”.

Going Green Method Cleaner Orla Kiely

Mrs. Myers Clean Day  “Inspired by Mrs. Thelma A. Meyer, an Iowa homemaker and mother of nine. It all started when one of her daughters was walking down a cleaning aisle, eyeing all the products with their harsh, stinky chemicals. Right then and there, she had an idea: “Let’s make cleaners that smell nice, like my mom’s garden, but still work like the dickens on daily dirt and grime.”

Green Mrs. Myers Soap

Karen Quinn Organics  “…we pride ourselves on our commitment to fair trade and the earth. We use only certified organic cotton, grown using sustainable farming practices that maintain and replenish soil fertility without the use of toxic and persistent pesticides and fertilizers. Our garments are made of ultra soft, all-natural, organically produced cotton certified by Control Union Certifications (formerly SKAL), a USDA Accredited Certifying Agent. Our garments are also made using Fair Trade practices under Global Organic Textile Standards (GOTS). Every little garment supports our vision and hope of a cleaner, kinder earth.”

Going Green Kate Quinn Organic jumpsuit

Bambeco- Hot Style for a Cool Planet  “Bambeco was founded in 2009 by Susan Aplin and Carolyn Wapnick; it was inspired by a trip to Alaska where they saw extreme glacial recession and other impacts of climate change up close. That’s when Aplin set off on a personal quest to understand her impact on the planet, which led to several carbon reduction changes in her life. After making household, energy usage, and commuting changes, Aplin wanted to extend her environmental values to eco-conscious home décor & furnishing purchases and discovered that fashionable, environmentally responsible home products were not available in the marketplace.”

Going Green Bambeco Apron

Of course, you can shop organic at any of your local farm stands or grocers. Just make sure you bring along your eco-friendly bags! This company showcases a wide variety of attractive shopping bags for stylin’ while you’re shopping!

EcoBags.com Cleaning Up the Planet, One Bag At A Time     “EcoBags opened 1989 with a simple goal; to produce quality bags at great prices so that “Reusable becomes a way of life.” We started with the ECOBAGS® Brand Classic String Bag, a simple lightweight, expandable cotton net bag used in Europe for generations, long before paper and plastic bags.” LOVE this French Woven Basket

Going Green Organic Tote from EcoBags

And, of course, for the designers with a conscience, Benjamin Moore makes a NO-VOC paint called Natura– even the label is beautiful!!

Going Green Natura Benjamin Moore

“Natura Waterborne Interior Paint continues  Benjamin Moore’s commitment to providing the most environmentally friendly paint.  Natura Paint emits lower total VOCs than other national zero-VOC products on the market, all without compromise to performance or color selection. Natura is truly “Green Without Compromise®.”  Again, a marketing term we hear quite often, but what are VOC’s? Volatile Organic Compounds that are emitted as gases from certain solids or liquids. VOCs include a variety of chemicals, some of which may have short- and
long-term adverse health effects-yikes!

If you have a favorite, eco-friendly company, drop me an email and I will be happy to share with everyone! The more we know, the more we can help our planet! Have a green Friday everyone! Susan

Tee Shirt Memory Quilt

I am adding a new category to my blog called

D.I.M. (Do It Myself Because If I Don’t Do It Who Else Will?)

So today’s D.I.M project is a T-Shirt Quilt!  I have had a love affair with quilts since I was a kid, especially antique, hand-stitched beauties that have withstood the test of time. (I am a country-girl at heart, after all) Not having much time these days to spend the hours necessary to make an authentic hand-made quilt, I typically create T-shirt quilts and donate them for various Boston area charities through

 Threads of Hope.

Occasionally I am commissioned to make one as a gift, so I am featuring this quilt for a soon-to-be high school grad for demonstration purposes. The collection of t-shirts his mom handed over to me are sacred to him- various basketball & soccer teams, childhood memories of camping and community service- and one very special shirt with pics of his dog.  Each time I create a quilt, I do so with the recipient in mind, creating what I hope will be a cherished momento that will last a lifetime. In that spirit, I am sharing this information so that you, too, can make a quilt for someone you love!

T-Shirt Quilt Creations 101 is now in session.

Supplies you will need to create one quilt approx 52 x 70 inches: A layout of the quilt you are making with the shirts and cross-pieces laid out.

T-shirts -I typically work with a dozen, using each as a square, cut 14″ X 16″. They can be brand new, used, stained, painted, torn-it doesn’t matter, as you will be cutting them apart anyway. Make sure you wash them all before you start- don’t want your quilt smelling like a locker room!

Scissors, Rotary Cutter & Cutting Board, T-square.All the tools you need to get the shirts cut accurately-very important!

Pellon Fusible Interfacing. T-shirts have a lot of give & stretch, so they need to be stabilized to prevent them from warping while sewing. This stuff is the easiest and cheapest to work with. Only .99 per yard, and with a Joann’s coupon, only .50!

Batting- you can use cotton or poly. I prefer the poly because it holds its shape better and is not as heavy as the cotton fill. Again with a coupon, pretty inexpensive.

Fabric for cross pieces and backing. I typically use a sheet- a full-sized one will give you a single piece for the backing, then enough left over to make the columns and rows. I have an embroidery machine, so I use different fabrics for the cross-pieces, but you can use the same for all three. If you want to use different fabrics to add more color or design, these little Fat Quarters are great- each one gives you 5 cross-pieces!

It goes without saying that you need a sewing machine. Any kind, as long as it sews a straight line or if you want to get a bit fancy, zig-zag! Mine is an old Brother that I got at Target for $159.99 Nothing special, but it gets the job done.

OK, now that you have all the stuff, let’s get going! First you need to identify what part of the shirts you would like to use. Sometimes I just use the front panel, other times I take patches off the sleeves or back and applique them to the front for added interest.

Rough-cut the front panels to approx 16W X 18L . Once you have them rough-cut, fuse each piece with the interfacing on the reverse side. When using the iron, make sure you follow the directions for the interfacing! Also, if you are using game shirts or raised silk-screen shirts, do not place the iron directly onto the shirt or it will melt! Always use a top cloth of white cotton. Once you have fused the square, make the final cut to 14W x 16L inches. Using a half-inch seam allowance, your final squares will end up being 13W X 15L.

Now cut all of your side and cross pieces. Cross pieces will be 14W X 4L. (I always leave a little extra on each end, in case of mistakes : ). If you have 3 columns of shirt squares, you will need 4 long strips approximately 80 inches long for in between each one and a top and bottom piece approximately 60W by 4L. I cut mine 4 inches wide, but you could do less, or more, depending on how big you want the quilt to be.

Line up your shirts in the order you wish them to be on the quilt. This usually takes place on the floor, as I don’t have a table big enough for the full visual. Now begin assembling your quilt, starting with top cross-piece, then a shirt square, then another cross piece, then a square, and so on, building your columns 4 shirts down and your rows 3 across. As you add each piece, make sure you line it up with the one below so your columns are even and straight.

Once you have your three columns of squares and cross-pieces, stitch the columns of 4 inch wide fabric that will hold the entire top of the quilt together. Add the top and bottom pieces that create a “frame” around the squares. Keep checking to make sure that your corners all match up! You know that old carpenter’s saying “Measure twice, cut once?”, so important! I measure and re-measure as I go. Trim excess.

Now that your top is completed, you will attach it to the back, right sides together. Pin first, then stitch, then trim. Make sure you leave an adequate opening to turn the quilt right side out, at least one full shirt square in width.  Once it is trimmed, you are going to hand baste the batting to the quilt all the way around. Again, the easiest way I have found to do this is on the floor (not great for the back…)

Once the batting is basted on, trim the excess away.

Turn your quilt right side out. Press and pin the edges and corners.

I stitch each corner with a tiny machine zig-zag, to hold the quilt and batting in place through all three layers. Press closed the opening and stitch by hand, or with a decorative stitch (I used a blanket stitch here).  Press again, trim away any threads and you’re done!

A work of art that you can proudly present as a gift for that special someone. Now, I know this is somewhat confusing, and trust me, you won’t do this in a day. If you have any questions, or need assistance, please email me @ countrydesignhome@gmail.com.

Just remember, “a stitch in time saves nine” (right, I have no idea what that means either) Susan

%d bloggers like this: