American Flag Coffee Table

Inspired by the red, white and blue decor from last week’s blog, this past weekend I decided to create an American Flag Coffee Table.

American Flag Coffee Table LogoUsing an old brown table that we picked up at a flea market for $5 (you know, those ones that were mass-produced in the 70’s and are at every flea market and yard sale throughout the land…)

American Flag Coffee Table BeforeI transformed it from a drab brown circle to a colorful Americana coffee table! Here is the how-I-did-it:

1. I painted the base legs with a couple of coats of Heritage Blue Stain by General Finishes.

General Finished Hertiage Blue Water Based StainLove this stuff. It is water-based, has very little odor, dries quickly, can go on any surface and leaves a beautiful, satin finish.

2. Sanded the scratched and worn top…I am not sure what the finish was, but it certainly made a powdery white mess! Thank goodness it is finally warm enough to use my mouse sander outdoors!

American Flag Coffee Table Sanded3. Once it was sanded and wiped clean, I taped it off. The American Flag is probably one of the simplest designs you can use-stars and stripes. Easy to do with painter’s tape and a stencil. The table was just the right size to have 13 2″ stripes, so I doubled up my rows of 1″ painter’s tape from top to bottom.

American Flag Coffee Table Taped StripesThen I blocked off the area that would be the star field, and used the Heritage Blue to paint that area as well.

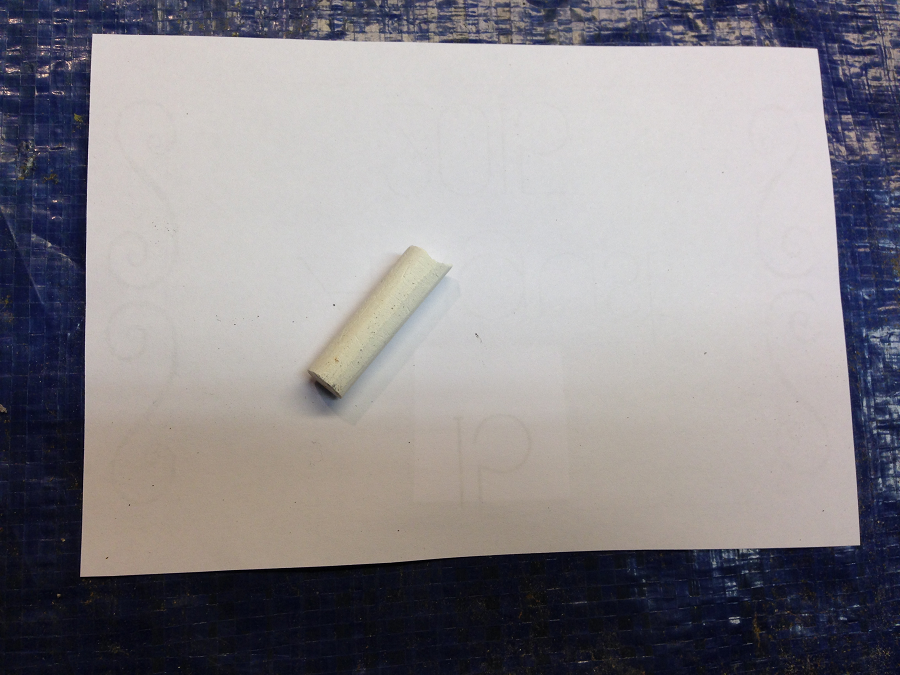
3. Painted the red stripes first, then allowed to dry completely…actually overnight. Because I knew I would be taping right on them and didn’t want to risk pulling the red paint off if it wasn’t completely dry. I used some homemade red chalk paint…need the recipe? Click here…

American Flag Coffee Table Red Stripes4. Re-taped along the edges of the red stripes and painted with white (also used some homemade custom chalk paint).

American Flag Coffee Table White Stripes5. Using the same white from the stripes, I stenciled the stars onto the blue field. You could also use a star-shaped stamp as well. I just happened to have a whole bunch of different style star stencils…

American Flag Star StencilI knew I would not be able to fit 50 stars, so I just went with a pleasing arrangement using a simple star pattern.

American Flag Coffee Table Stars and Stripes6. Sanded down the entire piece to distress it just a bit.

American Flag Coffee Table Sanded and DistressedTIP: when you are sanding red alongside white, keep the sanders separate. The red builds up on the sanding bar and can smear onto the white.

Red Tinted Sanding SpongeIn which case you end up with pink stripes. Which is cute, but not necessarily  all-american.

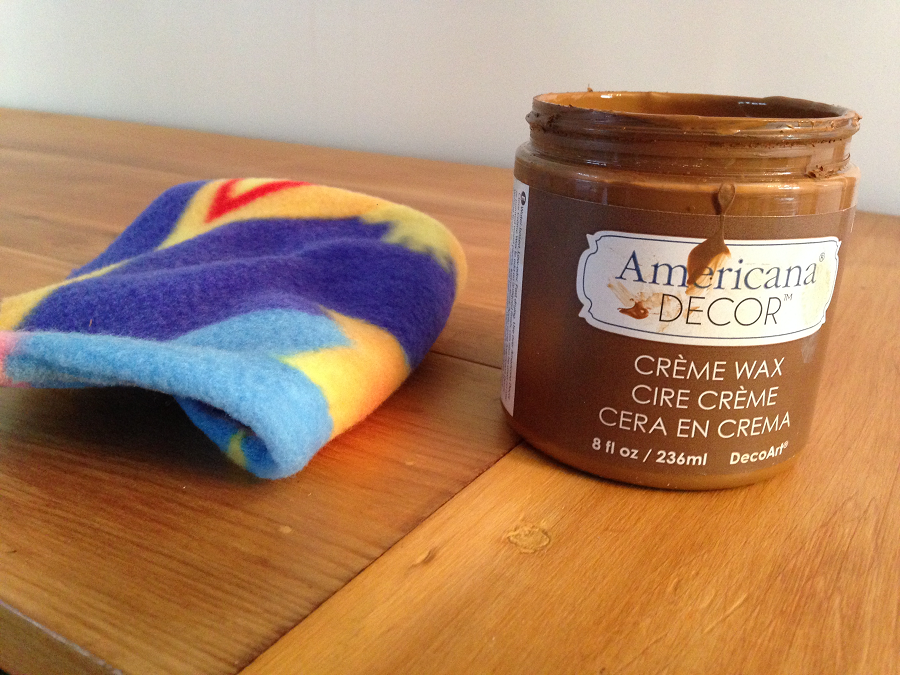
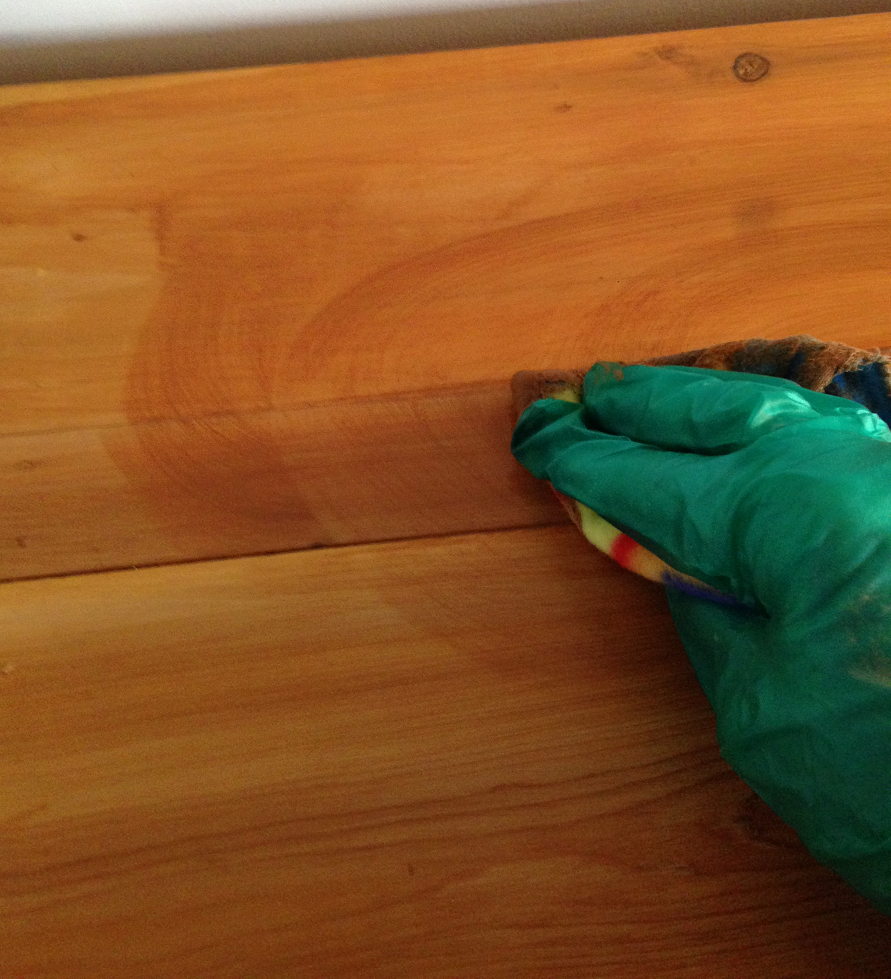
7. Finished with 2 coats of General Finishes Natural Stain. 

General Finishes Water Based Wood Stain NaturalIt is clear and works as a nice satin finish for any surface where you don’t want to add color.

8. Voila! A Red, white and blue table-perfect for a nautical or Americana theme for your red, white and blue porch or family room!

American Flag Coffee Table Complete
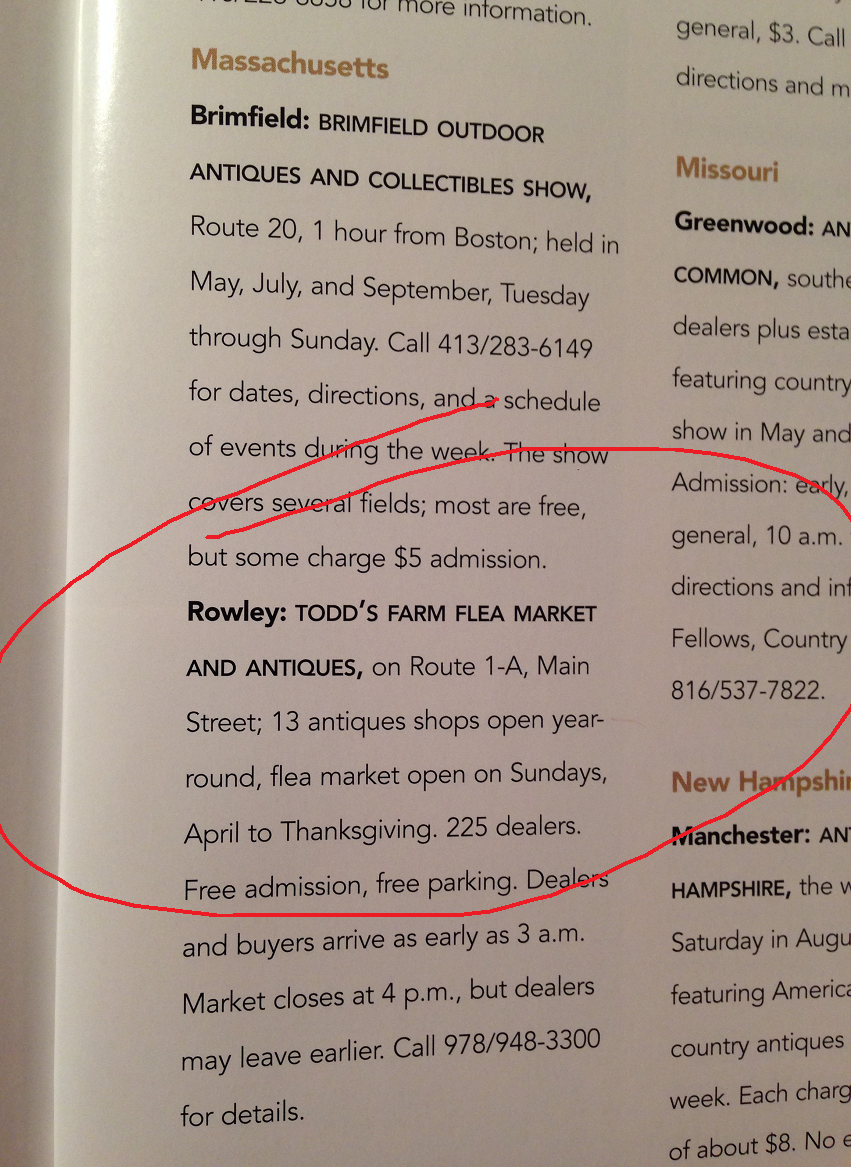
So where is the table now? At the Barn at Todd Farm! Since I already have an American Flag Whale Table,

This Old House Whale Tableit only seems right that someone else has this beauty for their home. Wow-it’s Thursday again already, everyone!! Hope it is memorable! Susan


One Ocean, One Love Shop

This past weekend, we had the great pleasure of attending the grand opening of One Ocean, One Love Shop in Rockport, Mass.

One Ocean One Love ShopOne Ocean Arts, the brainchild of our super-talented and artistic niece Jamie, is a retail shop in the heart of Bearskin Neck in Rockport. For those of you who do not know about Rockport, it is an iconic little seaside town about 50 minutes north of Boston, most famous for its “Motif #1” fishing shack.

Rockport Motif #1The entire downtown, including the enclave know as Bearskin Neck is dotted with art galleries, retail shops, ice cream parlors and candy shops with a spectacular ocean view-perfect for a Sunday summer stroll. A year ago, Jamie started her One Ocean Arts Etsy shop featuring sea-inspired block-printed clothing and accessories, then expanded to her website, One Ocean Arts, then offering her wares at local craft fairs and events. With the incredibly positive response (and repeat customers!) opening the shop with her business partner Erin

Jamie and Erin One Ocean Artswas the next step in spreading their “Once Ocean, One Love” mantra.

One Ocean Arts Shop WindowYou see, Jamie is not only a talented artist, she is also a marine mammal trainer at the NE Aquarium,

Jamie Mathison OneOceanArtsand her love of the sea and all of its creatures is most evident in her hand-carved blocks…

One Ocean Arts Octopus Blockthat she uses for printing her merchandise.

One Ocean Arts Whale PrintThe shop, although brand new, has a time-worn surf shop appearance

One Ocean Arts Short Boardwith natural planking and old weathered docking used to create the display fixtures throughout the shop.

One Ocean Arts WindowJamie is also an outstanding photographer, and many of her black and white ocean images dot the walls,

One Ocean Arts Dock Photographcreating the perfect backdrop for their vintage-washed clothing line.

One Ocean Arts PhotographyThis is the incredible view from the rear window…not sure how I would get any work done looking at this all day : )

One Ocean Arts rear windowOne of my personal favs…it’s all about saving our oceans…

One Ocean Arts T-ShirtThe clothing is super soft cotton, eco-friendly, hand block-printed and washing machine safe.

One Ocean Arts SurferThere are baby clothes…three little fishes!

One Ocean Arts Baby Capsand all sorts of sea-inspired accessories including tote bags

One Ocean Arts Tote Bagsand hand-crafted dog leashes…

One Ocean Arts Dog LeashesJamie’s love of animals extends to her own two dogs, Brooks and Parker, who you may find hanging around the shop when you stop in for a visit.

One Ocean Arts the dogsBy the end of the evening, as the party was drawing to a close…and the sangria was all but gone…

One Ocean Arts Partyit looked like everyone was wearing a bit of One Ocean Arts…

One Ocean Arts Apparelincluding surfer dude Coach…

Once Ocean Arts CoachSo if you happen to be in Rockport taking in the sights and sounds, make sure you look for the shop with the bright blue door…

One Ocean Arts Front Doorit’s the third one down on the left as you enter Bearskin Neck…#6…and tell Jamie and Erin that Auntie Sue sent you!! And if you can’t get to Rockport, be sure to check out the website @ OneOceanArts.com Have a terrific Tuesday, everyone! Susan


Bathroom Remodel Week One

Since the bathroom remodel is in week one and moving full steam ahead, I thought I would share a few photos along the way, kind of a NON-DIY diary. I am very, very grateful that this is NOT a DIY project by me, but instead is in the very capable hands of our contractor Matt from Couture Construction. I know that working in a 160-year-old house has its unique challenges and I think Matt has his hands full trying to make sense of the Jenga-style construction techniques that were used to build this bathroom back in the day.

Bathroom Demo Wall ExposedBetween the horsehair plaster and the patchwork of flooring (using whatever boards they happened to have handy) and an occasional mouse in the wall,

Bathroom Remodel Trapped Mouseevery day I see Matt digging in and pulling junk out until now there is less actual bathroom and more bags of demo trash sitting in the driveway next to the toilet and sink. So here is the before…please don’t judge me because of the seashell sink. It was a thing once…


Bathroom Remodel BeforeThis is day one: horsehair plaster & lathing exposed (wait, is there supposed to be daylight shining through along that eave?)

Bathroom Remodel Horsehair Plaster Wallsday two: the walls come down

Bathroom Remodel Day 2day three-whoops- almost fell in!

Bathroom Remodel Day Three FloorRemember the time when I tore up the hall carpet to remodel the hallway in time for Easter (in 2012?!?)? Well, thank goodness we never added the carpeting to the as of yet unfinished Hall of Shame, knowing that we would eventually be remodeling the bath at the top of the stairs. Because look at these stairs now!

Bathroom Remodel StairsThey were really bad to begin with after two years of white paint and no carpet, but now with muddy shoes and boots coming and going, they’re just plain gross. I cannot wait for this bathroom reno to be finished so I can finally carpet those stairs-perhaps in time for Easter 2014?? But from that point on, its shoes off when you hit the hallway! Have a great Thursday, everyone. Just remember to be grateful for the simple things we so often take for granted here in the US, like a functional toilet and a nice, hot shower…mine soon enough. Susan


BHG Flea Market Decorating Book…A Review

Better Homes and Gardens Flea Market Decorating Book

Photo Courtesy of Better Homes and Gardens

Everyone know Coach has books. Lots of books. Thousands of books.

Stacks of books in the barnAlthough typically he is more inclined to pick up historical books and vintage magazines rather than novels or DIY manuals, he recently came across this Flea Market Decorating Book at a…where else…flea market, so he grabbed it for me. This Flea Market Decorating…Creating Style with Vintage Finds book by Better Homes and Gardens (*BHG) was published in 2000, but is even more relevant today than it was than a decade ago. Today, flea marketing is big business, and dealers, decorators and homeowners alike know the thrill of the hunt and how to create home environs with one amazing found piece as the inspiration. This book contains page after page of glossy photos with inspired decorating ideas utilizing all styles of flea market finds. Some are maintained in their original form, some are altered in the necessary way to fit the intended space, like this hospital gurney turned bathroom vanity.

BHG Flea Market Decorating Hospital Gurney Bathroom Vanity

Photo Courtesy of Better Homes and Gardens

The book is separated into chapters: The hunt (what to look for when flea market shopping), defining a style (which style suits you?

Cottage Style

BHG Flea Market Decorating Antique Cupboard Cottage Style

Photo Courtesy of Better Homes and Gardens

Retro Rustic

BHG Flea Market Decorating Retro Rustic Dining Set

Photo Courtesy of Better Homes and Gardens

Modern Country

BHG Flea Market Modern Country Decorating Bedroom

Photo Courtesy of Better Homes and Gardens

Salvage Chic

BHG Defining a Style Salvage Chic

Photo Courtesy of Better Homes and Gardens

or Fifties Plus

BHG Flea Market Decorating Mid-Century Modern Fifties Plus

Photo Courtesy of Better Homes and Gardens

Once you find your treasure, you’ll find the chapters bringing it home (integrating your newly found pieces into your existing home decor, both inside…

BHG Flea Market Decorating Dresser in Kitchen

Photo Courtesy of Better Homes and Gardens

…and out

BHG Flea Market Decorating Outdoor Patio

Photo Courtesy of Better Homes and Gardens

&  can it be saved (with helpful DIY tips…everything from refinishing wood to rewiring old lamps)

BHG Flea Market Decorating Book Restoring Finish on Table

Photo Courtesy of Better Homes and Gardens

to be most invaluable. At the end there is a national listing of flea markets and look here..my two favorite Massachusetts markets! Brimfield Flea Market and our very own Todd Farm Flea Market (April can’t come fast enough, my friends!)

BHG Flea Market Decorating Book Todd Farm AdIf you are an avid flea marketer (like me and Coach) and love to decorate with vintage furnishings, this book could quickly become your flea market bible. So many inspired ideas and great design mixed in with helpful hints and information. If you are lucky enough, you can find it at your local flea market, or it is still available on Amazon.com. Now if you will excuse me, I have to go make a bowling pin trunk : )

BHG Bowling Pin Trunk Table

Photo Courtesy of Better Homes and Gardens

Do you have a favorite room designs with flea market decor?? If so, please share it with me- just send a pic and I will post it here and on my social media pages : ) Have a great (& not too snowy) Sunday everyone!! Susan


Fun Friday Cash Giveaway!

Well, it’s finally Friday. Somehow we made it through this week of unending snowfall (with more on the way!), school closings and Super Bowl parades-yay, Patriots! As a way to welcome in February, I’ve teamed up with some generous fellow bloggers from All Bloggers United

All Bloggers United Facebook Group

for a little fun Friday Cash Giveaway called Treat Yo Self!

Treat Yo Self $$$ GiveawayJust enter using the Rafflecoptor form below. So, what can you do with $100?? Well,  you can  just take a winter break…dine out, have a spa day…or perhaps a little retail therapy-just make sure you use it to treat yourself! From now until February 18th, you can enter here to win a $100 Paypal Cash Prize! Just click the Rafflecoptor link below and follow the simple instructions to enter.


Rafflecoptor Giveaway

Thanks to the following All Bloggers United for participating in this giveaway…

Paint By Number…Vintage Sideboard Makeover

Today’s Vintage Sideboard Makeover brought to you by DecoArt’s Americana Paints and the numbers 1 through 7 : )

Americana Sideboard Makeover on Country Design HomeI’m so pleased to announce that I am now a contributing blogger to the Deco Art Blogger Outreach Program!

DecoArt Blogger Outreach ProgramI use their line of Americana chalky paints and finishes quite frequently and am happy to share my latest furniture makeover featuring their great products with you! This vintage sideboard has been in our family room since we purchased it at a second-hand shop a few years back. Every time I walked in the back door, I was greeted by this drab brown large block of wood.

Americana SideBoard BeforeNo matter how I styled the top, the fact was that it was dark and sucked up all the light in the space. I have been on a painting and DIY overdrive since all of the snow started piling up, and I figured it was high time to take this old wood-paneled station wagon and transform it into a bright, shiny red cadillac. Here is the how-to:

1. Cleaned the wood surfaces. The top was not part of the original piece, it was constructed with reclaimed wood, attached and sanded down to a clean blonde wood (but not by me-thanks to whomever did this step for me : ) Which is how has remained until I got inspired. Because the plank wood was quite pretty in its raw state, I knew I did not want to paint it, so decided to wax/stain it instead.

Americana Vintage Sideboard Top Before Unfinished2. So I finished the top with two coats of Americana Crème Wax in Golden Brown, allowing time to dry between the coats, which enhances the color and grain of the wood while providing a beautiful glowing finish.

Americana Creme Wax Golden Brown RagThese waxes are water based, have no odor, are very easy to apply and clean up. You paint on or wipe on with a soft rag,

Vintage Sideboard Wiping on Golden Brown Wax on Topthen wipe off the excess. If it gets too tacky while you are working, you can dampen the rag to soften the wax and smooth the edges. Allow to dry, then buff with a soft cloth.

3. I was on the fence about the wood knobs-whether to replace them or not-when I realized they were screwed and glued into place. Decision made. I taped them and painted around them to keep the wood knobs to match the wood top.

Americana Painted Sideboard Taped Off KnobsFor the doors and drawers, I painted them with two coats of Americana Chalky Paint called Primitive, which is a creamy greige (that’s a gray and beige combined). Using Americana stencils and Chalky Paint called Relic (a deep charcoal gray) per my No-Fail Stenciling Techniques, I added the numbers to the drawers and doors for a touch of whimsy, then sanded the edges and finished with a coat of Americana Clear Creme Wax. 

Americana Vintage Door Panel Antiqued4. I decided to antique the doors’ center panels for a little bit of color and contrast, so I taped them off, then painted with two coats of Americana Serene Blue Chalky Paint.

Americana Painted Sideboard Serene Blue Chalky Paint5. Allowed to dry, then painted with a coat of Americana Crackle Medium. This is a clear finish that you paint on to a sealed or painted surface, then allow to dry. As it dries, it crackles the paint underneath it and antiques it at the same time. If I had the time-lapse option on my camera, I could’ve shared this process. But trust me when I tell you it looks like a science experiment! The thicker you paint it on, the more crackling appears. In this case, I put it on really thick and most of the blue paint actually crackled off.

Americana Vintage Sideboard Door Panel FinishedWhoops. But I was OK with that, as it gave the panels the appearance of old paint that had been worn away by time and use.

6. For the body of the piece, I had decided to paint it an antique red to co-ordinate with the rug that sits directly in front of it. The plan was to paint with two coats, then add the darker wax finish. But, when I started painting the Americana Chalky Paint in Romance Red

Americana Chalky Paint Romance Redover the dark brown finished wood (remember, with these paints you do not need to prep or sand…just paint away!)

Vintage Brown Sideboard Panel BeforeI got a little panicky because it was really, really bright!

Americana Painted Sideboard Romance Red Chalky PaintBUT, then a miracle happened (not unlike that end zone interception with 30 seconds left in the game last night…) it basically antiqued itself! I painted it on, then wiped off the excess with a rag,

Americana Chalky Paint Romance Red Wiping Offessentially staining it red while allowing the brown tone and grain of the wood to show through! The chalky paint acted like a stain, allowing me to leave on as much or little as I preferred to get the perfect shade of antique red. I love it when the unexpected happens…in a good way : ) Had I preferred, I could have painted the entire piece with the two coats of red and then waxed with the darker finish. But this was so much easier! So all it took was one quick coat of paint on the wood, wiping it off, allowing it to dry, then coating with the Americana Clear Crème Wax, which gives the entire piece a bright, glowing finish.

Americana Painted Sideboard Closeup TM7. After I re-affixed the doors back onto the sideboard, I then re-staged it with some of my favorite things. And although much of those are the same, the entire wall takes on a whole new look with this bright, fun Americana Vintage Sideboard Makeover. This sideboard is a very functional piece of furniture in our home, holding a variety of household items like glasses, batteries, candles and more-essentially one large junk drawer…now when Coach asks me where I can find the IPhone chargers and cases, I can direct him to drawer #5!

Americana Sideboard Drawer #5Thanks to Deco-Art for supplying the Americana Chalky Paints and finishes but allowing me to use my own DIY imagination. Hope you all had a Super Sunday, everyone-I know we Pats fans sure did!  Time for some more snow shoveling… but at least we’ll know where to find our winter scarves…behind door #6!! Xoxo Susan


Crown Molding Installation…Kitchen Makeover Redux

Hey, so it’s been awhile since we visited the thrifty transformation of my mom’s kitchen. My last episode of the kitchen makeover saga was the installation of the travertine subway tile backsplash...and that was back in the fall! I’ve been slowly making my way through multiple projects, including transforming a charming bookcase for all of mom’s cookbooks, painting the adjacent dining room, adding a shelf…but mainly I just kept putting off the crown molding installation along the top of the cabinets…because I simply didn’t know how to do it. This is the before picture, with painted and glazed cabinets ready for their crown. They just look so square…

Thrifty Kitchen Makeover Before Crown InstallationI had attempted crown molding cutting in the past, with miserable results. I just couldn’t figure out all the angles…until I found Sawdust Girl on Pinterest!

Crown Molding Illustration via Sawdust Girl

Crown Molding Illustration Courtesy of Sawdust Girl

This tutorial with the photos and graphics is simply the best with the most complete and least confusing instructions for the proper installation of crown molding. My post today is not actually the how-to, I am leaving that to Sawdust Girl to show you the way…to a crowning achievement! I am simply sharing a few do’s and don’ts for your reading pleasure. I downloaded these pics onto my phone for easy reference as I went along. I referred to them continuously while I was trying to figure out which way to mitre and bevel.

Outside right

Crown Molding Outside Right via Sawdust Girl


Outside left cut:

Crown Molding Outside Right via Sawdust Girl

Crown Molding Outside Right via Sawdust Girl

As I was trying to figure out how exactly I was going to find 36.1 and 33.9 for my bevels and miters (kind of sound like I know what I’m talking about, right?), I looked more closely at my Ryobi Miter Saw and lo and behold, the numbers were right there on the saw! With a locking position for each one-woo hoo!

Crown Molding Ryobi Saw Mitre MarksWith a sigh of relief I started my measuring and cutting according to Sawdust Girl’s instructions. It made me feel a little better when I was reading her instructions and she said that she gets confused every time she does these cuts! So, its not just me…

The first cut may be the deepest, but the last cut is the scariest. This is the final cut to the exact measurement of the length of the piece. Fortunately my little Ryobi Miter Saw has a laser beam that helped keep my on the straight and narrow : ) Too bad that laser couldn’t make the cuts as well…

Crown Molding Ryobi Chop Saw Laser Mark

This is the money shot, the one you cannot screw up or you have to start over. Which I did, more than once, despite Sawdust Girl’s best efforts to guide me.

Crown Molding Perfect CutsNOTE: A big DON’T. In the middle of the installation, DO NOT offer to cut some wire flower stems in your little miter saw for your mom’s spring flower arrangement she is working on in another room…because you’re procrastinating and not cutting molding. They will melt and get all twisty and stuck in your saw blade.

Crown Molding Wire Stems Stuck in SawWhich require an hour of your time to take the saw apart and remove the twisty wire.

Crown Molding Twisted and Melted Wire StemsOnce the cuts were made, it was time for the installation. Now, with short pieces, its pretty easy to hold it with one hand and hammer it in with the other as long as you hammer the nail into the trim 1/2 way to get it started. (Well, actually its not that easy, and I am totally getting a nail gun, despite Coach’s fear that I will somehow maim myself with an errant shot.) But with the long pieces, its near impossible to attach one end if the other end it hanging down. Sometimes you just need your mom…to use her fabulous zebra broom stick to hold up the other end while hammer yours into place.

Crown Molding Install Mom holding other endThere…installed crown molding!

Crown Molding InstalledI finished one section, then had to leave for the day. When I returned the next day to finish up, I was delighted to discover that the molding I had installed was still hanging proudly on the cabinet! Yay! I finished the install, using a hefty amount of spackle to fill up those nail holes and even out the corners…which were not quite as perfect as I would have liked. But, hey, that’s why they invented spackle, right? So here is the finished molding, my crowning achievement in the Thrifty Kitchen Makeover, all painted and glazed to match the cabinets. Is it perfect? Heck. no! But it looks great and mom is loving it…and that is all that really matters.

Crown Molding Painted and GlazedA special thanks to Sandra Powel AKA Sawdust Girl , my new DIY BFF, who gave me the courage to make those cuts and finally finish the crown molding installation! Just a few more tweaks and we’ll be ready for the final reveal. Hope you achieve something special today as well! Susan


New Life For An Old Cupboard-Without Paint!

When Coach first acquired this unpainted vintage glass front cupboard, my first inclination was to paint it, distress it and add some new knobs.

Vintage Glass Cupboard Before

But every time I walked past it, for some reason it tugged at my heartstrings just a bit, although I was not sure why. We don’t have anything else like it in our home, and its just a simple little cupboard…one that you would find in your grandmother’s kitchen. And then it hit me…it was reminiscent of my grandmother’s kitchen table…the same wood color, the same glowing finish. So, as an homage to time gone by and Sunday Pot Roast dinners at my grandmother’s house, I decided to clean it up, shine it up and give it new life, but to leave it unpainted. Some old furniture just screams for a coat of paint and some embellishment, but this vintage hutch quietly begged to be restored to its former quaint and simple beauty. It was quite dirty and greasy, so I cleaned it up with some household cleaner. I was left with a rather splotchy finish…it appears that someone along the way decided to add a layer of varnish or stain in a rather streaky fashion. Using some Mastercraft Poly Gel Wipe On Stain,

Vintage Cupboard Mastercraft Wipe On Gel StainI attempted to even out the overall color as best I could. You simply paint or wipe the stain on,

Vintage Cupboard Side Panel Gel Stainlet it sit for a couple of minutes, then wipe it off, leaving as much or as little as you would like.

Vintage Cupboard Front Panel Gel AppliedYou need to work quickly and in small areas, as this stuff gets tacky fast. (It is a bit smelly, so despite the below freezing temps, I had the window open and a fan running continuously.) Once all of the wood was finished, I decided to add some vintage wallpaper to the back of it to add some color…this fresh green check is simple and looks like it could have been in grandma’s vintage kitchen.


Vintage Cupboard Check Paper Background and Drawer LinerI papered the back using decoupage glue…this wallpaper was not pre-pasted, and then followed suit with the drawer as well. The hinges were dirty and in need of some cleaning,

Vintage Cupboard Hinges Varnishedso I left them, along with a bottle of brass cleaner for Coach to use, thinking that would do the trick…until he called me and said it wasn’t working. So I instructed him to try the silver cleaner…again no luck. So I took another look at them, first thinking it was rust and then finally realized that whoever varnished the piece left the hinges in place and varnished right over them! Time for the heavy duty stuff: this LIFT-OFF varnish remover does the trick,

Vintage Cupboard Lift Off Varnish Removerhas very little odor and is water-based…so not too offensive to use indoors. I put the hinges in a metal tin with the remover, waited 20 minutes, scrubbed with a little warm water and an old toothbrush (do you save yours? I always do, just for times like these…,)

Vintage Cupboard Scrubbing Hinge with Toothbrushthen buffed with a bit of steel wool and they were good to go.

Vintage Hinge Buffed with Steel WoolI love the detail on these hinges…very art deco, and matched to top crown of the piece,

Vintage Cupboard Refurbish No Paint Top Crownwhich helps to determine what time period it originated from. There were six rather beat up wood knobs,

Vintage Cupboard Knobs Beforeso I replaced the glass door hardware with some cut glass knobs,

Vintage Glass Front Cupboard with Glass Knobsthen crackled and painted the door and drawer knobs to match the green plaid paper.

Vintage Cupboard Crackled Wood KnobsFinally, I filled the finished piece with some of my milk glass collection…can this be any cuter!?!

Vintage Cupboard Finished Filled with Milk GlassIs the finish perfect? No. I would’ve had to strip the entire piece down and start fresh if that was the look I was hoping to achieve. What I wanted was a fresh piece of furniture that looked as if it had been used and loved and worn, so that it would tug at someone else’s heart strings. Then they would use it for their own collectibles and kitchen wares…and someday their grandchildren would remember it fondly.

Vintage Glass Front Cupboard FinishedBecause, alas, I have no room for it in our home, so this one is in the Barn at Todd Farm if you’re interested in taking a look. Have a fresh new week, everyone! Susan

Wedding Date Chalkboard DIY

If you have been following my blog, you know that 2015 is the “Year of the Wedding” in our family. Our daughter and her fiance have set the date and plans are well under way for what we hope will be a great wedding weekend come this August. Of course, since we are a DIY kind of family, lots of the decor will be created by yours truly, with assistance from our multi-talented family and friends. One of the first things the newly engaged couple did…other than book the venue, the band, the photographer and the florist…and buy a dress, or two…was schedule a photo shoot for their engagement photographs. Since their dog Bartlet is such a big part of their lives, there could be no photos taken without the little guy in tow. The engagement photos are courtesy of Marcy Rolerson Photography and were taken in the North End of Boston.

Bartlet Photo Courtesy of Marcy Rolerson PhotographyMy daughter requested that I create a small sign with the wedding date that she could hang around his neck or attach to his collar, so I created this Wedding Date Chalkboard Sign. It is so simple and makes a really cute addition to the engagement photos, don’t you think?

Wedding Date Chalkboard Marcy Rolerson PhotographyHere is the How-I-Did-It:

1. I found an old chalkboard kicking around my workshop, but you can purchase these at any local crafts store.

Wedding Date Chalkboard Before Sanded EdgesSince Bartlet is mighty in personality but quite small in stature, we had to make sure it was little enough so it wouldn’t hang on the ground once it was attached to his collar. I dry-brushed it white and then sanded the edges, just for a bit of rustic contrast.

2. I created the chalkboard pattern on Avery.com.

Wedding Date Chalkboard Avery.com Screen ShotThere are a limitless amount of fonts and styles to choose from on this website, typically used for designing labels and cards. Design what you would like, then re-size it to the dimensions of the surface of your chalkboard. Simply print it out on a regular piece of copy paper that has been cut to the size of your chalkboard.

Wedding Date Chalkboard Printed Pattern3. Coat the BACK of the printed paper with the chalk-rubbing with the side of the chalk all over the surface until it is covered.

Wedding Date Chalkboard Coating Reverse Side of Pattern with Chalk4. Place the chalk-covered pattern on the surface you are transferring it onto-tape it down along the edges to secure-then take a sharpened pencil and trace the lines of the pattern onto the chalkboard.

Wedding Date Chalkboard Tracing Pattern with Pencil5. Carefully remove the paper pattern from the board and you will see the transferred pattern, faint but there.

Wedding Date Chalkboard Peeling off Pattern from Chalkboard6. Sharpen your chalk…did you know you can sharpen pieces of chalk with a little pencil sharpener? No? well, now you do!

Wedding Date Chalkboard Sharpening Chalk with pencil sharpening7. Begin tracing the transferred pattern with the chalk, re-sharpening as you go until the entire pattern is clearly defined. Try not to press on the paper other than what you are tracing, otherwise you’ll have more chalk than you bargained for on the chalkboard.

Wedding Date Chalkboard Re-chalking Printed Chalk8. To clean up the edges and smudges, you will need some Q-tips and water.

Wedding Date Chalkboard Q-Tip and Water CleanupJust dip the tip into the water, then squeeze most of it out until it is damp only. Use the dampened tip to wipe away all of the smudges and unwanted lines.

Wedding Date Chalkboard Cleaning up Chalk with damp Q-tip9. I had originally added some side scrolls on the printed pattern, but decided to erase those and add some color instead. That’s the beauty of chalk-simple to erase and start over! So I used some scroll stencils to create the blue side scrolls.

Wedding Date Chalkboard Stenciling Scroll Pattern10. It’s simple to make a perfect dot! Dip the butt end of your paint brush into the paint-just the very tip-

Wedding Date Chalkboard Paint Dot

and then dot it onto the board. The bigger the brush end, the bigger the dot. Makes a perfect circle every time.

Wedding Date Chalkboard Adding Paint Dot Embellishment11. The finished wedding date chalkboard. Now at this point, you have some options. I actually drilled two holes in the top and added the raffia rope for hanging, but you won’t need to do that if you are planning on hanging it on a wall rather than a dog. If you don’t have a drill, you can hot glue the rope or ribbon to the top- this piece is super light-weight so it should be fine.

DIY Wedding Chalkboard By Country Design Home12. Also, if you want this to be permanent, then you would just need to spray it with a light coating of varnish or acrylic finish so it doesn’t smudge or erase. NOTE: You cannot brush on a top coat because it will smear the chalk. Or, you can keep the painted pattern on there and use the chalkboard again (perhaps you could update it each anniversary with a new love message : )

13. So here is Big B with his chalkboard sign attached to his collar. Apparently he was quite the rock star that day and posed perfectly for the camera. Thanks to http://www.marcyrolerson.com/ for the beautiful photographs!

Wedding Date Chalkboard Bartlet with SignAnd we’ll just chalk this one up as wedding project number one-done! Have a terrific Thursday, everyone! Susan

Being Sick (& Yummy Sea Salt Caramel Pretzel) Bites

I’ve been sick these past few+ days with some sort of flu or cold or whatever is “going around”. Sick as in I couldn’t go to work, couldn’t attend the annual neighborhood Christmas party and essentially just found myself lying on the couch for hours watching Hallmark Christmas Movie Marathons. This week so far has been a total frustrating fail for me. I kind of felt like this guy-agghhh!

Sea Salt Caramel Bites SnowmanNo big DIY projects, no blogging, no nothing, other than trips back and forth from the couch to the fridge to the pantry to open yet another can of soup or box of crackers. Coach would leave saying “my poor darlin'” and come home hours later with me still in the exact same position on the couch and say “really??”-lol-he’s not used to seeing me doing nothing, and I mean nothing-not a paint brush or sandpaper in sight-for days. But, you know, it hasn’t been all that bad. This little forced break given me an opportunity to step back and take stock of what I’m doing with this blog and the barn shop and start implementing a plan moving forward that doesn’t result in me being so run down and exhausted that I end up lying on the couch watching endless Castle reruns and stocking up on kleenex tissues whilst staring at a large, dark green evergreen in the corner of my family room.

Blank Christmas TreeThe house is not even close to being decorated, because I just didn’t have the energy to open up all of the giant bins and sort them out, never mind actually placing the items somewhere decoratively. Coach and I finally got a tree Monday night (good thing I’m not part of any of those blogging holiday house tours…) & it finally has lights but no ornaments.

Lighted Christmas TreeBUT, today marks a new day and newly inspired (and sugared up : ) by our annual work cookie swap which took place yesterday,

Cookie Swap Platter WrappedI’m on the mend and ready to add some holiday spirit to our home : ) In the meantime, I figured I’d share this yummy recipe for Sea Salt Caramel Pretzel Bites I used for the cookie swap. (And I assured my co-workers that I did not breathe on them and repeatedly washed and disinfected my hands before handling!) The original recipe for Salted Caramel Pretzel Pecan BonBons

Salted Caramel Pecan Pretzel BonBons by Baker By Naturewas via BakerByNature...but mine didn’t come out exactly as the photo (aren’t these gorgeous?!?), but they were still pretty tasty, if not a bit extra chewy! Here’s the how-to:

1. Assemble ingredients: Bag of caramels, bag of pecan 1/2’s, bag of mini pretzels (these I did not have in my pantry),

Sea Salt Caramel Pretzel Bites Ingredients from Walgreenssome melting chocolate, sea salt, holiday sprinkles (these I had on hand). I didn’t have any of the main three ingredients at home, so I ran over to Walgreens since that is the closest store to my home, and I figured they would have the basic snack bags the recipe required. Which they did, which made me happy, so I didn’t have to trek all the way to the grocery store. And they had more kleenex and cough drops too, which made me healthy (sort of). And that is why they are at the corner of Happy & Healthy. So that was a win.

2. Preheat the oven to 325 degrees. Place a piece of parchment paper on a large cookie sheet. Or a small one depending on the # of bites you wish to make. The beauty of this recipe is that you can make small batches as you go.

3. Place the number of mini-pretzels equivalent to the number of bites you wish to make. 12 makes a dozen. 24 makes 2 dozen. Simple math.

Sea Salt Caramel Pretzel Bites on Parchment Paper

4. Unwrap the caramels…meh, not fun. When my kids were little and I needed unwrapped caramels, I used to have them race to see who could open them all the fastest-worked every time!

Unwrapped CaramelsBut the only “little one” I have around me these days is a Frenchie named Bartlet,

Bartland unwrapping caramels is near-impossible without opposable thumbs, unless you want caramels with drool and bite marks. Place an unwrapped caramel on top of each mini-pretzel. The recipe mentioned above called for chocolate mixed with coconut oil and vanilla, so I skipped that step by buying caramels that were coconut and vanilla flavored. Right?!?

Sea Salt Caramel Pretzel Bites Caramels on Pretzels

5. Place in oven and bake just until they soften. Now the original instructions said 7-8 minutes, JUST TO SOFTEN. But, I left mine in a bit too long (I swear I was watching them, but then I got distracted and…they over-melted. So I scrambled to put the caramel back onto the pretzel by taking a small knife and scooping it back up.

Sea Salt Caramel Pretzel Bites Over Melted Caramel

6. Quickly place a pecan 1/2 on each one. These look pretty messy because I was placing pecans and scooping up oozing caramel lava as I went along.

Sea Salt Caramel Bites Scooping Melted Caramel Over Pecan

If you melt them correctly, you won’t have this problem. Lightly sprinkle each with sea salt. Good thing sea salt is a thing right now, because I have this giant cannister full that will probably last me forever!

Sea Salt


7. While they cool, you melt the bag of chocolate in the microwave according to the directions. These are the bags of Wilton Candy Melts you can get at your local crafts store. They have many flavors and colors, but I happen to like my chocolate dark, especially when mixed with salted caramel.

Sea Salt Caramel Bites Wilton Candy Melts Dark Cocoa

I always use a heavy bowl and cook in the microwave on high, the first go round for 30 seconds, then take it out and stir.

Sea Salt Caramel Bites Melting Chocolate Disks

Then every 15 seconds until the chocolate is drippy and all the little disks are melted.

Sea Salt Caramel Bites Melting ChocolateDO NOT OVERCOOK. OR YOU WILL HAVE A BIG SCORCHED BLOCK OF CHOCOLATE.

8. I dipped the bottom of the cooled pretzel in the chocolate, then flipped them over on the parchment to let them dry.

Sea Salt Caramel Bites Dipping Base in Chocolate9. Once dry, I flipped them back over, reheated the chocolate just enough to melt,

Sea Salt Caramel Bites Drippy Chocolate

then drizzled it over the top,

Sea Salt Caramel Bites Drizzling with Chocolateadding a few holiday sprinkles.

Sea Salt Caramel Pretzel Bite DecoratedCoconut is optional as well.

Sea Salt Caramel Pretzel Bites by Country Design Home

10. Allow to dry, then store in the fridge or a cool, dry place. Like my family room. Because we don’t turn the heat past 55. Sweaters, folks!! Unless I’m sick, in which case I got to turn it up to 60-lol! Then you share the goodies with friends and family, because you can’t eat all of them yourself. Or could you….have a sweet Thursday everyone! Susan