Bench Dressing

Not to be confused with ranch dressing,

Bench Ranch Dressing

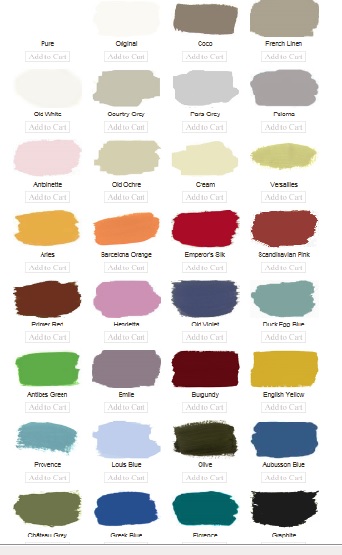
which has much more white than this restyled country bench does! So the bench is finally done and done. From the painting poll that I took on a recent blog post, the colors that won were distressed aqua/blue/gray/mint.

Behr Paint Palette

I have to admit, I tried the mint and it didn’t really work with my nautical vision, so I stuck with the blues and grays. Before I committed to the final colors, I wanted to find the co-ordinating fabrics I was planning to use for the cushions and pillows. Made a trip to my local Joann’s and-go figure-I fell in love with these lobsters.

Bench Fabrics

(Folks that know me realize that this is rather puzzling, as I think that the best part of any lobster is the melted butter : ). Fanciful fellows, bright reds on a background of dark teal. Perfect! Had some difficulty choosing the cushion fabric, but then discovered 1.this gorgeous aqua and navy block fabric that looked to me like nautical flags

Bench HGTV Fabric

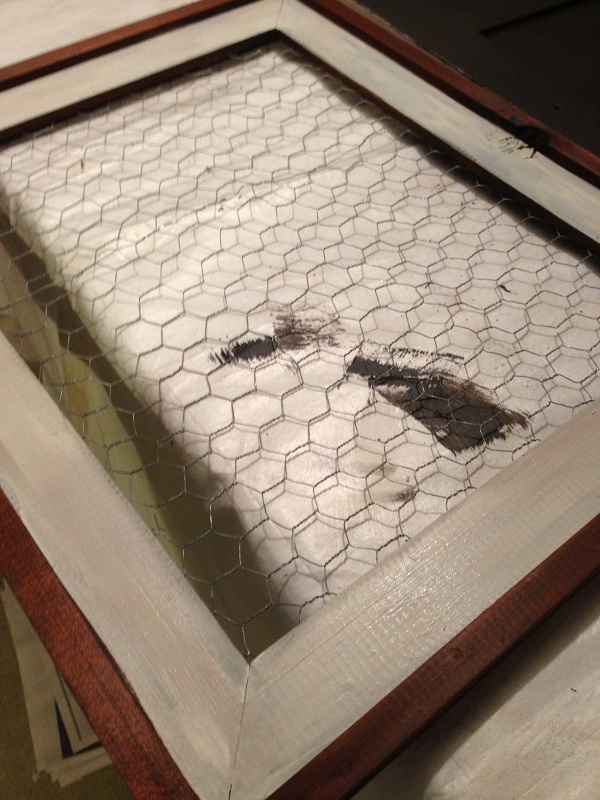
2. and then discovered that, of course, it’s from HGTV-sold! So starting with the old worn bench,

Bench Pediment Detail

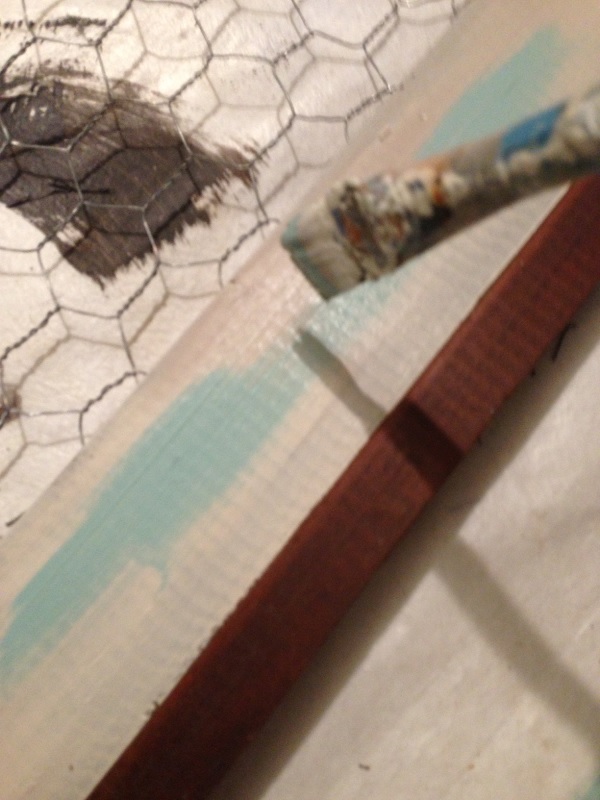
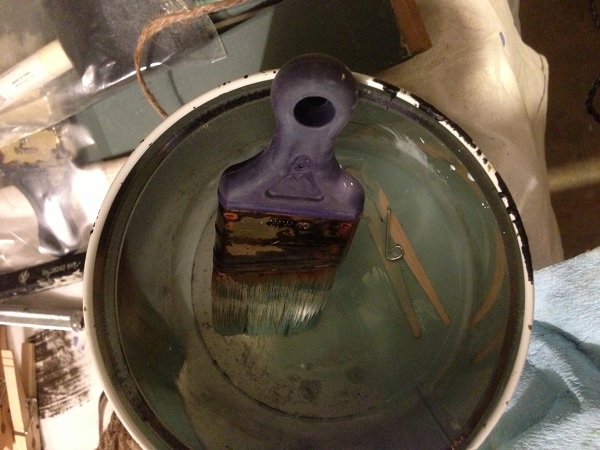
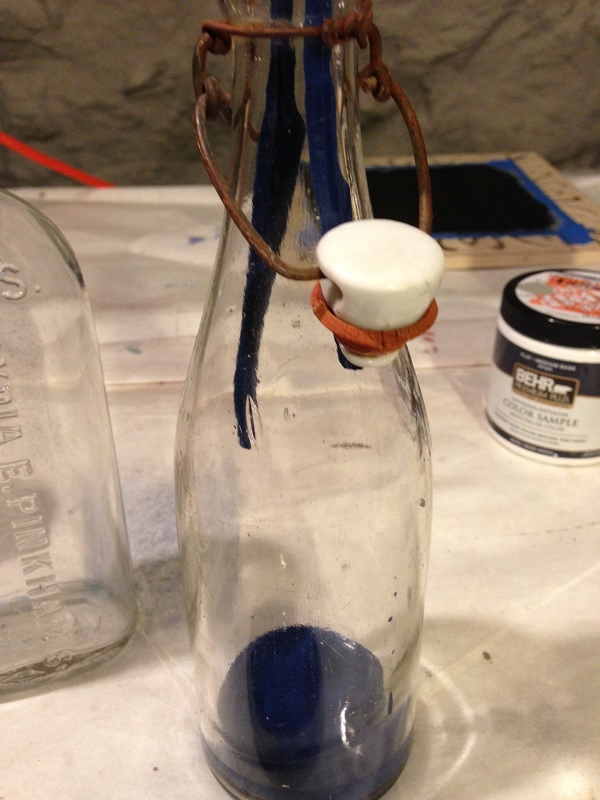
I added a layer of Annie Sloan French Linen, mixed with water to give it a washed look.

Bench Annie Sloan French Linen

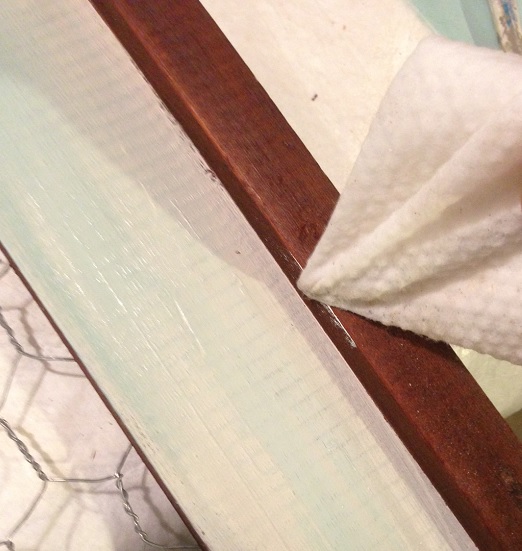
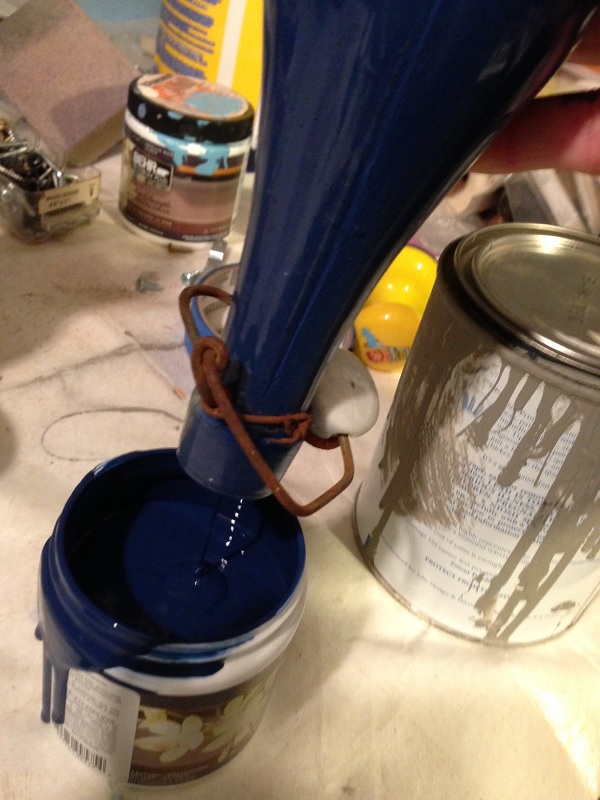
Then I added on layers of Behr’s Gulf Wind Blue, Peaceful Night, Battleship Gray and Gray Morning

Bench Annie Sloan Gray Wash

by dry-brushing to allow the lower layers of paints to be more transparent and add another dimension to the finished product. To enhance the spiral detail at the bottom, I added a touch of dark blue.

Bench Painted

Time to dress the bench! We all know that any delicious salad is just a bunch of veggies in a bowl until you add the spice and flavor with the dressing. Same holds true with decorating-it’s the finishing touches that define the piece. I love layering mis-matched co-ordinating pillows to achieve a casual, comfortable effect. So I started with the HGTV Home nautical flag cushion.

Bench Cushion

Added a large middle pillow-soft and sinkable for maximum comfort, created with two cotton kitchen towels from HomeGoods).

Bench Towel Cushion

The sailboat pillow came next-again, created with an embroidered kitchen towel (also thank you HomeGoods!) that I added the “SAIL” to.

Bench Sail Pillow

The next pillow was lobsters and sailboats with star buttons, both of those from Joann’s Fabrics.

Bench Three Pillows

When I stepped back to admire the bench, utilizing the squint test, I realized it needed one red item in the center. One more nautical towel, surrounded by the flag fabic, completed the vignette.

Bench Completed

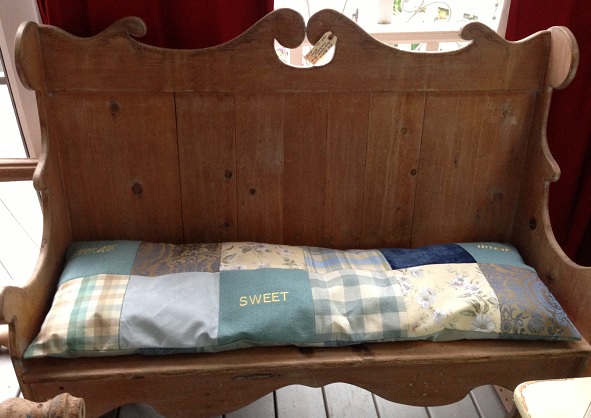
The finally finished, decorated bench is now sitting proudly in the perfect spot on my country styled summer porch that is now patiently awaiting spring. Which cannot come soon enough! Susan


Chicken Wire Memory Frame

Today I am sharing a simple D.I.M. (Do It Myself) project that’s fun and quick and pretty simple, assuming you have the right tools and stuff. I saw something similar to this at HomeGoods awhile back and thought, gee, I have some chicken wire and an old frame, I can make that!

Chicken Wire Memory Frame Blue

So I did. Here’s the how-to:

1. Ask Coach if he knows where that old frame and the chicken wire is. He disappears into the barn, and a few minutes later he emerges with both in hand.

Frame and Chicken Wire

2. Fix the frame- it was a little old and dinged and faded, so I glued the edges and added a touch of Minwax to brighten it up.

memo board minwax

I painted the inside edge, first with a coat of off-white, then I dry-brushed it with Gulf Winds.

Dry Brush on Frame

Dry-brushing technique is what it sounds like: take a small amount of paint on the brush, then wipe most of it off onto paper.

Dry Brush Technique

You lightly brush the surface with the remaining paint, which gives you a soft, aged look.

Chicken Wire attached to frame

I always keep a supply of wet wipes to clean up the many errant paint marks I make along the way. To get into really tight spaces, just wrap it around the end of a flat head screw driver-perfect edge!

Wipes on edge of frame

3. Cut the chicken wire-turns out that scissors work just fine. But not your good sewing scissors, unless you want to go with the raggedy look the next time you are cutting taffeta!

Cutting Chicken Wire

4. Attach the chicken wire to the back of the frame. This got tricky because I couldn’t figure out what would work. Tried my electric staple gun- those staples were too big. Then I tried thumb tacks. Well first I had to find some thumb tacks, which you would think would be a breeze considering I have a “thumb tacks” drawer in my little nail organizer. NOT. Anyone need a giant bolt?

Thumb Tack Drawer

So I went to the junk drawer- please tell me you all have a junk drawer that looks like this?!

Junk Drawer

Nope, none there, either. Finally found a few, along with an American flag pin-so that’s where that went!- in my desk drawer.

Tacks in Drawer

And so, after all that, I tried the tacks and guess what-big fail!

Chicken Wire with tack

I would push them into place, then as soon as I tugged on another corner, the wire would slide over and the tack would pop off! Next option, my trusty old Bostitch stapler, which worked great.

Stapler and Chicken Wire

5. Add the decorative lettering. I had a bag of old “fake” Scrabble letters hanging around (doesn’t everyone?), so I used those.

Scrabble Letters

You could put whatever you want, but no profanities please : ) Well, I suppose you could, but it probably wouldn’t sell very well. Then again, maybe it would. Something like The F***ing Egg Plate might work. (If you have no idea what I am referring to, click the link for a good laugh…) So, now you measure out the amount of twine you will require to fit all of the letters.

Measuring twine

Hot glue the letters to the twine and affix twine to the frame with the glue.

Scrabble Tiles Attached

6. Color the clothespins. I threw them in a little can with some watered down paint and stirred them around, then let them sit for awhile.

Paint wash for clothespins

Hung them to dry-the reverse clothespin effect.

Clothespins drying

You’re going to use the clothespins to affix the photos or whatever else you would like to display.

Memory Board Completed

7. Add a picture hanger to the back and you’re done! Cute, simple project. I like the fact that there is no backing, that way you can use it on whichever wall you would like to have as the background color (like the red shown here from my dining room, or the blue above from my hall).

Chicken Wire Memory Frame Red

8. So, I guess for this week’s High Five for Friday will go to chicken wire! It’s cheap, pliable, cuttable with scissors and adds a rustic, country charm to any project you might be considering. Happy weekend everyone! Susan

RitaJos Vintage & Me

True story. Loved this hilarious account by Lisa of RitaJosVintage of the Saturday we just spent wheeling and dealing (NOT) at the Mill 77 Flea Market. The only thing she forgot was the part about all the crap falling from the trees that had both of us sneezing and coughing and popping Benedryls. Apparently nature and flea markets just don’t mix-lol!

Ritajos Vintage

http://ritajosvintage.com/2013/06/04/the-fing-egg-plate/

Thanks, Lisa, for giving me a hearty laugh after more than a couple of days of sadness. Have a terrific Tuesday, everyone! Susan

Mill 77 Outdoor Bazaar

This week’s High Five for Friday goes to Mill 77 Trading Company in Amesbury!

Mill 77

As you may recall, yours truly recently entered and won a staging contest at the Mill-yay team Mother Knows Best! Well, this weekend, for one day only (Saturday, June 1), the Mill is hosting their Macy Street Bazaar from 8-noon.

Macy Street Bazaar

This is a monthly outdoor marketplace event featuring many of the inside vendors, as well as outsiders, like myself. I am teaming up with Lisa from RitaJosVintage

Ritajosvintage

to offer a variety of vintage and “junk-tique” wares. By the way, if you haven’t started reading Lisa’s new blog, check it out! You are in for one hilarious ride : ) We will have refurbished furniture (the finished bench, perhaps?), china, glassware, linens and so much more! Please stop by for a visit-we will be there from 8-noon only! Which means we have to be up at the crack of dawn…I take my coffee iced and black, thanks! Here’s a map: Mill 77 Map

It’s a straight shot up 95 north, or just a quick ride from 495 (unless you are using your car’s compass, yes, COMPASS, in which case you may find yourself driving through cow pastures and hayfields…just saying) Have a sunny weekend everyone, hope to see you at the Mill! Susan

Bench Voting Update!!

Woops! As the votes have been coming in, I realized that there is no way for me to track who is voting for what!! So if you do vote, please send me an email at countrydesignhome@gmail.com, post it on my Facebook Page, add a comment in the comments section at the bottom of the blog post or Tweet it to me here: https://twitter.com/countrypretty I am country pretty on Twitter.

Keep the votes coming!! Add your own ideas if you’d like : ) Susan

I’m Being Benched…

…due to my inability to make a clutch painting decision about this fine pine country style bench.

country pine bench front

Coach brought this one home last summer, and it has been sitting in the barn, awaiting its transformation. Alas, I have found myself stymied over the best course of action to take to turn this Plain Jane into a showpiece worthy of Vintage Thymes. I brought it to market last month, as is, with a cute embroidered Home Sweet Home cushion

Country Design Home Shop

where it sat in the back of my booth, apparently going unnoticed and unloved. Didn’t help that it was covered with stuff and completely overshadowed by its glamorous booth-mate, the shutter table : ) It has some really nice detail, like this curvy pediment top,

country pine bench top detail

and the circle cutouts on the bottom. As you can see, it does have a worn white-washed finish on it.

country pine bench front detail

Typically, furniture speaks to me (I know, I know) and the choices become apparent-painted, stained, crackled, sanded? But, the next market is almost upon us, I am still at a loss, and nothing has been done to highlight this piece! So it’s time for the seventh inning stretch and a trip to the hot dog stand for a dog and a cold one.

fenway franks

While I’m gone, I am hoping that you can pinch hit for me and decide what to do with this fabulous country bench!? My assumption is that it will reside on someone’s porch or deck, hopefully with a view of the ocean (wouldn’t a brightly colored bench look amazing on this porch!?!)

Porch white

Presently, the bench sits sadly on my back porch, where everyone who sees it says “Wow, that’s really nice”. Hmmm. But leaving it alone is no longer an option.

country pine bench side view

That being said, most New England homes are painted white, and the ones along the shore are typically weathered gray, so I am thinking that a pop of color, or Annie Sloan Graphite with a hint of color underneath is the way to hit a home run with this piece. Like this great piece from Lily Pad Cottage

Annie Sloan Painted Hutch Lily Pad Cottage

Or, I could even transform it like Mr. Whale Table here-I am ditching the cushion, so don’t worry about matching that!

 Whale Table Center

So, I am leaving this totally up to you. Here’s the deal: click your choice in the box below. You can add your own answer in the blank box-I am certainly open for any and all suggestions! Here is an Annie Sloan Color Chart you can use for ideas. (Just an FYI, probably not going to go with pink…unless you want to buy it and consign me to paint it pink for you…)

Annie Sloan Paint Colors

There is a one day limit on the poll, because it needs to be transformed over this long holiday weekend. The choice with the most votes wins, I will paint/stain it and show the results right here, and you win one of these cute little chalkboard signs in your choice of colors.

Chalkboard Signs

In the event of multiple choices of the same color, I’ll have Coach pick one out of a hat-or an old batting helmet-for the winner. If you choose other, then write in the box what you think it should be!

batting helmet

Thanks, and good luck! Let’s hit this one out of the park! Susan

Brimming With Fresh Ideas


Aqua Thunderbird

Whew! Another epic road trip adventure to Brimfield, via Framingham for a flea market stop and Palmer for an old church fair before we even reached the big show! This was the car after those stops, not much room left…

Brimfield Car Before

But once we had arrived, it was a go! Hours of walking, shopping, chatting and checking out what was hot and what was not. The hotBrimfield Signs Color

 of the year, if I was judging Brimfield trends? Fresh minty green

Mint Lamb

Mint Wicker Table and Dresser

Mint Statues

and pastel blues (ah, my dream truck- if only I had won the mega millions last night!)

Brimfield Aqua Pickup Truck

and not an orange anything in sight. This time it was all about more natural, muted colors

Brimfield Basket Pile Rustic

and pastel hues.

Brimfield Distressed Cupboard and Pitchers

Brimfield Vintage Stove

Worn, distressed, milk-painted and Annie Sloan’d furniture as far as the eye could see!

Aqua Desk

Even an old junky ladder takes on a new life with a coat of distressed blue paint : )

Mint Ladder

And architectural panels become dear hearts with some tin snips, satin ribbon and a few crystal baubles.

Mint Green Tin Heart

This year, the trend seemed to move away from industrial chic, and more into schoolhouse rock. Loads of old desks, chairs, science lab tables and beakers and lockers, lots of lockers.

Brimfield Barn Mint Lockers

“Sign, sign, everywhere a sign

Brimfield Signs Wood

Blockin’ out the scenery, breakin’ my mind

Brimfield Signs Parking

Do this, don’t do that,  can’t you read the sign? “

Brimfield Signs Warning

by the Five Man Electrical Band

Just wondering, where are people getting these signs? They all seemed to be in mint condition- are they climbing up poles under the cloak of darkness and taking them to sell at flea markets? These street signs were everywhere-and so not cheap either!

Along our five mile journey on foot, we came across this booth by Cari Cucksey from Cash & Cari. Loving her re-purposed sign.

Cash and Cari Sign

Her booth had all sorts of cute, remade, recycled products like these old license plate bags.

 Brimfield Cash and Cari License Plate Bags

And piles of plastic letters and numbers- one can only imagine where these originated!

Brimfield Cash and Cari Letters

This year, Nancy & Robin from Vintage Thymes Monthly Market had a fantastic booth representing the Norwood shops- they both look pretty great considering they had been working in a tent for a the past week!

The Girls from Vintage Thymes

As decorating trending goes, so does lighting. While last year’s lamps leaned more towards turbines and propellers, this year’s standouts were Steampunk-meets-Back-To-The-Future-inspired style.

Lighting Industrial Gears

Fanciful, intricate designs from fabulous, creative minds.

Brimfield Lighting Steampunk

Not to be unnoticed, these mid-century crystal beauties from Collection by Kelly McDonnell caught my eye as well.

Brimfield Lighting Crystal Orb Chandelier

What’s a market in farm country without some animals? Horses were big this year (well, they are big as a rule, so popular would be a more appropriate descriptive term)

 Animal Horses Animal Horse Head Animal Horse and Indian

but taxidermy appears to be making a comeback as well. What an angelic face- didn’t even know what hit it!

Animal Doe Head

And who wouldn’t need a gigantic yellow polka dot bear?!? Is the circus in town?

Yellow Dot Bear

Do you think this cage would be big enough?

Brimfield Peacock Cage

These two displays are a study in contrasts: the female mannequins accompanied by an ironing board,

Brimfield Mannequins and Ironing Board

while the male guy (why wasn’t he wearing those jeans, I wonder) was wearing a hard hat. Some things never change…

Brimfield Mannequin Army

Finally, we scored a couple of items: coach discovered this pile of old (well, I think they are old, but after reading Killer Stuff and Tons of Money, you never know what’s been artfully disguised) burlap potato sacks.

Brimfield Potato Sacks

They’re pretty stinky, but have great style and color. I discovered this campy violin shaped coffee table.

Brimfield Coffee Table

The dealer was asking $20, so coach started to walk away. This was the hard sell to me:

Seller Guy: “What do I need to do to make this deal work?”

Me: “You need to make it be shaped like a whale”

Seller Guy (looking befuddled): Why’d you ask me the price if you wanted a whale table and not a violin table?”

Me: “I was thinking I could make it into a whale.”

Seller Guy: “OK, you can have it for $10”   Sometimes it works when you act like you don’t have a clue…

At the end of five hours of traipsing through endless rows of tents, filled with anything and everything, I kind of felt like this guy.

Brimfield Crash Test Dummy

Dusty and exhausted. Destined for a crash landing. Which I did, in the car on the way home…but I can’t wait for July!! Have a sunny Sunday everyone! Susan

Pretty Painted Bottles

Hey, it’s High Five for Friday time! But this week I am calling it Freakin’ Fun Friday, because I want to share with you this super fun craft project – any one can do this, it’s quick, easy (a little messy) but soooo country pretty!

The Painted Bottle Project

Browsing Pinterest the other night, I came across this project from Work In Progress Kits and literally jumped off the couch and said “I can do this!”. Coach and I have collected quite a number of old bottles, some dug up right in our own backyard,

Antique Bottles

some in more recent estate sales and auctions. Many are old, rusted, scratched and lidless, essentially worthless (don’t worry Coach, I didn’t paint the Old Log Cabin Bourbon bottle in the back-turns out that one is worth something!) so I figured this would be just the trick to spice them up! Here’s the how-to: First, you need some clear glass bottles and jars. Anything will do, doesn’t matter if they’re old or new, but the ones with the embossed labels on the outside look especially cool once they are done.

Bottles Clear

Wash thoroughly- I put mine through the dishwasher to make sure I got all of the grease and dirt off. Choose your paint colors. Home Depot has these awesome Behr paint sample pots- for $2.94 each if you want custom colors-but these were in the Oops! Bin for 50 cents apiece!

Bottles Behr Pots

I also have a number of the little craft paints, and those actually work better for the smaller-necked bottles.

Bottles Paint Jars

So I grabbed a pile of paints, assembled my bottles and got to work. You simply take the paint and bottle of choice, pour the paint inside,

Bottles Navy Pour

turn the bottle until it is completely coated on the inside

Bottles Navy Drip

turn the bottle upside down and allow all of the excess paint to drip back out into its original container

Bottles Navy Pour Out

wipe the edge to give it a nice clean finish (loving this little blue bottle with the mint green inside edge : )

Bottles Mint Green and Blue

allow to dry overnight…add flowers, battery tea lights, whatever you would like to decorate. But remember- this is acrylic paint- you can’t use real candles or put water in them! The paint makes the embossing stand out on the bottle- before the paint I didn’t even know there was a ship on this bottle. Bottles Embossed Detail

You can mix and match the paint colors- like the blue and green one above. Or you can stick to all one color- whatever works for your decor. A couple of simple tips: more is better– pour in enough so you are not standing there trying to swirl around a little bit- takes forever! Remember, you will be pouring most of it back out anyway.

Bottles Navy Bottom

Propping for time’s sake. Watching paint drip is almost as bad as watching paint dry. So set up a propping/dripping area where you can set it and forget it until all of the big globs are gone.

Bottles Blue Drip

Keep a container of wet wipes handy. This project does get messy, as you can see by the pics.

Clorox Wipes

These are essential for getting a clean edge on the top of the bottle, and for cleaning off your hands as you go. You don’t want to transfer fingerprints from one jar to the next. So there you have it- super fun project for a rainy day. Simple enough for kids, pretty cool results. Have a great weekend everyone! We’re off to Brimfield on Saturday- can’t wait to share what we find. Susan

The Beautiful Aloha State

It’s Wanderlust Wednesday, and this week we are off to the great state of Hawaii, our 50th state, joining the Union in 1959. Some of my favorite photos from an epic Hawaiian Cruise.           From the highest volcanic peaks and craters

Horseback Mountainside

to the deepest, dankest rainforests

Fern Grotto

and fern grottos

Rainforest

to the smoldering volcanic landscapes,

volcanic crater smoke

this state is a lush tropical paradise,

Hawaii Waterfall

resplendent with colorful flora

Fern Grotto Flower

and fawna (this is the rare Haleakalā Silversword that is found on the island of Maui at an elevation of 6,900 to 9,800 feet on the dormant Haleakalā Volcano)

Silver Leaf Plant

and of course, an occasional peacock. (I don’t know how Coach got this close, but this girl doesn’t chance any bird encounter, no matter how beautiful the feathers!)Peacock Blue

Water, water, everywhere.

crashing surf in Kona

Comprised of 6 major islands and surrounded by the vast Pacific, the Hawaiian islands have shorelines of breathtaking scenery. These “blow-holes”, that give the appearance of whale spouts, are actually created by years of erosion, the pounding surf carving crevices in the rocky ledge that blows through as the waves crash against the shore. And, yes, the water really is that blue.

Maui blowhole

From the cruise ship, the view is to shore, floating by craggy mountainsides in the morning mist,

The Big Island

pretty lighthouses standing watch along the rocky shore

Kona Lighthouse

and amazing sunsets and sunrises

Sunset from the Ship

Sunset from ship

and softly colored rainbows in the distance.

Morning Rainbow

Pearl Harbor. Crowds silently cueing in line, patiently waiting their turn for a boat ride out to view the memorial constructed over the sunken remains of the USS Arizona.

Pearl Harbor Memorial

And on our final evening in this great state, a fitting tribute: fireworks over Honolulu on the 4th of July. Our Independence Day.

Fireworks over Honolulu

Mahalo for stopping by, and have a wanderful Wednesday, everyone!! Susan