Creative Kitchen Makeover-DIY Series-The Prep

Recently, I was asked to sample and review a new paint primer called Kilz HIDE-ALL,

Kilz HIDE-ALL

which happens to be perfect timing for the kitchen makeover I have just begun! My mom, who lives in a townhome (that was once owned by my sister…long story) has been asking for a kitchen makeover for quite some time now. Although the budget does not allow for a full gut-job and remodel, we are using paints, glazes and some elbow grease to create that “French Country” look that she adores. The kitchen is circa 1980’s construction-grade with very dark oak cabinet doors and drawers and veneered plywood boxes. In the center of each door is a white vinyl panel that was glued into place, and the backsplash is alternating 4″ square ceramic tiles in black and white stripes that mirrors the white door panels.

Mom's Kitchen View 1
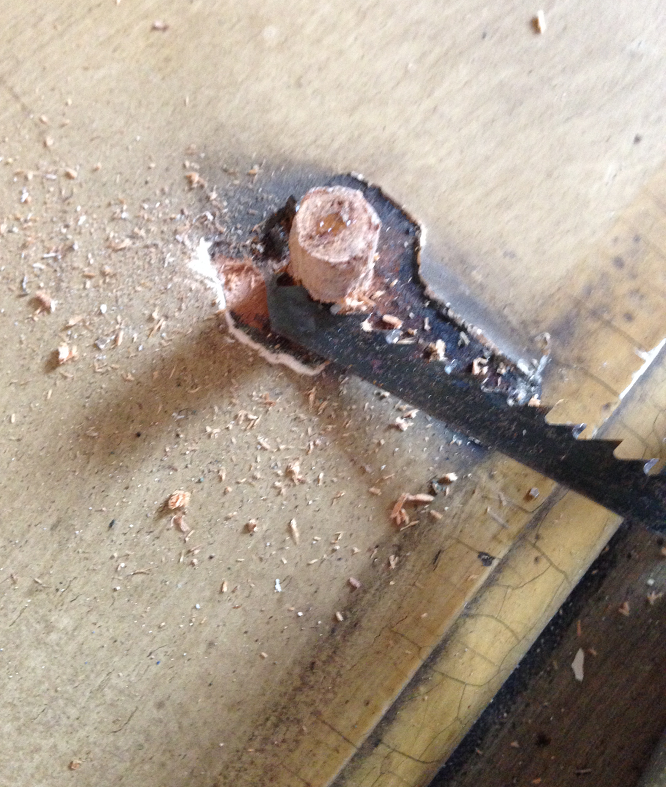
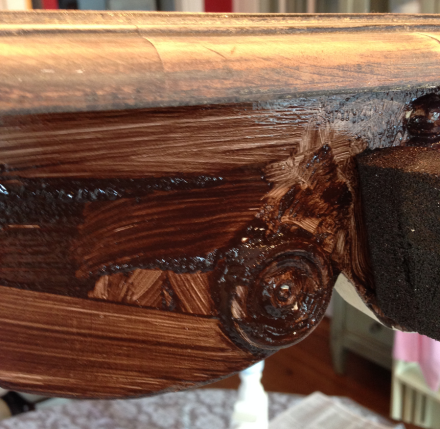
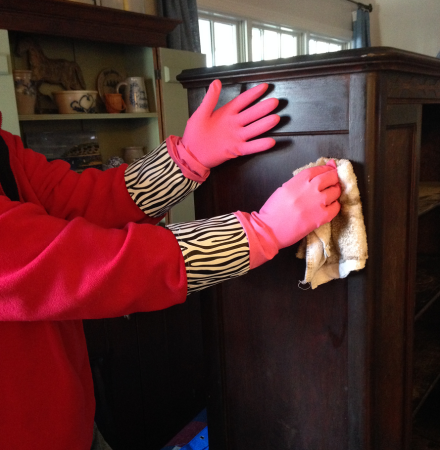
The appliances are fairly new and white, so they are staying, and the floor is a sheet linoleum in a vintage black and white tile pattern, so that is most likely staying put as well. So, everyone knows that the key to a successful painting job is the prep work, which I personally despise, but it must be done! In this case, those white vinyl panels and the adhesive used to attach them had to be removed. I tried many, many de-glossing, de-gooing and de-sticking type products before I could get the edges ready for priming and painting.

Kitchen Cabinets with Vinyl Panels 
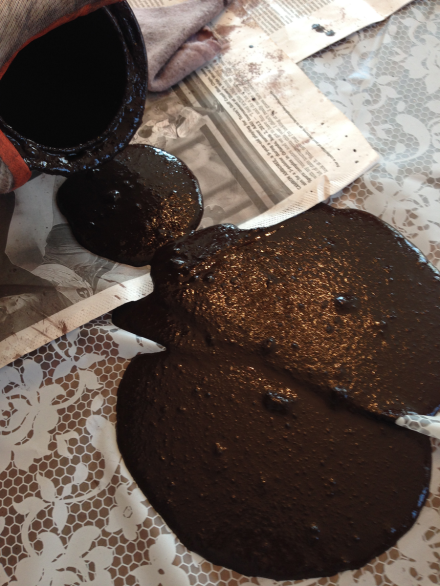
A messy job, but absolutely essential to ensure a good outcome!

Cabinet De-Greasing Fromula 409
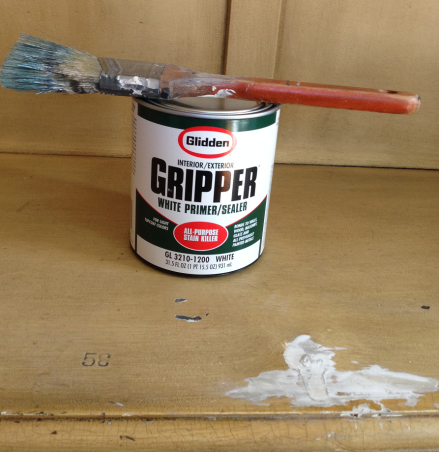
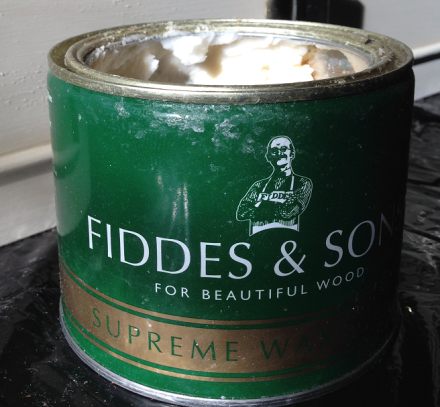
Once that was accomplished, it was time to try the new Kilz HIDE-ALL product.

Kilz HIDE-ALL PrimerThis is from their website:  “KILZ® HIDE-ALL™, a new primer sealer exclusively available at Lowe’s stores across the country. For home interior painting projects of all types—including covering dark colored walls, masking minor surface stains, smoothing out porous surfaces and more—the undercoat offers consumers excellent hide at an affordable price. KILZ HIDE-ALL helps prepare surfaces for painting by evening out porosity and creating a consistent canvas for adding the desired topcoat. With a multi-surface formula, KILZ HIDE-ALL can be used on drywall, cured plaster, woodwork, masonry, concrete block, brick and previously painted areas. The high-hiding, fast drying, latex primer sealer helps minimize issues caused by dark colors and minor surface stains to effectively transform bathrooms, kitchens, bedrooms and more.”

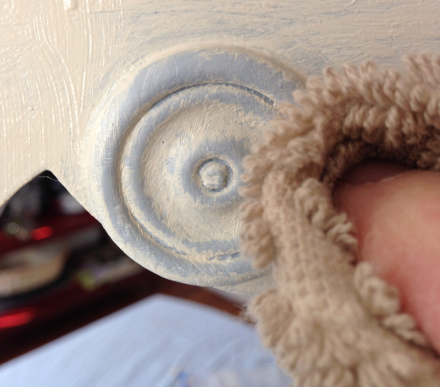
Did the primer live up to the hype? You betcha!! For only $26 and some change for a 2-gallon bucket, what I got was little to no prep work and no sanding-yay! Just a quick cleaning to remove any accumulated surface grease, dirt and dust-and that pesky glue.

Kilz HIDE-ALL Primer
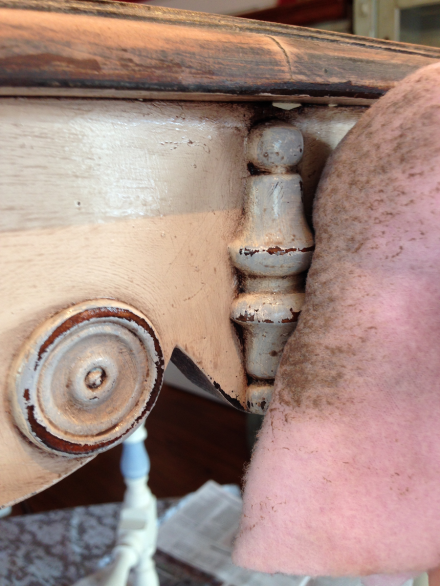
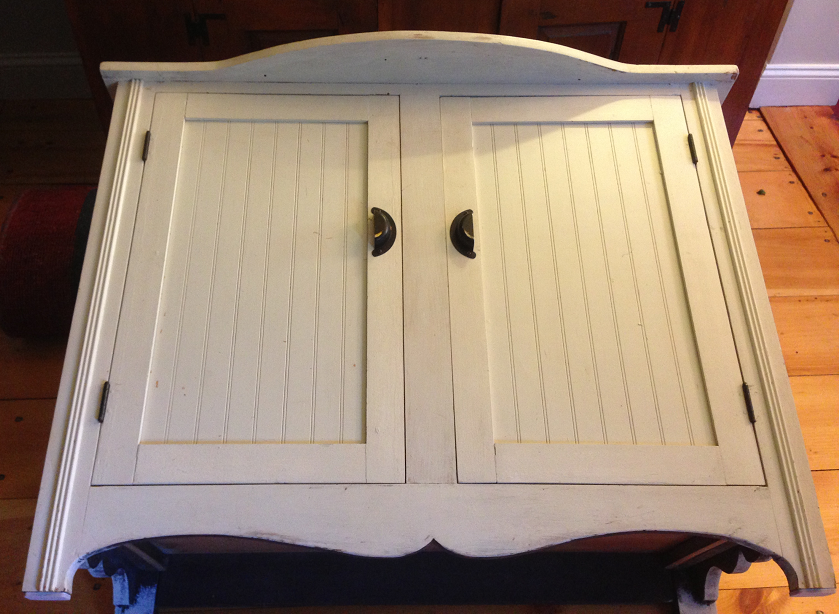
The odorless primer is a creamy white color with a slightly grayish hue. It has the consistency of a watered-down school glue. Very smooth, very little dripping, brushes on easily and cleanly without leaving brush stroke marks and creates a light, bright prepped surface. And a little goes a very long way! Since these cabinet doors have had a lot of wear, the surface finish in some areas was worn away, while other areas were still shiny. The primer covered all of that evenly so that you cannot see the difference. The directions indicate that the primed surface can be re-painted after one hour with oil or latex paint, but I didn’t attempt that, as I am doing this makeover in stages, which I will be sharing as I complete each one. Brushes easily cleaned up with soap and water.  Here is a before cabinet door

Kilz HIDE-ALL Cabinet Door Before

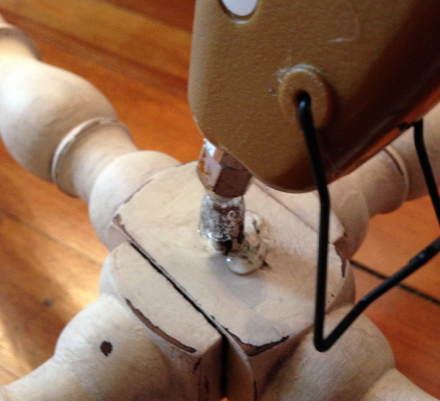
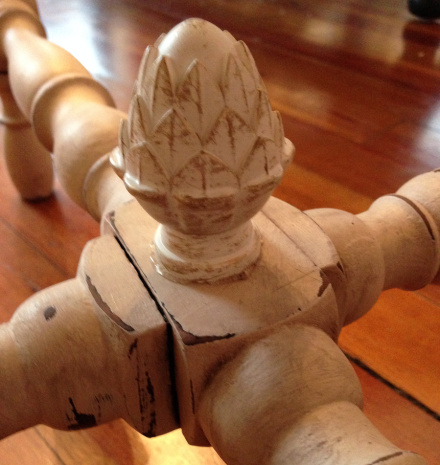
(note the taped #? Prior to removing the doors and drawers to paint them, remember to number them and make a map so you know where they go once you are finished):

Kitchen Cabinet Map
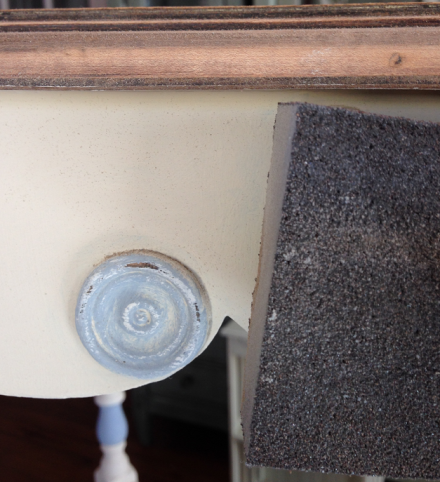
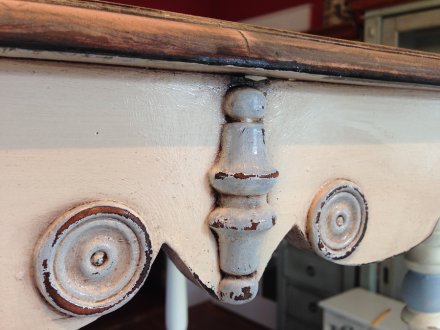
Here is the primed cabinet door:

Kilz HIDE-ALL Primed DoorA perfectly smooth, matte surface awaiting the paint and glaze. But that will be in the next installment! I hope you are having a prime Tuesday, everyone!  Susan

Disclaimer: Although the product in this blog post was provided by the makers of Kilz HIDE-ALL, the opinions expressed are strictly my own and have not been edited or altered in any way. Susan

Cupcake Tower of Terror

These past few weeks have been so incredibly busy with 2 destination weddings and a law school graduation (with the accompanying parties : ) thrown in for good measure. All of which has left precious little time for blogging, never mind DIY’ing! For a spectacular wedding in the clouds this past weekend,

Wedding on Pinnacle Mountain

I had volunteered to make some desserts, specifically cupcakes and mini fruit cobblers in mason jars.

Mini Cobblers in Mason Jars

(I’ll share the successful cobbler story later. Today’s blog is about the cupcakes. And the tower.) Remember those Life-Changing Cupcakes I made last year for a wedding shower?

Chocolate Caramel Sea Salt Cupcakes

Well, I decided to use that recipe again, since those were such a big hit, but we had decided on two flavors for the wedding. The trouble really started with the lemon cupcakes. As I was baking the batches, one would come out OK, the next batch would collapse as soon as I took them out of the oven. As someone who has been baking since I was a kid, and having made my share of wedding cakes as well, I was baffled by this. But, I just kept baking until I had the necessary 6 dozen for the wedding guests. Those fallen lemon cupcakes were a sign…

Fallen Lemon Cupcakes

Now, everyone knows that the proper way to serve cupcakes at a wedding is to buy build a cupcake tower so that it has the appearance of a wedding cake, right? So, I did a little Pinterest research and came up with the best plans (or so I thought) for creating a strong and sturdy tower that would show off the decorated cupcakes. Here is the How-I-Did-It (but don’t you do this…)

5 stacked shelves were created, beginning with a 16 inch base and cutting them smaller in 2″ increments to the top. I purchased a package of cake rounds (these are moisture resistant cardboard that you can purchase at your local arts and crafts supply store).

Cupcake Boards and Foam Core Stacked

For added strength and support, I sandwiched a layer of foam core board that I cut to the same size for each shelf. For the supports in between, I took some old, empty, clean tin cans (OK, MISTAKE #1, they should have remained full to add extra weight to the tower), wrapped them in white craft foam cut to fit and hot glued into place

Cupcake Tower Wrapping Tin Can

(it looked like fondant, so I was quite happy with that).

Cupcake Cans Covered in Foam

But then I needed some sort of trim, so I used that foam faux wainscoting from my country cupboard makeover, cutting it along the ridges

Foam Wainscotting for Trim

and then hot gluing it into place for a nice clean edge. For a final trim, I glued purple satin ribbon around the edges.

Cupcake Tower Glueing Ribbon Trim

Once I had all the top layers ready, I stacked and hot glued as I built my tower, with the covered cans centered (MISTAKE #2-the top one was not quite centered, but once they were hot glued into place, there was no going back…) For an extra decorative touch, I cut some paper doilies

Cupcake Tower Lace Doilies

to fit around the edges and glued into place to create a lacy scalloped look.

Cupcake Tower Glueing Doilies

For the base, I used a 16″ scalloped plastic cake round on feet that is typically used for just this purpose. But, it was pretty plain, so I added the lacy doilies to that, but then also placed a scalloped, foiled cake round in the center. MISTAKE #3. Finally, I glued the entire tower to that foiled round (did I say MISTAKE #3 ?!?)

Cupcake Tower Completed

For the topper, I baked one six inch round, decorated it and then added a beautiful bouquet in shades of purple that was created by our friends at Parker Florist in Wakefield.

Parker Florist Cupcake Topper Bouquet

OK, everything was transported safely to the venue on the top of a mountain, the cupcakes tucked into these awesome boxes I picked up at Michaels (they have inserts with holes big enough to fit my fat fingers around the cakes to remove them once it was time to fill the tower.) Aren’t they so pretty!?

Cupcakes in Carrying Boxes from Michaels

Once the ceremony was performed and the delicious wedding dinner was finished, it was time to assemble the tower. So, with the help of my BFF’s,  we walked down the hill from the main house to the tent where the reception was taking place, me carrying the tower, them carrying the boxes of cupcakes (did I mention that it was raining as well?)

Wedding Venue Tent

The tower was settled down onto the designated table, which, because we were outdoors on the soggy lawn, had a bit of a tilt to it. (MISTAKE #4. NEVER ATTEMPT TO STACK A CUPCAKE TOWER ON A TILTED TABLE). I placed the floral round on the top (MISTAKE #5. DO NOT REST THE CAKE TOP ON THE TOP OF THE TOWER-IT MUST BE SECURED). As we were stacking the cupcakes on the tower, it started to wobble forward-remember, it was on a tilted table. So I decided to start stacking from the back to balance it. Reaching around behind to add more cupcakes, I accidentally hit the tower, which instantly fell forward, spilling cupcakes all over the table and ground.

Fallen Cupcakes in Grassy Box

And my shoes.

Cupcake Tower Frosting on Shoe

In an instant we went from Cupcake Wars to Cupcake Disaster. As the tower was plummeting to its grassy grave,  my dear friend Alice caught the flower topper as it was flying by, resulting in a splotch of bright purple frosting on her brand new jacket!! (Alice, please send me the dry cleaning bill : ) At one point, I attempted to put the tower back together, but if you recall MISTAKE #3, the piece that was glued to the foiled round based gave way, so there was no way to re-attach it to the base. Apparently, hot glue and foil don’t adhere well. Lesson learned.

Cupcake Holder After the Break

As we were scurrying around, attempting to save the remaining cupcakes, I was convulsed in laughter, thinking that this could have been an episode of I Love Lucy.  Turning around to see the table of guests directly behind me with their mouths agape, watching the spectacle unfolding before them,  I said “nobody saw that, right!?”, which resulted in more laughter from everyone involved. Now, if someone had been recording this, we most definitely would have won top prize on America’s Funniest Videos, which I then could have used to purchase a fabulous wooden cupcake tower like this one of these beauties on Etsy.  But, alas, I didn’t even have my camera with me until it was over! So, the remaining unharmed cupcakes were set out on the table for the guests to enjoy,

Cupcakes After the Fall

which they reportedly did. The bride graciously laughed it away and the party danced on into the night. My heartfelt congratulations to the bride and groom-hopefully this is the first and last disaster for many years to come. So, you ask, what’s my take-away from all of this? NEVER AGAIN. Don’t ask, I won’t bake them. I’m sticking to wood and paint, from this day forward. Hope you have a memorable Memorial Day, everyone! Susan

Mother’s Day Forever Bouquet

Several Mother’s Days ago, I received a small wooden painted sign from my children. It reads:

Forever My Mother SignThat day, it brought me to tears, and it sits on my windowsill, where it catches my eye and is a never-ending reminder of how blessed I am to have the most amazing children whom I love dearly. Every year it is increasingly difficult to come up with unique gift ideas for my mom; after all, how many HomeGoods gift cards can one woman use?! (Well, in my case, I can never have enough of those, but I supposed that’s just me : ). Inspired by a gorgeous wedding bouquet that was created by a co-worker using vintage brooches and pins, I decided to make a “Forever Bouquet”. This floral forever bouquet uses only silk flowers, crystal pins and beads and any other embellishments you wish to add. Nothing to water and something that will last forever.

Mothers Day Forever Bouquet Closeup

Here is the how-I-did-it: The supplies:

1. A glass vase or vessel. It can be transparent or not. You can actually use any style vase you would like, even a martini glass or mason jar! The options are only limited by your imagination!

2. Any crystal beads, barrettes, pins and buttons you wish to use to create your bouquet. It can be multi-colored or simple.

Mother's Day Bouquet Jewels3. Florists foam, green florists tape plus any embellishments: rhinestones, lace doily, beads and a hot glue gun.

Mother's Day Bouquet Supplies5. Faux flowers: again, any type. The base of my bouquet is one large white sparkly hydrangea, which I encircled  with roses and feathers and berries- all faux (faux sounds so much better than fake, am I right?!) I also used white, pink and green roses.

Simply take the vase and place the foam in the base and press down firmly.

Mothers Day Bouquet Vase with FLorist FoamI added a touch of bling by cutting a rope of rhinestones

Mothers Day Bouquet Rhinetone Cutterand hot-gluing it to the middle of the vase.

Mothers Day  Bouquet With Rhinestone Trim

To assemble the jewelry flowers, remove any backing (such as the barrette or the pin). Add a spot of hot glue to the middle of the underside of the flower.

Mother's Day Bouquet Glueing Stem to BasePress cut stem into glue and hold until secured. When I cut the wood stems, I actually make the end rather jagged to give it better gripping power.

Floral Stem CutWrap entire stem with florists tape. Repeat with as many sparkly blossoms you would like to use in your bouquet.

Mothers Day Bouquet Wrapping StemsNow is the fun part! Start building your bouquet, beginning with the lace doily at the bottom of the vase.

Mothers Day Bouquet Vintage Doily DetailThis creates a base, much like a wedding nosegay. Next up was the one large sparkly hydrangea, to which I added a drop of glue to the base before I stuck it into the foam.

Mothers Day Forever BouquetAdded the feathers around the base, gluing each at the base and pressing them into place.

Mothers Day Bouquet Feather DetailAfter that, I arranged the flowers. I am not a flower-arranging expert, so I am not going to instruct you in the proper techniques, only to say that you should make a “dome” effect of the bouquet. I wanted it to have a tightly-packed look, but you could certainly do a more woodsy, organic look as well.

Mothers Day Forever Bouquet Closeup

I used primarily white flowers to really show off the jeweled blooms, but then added one pink rose in the center for a spot of color. Once my shape was complete and flower-filled, I started adding the jewelry flowers, one at a time, until the entire piece was completed. The final touches were some green berries and eucalyptus stems. There you have it!

Mother's Day Forever Bouquet Vintage Vignette

A forever sign of love for your forever friend or mom to cherish. And, since I won’t be blogging on Sunday, I will just say Happy Mother’s Day to all of you!! And to my mom? Well, it goes without saying, Forever My Mother, For Always My Friend. XOXOX Susan


Cottage Fresh Country Cupboard

A few days ago I shared a project that I had been working on: transforming a country cupboard from this ugly, broken, junky piece to a cottage fresh country cupboard. This was the before:

Country Cupboard Unpainted

this was the during

Country Cupboard Painted

this is now.

White Country Cupboard Signed

A simple fresh white country cupboard that is filled with some of my cherished blue and white pieces, including this vintage set of Block China that I have kept stored away for over 30 years!

Block China Blue Strawberries

I have treasured this dinner set with the luscious blue strawberries for so long, but have never had an open cupboard to display them…and now I do! In this close-up pic you can also see the wainscoting wallpaper that I had installed and painted. It just gives a little extra depth to the otherwise plain back of the piece.

Blue & White Country Cupboard

You can read about the initial transformation process, including the prepping and installation of the wainscoting wallpaper here:

https://countrydesignhome.com/2014/04/10/wow-wainscoting-wallpaper/

Once I had finished painting the cupboard, I wanted to add just a bit of glazing to the detailed trim to enhance it. BUT, I did not want to change the overall look of the piece. It needed to remain bright white to contrast with the red walls of my dining room. This concoction of DecoArt Metallic Pearl White Paint + Behr Custom Color Sample (kind of a soft tan-but I’m not sure of the color because it was in the OOPs bin at HomeDepot for 50 cents!) + Martha Stewart Tintable Glaze Effects.

Martha Stewart Glaze, Americana Metallic Paint, Behr

I mixed it all together- lets say 6 parts glaze to two parts metallic paint to one part tan paint. Very scientific.

Martha Stewart Glazing Mixture

Then I painted it only on the areas where I wanted the trim to be defined- then wiped it off with a damp rag.

brushing on glazing mixture

Just a hint of color was left behind to enhance the deep trim work.

Country Cupboard Trim Glazed

Once it dried, I then mixed the Metallic Pearl White paint and the Tintable Glaze (about 50/50) and painted over all of the raised detail and trim areas. So what I have now is an elegant piece with a pearlescent glaze finish that captures the light and makes the detail pop.

Country Design Home White Glazed Trim

Perfect. It just goes to show you what a little TLC and elbow grease can do to transform any ugly duckling into a beautiful swan. And just in time-now I can clean up the dining room and get ready for Easter, whew!! Have a terrific Tuesday, everyone! Susan


An Easter Bunny Pattern For You!

I know Easter is just around the corner, and you are probably Easter-crafted out, but I couldn’t resist the chance to share my chunky wood bunny with all of you! Many, many years ago, a dear friend of mine made this wooden Easter Bunny for me.

Pink Wood Easter BunnyFor all these years, he has been the center of my Easter decor, whether on the table, on the mantel or sitting on the buffet surrounded by yummy desserts. When Coach brought him down from the barn loft this year, I noticed that his pink coat had become dirty, worn and scratched. Not good for a bunny who needs to look his best while roaming the world delivering Easter baskets! I decided he was in dire need of a facelift. And, since I was taking him apart anyway, I thought I would trace the pattern and share it with all of you!  He was cut out of 1 1/2″ planks-very heavy and sturdy. But you could certainly use any width you would like. Here are the patterns (you just need to right-click and download them, then resize them to your specs)

The body is  14 3/4″ high by 8″ wide. You will need to cut one.

Wood Easter Bunny Pattern   The ears are  7″ long by 3 1/4″ wide. You will need to cut two of those, one for each side.

Wood Pattern Easter Bunny Ear

The arms are  7 1/2″ long by 3″ wide. You will need to cut two of those, one for each side.

Wood Pattern Easter Bunny Arm

The legs are  10″ wide by 6″ high.  You will need to cut two of those.

Wood Easter Bunny Leg

Once you have cut the pieces, you will need to cut three 3/8″ dowel pieces into 2 1/2″ lengths (assuming you are using the 1 1/2″ width wood for the bunny), one each for the arms, the ears and the legs. Using the proper size drill bit (it needs to be snug, so don’t use a larger one or else the extremities will just flop around!), drill the three hole completely through the bunny’s body. Tap the dowel through so there is 1/2″ protruding from either side.

With the same 3/8″ drill bit, drill 1/2″ deep holes into the extremities in the indicated spots on the patterns (the big black dot). Make sure you drill one on each side to create mirror images. Otherwise you’ll have a holy bunny!

The fun part: paint the bunny! Go nuts and make him polka dot or plaid or just plain and simple. He’s your bunny to keep, so have a ball. You can even have your kids give him the finger paint treatment : )If you do decide to make one, please share your pics!!

Painted Wood BunnyNow just gently twist the extremities onto the dowel sections of the body: Ears on top, arms in the middle, legs on the bottom. Or, you can mix it up and go all Picasso on him- that’s fine too. The fit should be snug so they stay in place and he stays upright. If you have made the holes too large, you will need to glue the pieces in place or add a little putty. And there you have it- a bunny that is ready to join in all the Easter fun! And my little guy? Well, he’s being painted right now, and he’s not quite ready to show off. But I wanted to get this pattern to you, just in case you need some last minute Easter fun. Have a warm and wonderful Wednesday, everyone! (I know I will : ) Susan


WoW! Wainscoting Wallpaper!

Coach and I recently purchased this country-style cupboard at auction for…wait for it…$10!!! It was pretty grimy and the front doors were missing, but I just fell in love with the detail in the top trim and base.

Country Cupboard Before PaintingThe color was a faded and chipped greenish-mustardy yellow with some sort of stenciling on it. So not country pretty, so time for a makeover. First step, clean it up! Second step, I had to remove the middle piece of wood where the now-MIA doors would have normally closed and latched. (If anyone knows what that piece is actually called, let me know : )

Country Cupboard Middle trim pieceIt was easy to pop out with a tap of a hammer, but there was a wood spindle at the base that needed removing, since I wasn’t planning on replacing the doors.

Removing Spindle from Door(This is the point when Bartlet the Frenchie was exiled into the hall closet, as he was none too pleased with the noise of the saw and kept trying to attack it!)

Bartlet the French BulldogEasily done with a small saw, then I patched up the holes and was good to go. The first coat, my go-to primer, Glidden Gripper. It covers lots of sins : )

Glidden Gripper PrimerAmazing how one coat of primer can change the entire look of a piece! See how the detail pops with the clean, white paint!?

Country Cupboard Primed DetailMy finish paint choice? A lovely shade of creamy white called Snowfall White by Benjamin Moore in a matte finish.

Benjamin Moore Snowfall White

If Linen White and White Dove were married and had painty children, this is the color they would be. Before I applied the top coat, I decided I wanted to add some sort of trim or wainscoting to the back panels to give the cupboard a bit more interest. I went searching through Lowes (well, first I scoured the basement workshop and the barn but came up empty handed there), where I perused all sorts of wood, metal and vinyl options. I wanted something simple and lightweight to install that would give a nice finished look. At Lowes I discovered this roll of faux paintable, pre-pasted wallpaper wainscoting by Allen & Roth. Score!

Allen & Roth Paintable Wallpaper WainscotingIt looks like a regular roll of paper, but It had the feel of foam, so it is very lightweight and easy to cut with scissors. No dragging out my saw and sanding down edges, then gluing and nailing in place. Just measure, cut, dip and paste. Perfect.

Measuring Faux Wainscoting

Simple to cut, just measured it out, marked with a pencil and used scissors.

Faux Wainscoting Measure and CutDipped it in a warm bath in the sink for 30 seconds, then removed it and allowed it to sit for 3 minutes to allow the glue to really gel up.

Dipping Wallpaper in Warm BathThis is some seriously sticky and gluey glue! The panels went on so easily over the primed surface, and since I had already premeasured and cut, no additional trimming was necessary. I just placed the paper into position and used a damp sponge to wipe it down and remove any excess glue.

Wiping Faux Wainscoting with damp spongeAccording to the instructions, I waited 24 hours prior to painting, then I painted the entire piece with the Snowfall White.

Painting Faux WainscotingAnd folks, this really does look like raised wood wainscoting!

Faux Wainscoting PrimedThis painted piece is so much better, BUT, I am not finished.

Country Cupboard Painted

I need to decide on an accent glazing color, and I am open for suggestions. Red, lavender, gray, blue, brown, what color would you choose to enhance the beautiful trim and the wainscoting without changing the overall feel of the cupboard? I am loving the white, but it needs just a touch of something!

Country Cupboard Trim Detail

And this needs to be completed quickly, as Easter is fast approaching, so time is of the essence. Help! Susan

Anchors Away Vintage Cabinet

summer porch nautical themeAnother DIY project for the summer porch (if it ever gets above freezing around here so we can actually use the porch). This is the before, one of those old tin wall cabinets that someone had painted an awful shade of mustard neon yellow.

Nautical Cabinet Mustard Yellow Before

And this is the now: an Anchors Away Rolling Cabinet!

Nautical Cabinet Side view Stripes

A pretty dramatic transformation, yes? Here is the how-I-did-it:

1. Attached wheels to the base of the cabinet so it can roll easily

Nautical Cabinet Wheels

2. Painted with Glidden Gripper primer. This stuff works on wood or metal. Painted a coat of Benjamin Moore Snowfall white over the primer.

Antique Table Gripper Primer

3. For the sides, I decided to add a nautical stripe effect, so I taped the 2″ stripes over the white and painted with a custom (by me!) deep blue.

Nautical Cabinet Taping Stripes

Nautical Cabinet Blue Striping on Sides

4. For the front doors, I painted two layers of blue paint, a solid base and then a dry-brushed topcoat to create more depth of color.

5. For the anchor stencil. I needed to look no further than my HomeGoods shopping bag!

Nautical Cabinet Anchor Stencil Home Goods Bag

I buy these all the time, and for 99 cents they can’t be beat. I usually use them for toting stuff around, but since the anchor was the perfect size, I figured why not? I’ve got plenty more where those came from! So I used the cut-out anchor for the stencil, affixing it to the cabinet with some temporary craft adhesive,

Nautical Cabinet Spray Adhesive for Stencilthen sponging paint on with a regular sponge.

Nautical Cabinet Stencil Removed

The roping I created from my PicMonkey Photo Editor. This anchor design is very similar to the one I used, so I’m sharing that in case you would like to create one of these too!

Nautical Anchor and Roping Design6. I printed the design on regular printer paper, then affixed a sheet of freezer paper to it with some spray adhesive, just to give it more strength. Cut out the stencil with an exacto knife.

Nautical Cabinet Cutting Stencil

7. Affixed the stencil to the cabinet with painter’s tape, dabbed the white with a piece of sponge until the white was deep against the dark blue.

Nautical Cabinet Completed Anchor and Rope Stencil

For the twisted rope, I cut the pattern from the HomeGoods bag (it has two sides : )

Nautical Cabinet Cutting Rope Pattern

and taped that to the cabinet.

Nautical Cabinet Taping Rope Pattern

Nautical Cabinet Chalk Outline Roping

Outlined with chalk, then took a small, tapered sponge piece

Nautical Cabinet Trimmed Sponge

and followed along the lines, dabbing with the white paint to create the rope effect.

Nautical Cabinet Sponging between lines

The great part about using chalk is that once the paint is dried, the chalk just wipes away with a damp sponge.

Nautical Cabinet Rope Completed

For the top, I used some light balsa wood pieces that I affixed with glue.

Nautical Cabinet Balsa for top

I wanted that beachy, weathered appearance, so I added some blues mixed with water just to give it an aged effect.

Nautical Cabinet Swirled Paint and Water

Nautical Cabinet Glazing Supplies for Top

Then I glazed the top with a mixture of Martha Stewart Glaze and 2 paints, one white, one metallic silver to create that aged, driftwoody look I was going for.

Nautical Cabinet Weathered Top

With the glaze, you just paint it on, then wipe off what you don’t want

Nautical Cabinet Wiping Glaze off Top

The original handles were 1950’s chrome, which would have been perfectly fine.

Nautical Cabinet Chrome Handles

Instead, I used some brass grommets, one in each hole. I had do do a bit of drilling to make the holes larger, and then glued them into place.

Nautical Cabinet Grommets in Place 
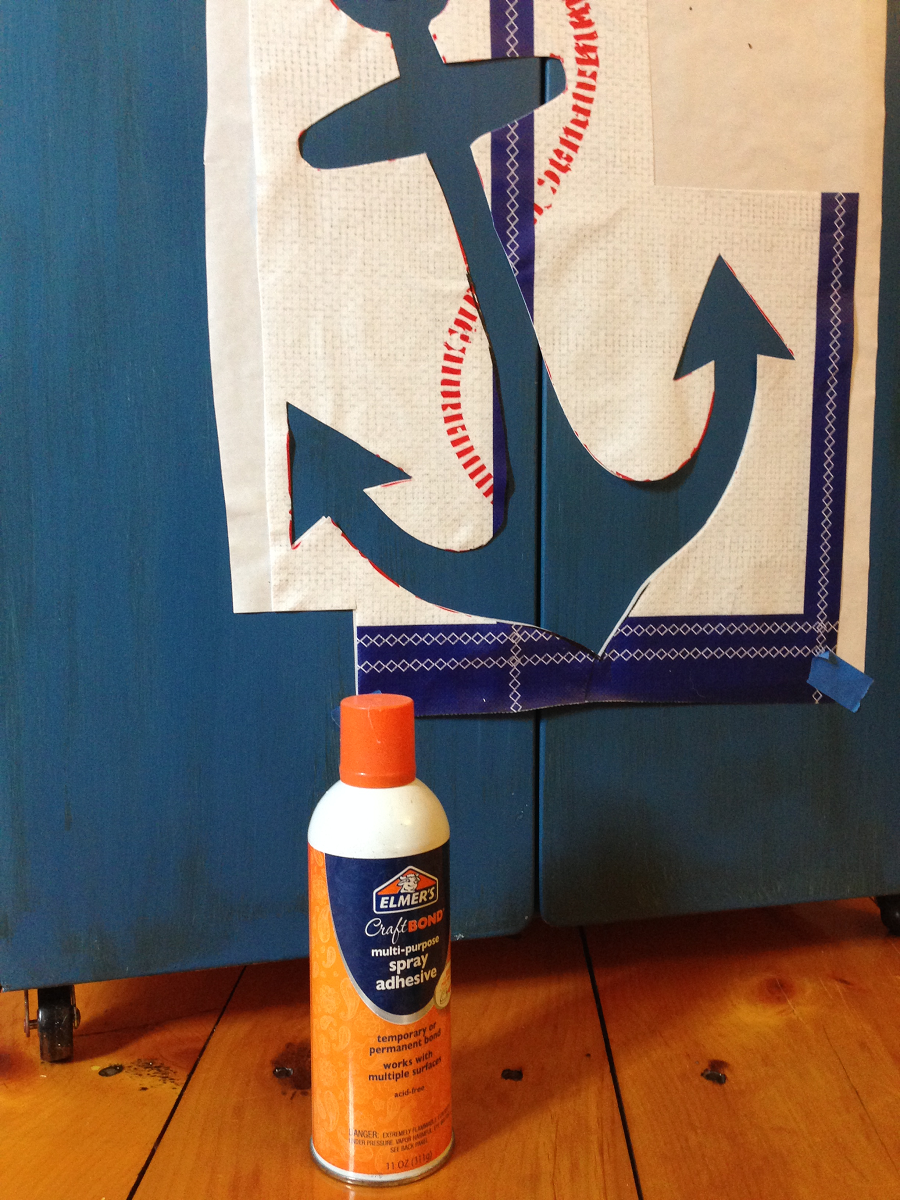
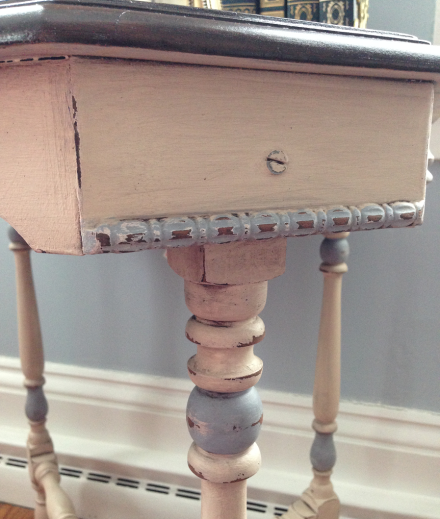
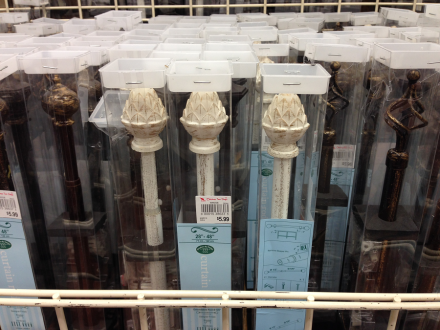
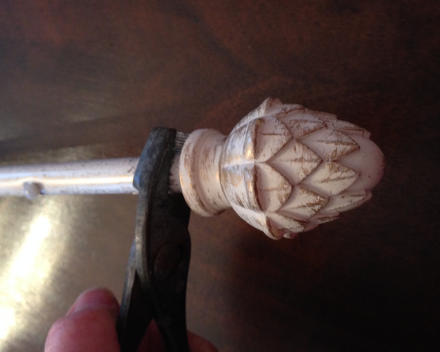
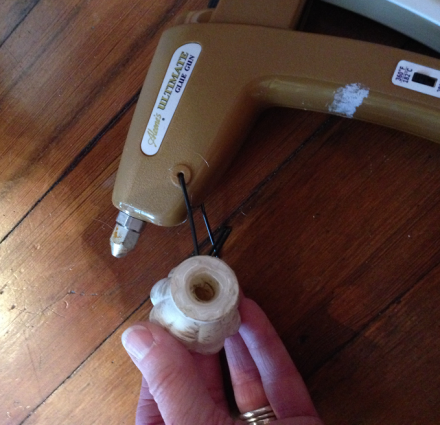
Added some nautical roping to create the handles. Plus, it mimics the roping in the stenciled design. Perfect!

Nautical Cabinet Rope Handles in place

A bit of DIY FYI: when you are cutting twisted rope, tape the end before you cut, otherwise it will untwist!

Nautical Cabinet Cutting Rope Taped Ends

For the inside, I just painted it to match, then decopaged the shelves with some pretty blue tile paper I picked up at Michaels-4 for $1!

Nautical Cabinet DecPage and paper

Then I added a Martha Stewart Gloss finish just to waterproof the paper.

Nautical Cabinet Martha Stewart Gloss Finish

This cabinet is plenty big enough to hold cups, plates and glasses and an ice bucket for the porch.

Nautical Cabinet Interior Storage

The finished cabinet is perfect on our Nautical Summer porch, right at home with our white wicker seating and the Whale Coffee Table!

summer porch nautical theme

And. perhaps someday soon, we will be able to sit out on the porch and enjoy some much-anticipated warm weather! But for now, I hope you enjoyed my DIY Anchors Away Cabinet Project! Have a warm Wednesday, everyone! I know I will because I am headed to sunny California!!!  Susan


The Antique Table Throwback

It’s #Throwback Thursday, everyone! What better way to celebrate than to show off my latest DIY project? This week it’s a turn-of-the-century table Coach had stashed in the barn. Pretty beat up, lacking polish and pizazz and missing the little finial in the base.

Antique Table Before Restoration B&WThis is the before when it was manufactured by the Denhard Furniture Company of Louisville, Kentucky, sometime between 1855 and 1905. This is the after.

Antique Table Clock and Books Staged PMHere is the how-I-did-it:

1. My first step is always to clean the piece to make sure there isn’t any dust or dirt or mold or mildew-after all, who knows where its traveled in these last 100 years? I wanted to preserve the top to stain, so I flipped it upside down and went to work.

Antique Table Primer Upside Down

2. I painted the base it with my favorite primer: Gripper by Glidden. Awesome stuff. Covers everything in one coat.

Antique Table Gripper Primer

3. Once that dried, I painted the body with a coat of Benjamin Moore matte finish paint in a custom color. And by that I mean that I mixed a couple of different cans of paint I had on hand to create this creamy white color. I will name it Buttercream Frosting. Because I love Buttercream Frosting. And it is a buttery cream color. Hence, the name.

Antique Table Benjamin Moore Custom Color4. I painted all of the raised detail blue-this is why I LOVE redoing old furniture. You don’t find this kind of carved detail at big box stores!

Antique Table Old Finish Detail

And this locking mechanism for the legs is brilliant! A screw-eye is attached to the leg, which then in turn is attached to the brace with the screw. So sturdy.

Antique Table Screw and Hook
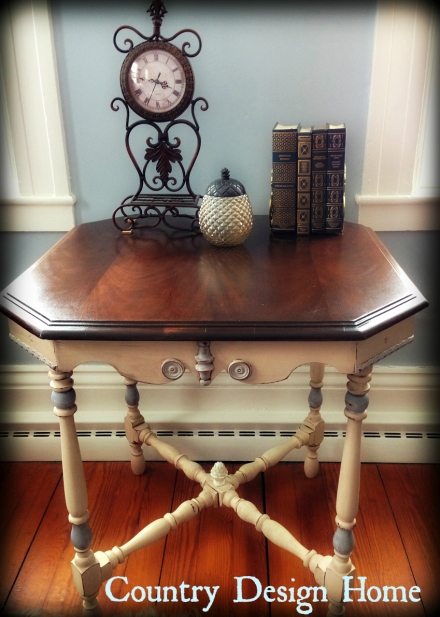
OK, so I painted all of the raised detail with the same home-made blue paint concoction that I used in the Colonial Country Cupboard I recently completed. Love it, want to use it over and over again. But I am almost out, so I’m going to have to find a way to replicate it! OK, so now the detail was blue.

Antique Table Painting DetailThen I repainted the entire piece again with the Buttercream Frosting and wipe away the excess off the blue details.

Antique Table Wiping Off Paint from Detail5. I sanded everything down to give it that rustic, aged look that we like.

Antique Table Sanding DetailAnd by we, I mean myself and Coach. I know a lot of people are not fans of the painted, sanded, stained look, but that’s cool. One man’s trash is another family’s re-loved vintage table : )

5. I glazed the entire piece with General Finishes Brown Mahogany

Antique Table General Finishes Brown Mahogany Glaze

(I was planning on using this for the top, anyway, so this way it matched color tones. I’m kinda smart like that.) Simple process. Paint the stuff on.

Antique Table General Finishes Brown Mahogany Glaze Applied Try not to spill it. But if you do, use plastic drop cloths so it’s easier to scoop the stuff up and put it back in the can.

Antique Table Spilled GlazeI’m using plastic lace table cloths from the dollar store. I know, right? Cheap, pretty and practical (insert joke here). Used a damp rag to keep it workable while I wiped it off until I was satisfied with the results.

Antique Table Wiping off Glaze

Look how the detail pops now!

Antique Table Glaze completed

Antique Table Side Detail Finished6. The base has two cross pieces that meet in the middle. At one time there was most definitely a decorative finial, but that was  missing. I was searching for something suitable when I spotted these curtain rods at the Christmas Tree Shop. (If you don’t have one near you, and don’t know what this store is, let me assure you it does not merely sell Christmas Trees!) These were a glazed, antiqued metal and cost $5.99!

Antique Table Pineapple Rods Christmas Tree ShopSo I removed the finial from the rod,

Antique Table Removing Finial From Polethen filled the finial with glue

Antique Table Finial with glue filler

and also coated the spindle with glue so it would be very secure.

Antique Table Coating Post with Glue7. So now the new pineapple finial is a welcoming addition to the antique table. Is it the original? No. But I would never have been able to find that. This seemed like a sweet solution.

Antique Table fixating pineapple finial to post8. For the top, I used the aforementioned Brown Mahogany Stain to replicate the rich brown of the original color and finish. That was after Coach sanded it down, but I didn’t catch him in the act, so I don’t have a shot of that. But I do have a pic of him cleaning an old cupboard using my kitchen gloves. He worked for a few minutes and then said, and I quote: “This DIY stuff is hard work. I’ll finish it later.) And he removed the pink gloves and left! So I remind him of that whenever he drags home yet another piece of furniture and says “work your magic with this”. Ha.

Coach cleaning the cupboard7. I applied a couple of coats of Fidde’s Supreme Wax

Hope Chest Fiddes & Son Waxto give the top that glowing finish.

Antique Table Top Fiddes Wax Finish

8. Here is the final closeup reveal of the accented details and beautiful wood top!

Antique Table Top Dressed

I think Mr. Denhard would be very pleased with how I have lovingly restored his table. What do you think? Could you love a table like this in your home?! Do you have an old piece of furniture kicking around? If you do, then it’s your turn to add it to the #Throwback Thursday Collection! Susan 

Dangers of DIY-Hardware Replacement

I recently wrote a post entitled the Dangers of DIY

Dangers of DIY

where I discussed the many chemicals and compounds that are in all of the seemingly harmless paints and finishes that DIY’ers use on a daily basis. If you didn’t see it, please click here and read it. It’s very important that you are aware of the pollutants and potentially hazardous materials that you are breathing in while working on your favorite old piece of furniture or wood trim in your homes!

However, there is another, less apparent danger that is also so important to know about and correct for your family’s safety. In another recent post, I showed off a gorgeous 1950’s Lane hope chest that I had completely restored.

Refinished Lane Mid Century Modern Hope ChestI am really proud of that piece, but what was I not aware of that needed changing? The locking mechanism of the chest was similar to the one that was in the news recently, when two small children climbed into it and tragically suffocated. How could that happen?! The old locks, in the chests built before 1987, had a push-button that was easily engaged so that the top could open up, and then instantly click into place and lock down once the top was lowered. There was no way to unlock it from the inside, and since it is a cedar-lined chest, it was built with a tight seal to keep out the moths and protect your clothing. Clearly, this needed to be changed.

The new locking mechanism was provided by the manufacturer, the Lane Company, free of charge.

Lane LogoThey have had several recalls in the past, most recently in 2014 due to this recent tragic incident. All we had to provide was the latch style and serial number (here is the online link to use)

Lane Furniture Latch Replacement Illustration

and we received the new lock in the mail in less than a week. The simple replacement process took just a few minutes, and you can see a video here by The Furniture Refinishing Studio on the exact procedure. Lane Hope Chest Lock Replacement VideoThe lock is not that difficult to open (and it does come with a key if you really want to keep it shut tight) but once it is opened, there is no way to lock it down from the inside. The mechanism remains disengaged and the top remains open about 1/2 inch until you re-engage it, which can only be done from the outside of the chest.

Lane Latch Operation Video

So now, there is no way that this tragedy can be repeated. If you have an old hope chest or any other old piece of furniture that you are DIY’ing, check the hardware! Old cupboards and cabinets and cribs and dressers were not built with the same safety procedures we have in place today. It is our responsibility, as we are refurbishing these pieces to use or sell to make sure that we change locks and alter pieces to ensure the safety of our children and pets, too! So, as you are working on your next DIY project, take a step back and make sure that what you are producing is not only beautiful but safe and secure for all to enjoy. Have a terrific Tuesday, everyone! Susan

Colonial Country Cupboard

Last summer, Coach and I took a long weekend trip to Bethel, Maine for a bit of golf and R & R.

Two Beers Please Bethel Maine PMWell, I should say R & S (Rest and Shopping) as we did quite a bit of antique shopping up and down the Maine coast. My heart skipped a beat when we turned a corner while wandering through the many aisles of Pa’s Tradin’ Post in Oxford, Maine.

Pa's Tradin Company Signand discovered this gorgeous old country cupboard!

Pa's Tradin Company MaineAnd, I was even more excited that it actually fit in our CRV, even with all the luggage, coolers and golf clubs! (Truth be told, I would have tossed those clubs to get this piece in my car…)

Country Cupboard in CRVIt was newer, but completely hand-crafted using old lumber and pieces from antique windows and dressers. It needed quite a bit of work, so I took my time refurbishing it, in between quicker, easier projects. Well, I am happy to say that it is finally finished, and styled, and sitting proudly next to the fireplace in my family room. So, what once looked like that, now looks like this!

Painted Country CupboardThe exterior body was painted with Annie Sloan French Linen Chalk Paint. I then sanded the edges and raised detail to give it the distressed look we like.

Country Cupboard Sanded Corner DetailThe shelves and doors I painted (after replacing and re-glazing many of the old panes-these were actually old windows that were repurposed-I LOVE that!)

Reglazing and painting window panesin Glidden Antique Beige “chalk-like” paint that I mixed myself. Here’s the recipe from “In My Own Style”

In My Own Style Chalk Paint RecipeThe back planked wall of the cupboard was painted with a custom color that I created-kind of a soft, denim blue.

Country Cupboard Custom PaintI had originally painted it with Miss Mustard Seed Eulalie’s Sky Milk Paint (you can read about that fiasco here),

Miss Mustard Seed Milk Paint Eulalie's Skybut once I decided where it was going to be in our home, that needed changing. Oftentimes, I paint a piece with the colors I would like, only to realize that it just doesn’t work in the intended space. That’s the beauty of paint-one quick coat and you have a whole new look! I wanted it to be a close match, but a lighter blue tone to the drapes in the room, since it would be in proximity to the window where they hang. Finally, I waxed the entire piece with Fidde’s Supreme Wax to give it a nice, warm, glowing finish. The hardware remained the same. Chipped, rusted black? Perfect!

Fiddes and Son Supreme WaxThis is the before, dingy white, cracked windows, unpainted interior.

Country Cupboard Base Interior

Country Cupboard Base BeforeThis is now. A pretty painted piece that shows off many of the pieces that Coach and I have collected over the years.

Country Cupboard Design HomeThe showcased pieces are primarily from Colonial Williamsburg in Virginia, The custom color blue I chose for the background enhances the blues in the pottery and plates and brightens the brass trivets and pieces.

Country Cupboard Styled
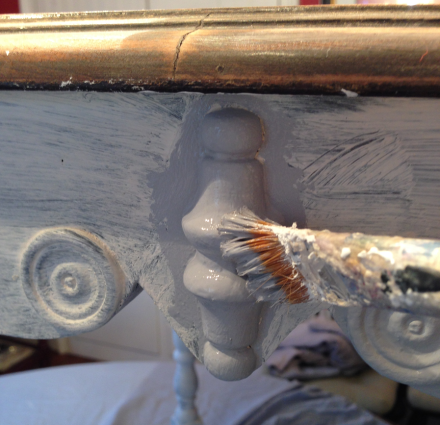
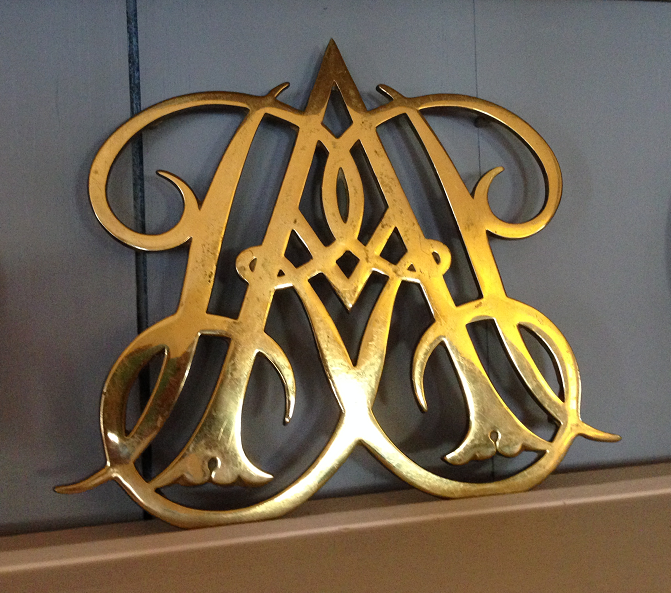
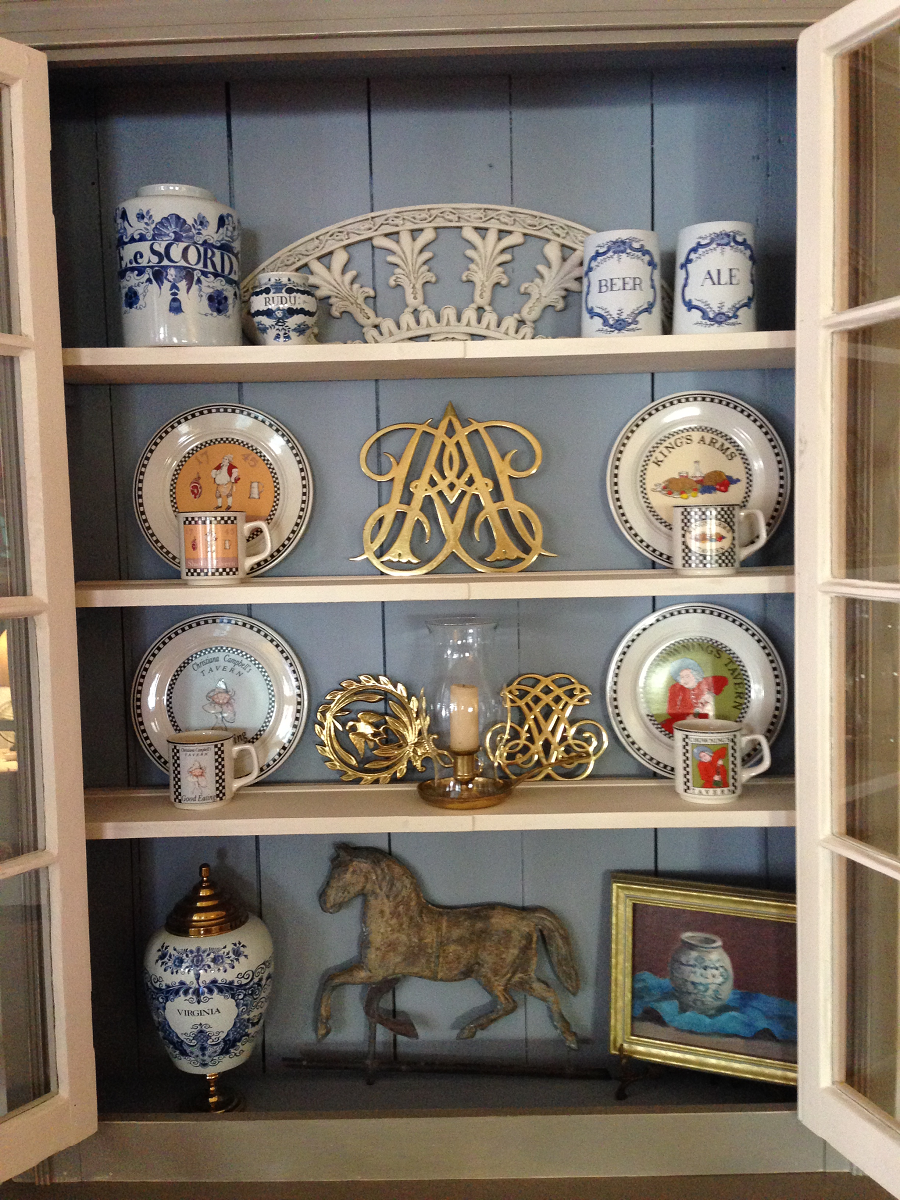
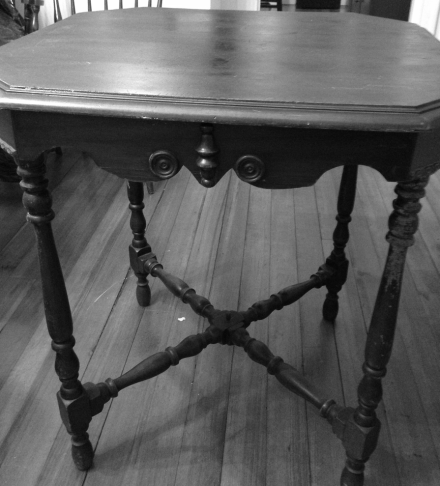
Colonial Williamsburg is an historic site that Coach and I love and have visited many, many times. This is the William and Mary crest trivet-one of our very first mementos we purchased over thirty years ago.

William and Mary TrivetThe re-painted and re-loved cupboard now reminds me of the shop front windows and taverns on the Duke of Gloucester Street, filled with old glass and pottery pieces, brass trivets, plates and mugs.

Williamsburg Virgina JugNow, when I step back to admire my transformed country cupboard,

Country Cupboard Doors Opened Styled

I am transported back in time to our many wonderful trips to Williamsburg. And isn’t that why we save our souvenirs and mementos-to remind us of happy times and fun trips? I hope you all have mementos you keep to tell your story, and a beautiful cupboard in which to display them. Have a “think spring” Tuesday, everyone! Susan