This past weekend, my company took part in a charity holiday tree decorating event. For the past couple of weeks my co-workers and I have been collecting ornaments and trimmings to decorate the perfect tree. Saturday morning, we met at the old school building to decorate our tree for the upcoming Festival of Trees. And although we had enough decorations to trim not one, but two trees, we realized we had neglected to bring tree skirts! Even though that wasn’t required, the skirts give the trees a finished look that ours were lacking. So back home I went to see what I had handy in my fabric bin. I found this pretty piece of soft polar bear fleece
 which I thought would be perfect with the silver and white snowflake theme of tree #2. So I cut and knotted it and created a cute little skirt for the tree. Here is the HOW-I-DID-IT:
1. Fold the fleece in half lengthwise and make sure it is long enough to go around the base of the tree.
 2. Cut the unfolded end into a semi-circle, making sure the edges are even. I happen to have a round dining room table which was the perfect pattern, but you can just do the old pie plate method where you fold it in 1/2 and then cut an arc from corner to corner.
 3. Starting at one end of the cut edges, cut strips of the fleece approximately 1 inch apart.
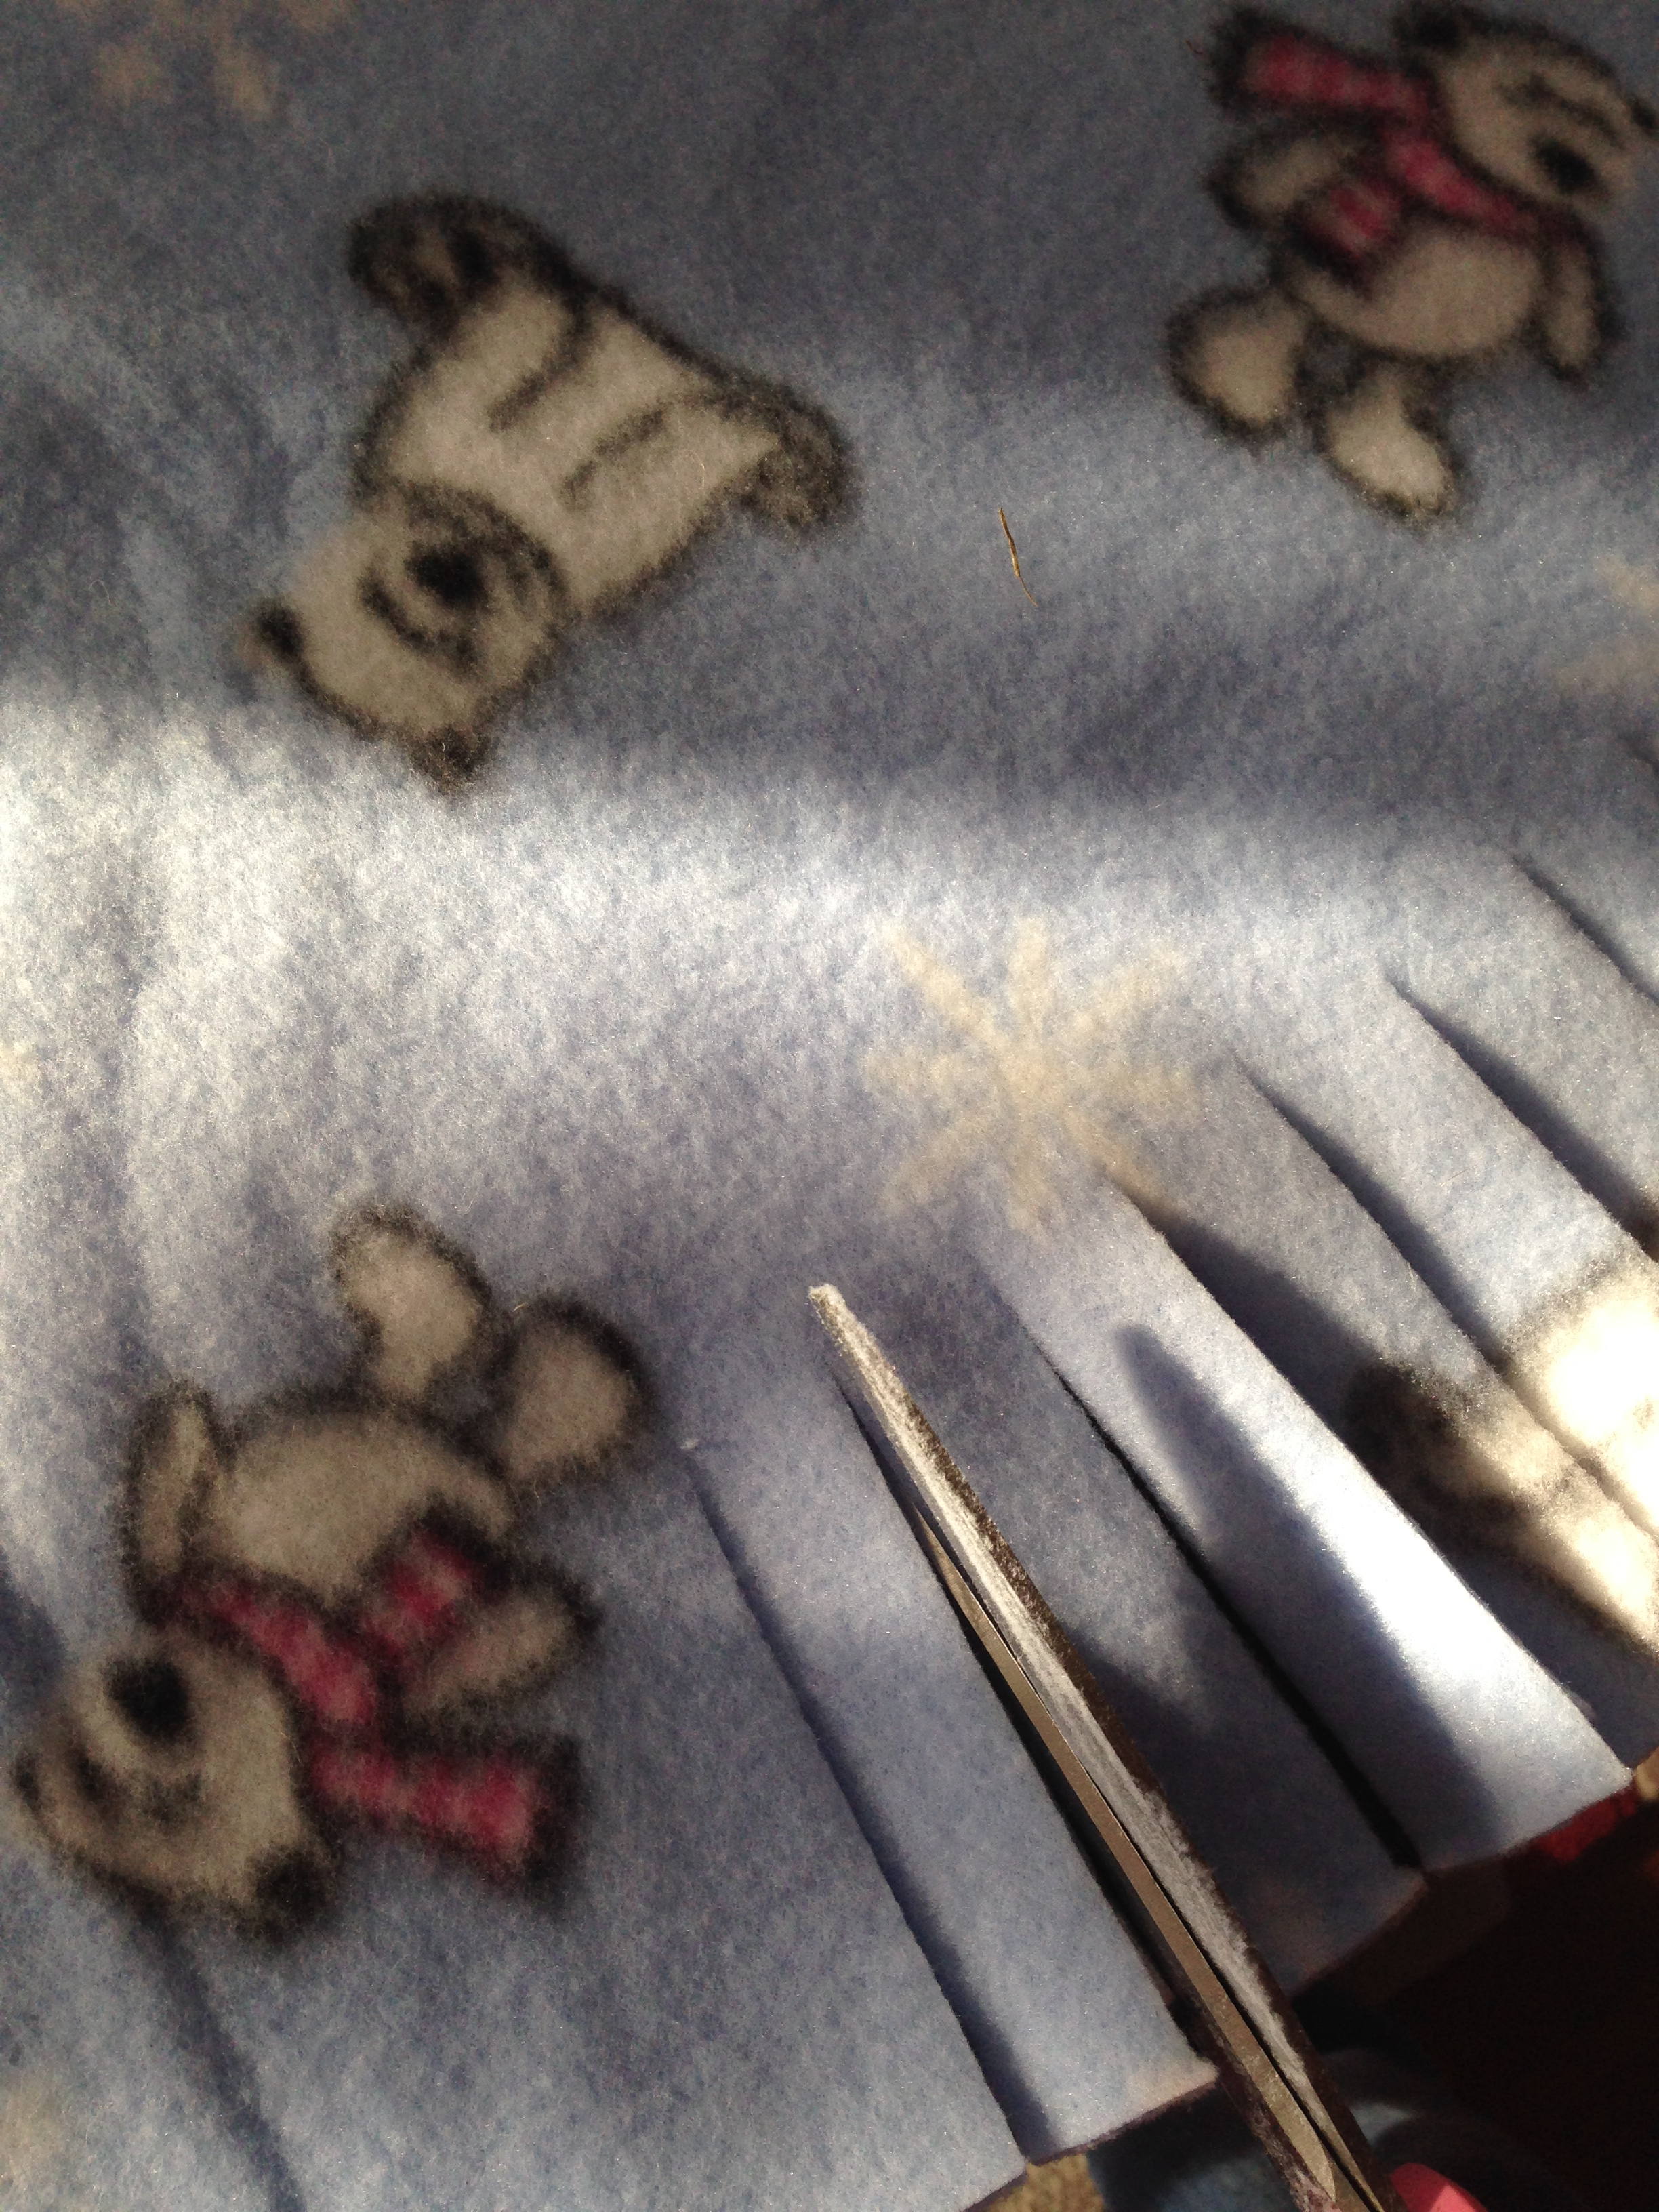 I typically measure these lengths to 5-6 inches, but this time I just used the scissors as my guide and did one cut to the end of the blades for each strip. The deeper the cuts, the longer the fringe.
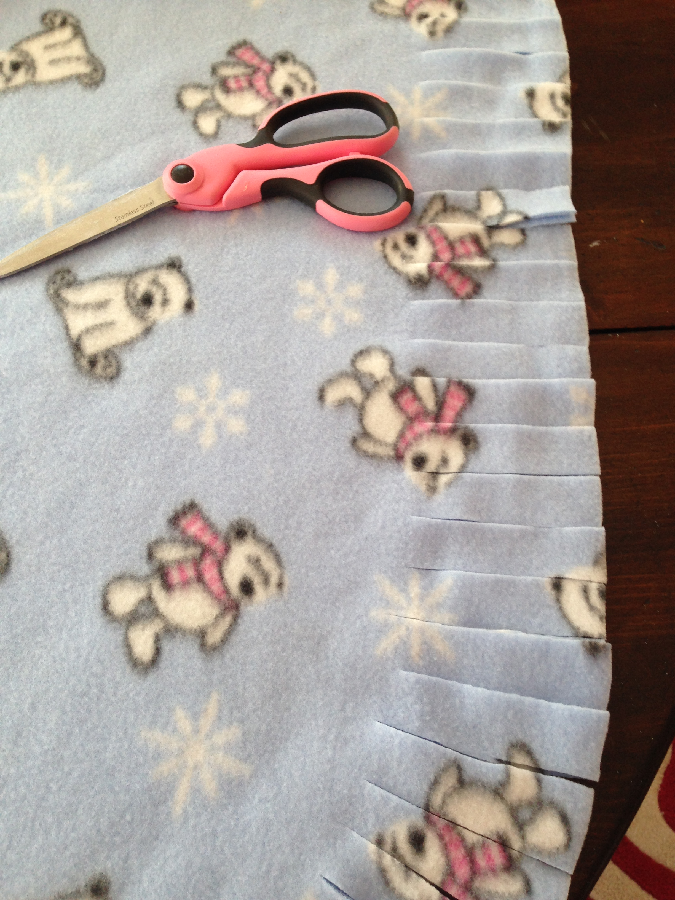
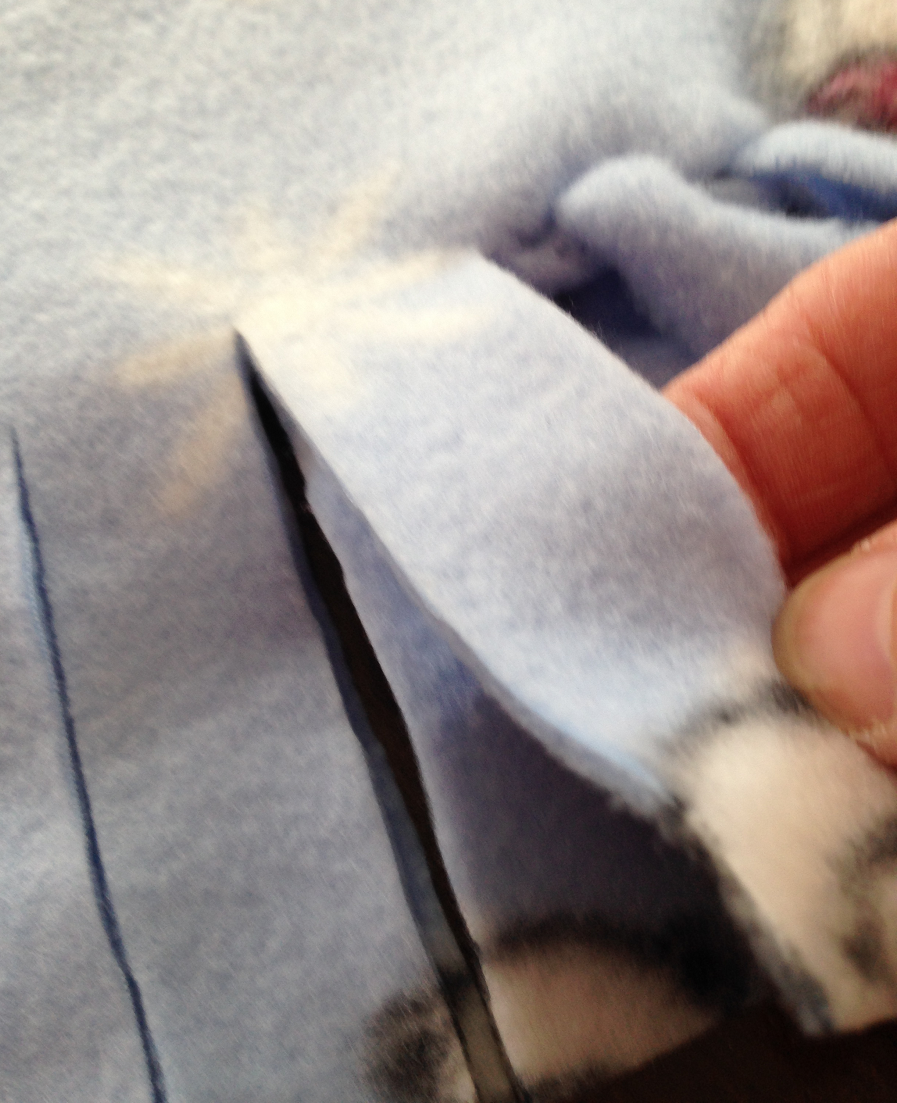
4. Moving around the arc, you need to cheat in just a bit; the top of the cut will be a bit narrower than the edge.
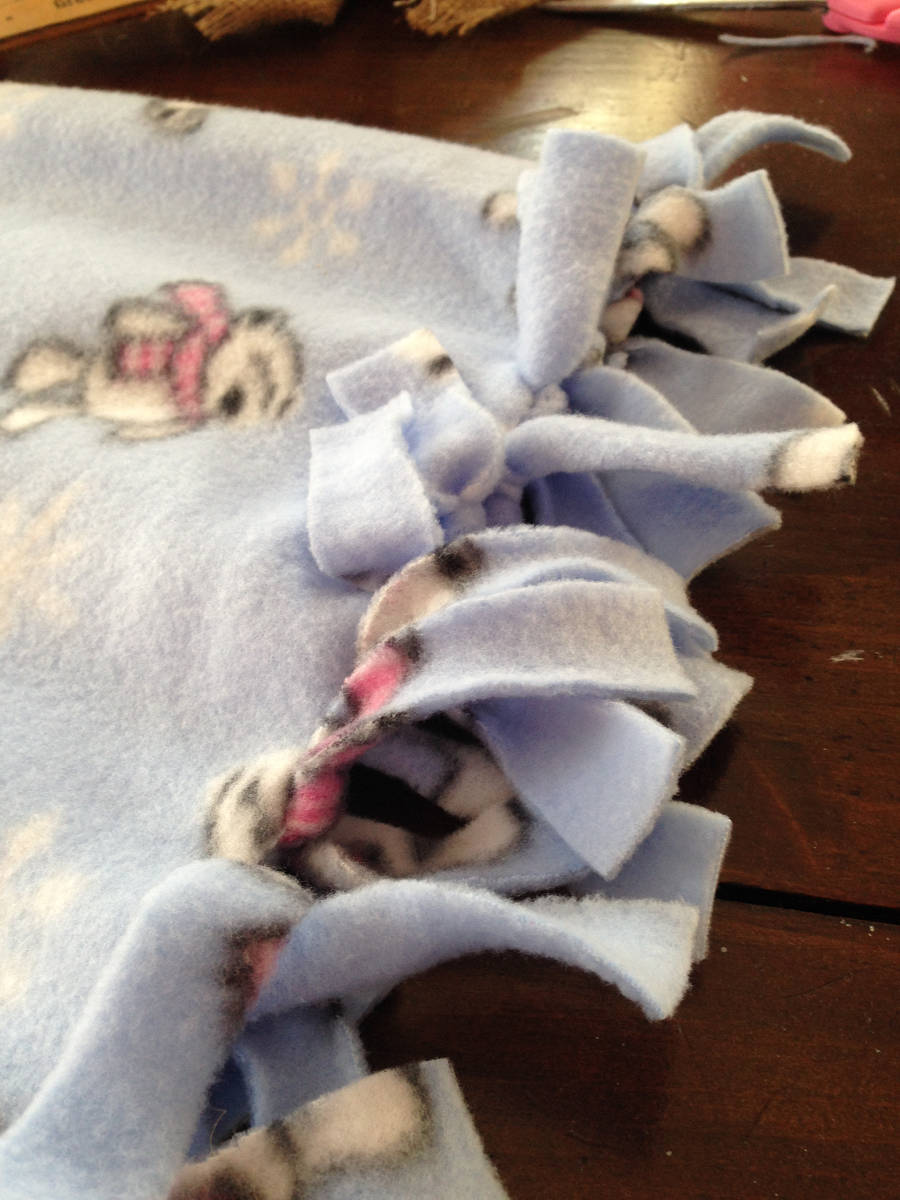
5. Once the semi-circle is cut, you can start knotting. Take a top and bottom strip that match up.
 Tie the ends into decorative knots I use a square knot, but you can do any type you like. I took pics of this, but their not very clear so check out this Animated Decorative Knots by Grog-any type of knot is illustrated here!
6. Knot all the way around the arc, creating the fringe effect, until you get to the other side.
 7. Decision time! To have this skirt fit properly you can leave the folded edge as is and just drape it around the tree base to create a “blanketed” look like this. It reminds me of Linus’ blanket wrapped around Charlie Brown’s little tree.
 OR you can cut a semi-circle in the middle of the folded half that is large enough to accommodate the tree base. This will allow the skirt to lay flatter on the floor. Either way is great and your holiday tree will look pretty and toasty warm.
8. Step back and admire your decorated tree : ) We did good, ladies!
![]()
Total time for the skirt: 45 minutes. And, at this time of year the local craft stores stock an endless style and variety of fleece designs, so you can do anything from a jazzy zebra print to Star Wars to a Frozen theme. Have a warm and toasty Sunday everyone!! Susan


Loved the reference to Charlie Brown… my family always watches that movie on Christmas Eve! Looks like your cute no-sew tree skirt will do nicely to keep that tree warm! Such a cute idea!
LikeLike
Thanks Betsy! It isnt Christmas without Charlie Brown : )
LikeLike
I love what you did, simple but looks perfect for the tree!
LikeLike
That looks adorable! It finishes the tree off nicely.
LikeLike
Fleece is all the rage here in TX at our local Hancock. I just haven’t worked with yet. May have to now!
LikeLike
So cute, Susan! I made my daughter a throw using that technique & my fingers were sore for days, LOL – a tree skirt sounds much more doable!
LikeLike
love this! would be a perfect craft to do with my little one! thanks for sharing! #SoMe2
LikeLike
This is an awesome easy idea! I’ve done blankets like this, but what a great idea to use the same thing for a tree skirt! Truly inspired! SoMe2!!
LikeLike
I like this! looks great. Thanks for sharing!
LikeLike
I love the tree! It looks great with your tree skirt too!
LikeLike
This is cute. I love the pattern on the fleece.
~Bonnie @ Our Secondhand House
LikeLike
Very cute, I can’t sew, so no sew projects for me are the only way to go.
LikeLike
This one is super easy!!
LikeLike
Endless ideas. I love how easy this is!
LikeLike
It is so cute and looks really simple.
LikeLike
Very cute!!
LikeLike
Stopping by from Social Media Link Party. Love easy projects that look great!
LikeLike
Thanks for linking up Melinda!
LikeLike
Very cute and I love that it’s a no sew craft.
LikeLike