What do you do when you have not one, but two giant, antique, rusty bedspring frames? Well, the first one you transform into a large marquee sign for your shop,

and the second one you mull over for awhile until you come up with a bright solution. So, without further ado, I’m introducing the
Rusty Bedspring Coil Votive Candle Holder!

Now, I have spotted many a rusty bedspring photo with a votive tucked underneath, but I wanted to take it up a notch by adding a second rustic element: the birch log slice. This elevates the rusty bedspring into a lovely woodland mantel decoration, does it not? Here’s the how I did it:
1. Get Coach to drag out the rusty bedspring frame from behind the fence where it had been weathering over the summer.

Have Coach cut off all the rusty bedspring coils during your freezing cold yard sale. Watch the pile ( of coils and $$$) grow.

2. Assemble your ingredients: A rusty bedspring coil (well, you know where I got these, and I have a ton more if you need one!), a birch log slice (this one I got at Michaels for $6.99 using a 50% off coupon, but you could certainly go into the woods and grab a log or two and slice ’em up), a votive candle-whatever style you choose as long as it fits in the bottom of the ring
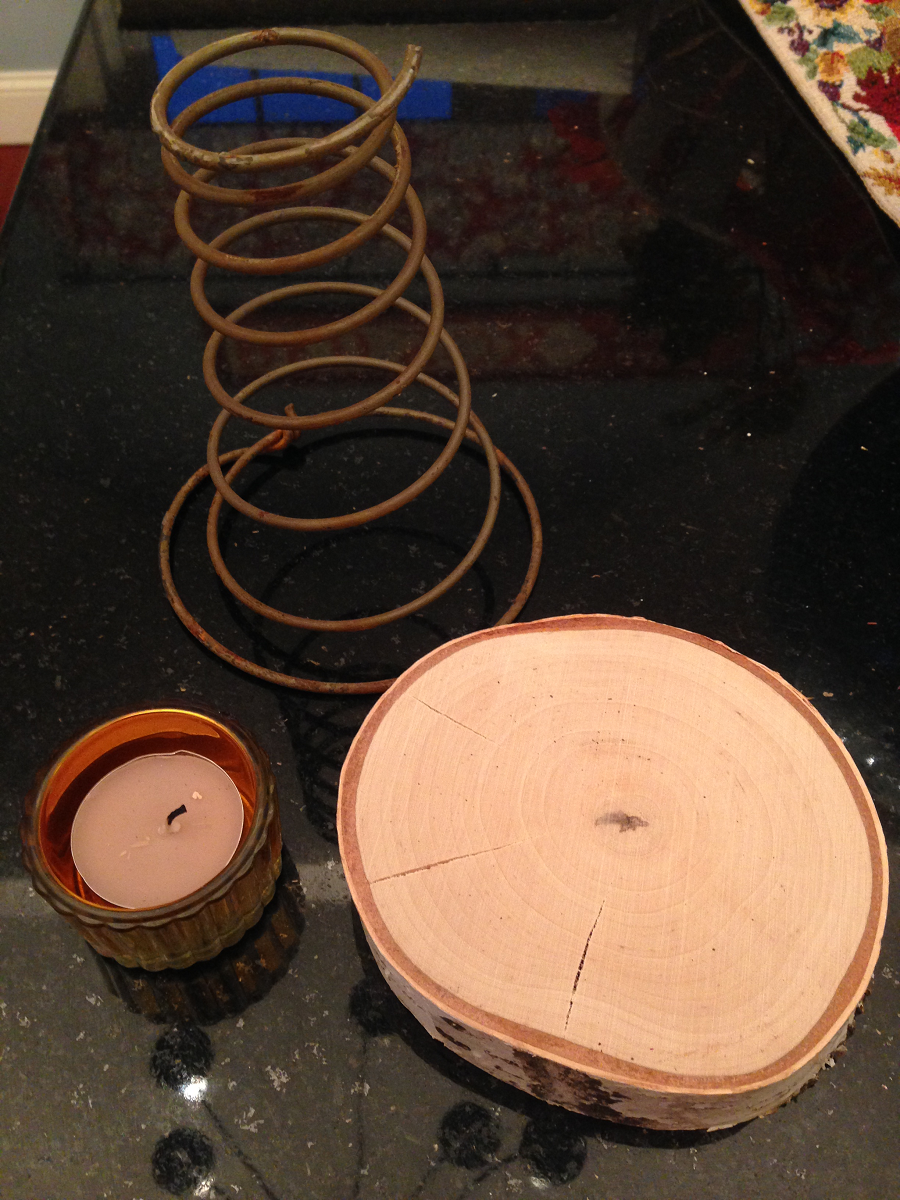
and a small clamp and screw (these I had kicking around the workshop-but if you need to purchase one, they’re in the plumbing aisle at your local hardware store. And they don’t need to be old and rusty, they’re not going to show anyway.)

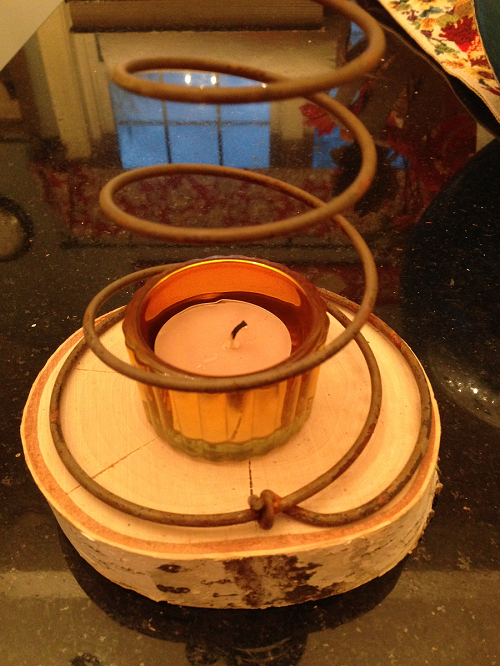
3. Place your rusty bedspring coil on the log slice and arrange in a pleasing manner. These springs are not exactly round, but neither are the log slices, so its a win-win. In this case, I kind of liked the little coiled knot in the front, but you could certainly turn that to the clamp side, or the rear of this rustic piece of art.
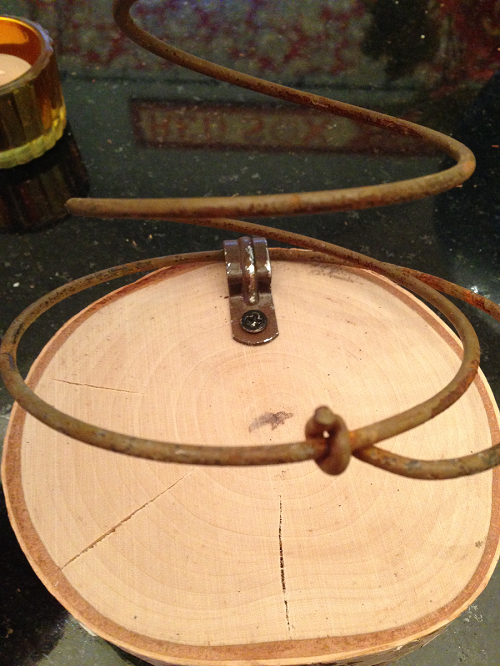
3. Attach the rusty coil to the log slice with the clamp assuring that you hold the clamp securely in place with the coil underneath the arched part-this will create a hinge effect.
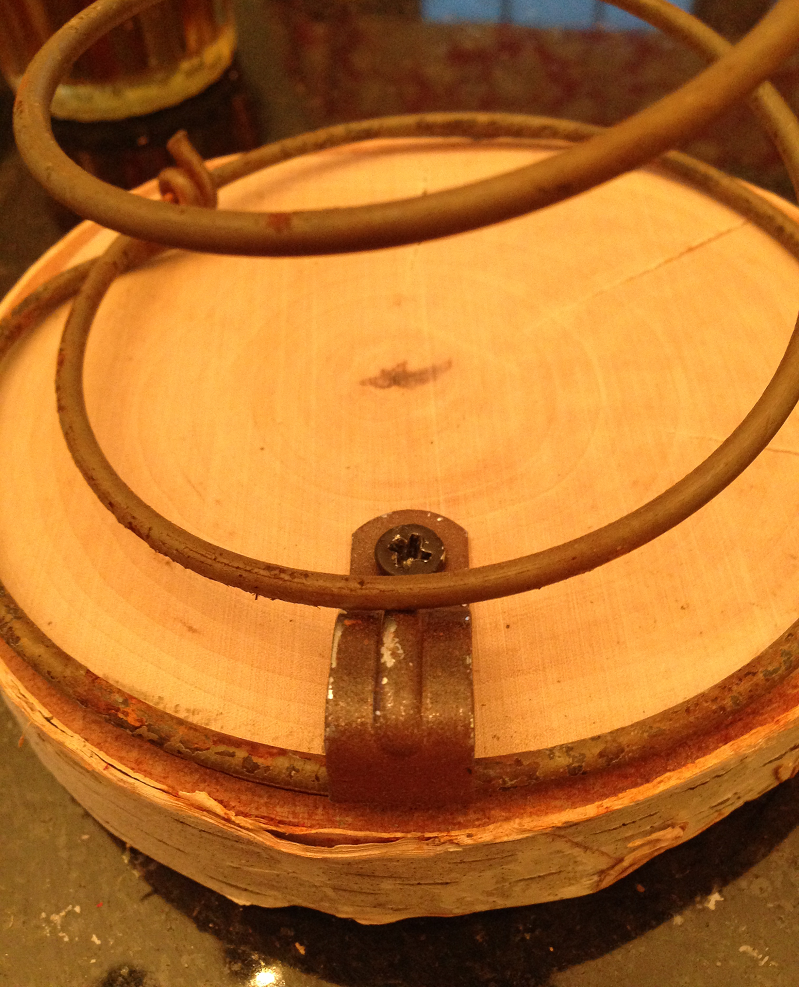
Now, this can be a bit tricky, because in order to attach the screw properly, you need to hold it at a 90 degree angle while you push down. So, just use the spring as a “tunnel” and go right down the middle. Remember, its a spring, so you can push it down to get a better grip on your screwdriver.

4. Test out your mechanism by slowly lifting the coil away from the log slice and you will immediately see the simple brilliance of this design! You’ll note that the coil does not slide off the log, thereby creating a safe cage for your votive to sit inside. So, in the event that somehow your rusty bedspring coil votive holder gets knocked over while the candle is burning inside, the rusty coil and the votive stay firmly in place : )
5. Decorate your holiday mantel with your new rusty bedspring coil votive candle holder and wait for the compliments! So, there you have it. A simple, quick and easy project that costs under $4 (assuming that you have a box full of rusty bedspring coils).
Now you’ll have to excuse my while I go slice up one of my precious birch logs and make a few more of these. I see many potential Christmas gifts in the works! Hope you have a sunny Sunday everyone, Susan


It took me a minute to realize these looked like Christmas trees! I love it! Thanks so much for sharing at Talented Tuesdays 🙂
~Meaghan
LikeLike
Guess what Meaghan?! I didn’t realize it until you pointed it out to me!!
LikeLike
Love the upcycling. I never would have thought to craft with a rusty bedspring. Very clever.
LikeLike
thanks- its a super easy and fun project!
LikeLike
Wow! So pretty, Susan! What a clever way to repurpose. I love this!
Kelly
http://www.alovelylifeindeed.com
LikeLike
How creative – love this idea Susan!
LikeLike
Thanks Marie-if you need a rusty coil-I’ve got about 100-lol!!
LikeLike