The final step of the kitchen cabinet transformation was the finish coat on the doors, drawers and boxes. To this point, we have painted 2 coats of primer, 2 coats of paint + I coat of tinted glaze to give the cabinets a slightly aged look.
 But they still required one last coat of protection-this is a kitchen, and kitchens get messy right? Don’t want some splashing spaghetti sauce messing up my hard work! First, I tried a satin polyurethane, but it was too shiny. I also have a can of absolute matte finish, but I knew that would be too flat. So I decided on a wax finish that would provide protection while adding just a touch of shine. In the past I have used paste waxes that you wipe or stipple brush on, then buff off. They do give a nice finish, but I don’t like the odor and the elbow grease necessary to get the job done. Having recently discovered a new Crème Wax from Americana, I knew this was the perfect solution!
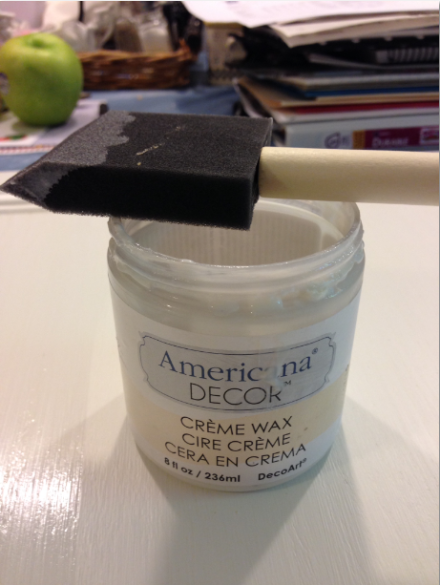 You literally brush this odorless opaque, white creamy liquid on with a foam brush,
 allow to dry (about 1/2 hour), then buff it. The more you buff, the brighter the shine. I purchased this product at Michaels Crafts (with a coupon, of course : ), but it is available online at HomeDepot.com as well. Now, this is Tuesday’s DIY Tip: I use my little mouse sander to buff my finishes (if auto detailers can do it, why can’t I??)
 Simply remove the velcroed sandpaper, stick on a soft cloth or rag in its place and buff away!
 Use a soft flannel or fleece, not terrycloth, as the loops in the cloth will make it a rougher finish. Unless, of course, that is the look you are trying to achieve. The buffed finish is perfect-smooth and with a low satiny shine-the look we had imagined when we first decided to make over mom’s kitchen. The wax finish is essentially colorless, so it doesn’t tint the finish, but it did enhance the glazing color I had already applied. So, this part of the transformation is complete and we’ve gone from this:
 to this:
 If you are just joining us now, you can check out my Pinterest page with all of the links starting at the beginning here. But we still have a long way to go! Up next, the hardware. Have and buffed and shiny Tuesday everyone! Susan


We are trying to get a match for our kitchen doors and yours is a match. Do you know the door style name?
LikeLike
Hi! Those cabinets were in my mom’s condo which was built in the 1970’s. They were pretty standard builder-grade cabinets at the time, but I am not sure that you could find them other than at a reseller. You might try a Habitat for Humanity ReStore- they often have old, recycled kitchen cabinets. Good luck!
LikeLike
I know I am late in asking, but with the wax do you brush it on like paint and wait for it to dry or do you brush it on and wipe off like Annie Sloan’s wax? Thank you. I am a novice.
LikeLike
Hi Rita- you brush it on like any other finish, allow it to dry (about 1/2 hour-1 hour) then buff it. The more you buff, the shinier the surface. I usually use plain fleece cloth because it creates a really nice finish. Good luck!
LikeLike
Love this! I am in the middle of painting an old table and chairs with a chalk paint and am looking for a hand wax look. In the past I have always used J & J Paste wax, but boy it’s a lot of elbow grease. I am heading to Home Depot tomorrow to pick up this wax. I see you used a B&D Mouse sander… do you just use a regular microfiber cloth to buff it with??? If so I have to buy this sander and some microfiber cloths too??? If you could email me and let me know before I go shopping, I would be ever so grateful!!
I’m also trying to decide if I want to paint my kitchen cabinets and yours came out so gorgeous… you have my mind spinning! Hope to hear from you!
LikeLike
Hi Pendra! I do use my B & D sander for just about everything-such a handy tool. I use microfiber or even fleece to buff- just make sure it isn’t scratchy in any way or it will leave marks on the waxed finish. As far as the wax goes, I do love the Americana wax that I purchased online at Home Depot. As far as I know, you cannot buy it in the stores yet. They do carry it at Michaels, but when I went the other day to get some more, they said it was a “seasonal item” and they would not be restocking. You can use my B & D buffing method with any good wax. I have used it with Annie Sloane and Fiddes Paste wax with excellent results.
Good luck!
LikeLike
can’t wait to see the whole picture! Looks beautiful!
LikeLike
this is like reading a great novel, but only getting it one chapter at a time and dying for the next xx
LikeLike
Lol-thanks! I will tell you that there won’t be any murders, but there is a bit of blood shed in the upcoming chapters : )
LikeLike
That is a great tip
LikeLike