In the weeks leading up to Christmas, I was finishing one project after another in record time, but with no time to actually blog about them! Snowflake Blocks and Sopapillas+++ were two of my favorite projects. The blocks were a fun DIY project I had seen on The Cottage Market Blog. The Sopapillas were a yummy treat! But blocks first before dessert. This past summer Coach had dug up a basket full of old kids’ wooden building blocks.
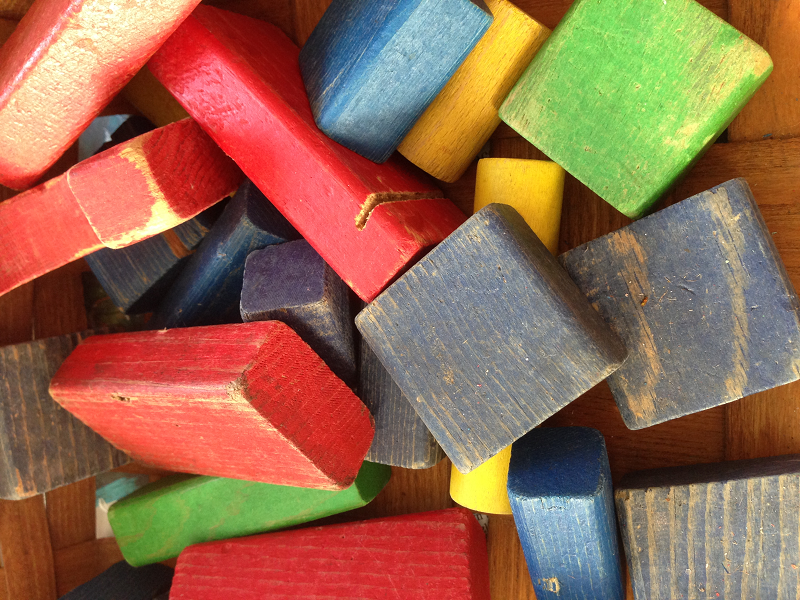
They were pretty dirty and looked like they may have had more than a few knock-downs. After a thorough cleaning with some bleach and soap, I came up with a new purpose: snowflake blocks! Each one hand-painted, no two alike-they are snowflakes, after all. But easy enough for even a novice painter to try. They are small, portable and stackable, perfect for a windowsill or mantel. Oh, and you can add some twine and make them into ornaments or gift tags. Here is the how-I-did-it:
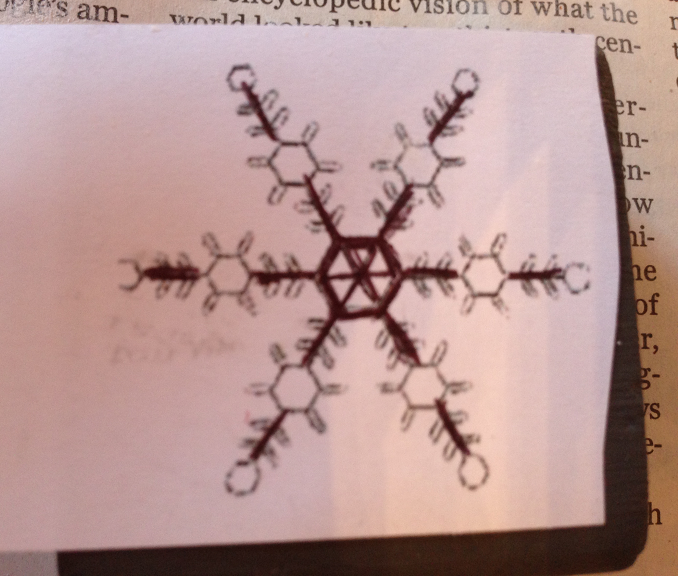
1.Found some pen and ink style snowflakes online. The Graphic Fairy supplied the images, thank you very much.
![]()


2. Painted the blocks with two coats of the base color.
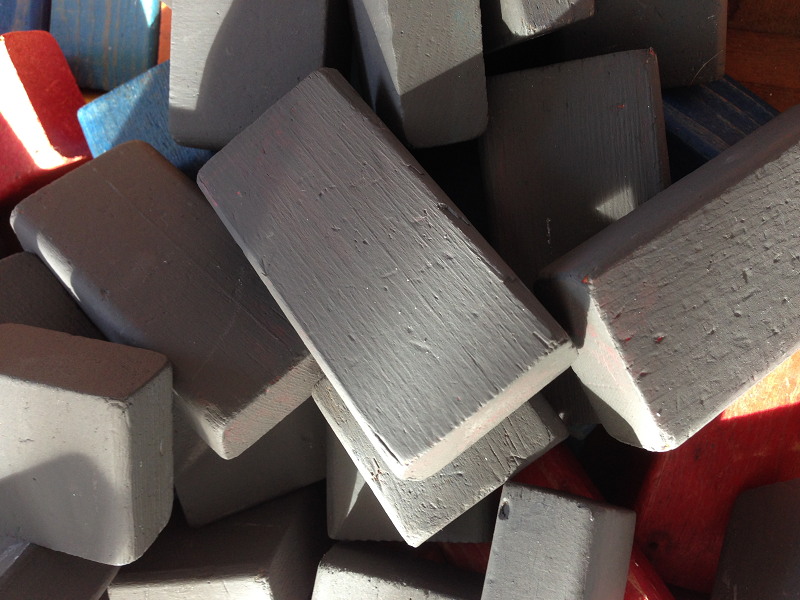
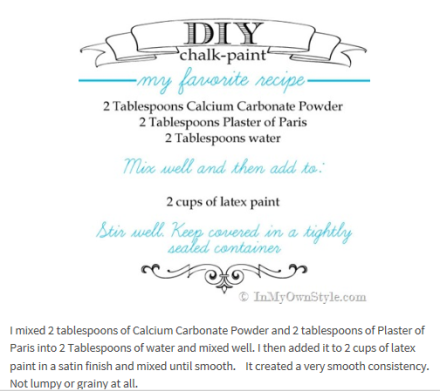
My choice was a deep grey that I have made into a chalk-like paint using some flat latex paint. I discovered the recipe on a blog called “In My Own Style”. You can transform any can of paint into a matte, chalk-like finish. Recipe here:
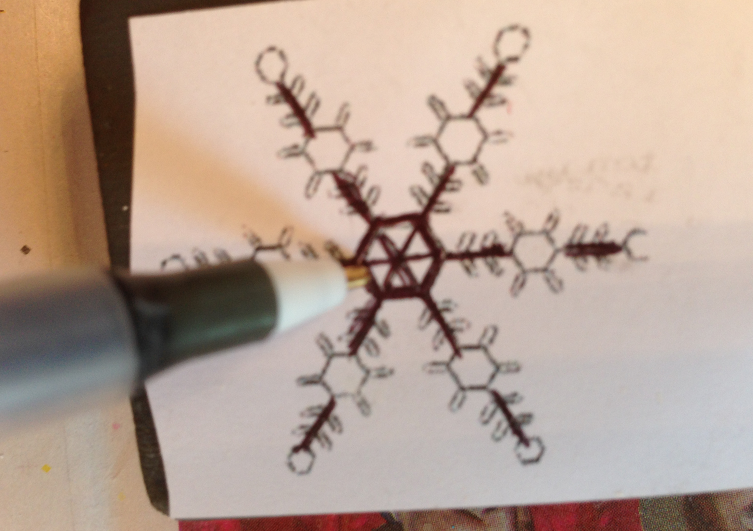
3. I printed out pen and ink snowflakes of various shapes and styles onto regular printer paper. Cut them each out so they were the size of the blocks.
4. Using my chalk-it-up technique, I rubbed the chalk all over the back of the snowflake prints.
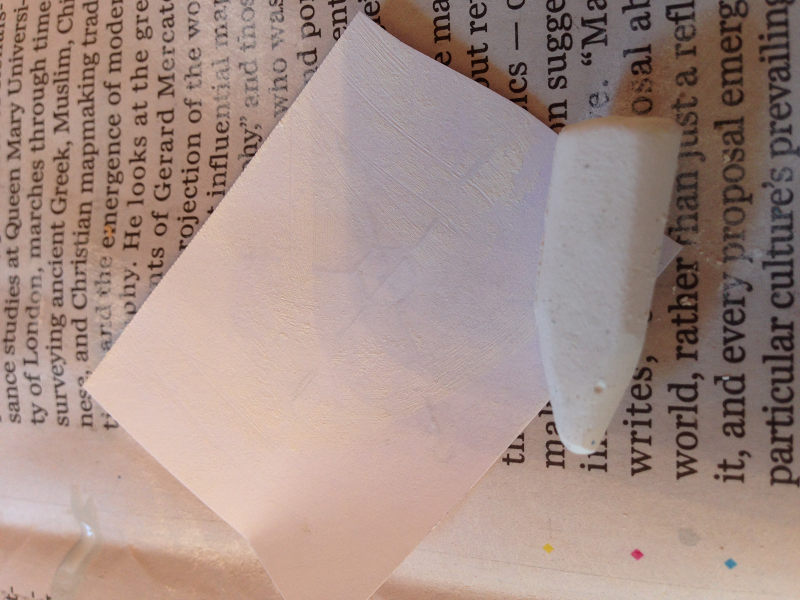
Then placed the snowflake pattern on the block, chalked side down. Drew along the lines with a pen using a little pressure.
5. Lifted the paper pattern to reveal the chalk outline image.

6. Followed along the line images with a small paintbrush and paints of various colors. I used a #3 which is pretty fine. The finer the brush tips, the thinner the lines, the more delicate the snowflake. I was going for a pastel look so it was white and pastel blues.

7. For the dots, I simply used the other end of the paint brush, dipping the tip into the paint

and then dotting it wherever I wanted a dimensional dot along the lines.

8. After they were dried, first I coated them with the matte finish Decou-page and allowed to try. Then I added a bit of glitter by dotting the snowflakes with Americana Decoupage

and then shaking on the glitter. Allowed to dry. Cute!

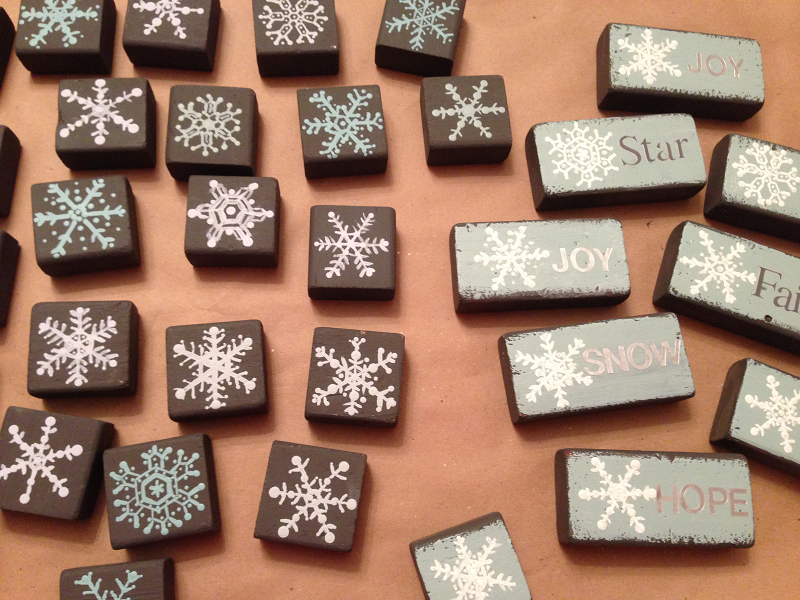
9. For the oblong blocks, I painted over the grey with some pastel aqua, then added the snowflakes. For the words, I initially attempted to hand paint them, but that was a big FAIL. Nothing worse than attempting to paint something very fine when you are stressed and hurried. So I used some adhesive scrapbooking stickers that said HOPE, FAITH, JOY, etc. I affixed them, then added a coat of matte varnish to the entire block.
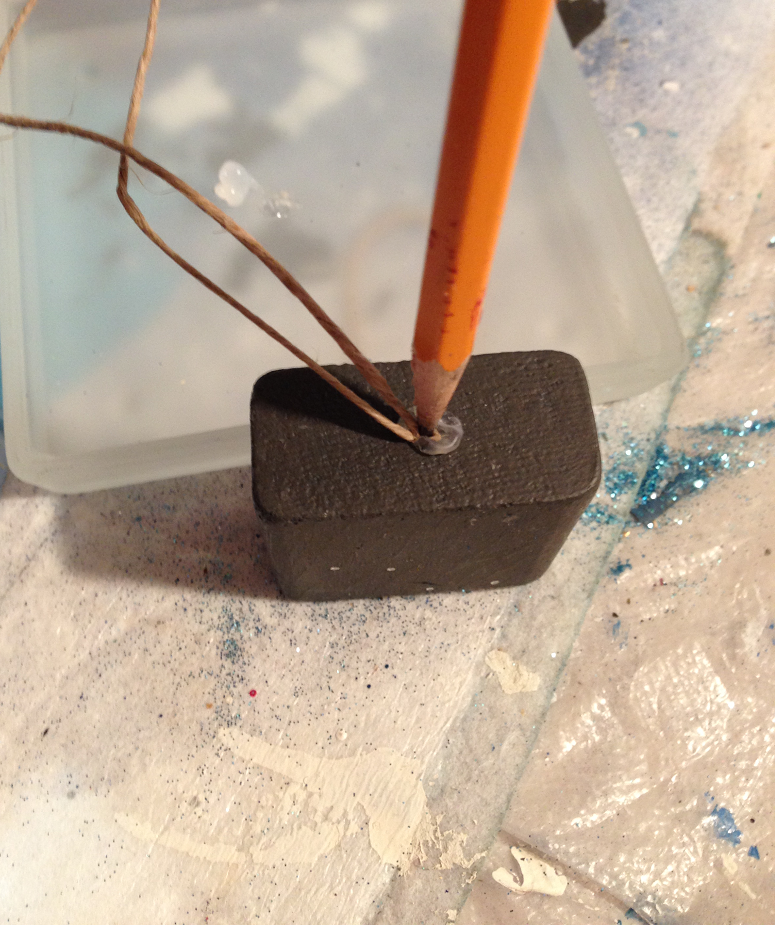
10. For the ornaments/tags, I drilled a small hole in the tops of the snowflakes,
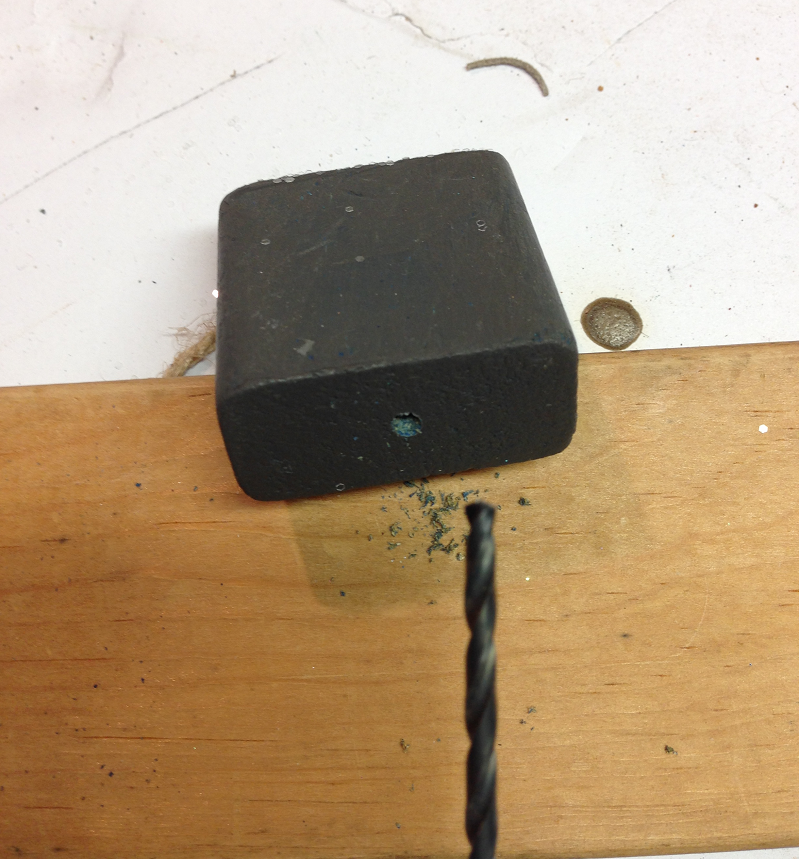
then added a drop of hot glue.
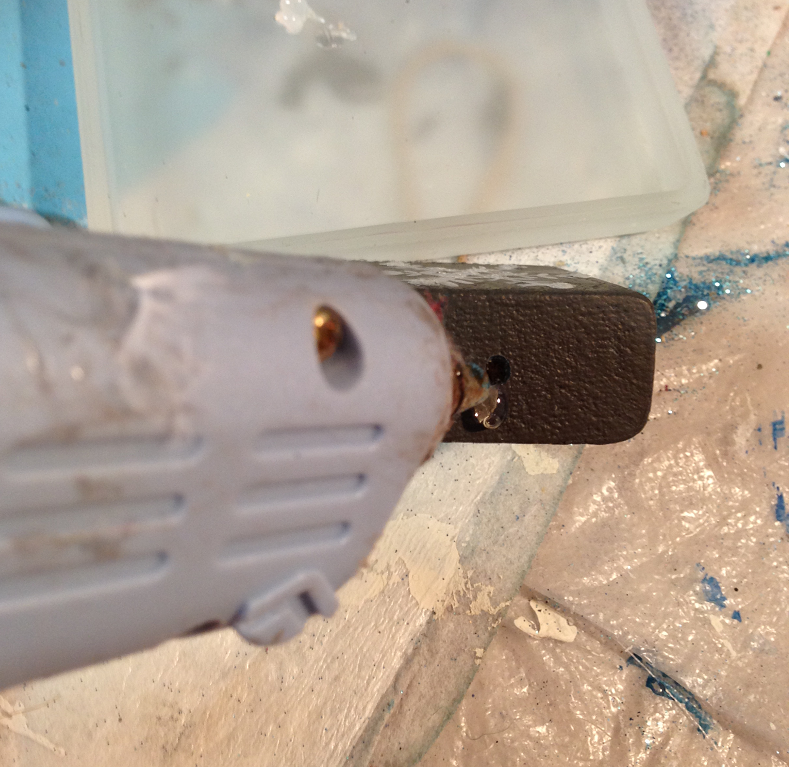
Using a pencil tip, I inserted the ends of a cut piece of twine into the hole. Allowed to dry.
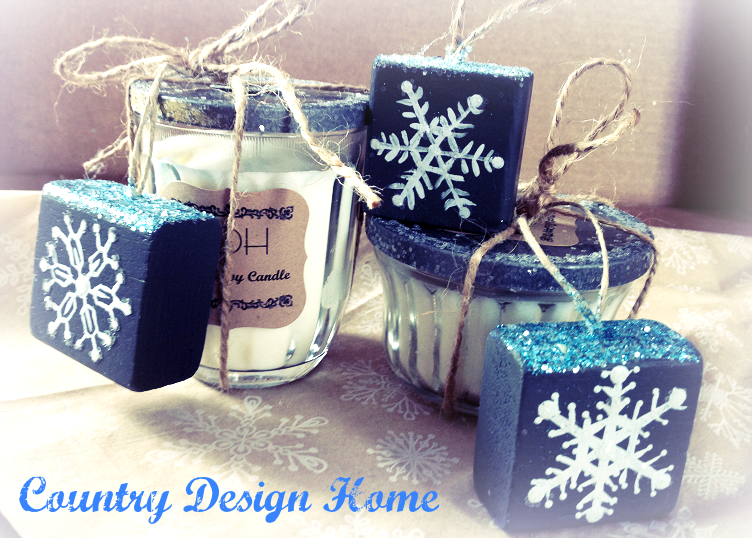
11. For a finishing touch, I brushed the tops of the blocks with the Americana Decou-page glue,

then sprinkled them with some colored glitter. Instant bling!

The finished blocks looked great as tags for the Jelly Jar Soy Candles I presented as gifts this holiday season.
So if you have some old blocks laying around, or anything you can cut into blocks, this is an easy-peasy project (even for kids!) that will add some sparkle to your winter landscape. Hope you are all finally recovering from the crazy holiday week! Susan
+++Oh, right, I was supposed to give you a recipe for Sopapillas too! Well, that project will have to wait another day : )


Such a clever idea and I love the finished product!
LikeLike