Over the 4th of July weekend, I traveled to Cape Cod to spend the holiday with a good friend at her family’s beach-side cottage in Falmouth. Is there anything more quintessentially Cape Cod than magnificent blooming hydrangeas against grey cedar shingles? Beautiful!!

We ate too much, drank margaritas, chatted for hours, watched the neighborhood fireworks and delighted in the joy of her two adorable tow-headed grandsons. The cottage is circa 1930’s, with dark beadboard walls and ceiling in the living room,

a vintage kitchy kitchen and many of the original furnishings still in place. Since she is slowly attempting to freshen and lighten the decor, her most recent flea market find was a white rattan living room set with green and blue striped cushions-so comfy and pretty!

But the dark brown, pressed-board, veneered-top coffee table had seen many better days,

so the choice was to toss it and get something new or refurbish it-nothing that a little paint, tape and time can’t fix! Since she has often admired my whale table,

our original plan was to cut the top of this table into the proper shape and then paint it. But the base was too wide, which didn’t leave a lot of room for cutting definition. The next choice was to define the background with a contrasting color and then paint the whale-perfect! The red, white and blue of my whale table would not have cut it in her beachy blues room, so we chose the Behr sample pots

that most closely matched the stripes in the cushion fabric.

(Funny story, when we went to the mixing counter to order our colors, the clerk said “Why is everyone calling these paint pots? They are jars!” I guess we can thank the British invasion for that one-so thanks, Annie Sloan!)
Here’s the how-to:
1. Get a table that fits a whale shape well. This one is oblong in shape so it was a natural fit with a curved middle and rounded edges. But since most coffee tables are rectangular, they lend themselves to the whale shape well. Prime it. I usually use Glidden Gripper

for its awesome priming ability to stick to pretty much anything.
2. Decide on a pattern

and then draw a whale on the primed table top surface.
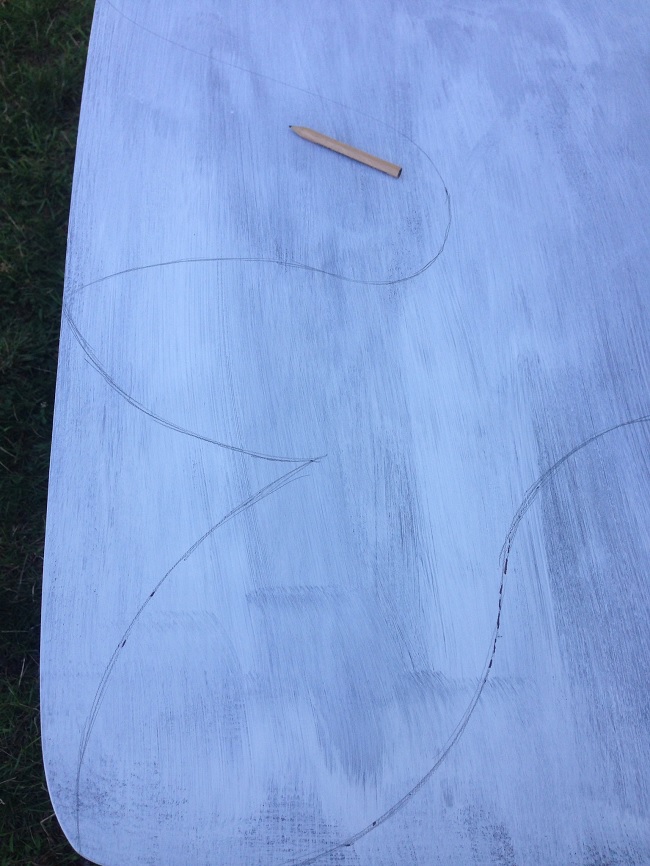
It you don’t have any drawing skills, the next best thing is to find the shape online and then print it. My skills are primitive, at best, but they get the job done.

Whales are pretty simple though. They are kind of just a big old long blob with a mouth and a tail.
3. Paint the background color. In this case, we used the darker green to give it a good definition. That also wrapped around the edge of the table. Then we painted the skirt and the legs the other contrasting colors of Mother Nature, Grape Vine and Blue Fox.

4. Painted the background color of the whale. In this case, it was a Behr plain white.

Now you can really see the shape taking shape against the darker green background.

5. Tape off the stripes. I originally measured true center, then started a line across using the table edge as a guide. However, I soon realized that since the table is oblong, it gracefully slopes down as it nears the edges. We could have followed those lines and created a curved effect, but we were going with pin-striped preppy whale so we just started with the center lines, then pulled the tape taut across.

A quick tip: instead of measuring each individual stripe row spacing, we just placed a small piece of tape, then started the next row-quick and easy!
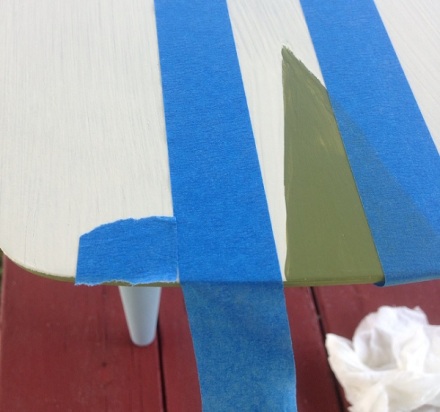
6. Painted the blue lines and tail. Make sure that when you are painting along the tape, you use light coats and strokes so it doesn’t bleed underneath the tape lines! Two light coats are better than one heavy coat. This paint takes so little time to dry, especially in the hot Cape Cod sunshine, that it was only a matter of minutes between coats.
7. Pull the tape and step back and admire the cute preppy whale emerging.

8. Decorate the tail. We wanted to make him look a little more fresh and beachy, so we used a starfish shape cut from an old sponge.

With the white paint, we began sponging the stars on his tail in a random pleasing pattern. This is your chance to use your creativity! Don’t want stars? Use circles or spirals! Anything you can think of you can cut out of a sponge or potato or find a stencil or stamp at your local craft store.

Tip: try to stamp a couple along the edges with a partial pattern so the overall effect is more even and not cramped into the defined space.
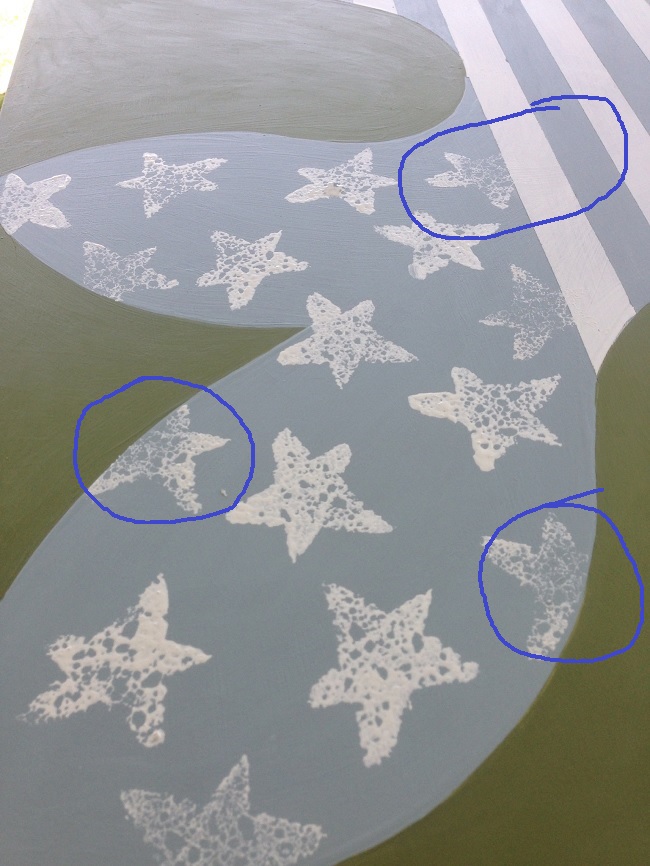
The sponge effect is lighter and makes for more realistic starfish.

9. Add an eye. This is a personal choice, but since whales have eyes and we wanted to add a touch of the soft green to the top, this half-moon shape worked beautifully.

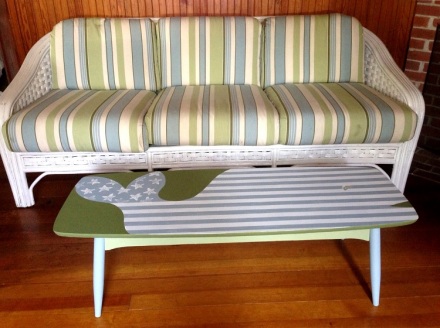
10. Stand back and admire. The table is back in place in front of the new sofa, and it instantly added a bright, whimsical touch to the living room.
At that point, it was time for me to head back home (to avoid the notorious Cape bridge traffic). So she’ll be finishing her whale with a touch of glazing and a couple of coats of polyurethane. Need to protect our project from the battle beasts that were once played with by her sons, and now by her grandsons.

So thanks for a whale of a weekend, Mary! See you very soon. I’ll bring the sandpaper…and the margaritas. Susan
PS: Check out my links on the Thirty HandMade Days Pity Party and on My Repurposed Life!


What a cool and creative idea!!! love it! Thanks for linking up to support Habitat!
LikeLike
LOVE THIS SO MUCH!
LikeLike
wow…what a great job as usual! Glad you drank lots and ate too!
LikeLike
Susan, This is just ingenious….love, love! Thanks so much for sharing with the rest of us arrangers & stagers!!! Roma in Florida
LikeLike
This is so starfish spangled great!!!!
LikeLike
Haha! Thanks!! We had a blast doing it
LikeLike