In a recent post, I blogged about transferring French Typography onto wooden furniture using wax paper– this week’s High Five For Friday! Yup-regular old wax paper– the old-fashioned kind we used to wrap our sandwiches in for our tin lunch boxes-is suddenly all the rage again.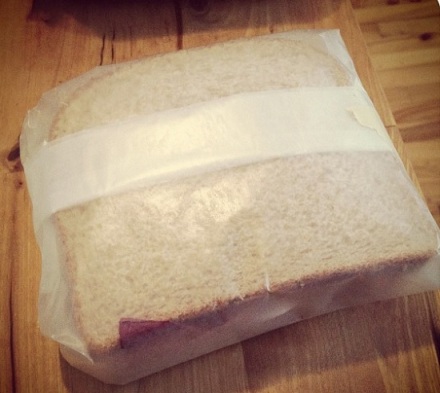 So I thought I would give the wax paper transfer method currently posted on my D.I.M. Pinterest page a try, since I am working on some new pieces. Coach found this cute little old pine telephone table that I thought would work nicely.
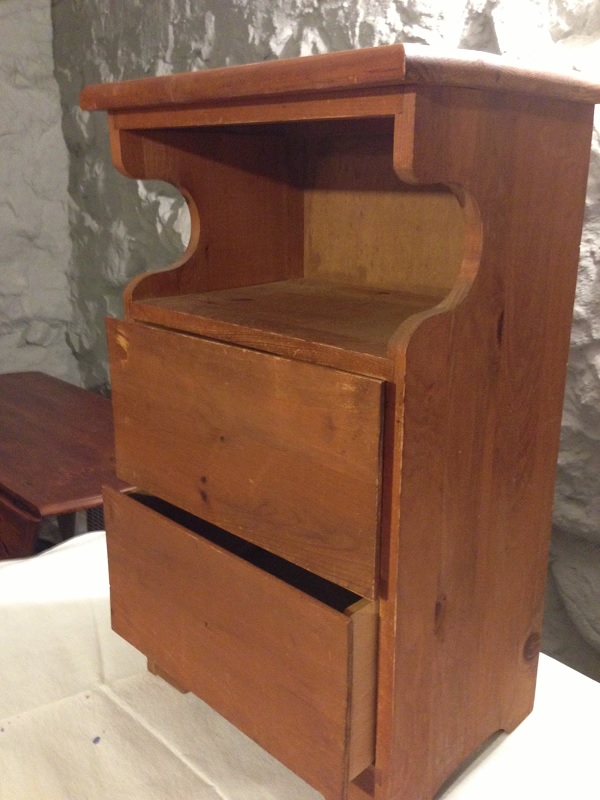
(This one’s from the olden days, folks, when we had those gadgets attached to the wall called telephones, with an attached cord so you had to sit down to talk on them and use loads of paper books with names and addresses and phone numbers in them : )…

Here are the steps:
1. Cleaned and steel wooled. It hardly had any finish on it so no sanding needed. But I made sure that the inside was clean as well. Nothing worse than opening up some cute, vintage refinished piece only to inhale the strong odor of musty cigarette smoke.
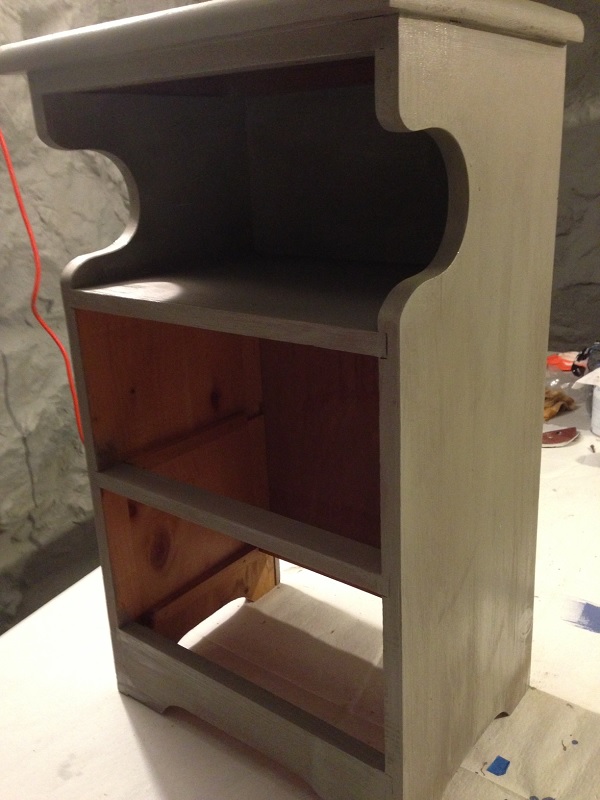
2. Added 2 coats of Annie Sloan French Linen paint. Love the soft color and the flat finish.
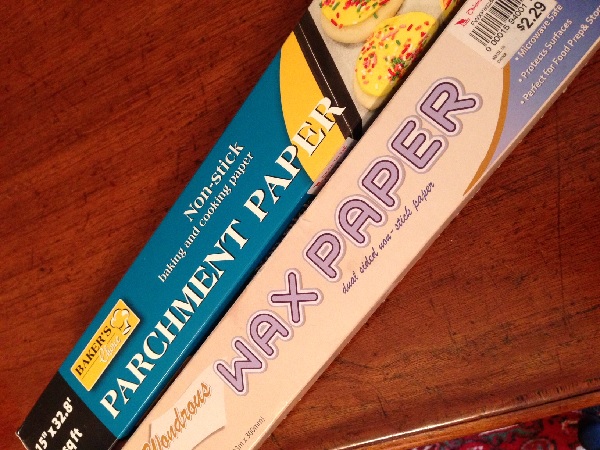
3. Got some wax paper (this pic shows parchment paper which apparently works as well, but I haven’t tried that yet)
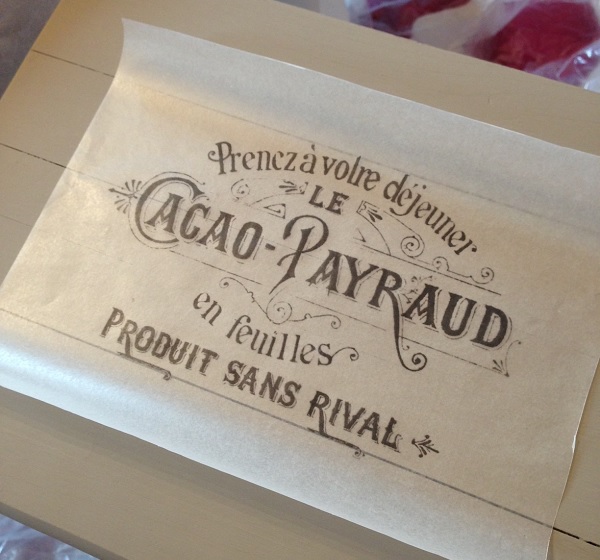
4. Find a picture- I got mine from the Graphics Fairy– and print it in your REGULAR INK JET PRINTER!! Not a laser printer, apparently that just melts the wax. Make sure when you go to settings you reverse it for the transfer process prior to printing. Cut the wax paper to the same size as a regular sheet of copy paper. Slowly feed the wax paper into the printer, being careful not to let it wrinkle or crease. Once printed, allow time for it to dry so it won’t smear when you lay it down on your piece.

5. Dampen (NOT WET!) the furniture so it will accept the ink. Center the wax paper, print side down, on to your piece of furniture.
6. Now just start rubbing all over the design, pressing firmly. I tried two methods of transfer- the credit card- which I found had too sharp of an edge to really press.

The back of a spoon-perfect! Rub the image until it is completely transferred.

The harder and longer you rub, the darker and clearer your image will be. You can carefully pick up the paper and check underneath as you go along, but just make sure you put it back exactly in the same spot- otherwise the image will appear blurry. Allow to dry (about 5 minutes)
7. Finish with a coat of Annie Sloan Soft Wax.

8. Since we no longer have giant phones and tons of phone books, I discovered a cute new storage place for my Ipad!

TGIF everyone!! So happy to finally have some nice sunny weather-NOT!!! Susan


It only seems to work on white or very lite wood 😟
LikeLike
Hi Lori! I am not sure what surface you were working with, but the lighter the surface, the more visible
the ink will be when dried. I used it on whites and light pastels with good results, and I have seen many
samples of work on lightly stained or unfinished wood. If the surface is dark and the ink is also dark,
there will be no contrast between the two, just as if you used dark chalk on a black board.
LikeLike
When printing does the print go on the waxy side or the smooth side.
Thanks
Debbie
LikeLike
The waxy side is what picks up the print and allows it to be transferred. Good luck!
LikeLike
Does this work well with pics that have color in them like flowers or anything like that?
LikeLike
Hi Dara- I have never tried using this method for colored prints, so I can’t tell you yes or no.
But I guess it wouldn’t hurt to try it!
LikeLike
No one ever tells me, do you put the print (copy it) on the wax side of the paper?
LikeLike
Hi Mary! With wax paper, there is no “right” side. You can use either side because they are both waxed. With freezer paper, you
will need to use the unshiny side that has the wax on it. Hope that helps!
LikeLike
Thank you for sharing ~ Can’t wait to try this.
LikeLike
Good luck with your project!
LikeLike
What do you mean go to settings and reverse it for the transfer process? I’d have to use a printer at Staples or another copy store.
LikeLike
Hi Robin- I think every copy machine has a option to change the property settings. In my case (I have an Epson), it is called “mirror image”- you click on that button and the print will be reversed on the paper. Also, depending on the program you use to create the graphic, such as Avery, it will ask you before you send it to print whether you want it to be reversed or mirror image. If you do not reverse it, then your graphic will look fine on the paper, but will be backwards when you turn it upside down to place on the furniture. Hope that helps!
LikeLike
Great lesson! Can’t wait to try 😌
LikeLike
Best of luck- its pretty easy with great results. My kind of DIY!
LikeLike
Does it matter what side of the wax paper you print on?
LikeLike
She says in a an earlier post that wax paper is the same on either side so it doesn’t matter which side you print on. Cool Huh? I didn’t know that either.
LikeLike
Beautiful. I love Printerest. It’s amazing been part of printerest. Lot of things to do.
❤️❤️❤️❤️
LikeLike
Finally someone explains how to use wax paper as a transfer. I haven’t tried it yet but will certainly do this. I love making wall plaques but my hand is not steady to paint the words but this I can do. Thank you so much !!!!
LikeLike
Glad I could help Rebecca! Just make sure you practice the technique a bit before
attempting your projects!
LikeLike
Do you remove the paper after the transfer or does it stay permanently with the image? If not, at what point do you remove it?
LikeLike
Hi! Sorry for the delayed response! You remove the paper immediately after you rub the design onto the piece. None of the paper
stays on, just the ink from your design. Remove it carefully so as not to smudge your design.
Good luck!
Susan
LikeLike
What side of paper do you print on?
LikeLike
Wax paper is the same on both sides so it does not matter.
LikeLike
How do I purchase ones like this for my own personal art work plz
LikeLike
Hi Julie- Not sure if you are referring to the printer or the paper? I just used my
regular HP printer. The paper you can pick up at any grocery store.
LikeLike
This looks very cool. I would like to try it. The for sharing.
Judy
LikeLike
Which side of the wax paper do you print on? Wax side or non-wax side?
LikeLike
Hi- I don’t think wax paper has a side- the freezer paper does, and on that I would use the wax side. That is what actually transfers to the wood surface.
LikeLike
Great Work Susan it looks brand new. I will try to use this on my bedroom wall.
LikeLike
Good luck! I have not tried that, so let me know how it turns out! Always up for a new project : )
LikeLike
I want to do this on my old toy box that I have painted out. But I want the picture to be bigger and 8 x 11 or 8 x 14. Have you tried to do a larger image over a series of papers ?
LikeLike
Yes, I have done that. In order to enlarge the pictures and have the images line up properly, I use a website called blockposters.com. They will take any image and enlarge it to the size you would like to use.
LikeLike
Have you ever had the ink bead up on the wax paper. Part of my design is printing perfect and the rest comes out as beaded ink. 😦
LikeLike
No I haven’t. Perhaps one side of your paper is glossier than the other? Try flipping it over?
LikeLike
Have you ever tried to transfer this to a wall?
LikeLike
Hi Tiffany- Unfortunately I have not so I cannot tell you how to do that. But if you go to the Graphics Fairy website, she has lots of readers tutorials that show how to transfer pretty much anything. Hope that helps!
LikeLike
I have a quote my late father wrote at the beginning of an old book. I had the quote (in his hand writing) enlarged and made several copies. I would like to preserve for my siblings. I found several unfinished wood hearts that I would like to use for this purpose. My question is : how do I reverse the image of the copies I had made at a printshop (I have a Cannon inkjet). So that I may transfer them to the hearts and preserve with polyurethane or something ? I am quite a novice at this, and don’t want to mess up the hearts as they were hard to find. If you can advise….I would very much appreciate it ! Thank you !
LikeLike
Hi Anne- what a lovely idea to preserve such a special memory! If I am understanding your question correctly, you have already had the quotes printed and now wish to reverse them to transfer to the wood? Unfortunately, if you are trying to transfer using wax paper, you need to do that on your own printer. Once you have designed the quote, you then need to print it on the wax paper in reverse. When you click print, a box typically will open up asking you questions about the size of paper and quality of printing. There should be a “properties” button to click, which should then take you to a screen that will allow you to choose options like landscape or portrait, etc. There should be a choice to print in reverse. Click that and save it. My printer is different from yours, so it many say something different but you should be able to find it in the properties. Make sure you print a test sheet before you begin printing on the wax paper. Good luck!
LikeLike
I would check out a copy paper store or scrapbook store they might be able to help.
LikeLike
Love this idea! I spray painted an old milk can I had with a mate finish cream color . I want to try this idea on it but do you think it would work since it’s not chalk paint? And how would you suggest sealing it on this surface if it were to work ? Thanks !
LikeLike
Hi Katie- It should work as long as it is a matte finish. The other issue is that a milk can has a round surface, which may prove tricky to get the transfer
secured. That being said, if it does work (fingers crossed), then I would go with a light spray varnish or finish, at least over the transfer part. Then if you
wanted to wax the entire piece to give it that look, you could do that.
LikeLike
OK, I AM NEW AT ALL OF THIS. CAN YOU TELL ME HOW TO MAKE THE COPY COME OUT BACKWARDS SO I CAN TRANSFER TO THE WOOD.
LikeLike
Hi- When you open up the printer box to actually print the picture, there will be a “properties” or options button (every printer is different). If you click on that, it will allow you to print the reverse side- just choose that button. Once the printing is completed, unclick the button so every thing you print won’t be backwards : )
LikeLike
Where did you find your graffics ?
LikeLike
For that particular project I think they were from The Graphics Fairy. She has thousands of graphics online to choose from.
LikeLike
I have only one problem with this, ink is smears when i try to apply finish on the furniture? so as wax doesn’t smear it when you apply it?
LikeLike
Hi! Sorry you are having trouble with this project! When I painted my piece for this particular project, I used Annie Sloan chalk paint. It has quite a porous finish to it so it absorbed the ink well. No smudges when I finished it. But when I used my own home-made chalky paint, I had the same issue you did. So after I applied the transfer, I waited until it was dry and then lightly sprayed it with a poly finish coat. Then I waited until that dried and waxed the entire piece. Hope that helps!
LikeLike
Have you ever tried this on canvas? I am doing a painting and want to transfer some writing to a few spot on the painting. Thanks for any input you may have.
LikeLike
Hi! I haven’t but I have seen others do this on fabric with an iron. The issue I would see is that canvas typically has sizing on it which may not accept the ink. Check out graphics fairy.com. She has lots of posts with transfers of all kinds.
LikeLike
can this method work on burlap? Also, I think the parchment paper would be better because it is already a little stiffer than wax.
LikeLike
You know, I have tried it on burlap, as I have seen others post photos of that. But I have to tell you that it was a big fail on my part. The burlap kept getting jammed in my printer, no matter how much I pressed it down. Then all the inkjets were smeared and I had to remove them and clean them multiple times. I wouldn’t recommend but I know other folks have had a lot of luck with it.
LikeLike
I tried this but just could not get it to feed into the printer.. crazy paper jams. even when hand feeding, even with taping to a piece of printer paper… no such luck.
LikeLike
Hi Jamie- I have two printers. One that I absolutely cannot use wax paper with (which is a quite expensive Canon photo printer) and one that works great (a very inexpensive HP Deskjet 2430.) The best technique that I have found to be the most successful is to use double sided tape and attach to a sheet of white copy paper. Make sure the edges are very clean and straight. I think that some printers are just to “finicky” to use the wax paper because it has a coating on it.
I have also used freezer paper, which is a little thicker and not quite as flimsy. Perhaps give that a try? Good luck!
LikeLike
go figure I have a HP photo printer as well! lol I haven’ given up on this endeavor but I’m going to have to try a couple of different ways! Or maybe just buy transfer paper lol.
I’ve seen where mod podge is used and that is just a mess haha.. I have tried it twice and its not a good solution!
LikeLike
would this work on paper?? I made a picture frame with musical sheet and I will like to add some word over it , do you think I can use this method??
LikeLike
Hi- I have never tried it so I am not sure if it will work or not. The ink needs something to grab onto, and I don’t know if paper will work.
LikeLike
Thank You 🙂
LikeLike
Once the image was applied to the wood did the ink not smear when you waxed it? That’s what happened to me:(
LikeLike
Hi! If the wood is raw, then it should be fine. If the paint on the piece is not matte or chalky paint, the ink may smear. In that case, I will lightly spray it with a coat of matte finish just to set the ink, then wax the whole thing.
LikeLike
Thanks for your reply!!
LikeLike
Having a senior moment here… bare with me. Do you feed the design and wax paper in the copier at the same time? Feeling very dumb…
LikeLike
lol- not a dumb question! The design is whatever you create or download on your computer. Usually I print from my Paint program, but lately I have been using my photo editor called Pic Monkey. Just prepare the design however you want it to look, then put your paper in the printer and print away! The wax or freezer paper just takes the place of the piece of copy paper in your printer tray. By the way, if using wax paper, I find it is a little easier to handle if you actually tape it to a piece of copy paper to give it more weight and feed through the copier easier. Just make sure you put the paper in the tray correctly so it prints on the wax paper and not on the copy paper (mine is print side down) Hope that helps! By the way, love your email address : )
LikeLike
too funny my computer whiz daughter is sitting next to me as i read this and i asked the same question and she gave same answer lol xx
LikeLike
I am excited to see this so simple and very inspiring.It will help me over my creative block
LikeLike
I’ve tried this and it works great. I taped a piece of computer paper to the wax paper which makes the “feed” process much smoother and easier.
LikeLike
That’s great!
LikeLike
About wax paper,will it work on eather side?🌸
LikeLike
Yes it will, with wax paper. With freezer paper you need to use the waxy side and not the paper side.
LikeLike
would this work on glass??
LikeLike
I am not certain, but I am thinking probably not. If you go to another blog “In My Own Style”, or The Graphics Fairy, and search there, you
may have a bit of luck. Both of those blogs have quite a lot of transfer information. Good luck! And if you are successful, send me a photo
and info to share- I am sure you are not the only person curious about this!
LikeLike
There are instructions for transferring onto glass using Leslie Riley’s TAP (Transfer Artist Paper), and also wood. She has a book out that explains the process – but you can also google this.
LikeLike
I’m definitely going to check that out!
LikeLike
Great tutorial, and I have to say, I will give it a try. I found you on the Before & After DIY Link up. New follower!!! Cant wait for more tips. 🙂
LikeLike
Thanks! I always try to be clear and thorough in my tutorials so my readers can understand them easily! If you go to my home page and type in DIM in the search box, there are some other projects you might like as well.
LikeLike
I’m not sure I would ever do this–well, never say never–but I showed a few women at work and they were all gaga about it.
LikeLike
I have never tried this method yet.I have tried it with fabric and it works.I definitely will be doing this on furniture. Thanks for sharing.
LikeLike
Well I’ve never tried it on fabric! That would be great if it worked too! Project for another day! Thanks for the tip.
LikeLike